🦋 Joyful Fluttering Butterflies // Origami Contest [ENG][ESP]

Hello, hello greetings my dear creative friends today I invite you to learn how to make in a very simple and fast way some nice butterflies using the origami technique to participate in this fantastic initiative
I invite my beautiful friend @yagelybr
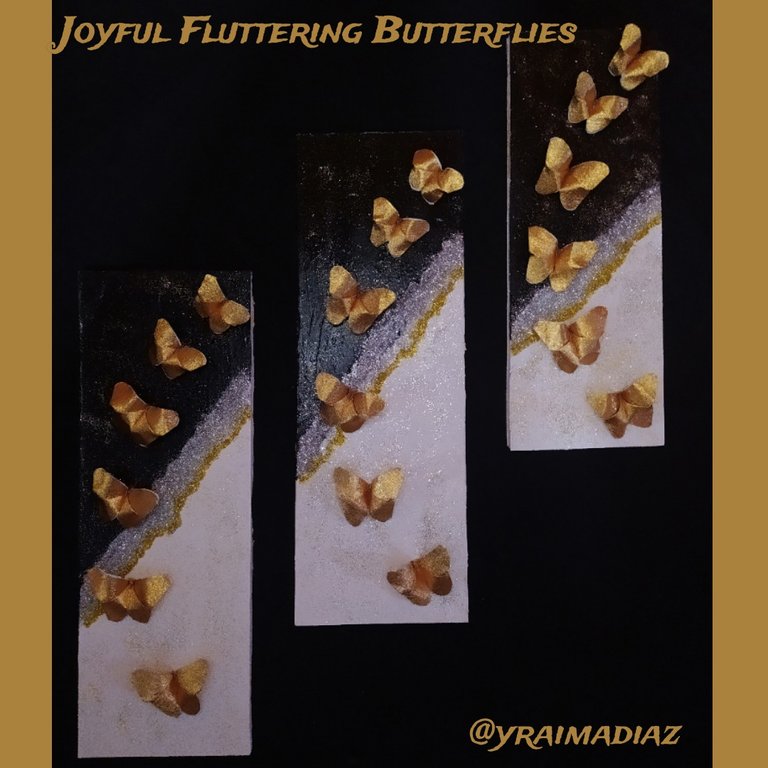
I feel much admiration for butterflies is fascinating to see the whole process of transformation that happen to get to get those wings so wonderful and amazing, as a mother for me they represent the children that gift so divine that God gives us and that at one point in life are transformed by leaving their wings and leaving their nest to grow, in honor of them I decided to make this beautiful craft, which I call Joyful Fluttering Butterflies.
For its elaboration I used metallic crepe paper and to highlight this beautiful work I took some leftover drywall to make some beautiful pictures.
I invite you to join me in its
realization.
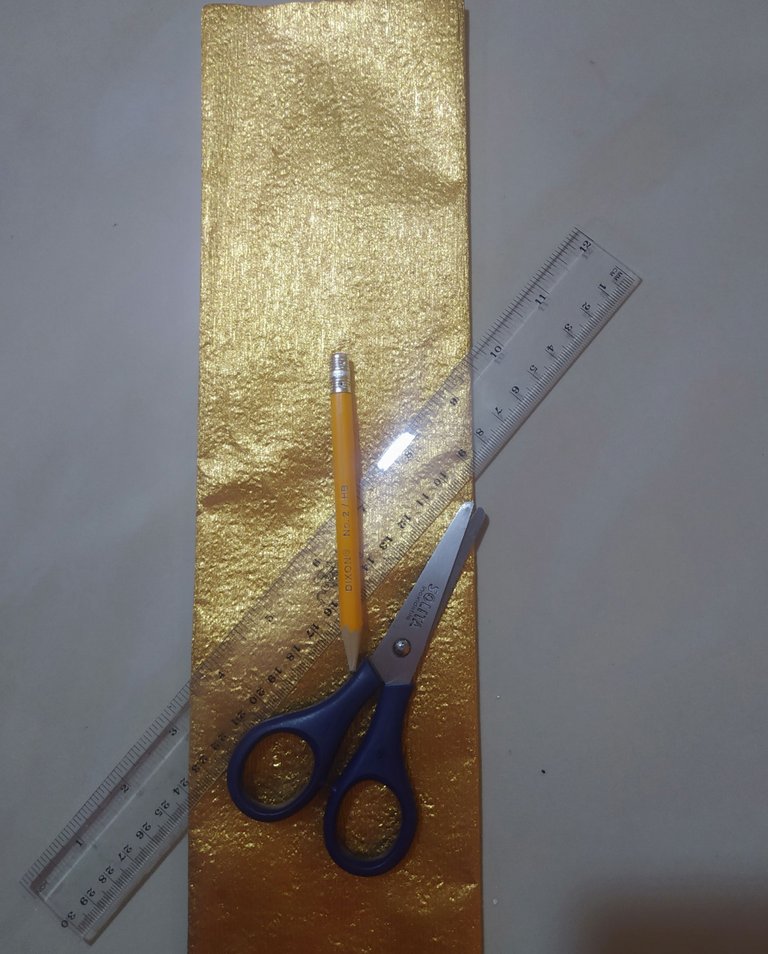
Materials.
- Metallic crepe paper.
- Ruler
- Pencil.
- Scissors
Let's do it.
 |  |
|---|
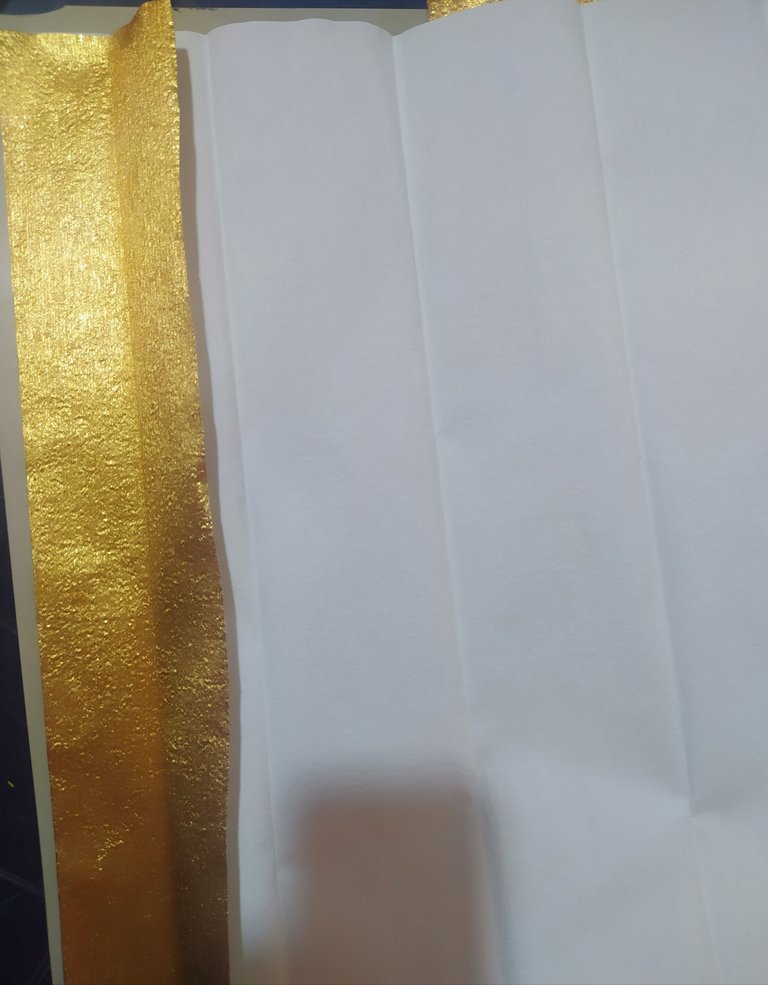
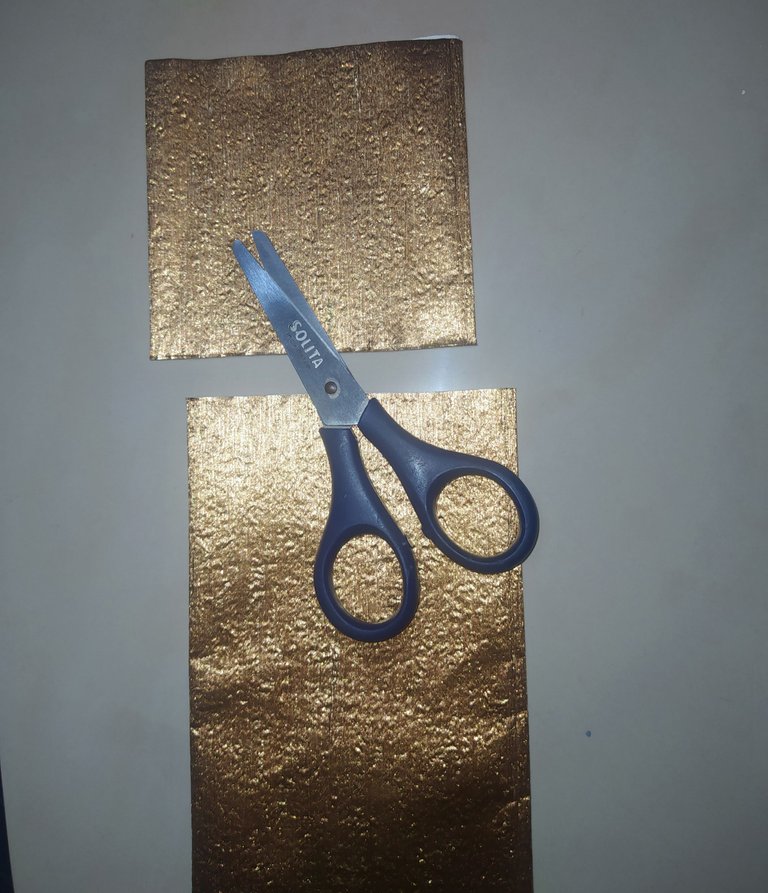
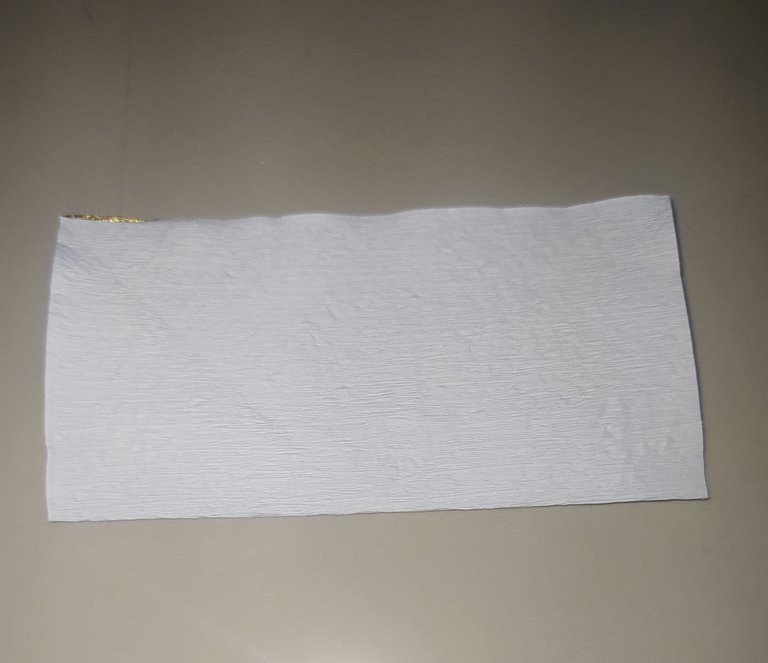
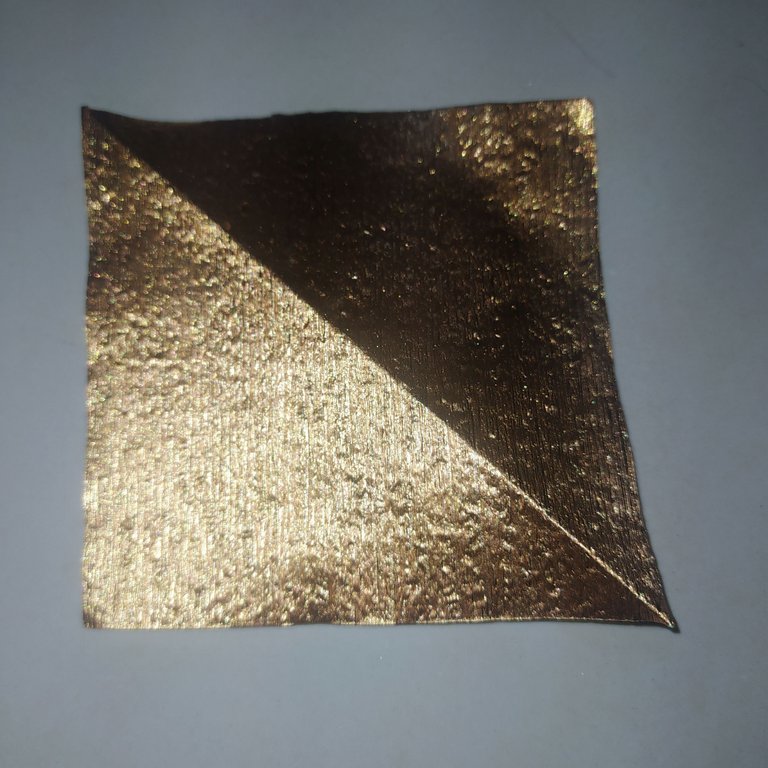
- The first thing we do is to square the paper by cutting out an excellent thinly folded piece of paper.
- Then we unfold the paper.
- We count how many parts of the bear we will need and roll it up again.
 |  |
|---|
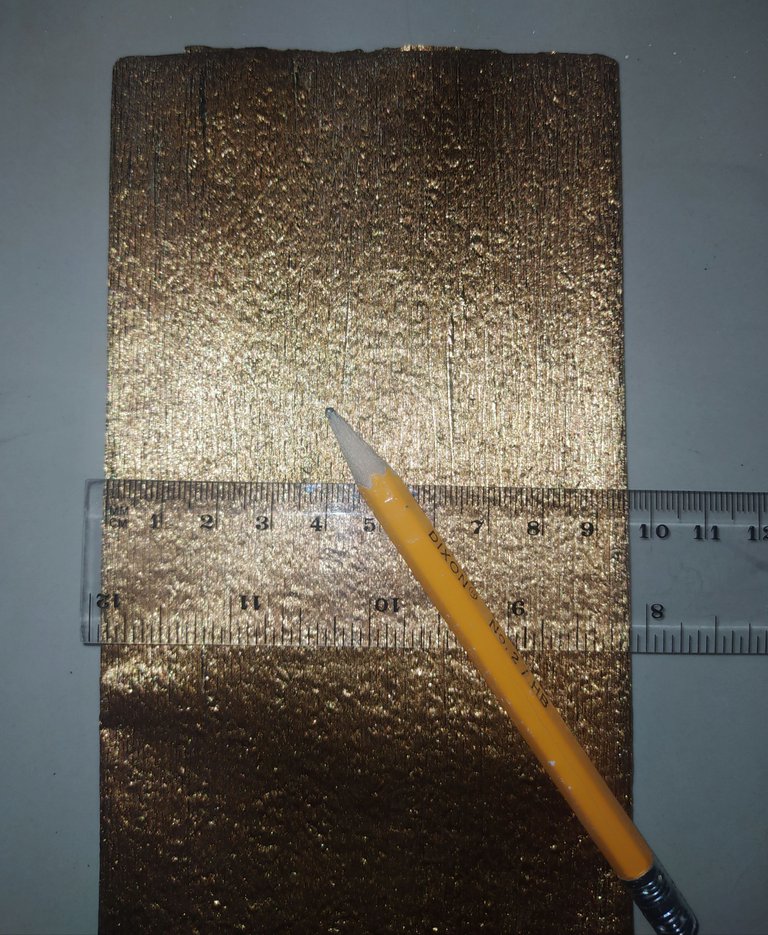
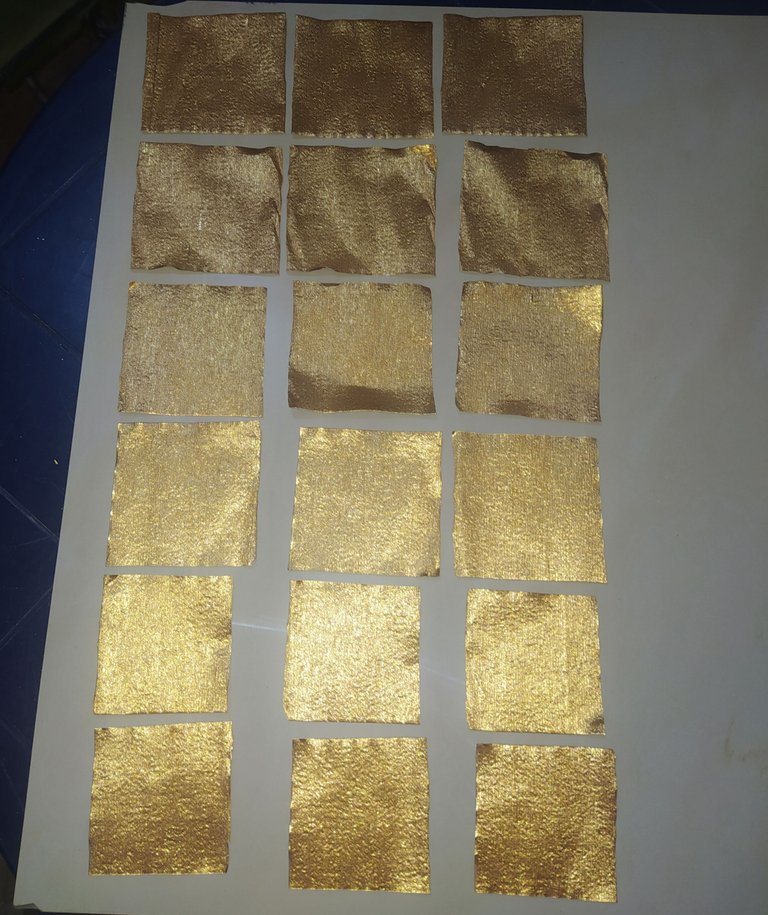
To make these butterflies I decided to make them in three sizes.
9,5 Cm.
7,5 Cm.
6,5 Cm.
Take the measurements with the ruler, mark with the pencil and then cut.
 |  |
|---|
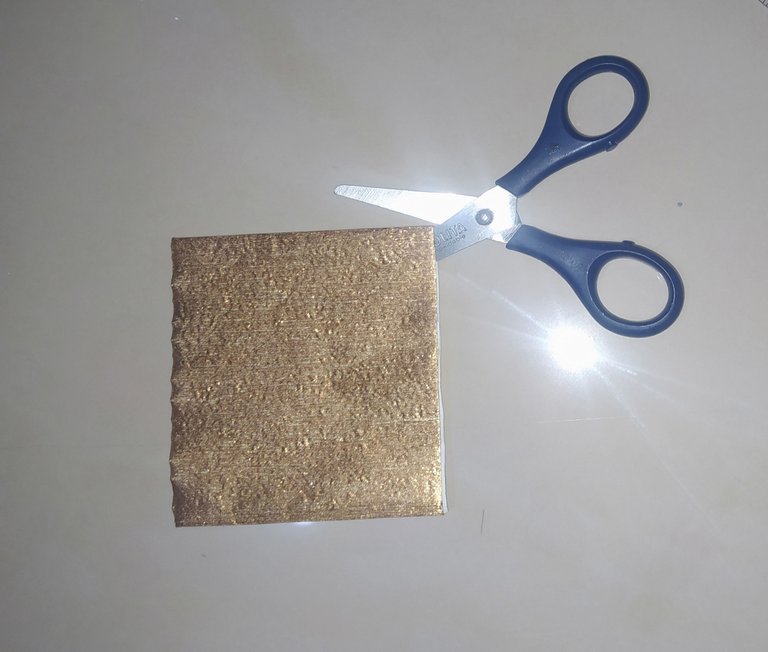
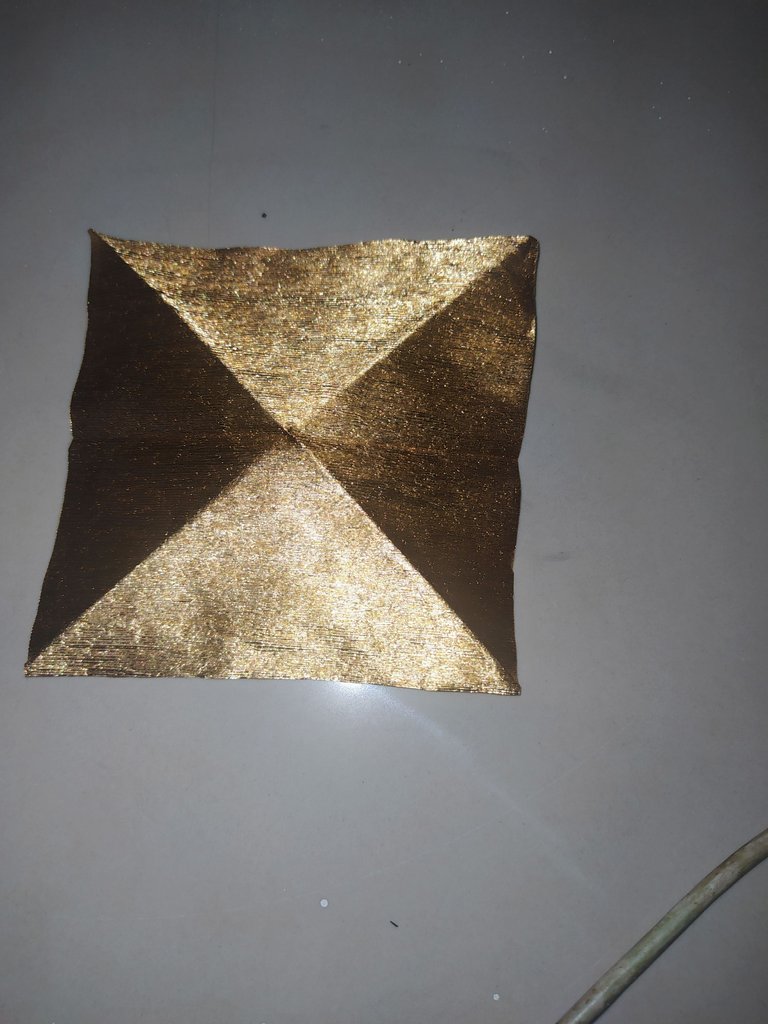
- Then I cut out the sides and in this way I obtained the 18 squares.
Aquí empieza la magia con está increíble técnica del origami
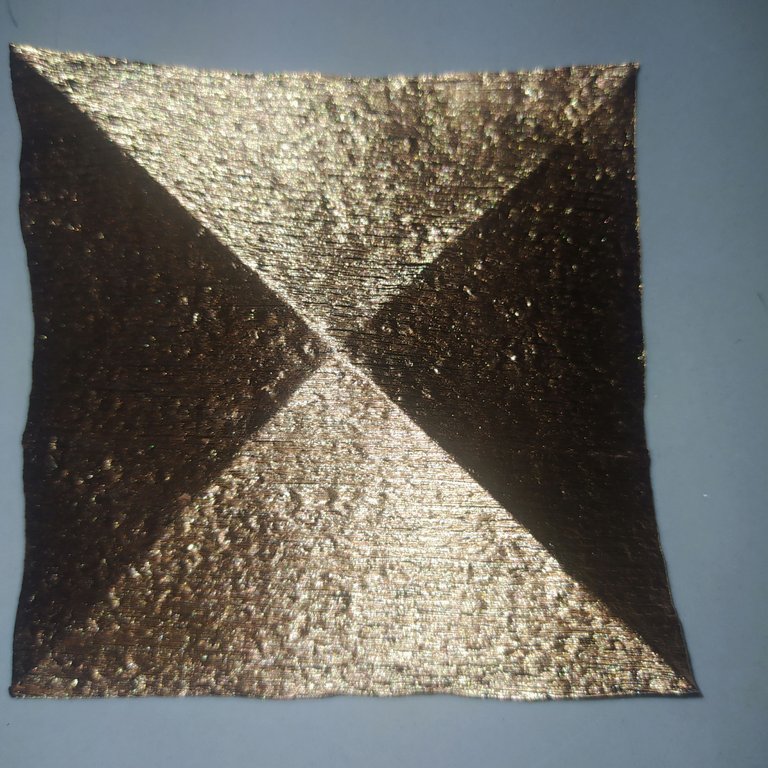
- We are going to start folding along the two diagonals, marking very well with the help of our fingers.
 |  |
|---|
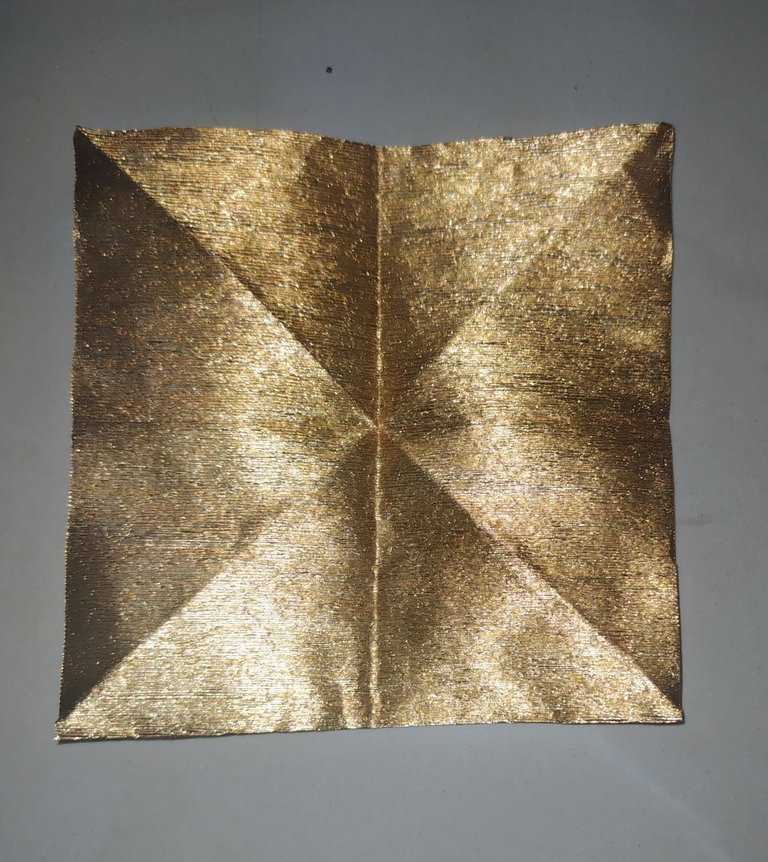
- Then we open our paper square and flip it over on the other side and fold it in half.
|  |
|---|
- Repeat the same step on the other side.
- Turn over on the right side.
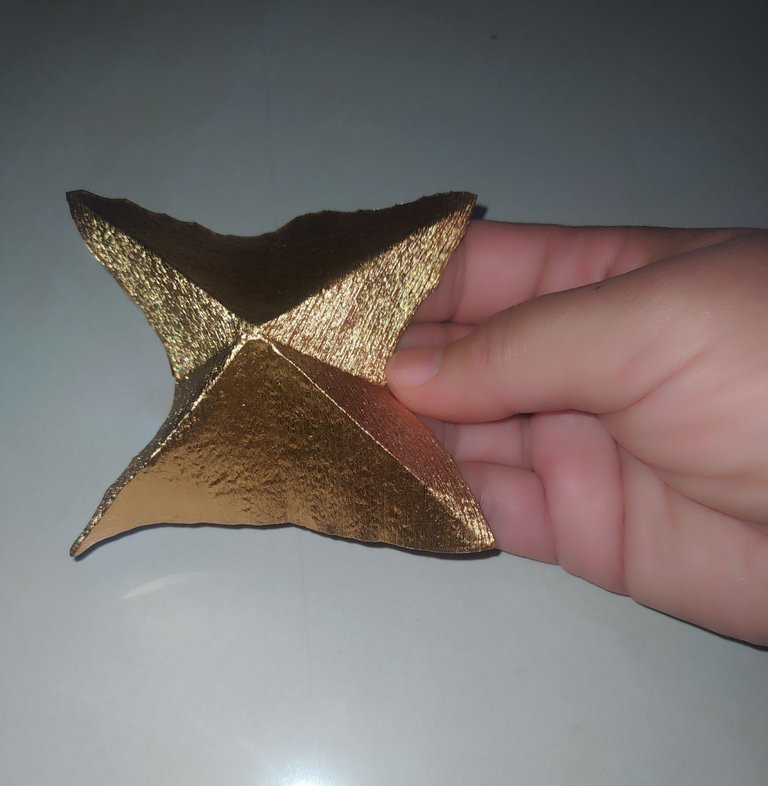
- Now with our finger on the back side we push upwards through the center.
- We take the diagonals and join them together.
- Form a triangle.
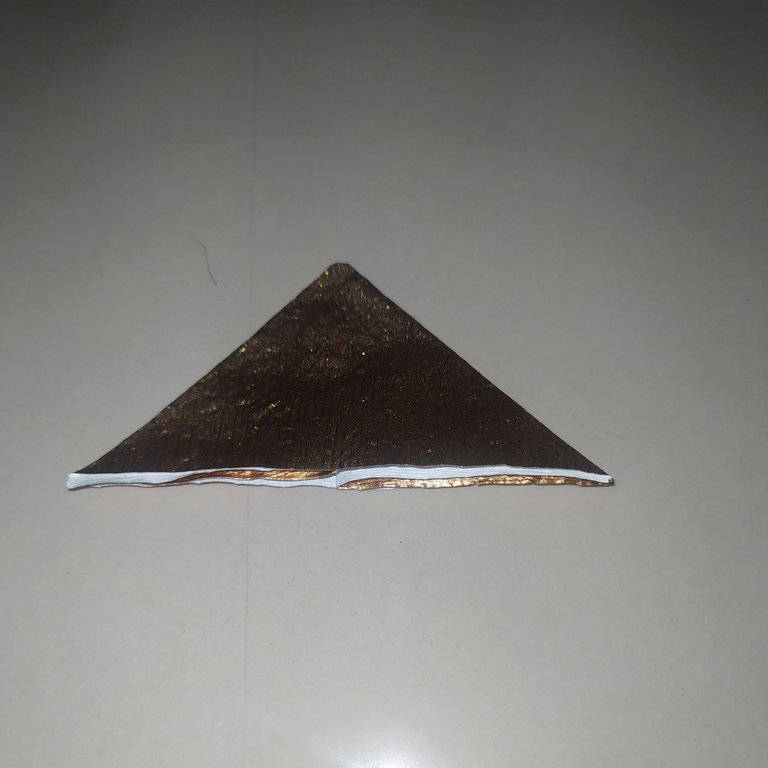
- Fold it again in the center and join the four points.
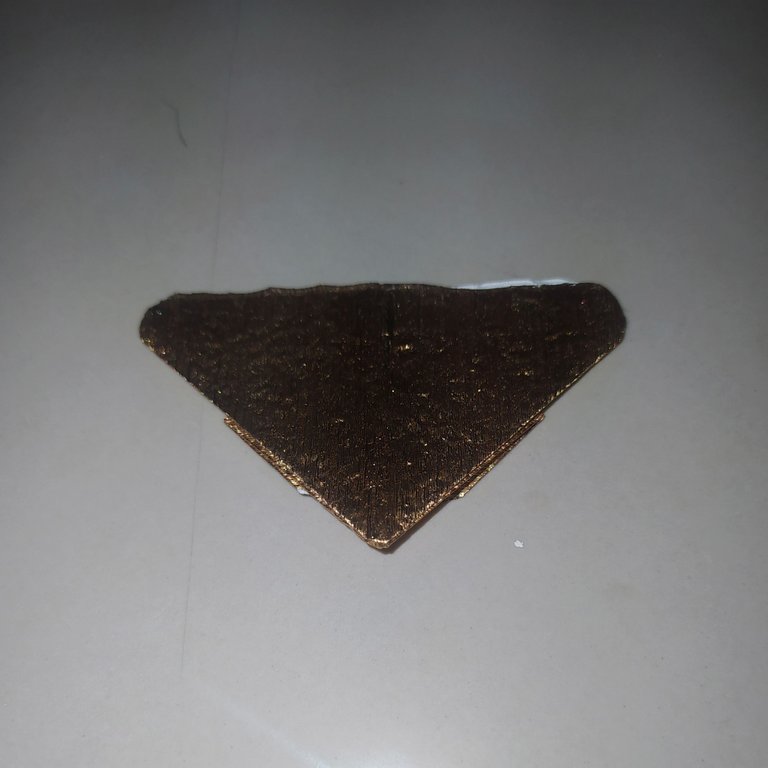
- Then we round the ends by trimming with the scissors.

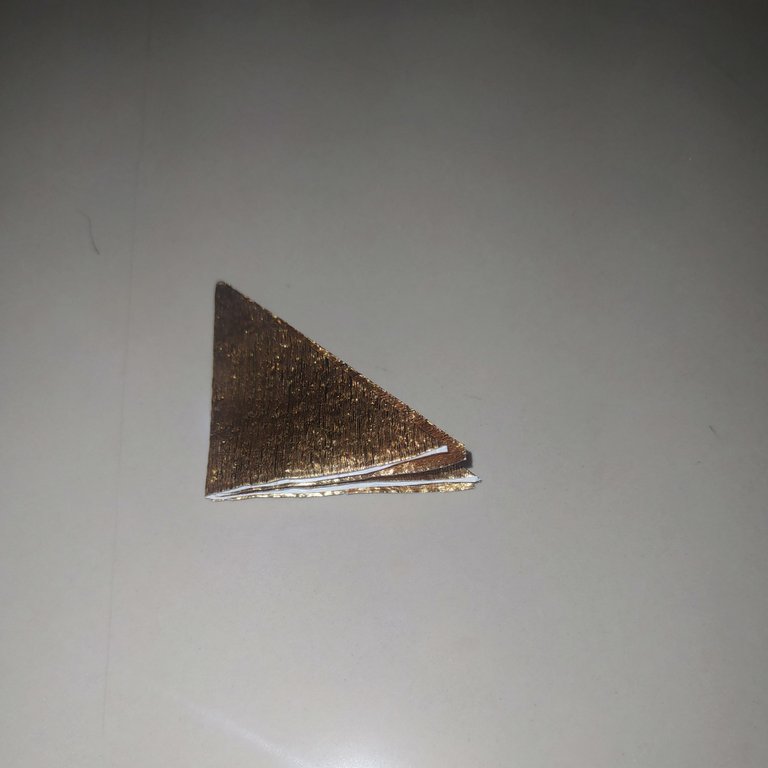
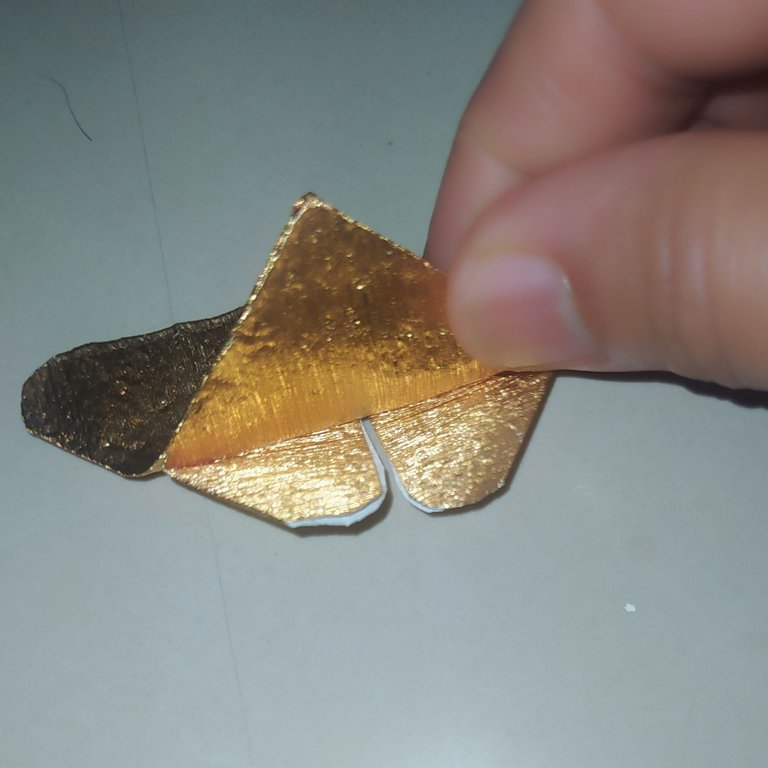
- We open it by placing the widest part upwards.
- Then fold one side towards the center.
- Repeat the folding on the other side.
- We must make sure to mark well with our fingers.
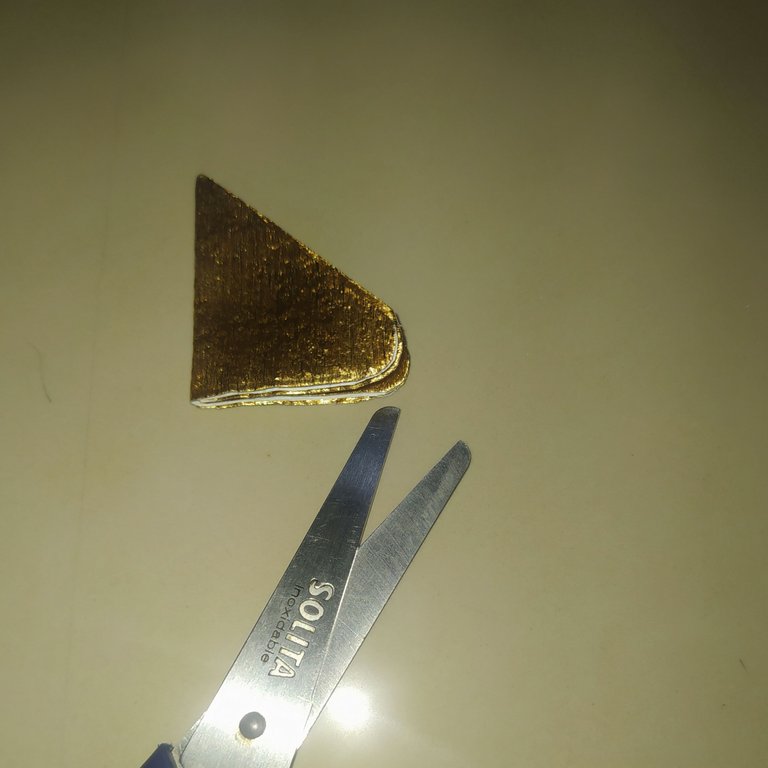
- We turn the other side and we will bring the bottom corner upwards.
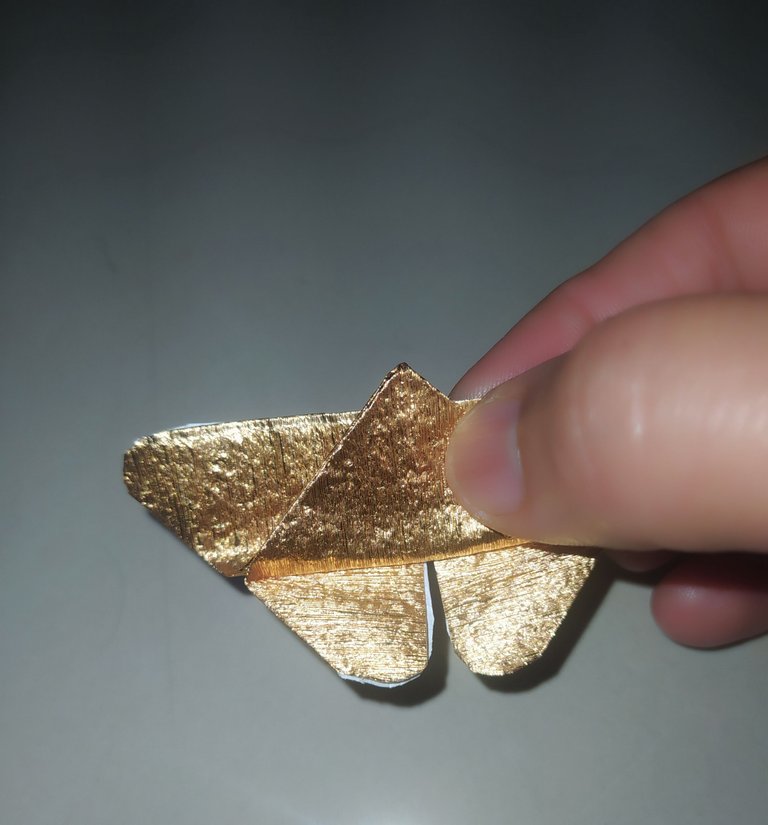
- We must go over the line approximately one centimeter.
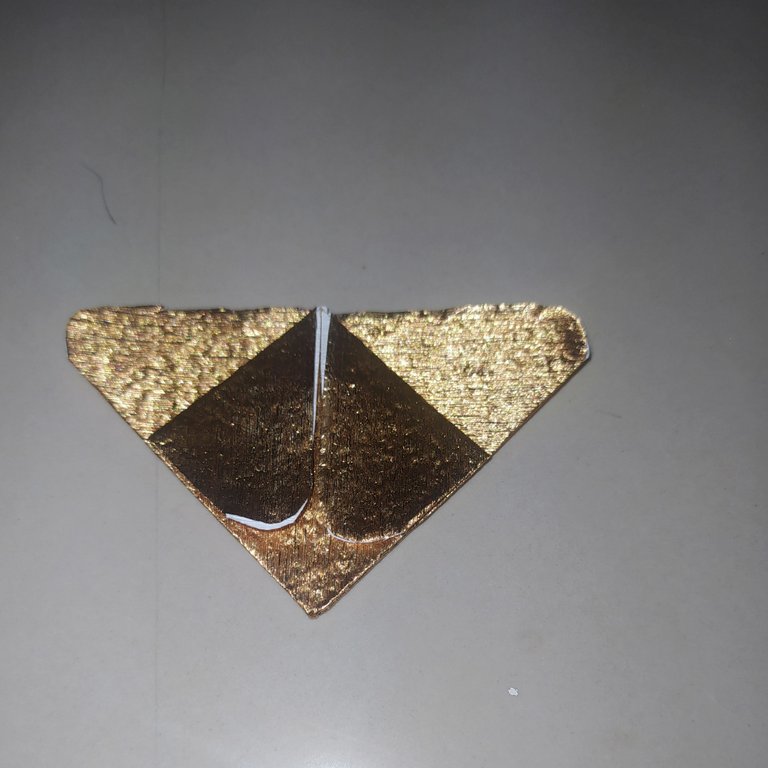
- Then we turn it to the other side and make sure it is in the center.
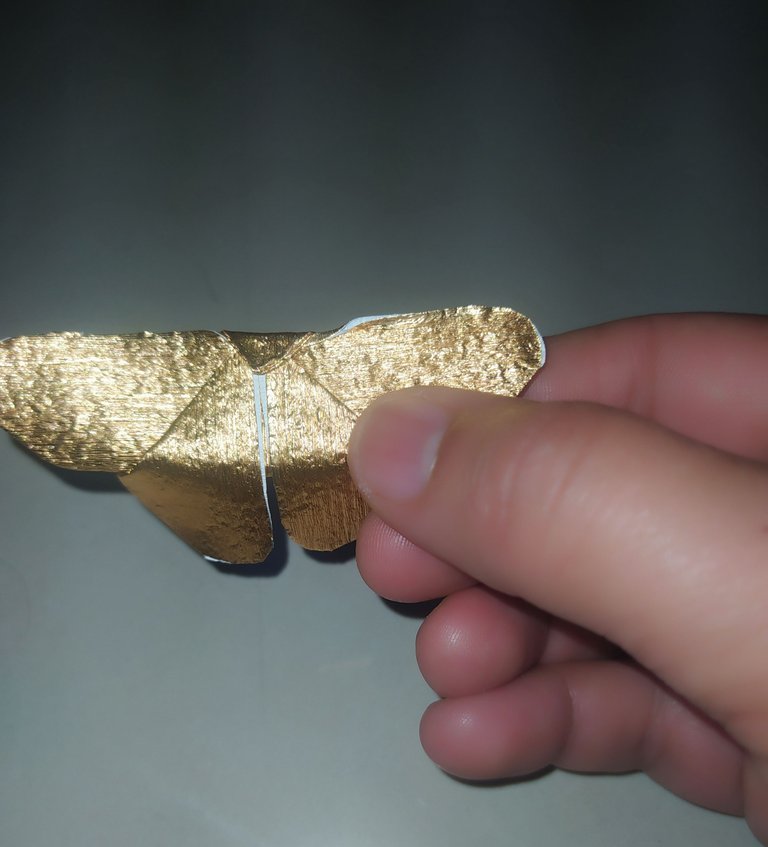
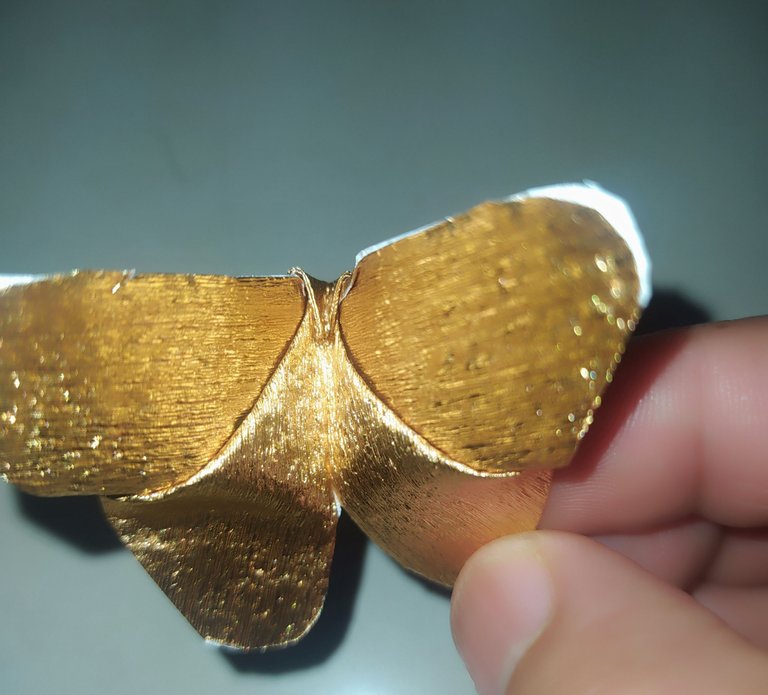
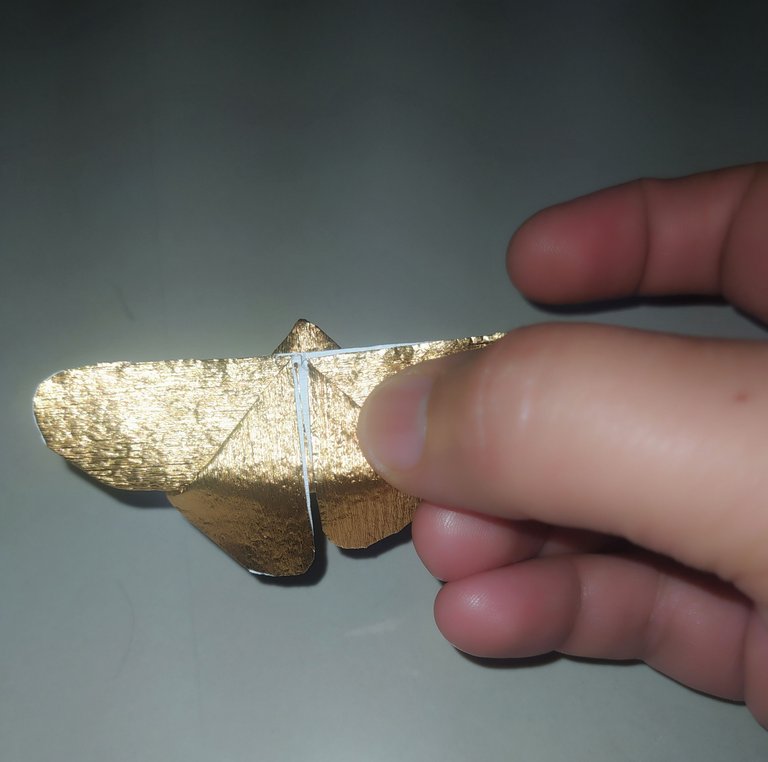
- We take the triangle inwards as shown in the photo, then we fold it in half and in this easy way we would have already made the butterfly.
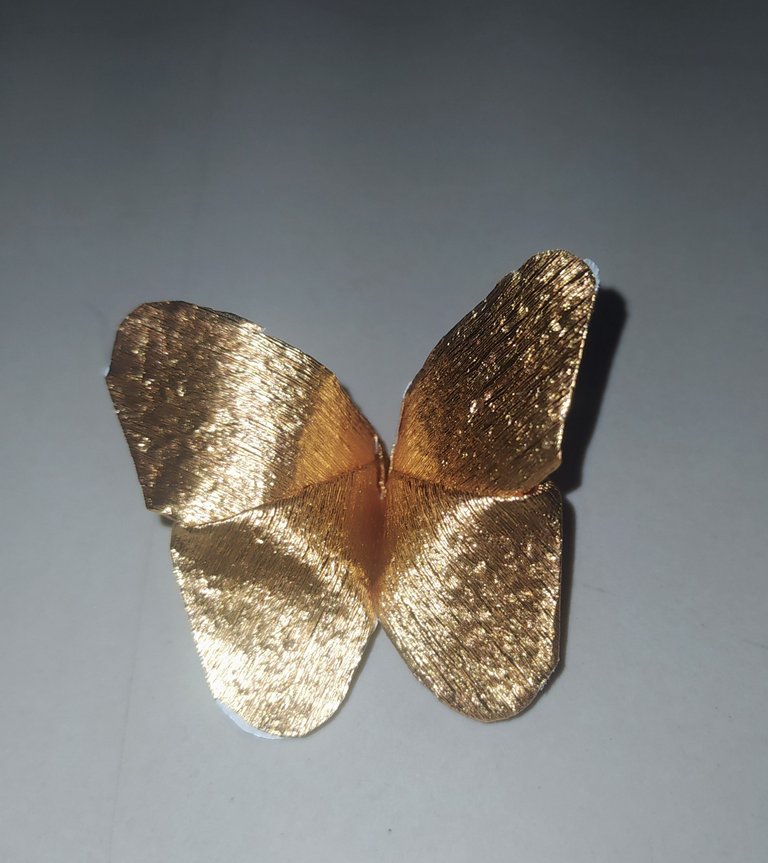
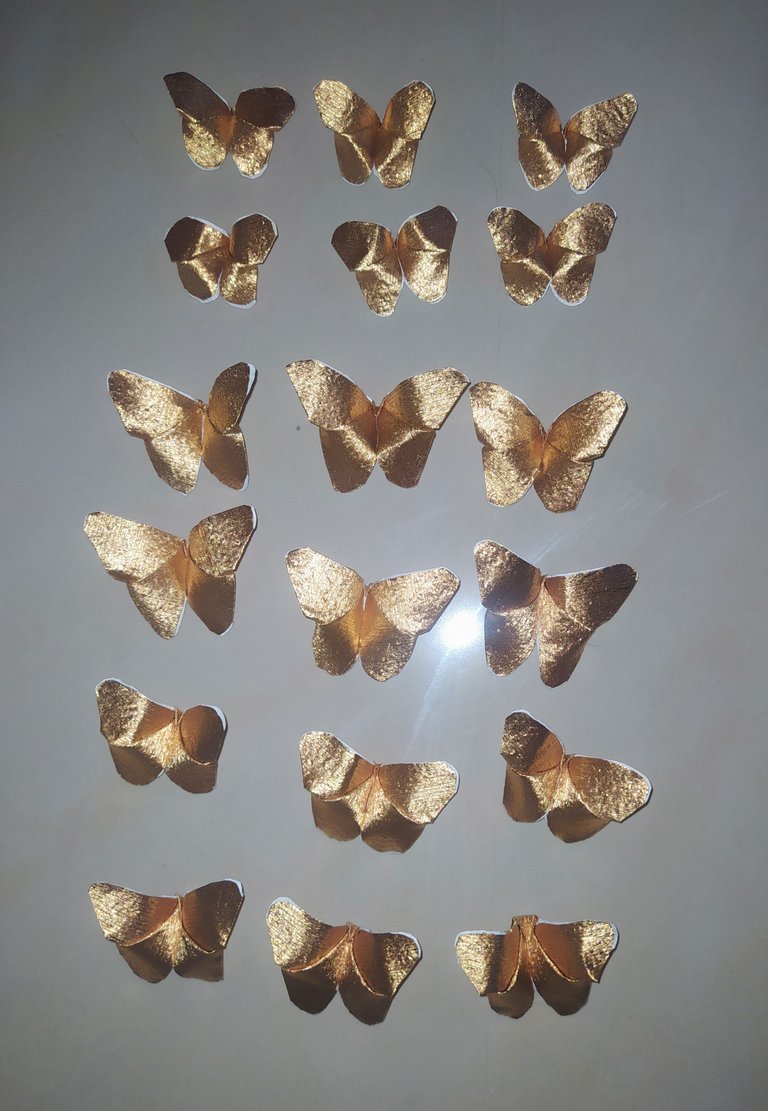
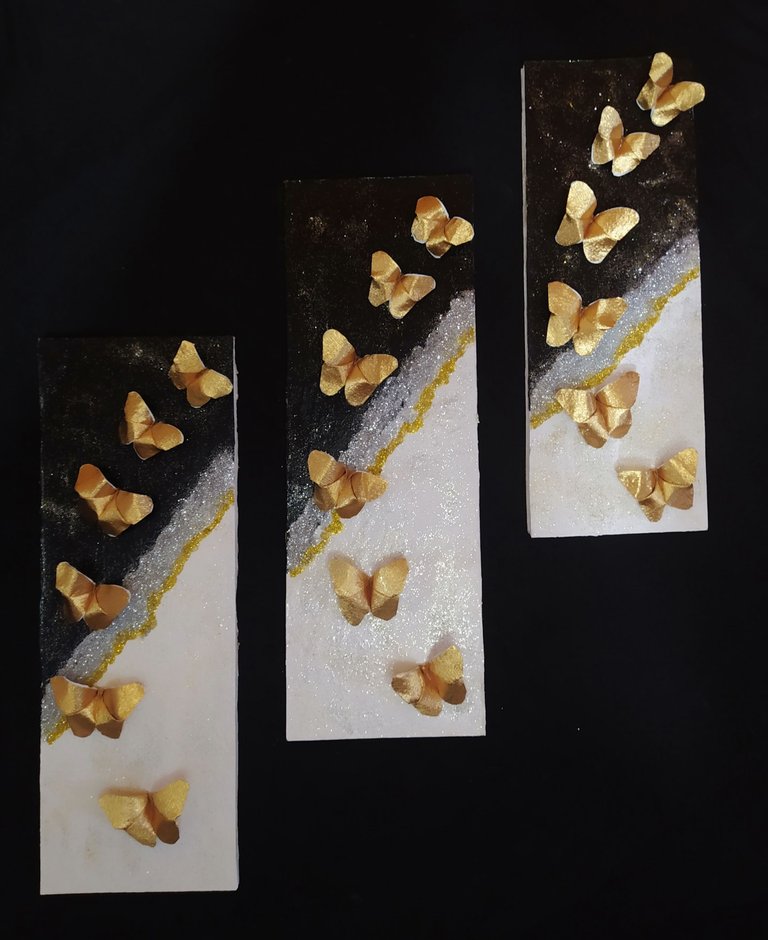
- Here are the 18 butterflies of three different sizes, make six for each size, using the same technique for each one.
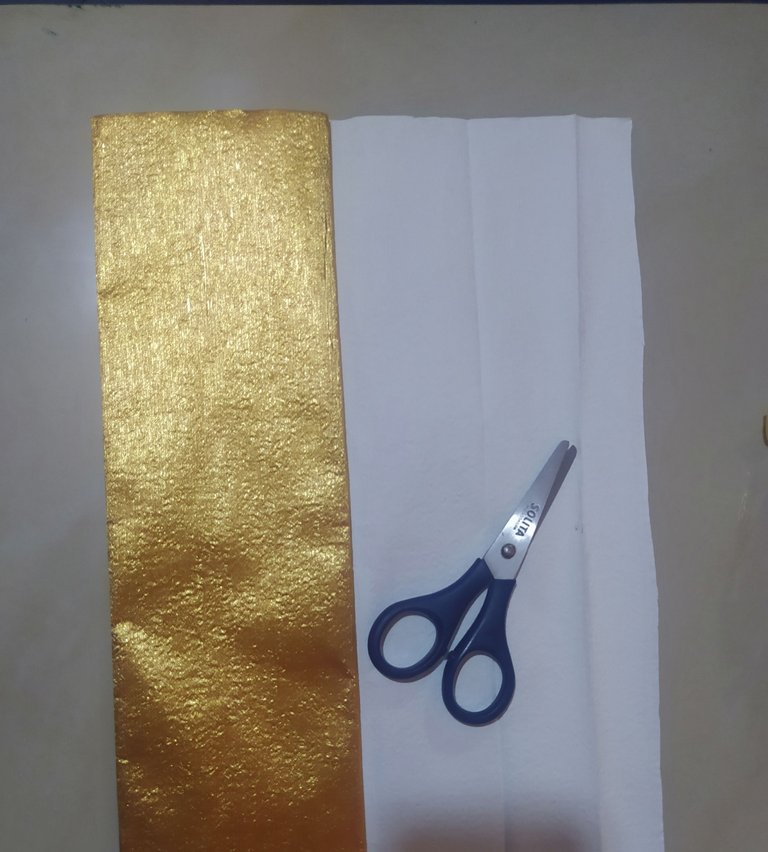
Here are the rest of the materials I used to make these pretty pictures
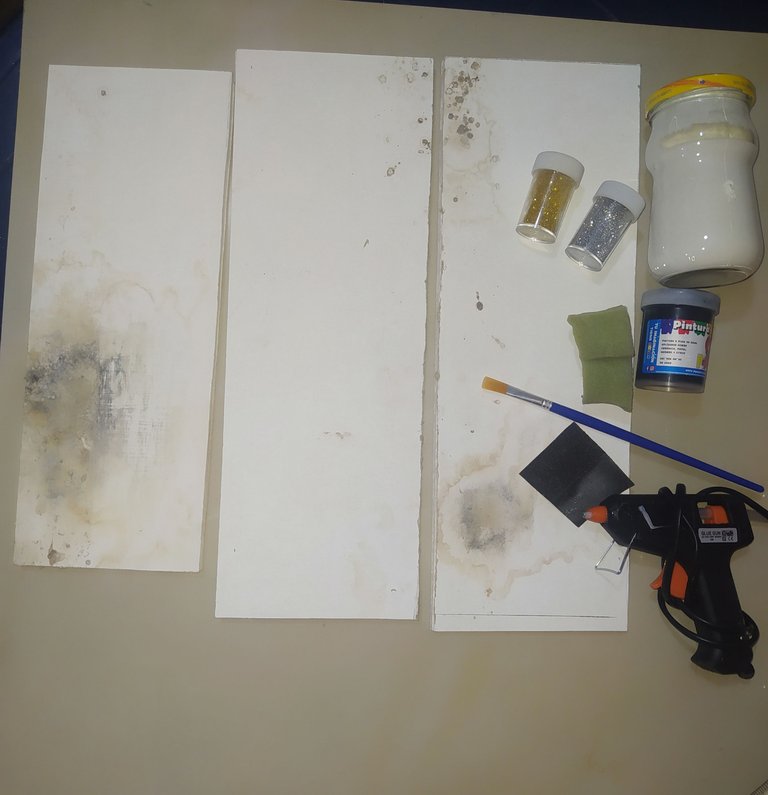
Materials.
- Drywall
- Sandpaper.
- White paint
- Black paint
- Frosting.
- Silicone gun.
- Silicone bar.
- Brush.
- Sponge
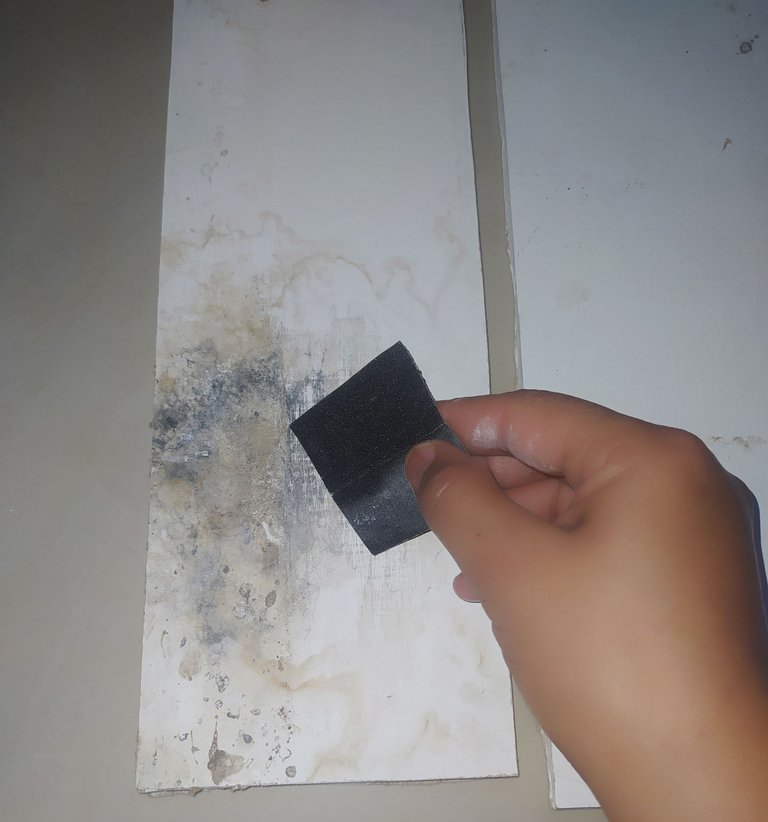
- The first thing I did was to file the drywall parts.
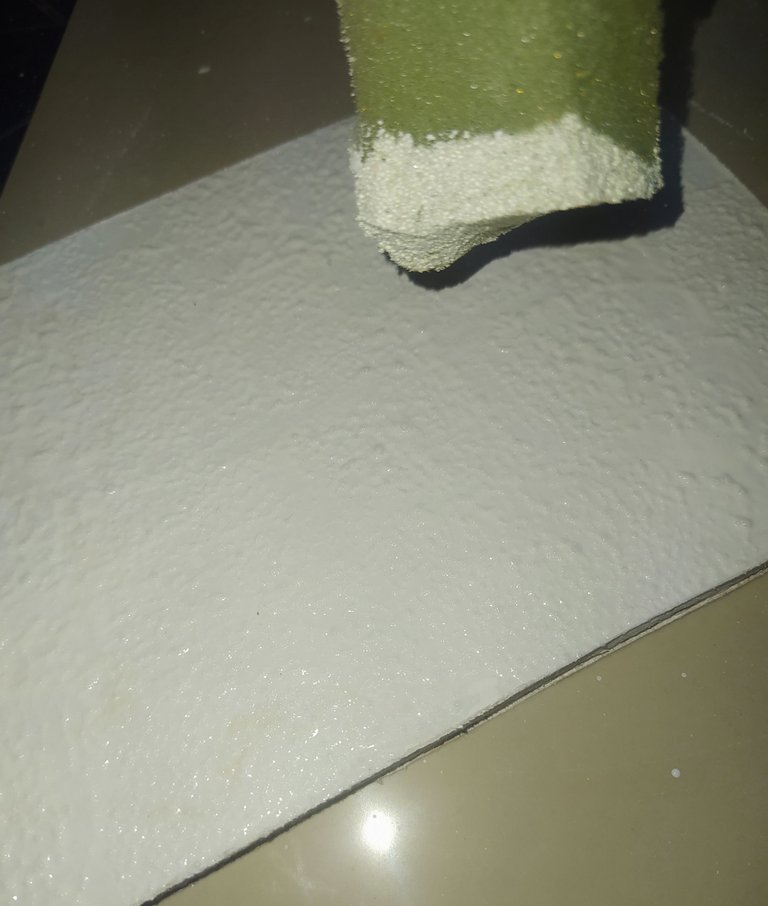
- Then apply several cups of white paint using the sponge.
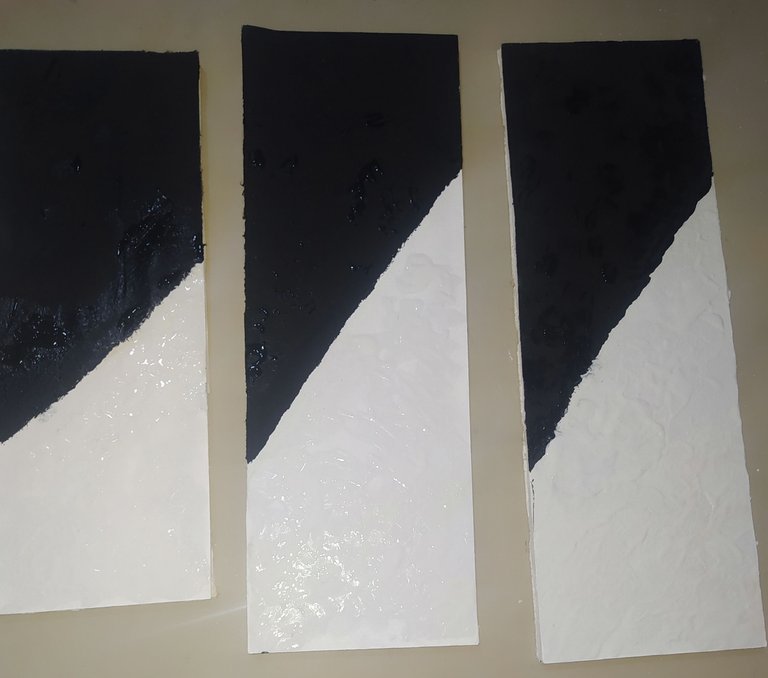
- Paint the top with black paint.
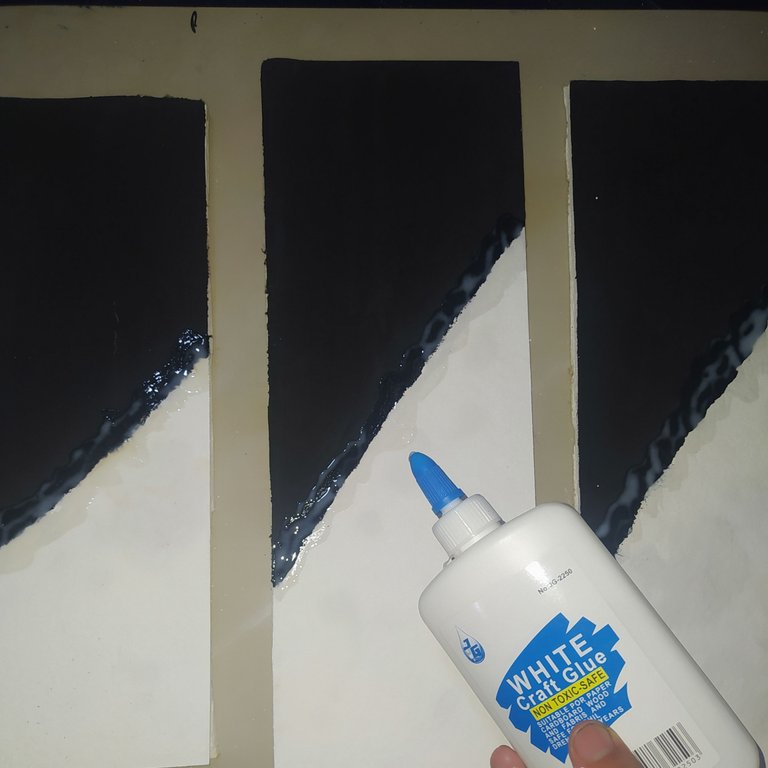
- Then put white school glue on the division of the two colors.
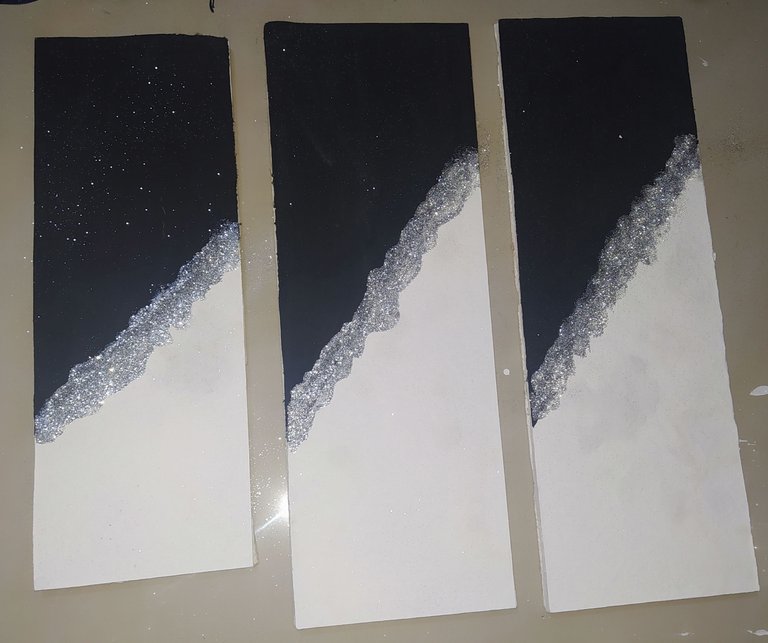
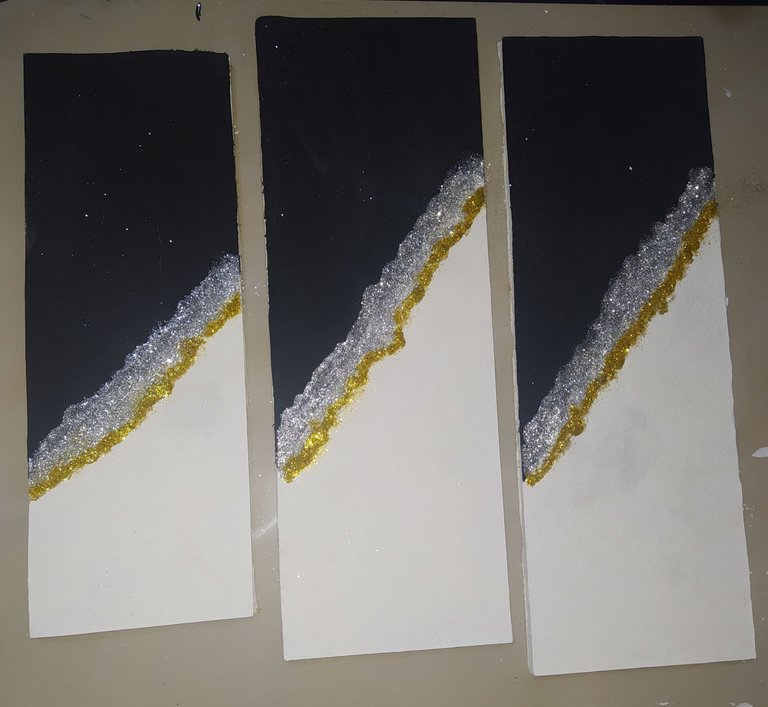
- I added a wide strip of silver frosting and a thin strip of gold frosting.
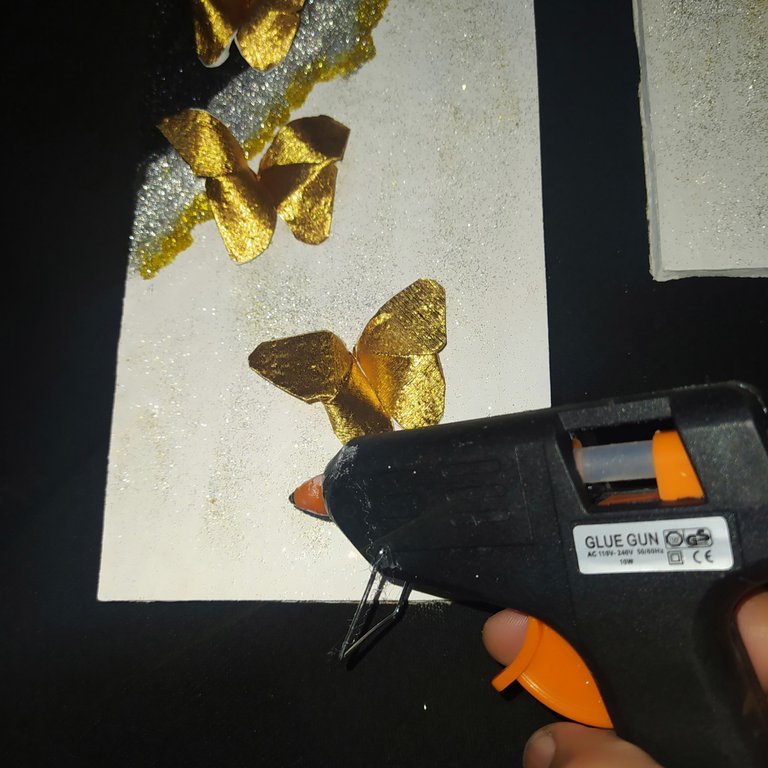
- I placed hot silicone dots and glued the butterflies one by one to give the impression that they are fluttering.
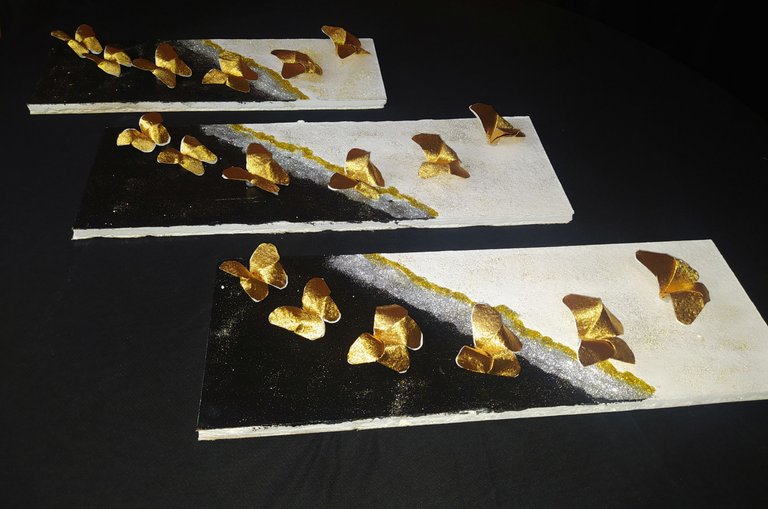
Thank you friends for joining me in this wonderful adventure of giving life through these paintings to these beautiful golden butterflies, I hope you like them, I would like to read them in the comments.

- Photos of my property taken with Xiaomi redmi note 8 phone.
- Banner made in PicsArt.
- Translator Deepl.

Hola, hola saludos mis queridos amigos creativos hoy los invito aprender hacer de una forma muy sencilla y rápida unas lindas mariposas utilizando la técnica del origami para participar en esta fantástica iniciativa
Invito a mi bella amiga @yagelybr
Siento mucho admiración por las mariposas es fascinante ver todo ese proceso de transformación que pasan para llegar a obtener esas alas tan maravillosas e increíbles, como madre para mí ellas representan a los hijos ese regalo tan divino que nos regala Dios y que en un momento de la vida se transforman saliéndome sus alas y abandonando su nido para crecer, en honor a ellos me decidí a realizar esta bella manualidad, la cual llame Alegres Mariposas Revoloteando
Para su elaboración utilice papel crepe metalizado y para resaltar este hermoso trabajo tome unos sobrantes de drywall para hacer unos bellos cuadros.
Te invito me acompañes a su realización.
Materiales.
- Papel crepé metalizado.
- Regla
- Lápiz.
- Tijera.
Pasemos a realizarlo.
| |
|---|
- Lo primero que hacemos es cuadrar el papel recortando un excelente que trae doblado de forma delgada
- Luego desdoblamos el papel.
- Contamos cuántas partes del.osoel vamos a necesitar y enrollamos nuevamente.
| |
|---|
- Para realizar estás mariposas decidí hacerlas de tres tamaños.
- 9,5 Cm.
- 7,5 Cm.
- 6,5 Cm
- Tome las medidas con la regla marque con el lápiz y luego recorte.
| |
|---|
- Luego recorte por los lados y de esta forma obtuve los 18 cuadrados.
Aquí empieza la magia con está increíble técnica del origami
 |  |
|---|
- Vamos a empezar a doblar por las dos diagonales marcando muy bien con la ayuda de los dedos.
| |
|---|
- Luego abrimos nuestro cuadrado de papel y volteamos por el otro lado y doblamos a la mitad.
| |
|---|
- Repetimos el mismo paso del otro lado.
- Volteamos por el lado derecho
- Ahora con nuestro dedo por la parte de atrás empujamos por el centro hacia arriba.
- Tomamos las diagonales y las unimos.
- Formamos un triángulo.
- Lo doblamos nuevamente por el centro unimos las cuatro puntas
- Luego redondeamos las puntas recortando con la tijera.
- Lo abrimos colocando la parte más ancha hacia arriba.
- Luego doblamos un lado hacia el centro.
- Repetimos el doblez del otro lado.
- Debemos asegurarnos de marcar bien con los dedos.
-|-
- Giramos por el otro lado y vamos a llevar la esquina de abajo hacia arriba.
|
- Debemos sobrepasar la línea aproximadamente un centímetro.
- Luego la giramos al otro lado nos aseguramos que está en el centro.
- Llevamos el triangulito hacia adentro como indica la foto, luego doblamos a la mitad y de esta forma tan fácil ya tendríamos hecha la mariposa
- Aqui estan las 18 mariposas de tres tamaños distintos, realice seis por cada tamaño, utilizando la misma técnica para cada una.
Aquí les muestro el resto de los materiales que utilice para hacer estos lindos cuadros
Materiales.
- Drywall
- Lija.
- Pintura blanca
- Pintura negra
- Escarchas.
- Pistola de silicón.
- Barra de silicón.
- Pincel.
- Esponja
- Lo primero que hice fue limar las partes de drywall.
- Luego le aplique varias copas de pintura blanca utilizando la esponja.
- Pinte la parte de arriba con pintura negra.
- Luego le coloque pega blanca escolar en la división de los dos colores.
- Le agregué una franja ancha de escarcha plateada y una delgada de escarcha dorada.
- Coloqué puntos de silicón caliente y fui pegando una a una las mariposas.
Gracias amigos por acompañarme en esta maravillosa aventura de darle vida a través de estos cuadros a estas lindas mariposas doradas, espero les guste, me gustaría leerlos en los comentarios.
- Fotos de mi propiedad tomadas con teléfono Xiaomi redmi note 8.
- Banner realizado en PicsArt.
- Traductor Deepl.
Qué lindas mariposas, son perfectas para decorar las habitaciones, me gusta el color en que las realizaste, y están muy bien explicadas. 😉
Si amiga en una habitación quedarían fantástica, gracias por pasar y comentar lo valoro mucho
Muy bonitas tus maripositas de papel crepé
Gracias cariño
Amiga que bella esa decoración con mariposas doradas, me gusta mucho. Es genial porque las haces una por una paso a paso... el trabajon que se debe haber llevado eso jeje te quedó muy bien
Hola mi querido amigo es un trabajo muy agradable y realmente fácil, me alegra saber que te gustó gracias por la visita
Bello trabajo amiga siempre regalando cosas tan lindas, bien trabajadas y atractivas visualmente.
Gracias por participar en nuestra comunidad, y en el concurso. Éxitos y suerte @yraimadiaz ✨
!DIY
Hola mi querida amiga @dayadam lo hago con mucho amor es una de mis comunidades favoritas.
Gracias por tus buenos deseos abrazos
Nice work in origami very nice. Thanks for joining the contest in our community. Good luck and lots of success...
Thank you @diyhub I am very pleased to know that you liked it I have done it with a lot of love
You can query your personal balance by
!DIYSTATSGracias amiga bella
Amo las mariposas...que lindas te quedaron amiga. Buen trabajo. Me encanta cuando trabajas el color dorado porque todo brilla igual que tú. Un abrazo infinito y feliz inicio de semana.
!discovery 45
Hola amiga bella sin duda alguna las mariposas son muy bellas y transmiten tanta belleza y armonía.
Me alegra saber que también las amas igual que yo.
Gracias por tus lindas palabras, abrazos
This post was shared and voted inside the discord by the curators team of discovery-it
Join our Community and follow our Curation Trail
Discovery-it is also a Witness, vote for us here
Delegate to us for passive income. Check our 80% fee-back Program
Thank you for your support, it's fantastic
Congratulations, your post has been upvoted by @dsc-r2cornell, which is the curating account for @R2cornell's Discord Community.
Enhorabuena, su "post" ha sido "up-voted" por @dsc-r2cornell, que es la "cuenta curating" de la Comunidad de la Discordia de @R2cornell.
Gracias por su apoyo, bendiciones
Que lindas se ven esas maripositas :)
Hola amiga gracias por pasar y comentas, abrazos
Realmente un hermoso trabajo de decoración, me encantó y las mariposas están muy lindas! Los colores son perfectos! 🥰
Gracias amiga por tus lindas palabras es muy satisfactorio para mí saber que te ha gustado
Congratulations @yraimadiaz! You received a personal badge!
Wait until the end of Power Up Day to find out the size of your Power-Bee.
May the Hive Power be with you!
You can view your badges on your board and compare yourself to others in the Ranking
Check out our last posts:
gracias por mi ultima insignia del año
Enhorabuena por participar en el PUD @marivic10. 💪🐝
Congratulations @yraimadiaz! You received a personal badge!
Participate in the next Power Up Day and try to power-up more HIVE to get a bigger Power-Bee.
May the Hive Power be with you!
You can view your badges on your board and compare yourself to others in the Ranking
Check out our last posts:
Congratulations @yraimadiaz! You received a personal badge!
You can view your badges on your board and compare yourself to others in the Ranking
Check out our last posts:
hola amigos @hivebuzz esto muy feliz orgullosa y complacida de haber alcanzado mi segundo año en esta maravillosa BLOCKCHAIN HIVE
gracias por mi bella y majestuosa insignia lo valoro mucho🎉🎉🎉😍
¡Felicitaciones @yraimadiaz! Nos alegra saber que estás disfrutando de tu tiempo en la blockchain Hive. ¡Esperamos verte alcanzar muchos más hitos en el futuro! ¡Sigue así! 🎉🎉🥳