[ESP-ING] Nectar Queen pendant in Peyote || Splinterlands Art Contest Week 342
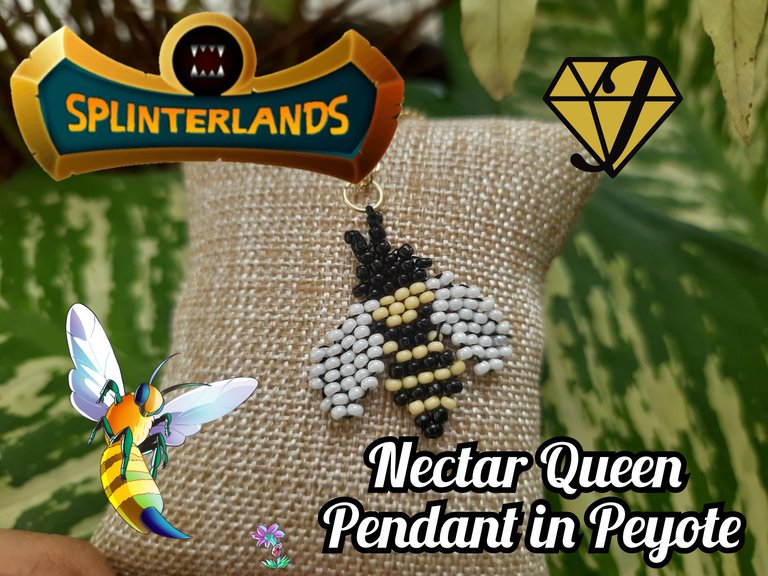

Un saludo, mi gente maravillosa de @jewelry hoy vengo a participar en el concurso #342 de Splinterlands, para ello me inspire en un fan art y realice un " dije de collar" de nuestra carta, inspirado en el personaje de nombre "Néctar Queen" este fan art me ha inspirado para realizar esta hermosa creación, además de que esta abeja me recuerda a las abejas de Hive y nuestro gran panal, ya había realizado este accesorio pero con la técnica de alambrismo, lo pueden ver aquí
Néctar Queen, La reina del néctar, es un monstruo de tierra cuerpo a cuerpo volador, y al nivel máximo tendrá la habilidad de represalia y la habilidad de veneno. No es el tanque más útil para la astilla verde, ya que no tiene ninguna habilidad defensiva para mantener los PV y absorber el daño.
Para este Fan Art utilice una técnica peyote con mostacillas para darle un toque especial, enyrr las dos abejas tengo que confesar me encantó mas la otra, quizas el diseño de peyote le falta un amarillo mas vivo, ahora les invito a ponerse manos a la obra mis queridos creativos. Y ver este pequeño pasó a paso que tanto me ha gustado y espero que ha ustedes también.

Greetings, my wonderful people of @jewelry today I come to participate in the contest #342 of Splinterlands, for this I was inspired by a fan art and made a " necklace charm " of our card, inspired by the character named "Nectar Queen " this fan art has inspired me to make this beautiful creation, besides this bee reminds me of the bees of Hive and our great honeycomb, I had already made this accessory but with the wire wrap technique, you can see it here
Nectar Queen, The Nectar Queen, is a flying melee ground monster, and at max level will have the retaliation ability and the poison ability. It is not the most useful tank for the green sliver, as it has no defensive ability to maintain HP and absorb damage.
For this Fan Art I used a peyote technique with beads to give it a special touch, enyrr the two bees I have to confess I loved the other one more, maybe the peyote design lacks a more vivid yellow, now I invite you to get to work my dear creatives. And watch this little step by step that I liked so much and I hope you liked it too.
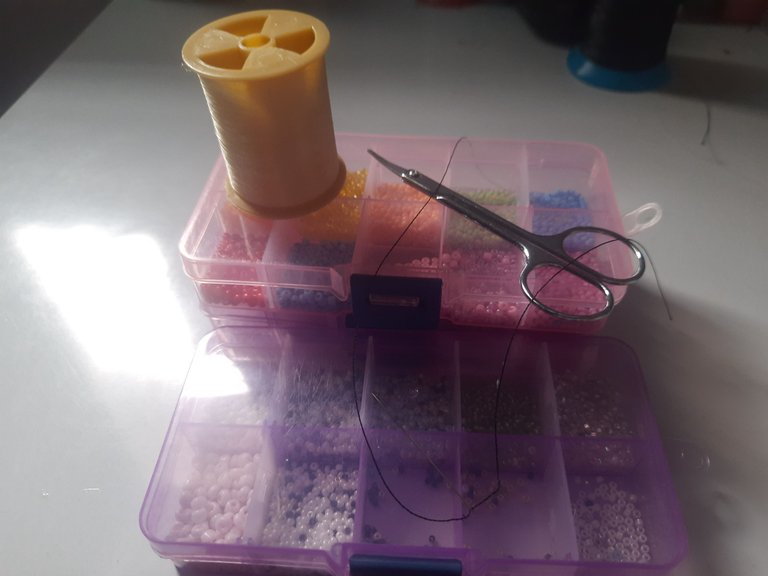
Materiales:
✅️ Mostacillas blancas, amarillas y negras.
✅️ un collar para guindar
✅️ Argolla
✅️ Aguja e hilo Miyuki
Materials
✅️ White, yellow and black beads.
✅️ a necklace to hang
✅️ Ring
✅️ Miyuki needle and thread
Paso a Paso / Step by Step
 |  |
|---|
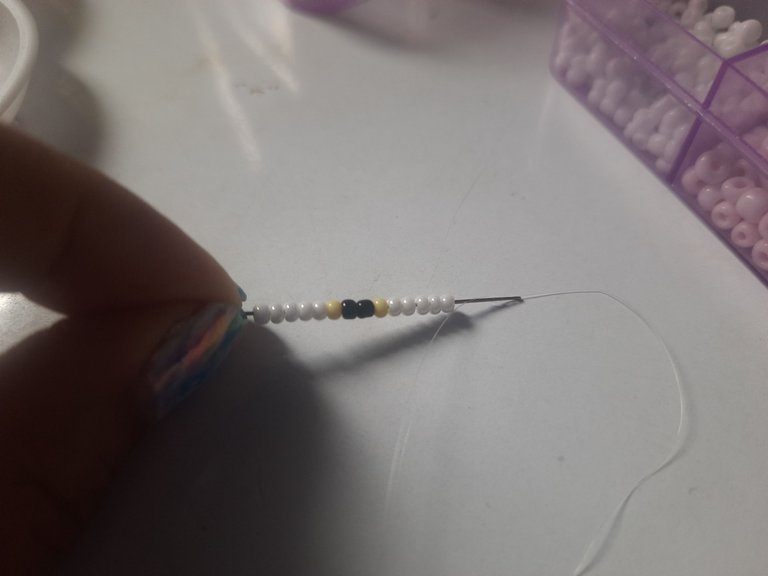
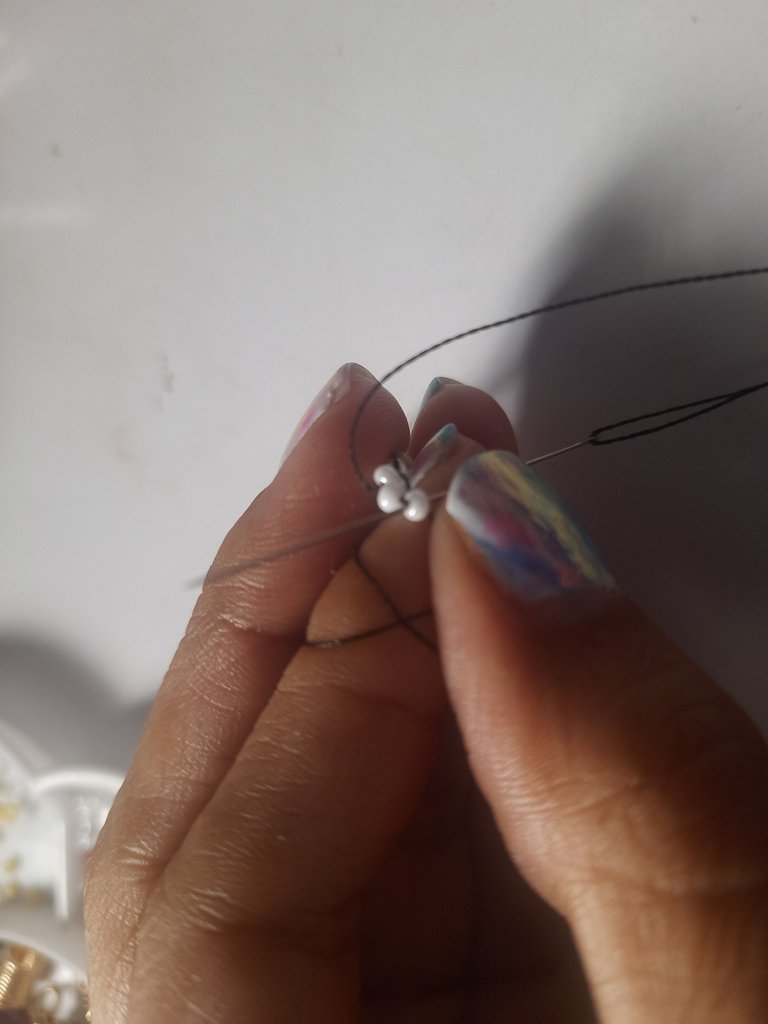
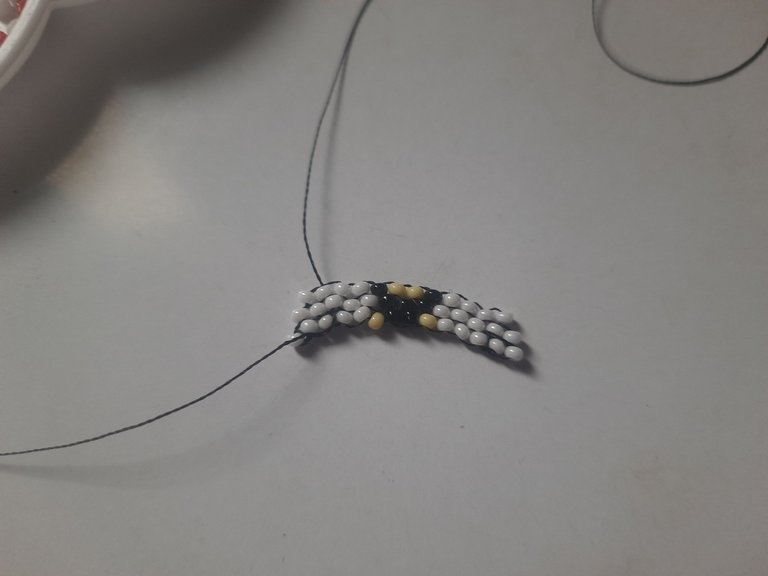
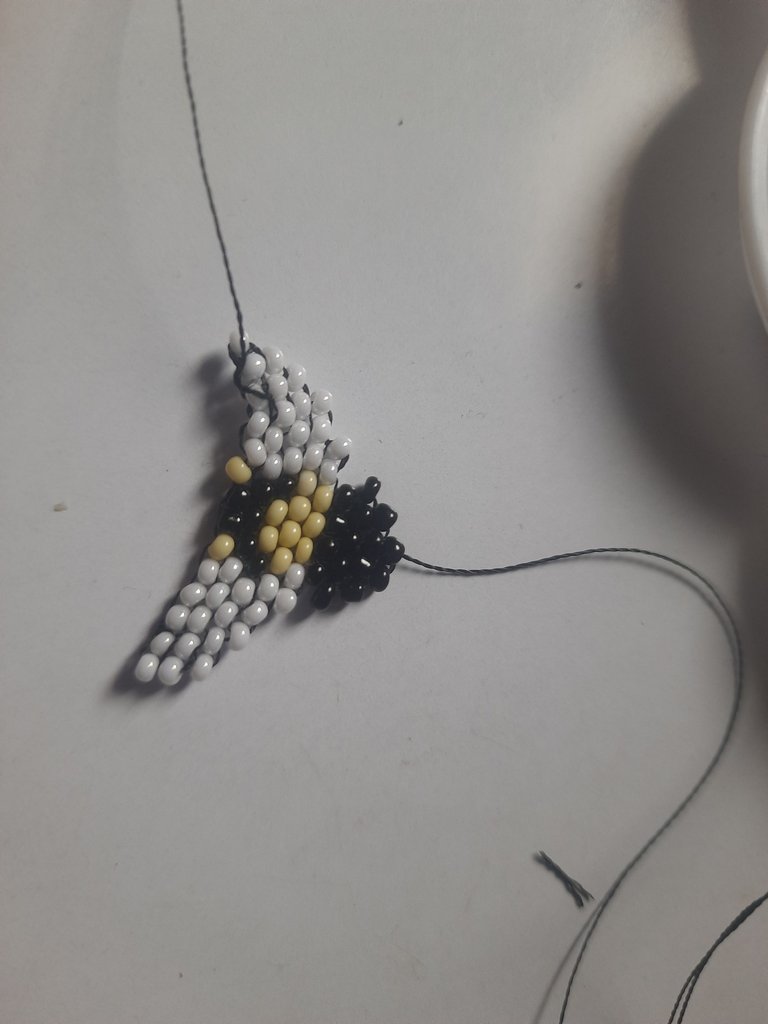
Comenzaremos colocando 5 mostacillas blancas, una amarilla, dos negras, una amarilla, y cinco blancas, vamos a pasar el hilonde abajo hacia arriba por las mostacillas comenzando por la primera.
We will begin by placing 5 white beads, one yellow, two black, one yellow, and five white beads, we will pass the thread from bottom to top through the beads starting with the first one.
 |  |  |
|---|
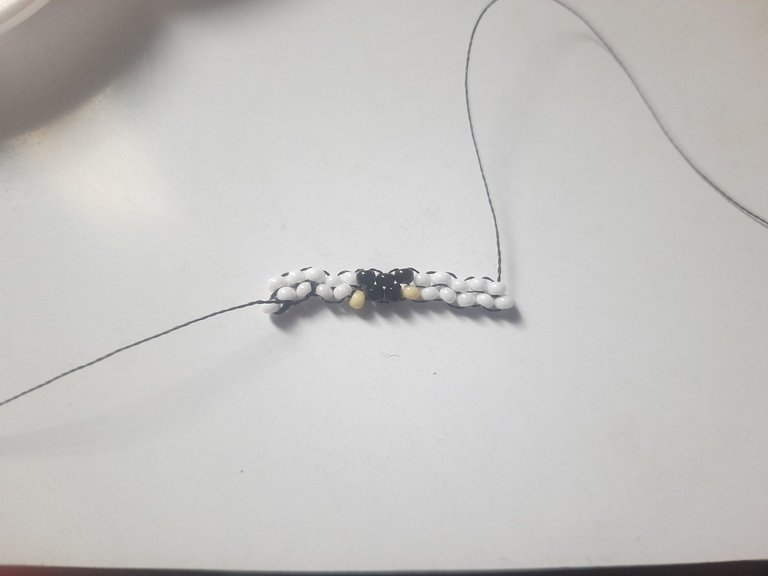
Ahora vamos en decreciente colocamos 5 mostacillas blancas, tres negras y cinco blancas nuevamente.
Now we place 5 white beads, three black beads and five white beads again.
 |  |  |
|---|
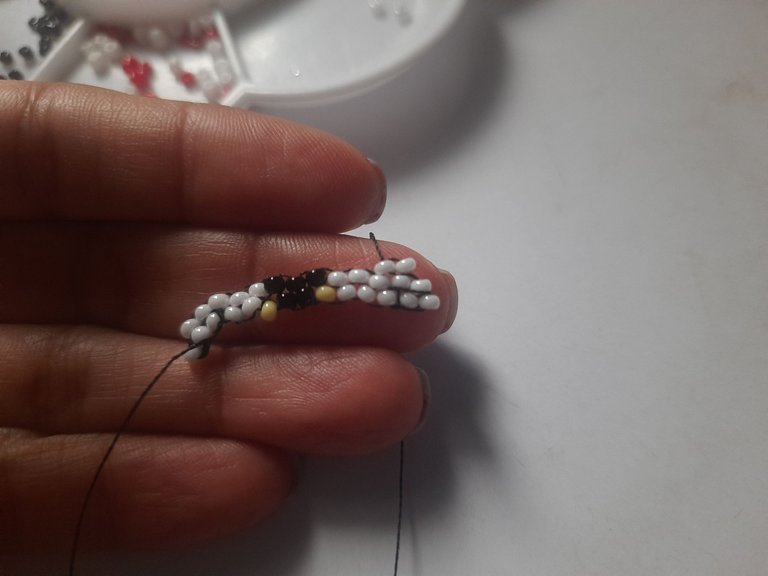
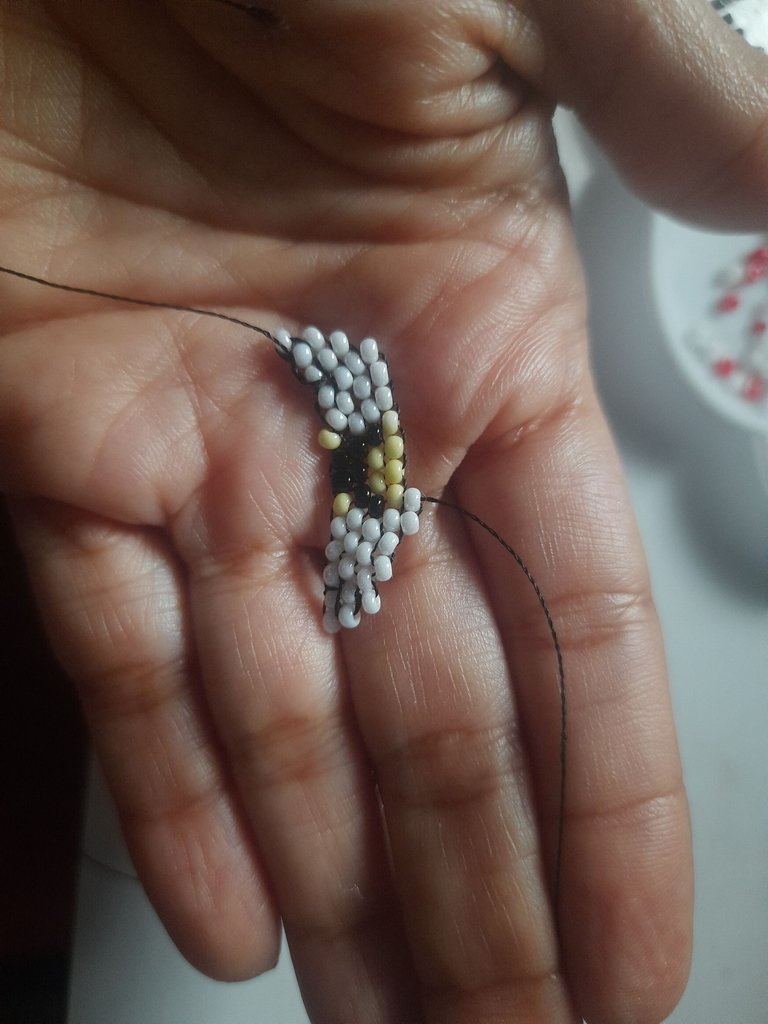
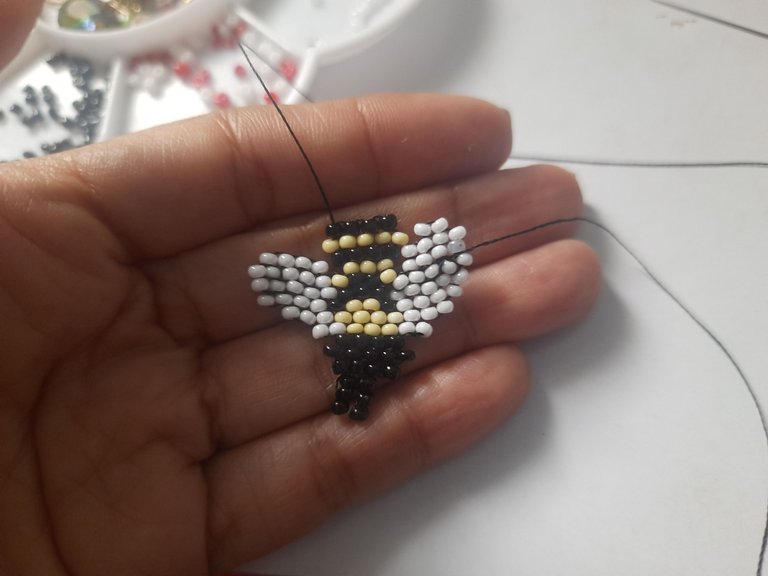
Ahora seguimos en decreciente colocaremos cuatro blancas, una amarilla, dos negras, una amarilla, cuatro blancas nuevamente, en el siguiente seguimos subiendo y vamos a colocar tres blancas, tres amarillas, tres blancas y volvemos en decreciente a uno.
Now we continue decreasing we will place four white, one yellow, two black, one yellow, four white again, in the next one we continue ascending and we will place three white, three yellow, three white and we return decreasing to one.
 |  |  |
|---|
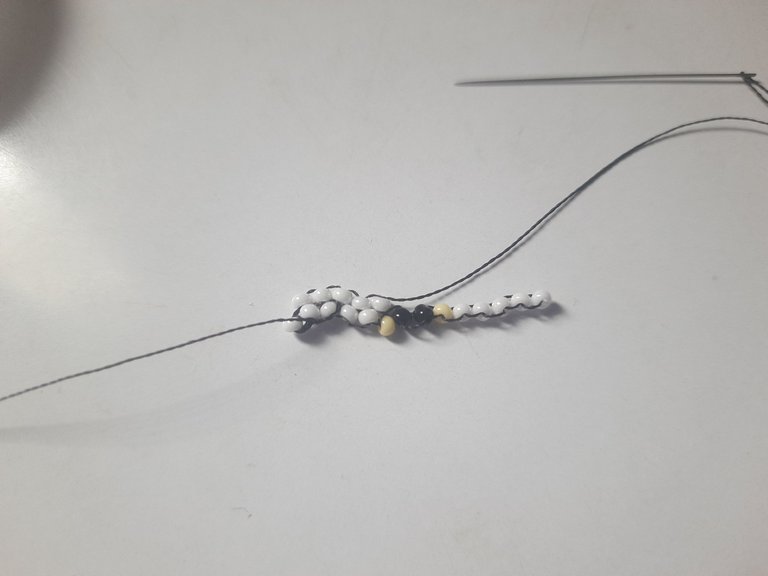
Vamos en decreciente a dos colocaremos dos blancas tres amarillas y dos blancas, iremos en decreciente a tres colocando cuatro negras para comenzar la cabeza de nuestra abeja, luego en creciente cinco negras, en decreciente cuatro negras, luego decreciente 2 negras y en cada una arriba dos mostacillas negras para formar las antenas, al llegar allí, nos devolvemos en zigzag para seguir creando la parte de abajo.
We go in decreasing to two we will place two white three yellow and two white, we will go in decreasing to three placing four black to begin the head of our bee, then in increasing five black, in decreasing four black, then decreasing 2 black and in each one above two black beads to form the antennas, when arriving there, we return in zigzag to continue creating the part of below.
 |  | |  |
|---|
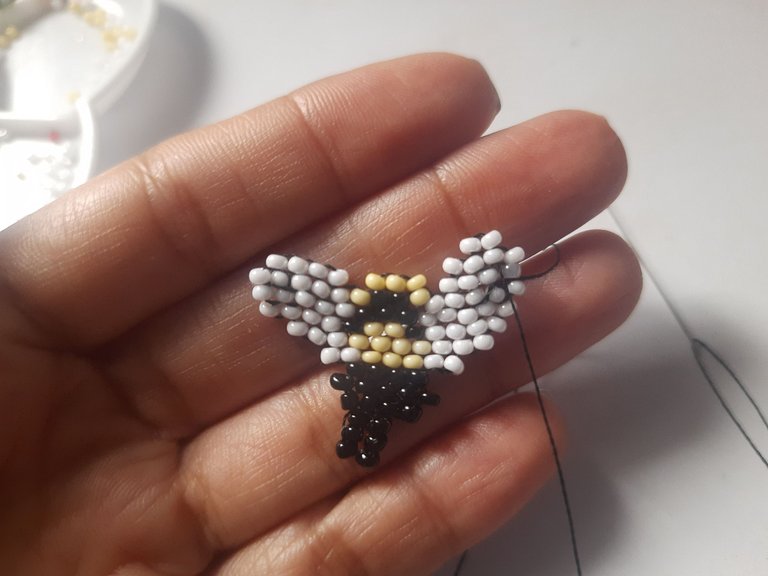
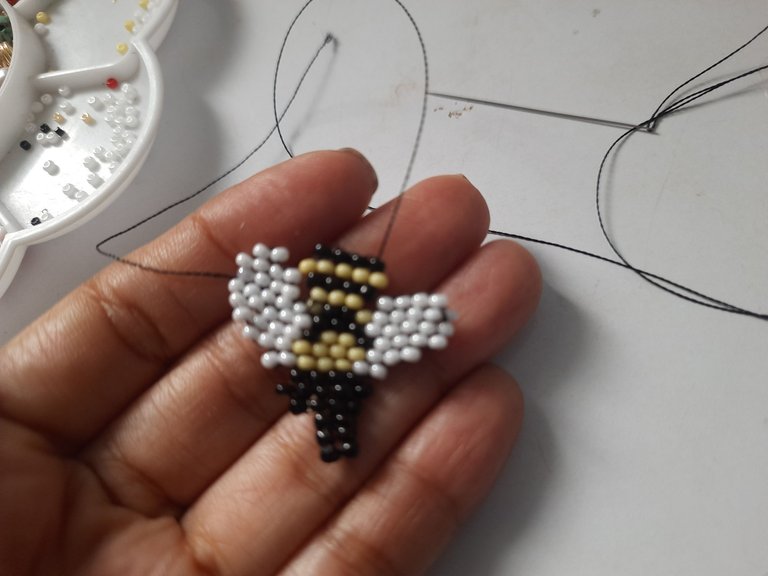
Por último en la parte de abajo vamos en decreciente colocaremos cuatro blancas dejaremos un espacio y vamos a colocar tres amarillas dejamos otro espacio y colocamos otra vez cuatro blancas subimos y colocamos cuatro blancas, y para culminar el ala 2 blancas para hacer la punta
Vamos ahora con la parte del cuerpo y colocaremos encima de las amarilla, en forma creciente cuatro negras volvemos en creciente 5 amarillas y en decreciente 4 negras para culminar la punta con dos negras en el centro Lo cual hace El aguijón de nuestra abeja.
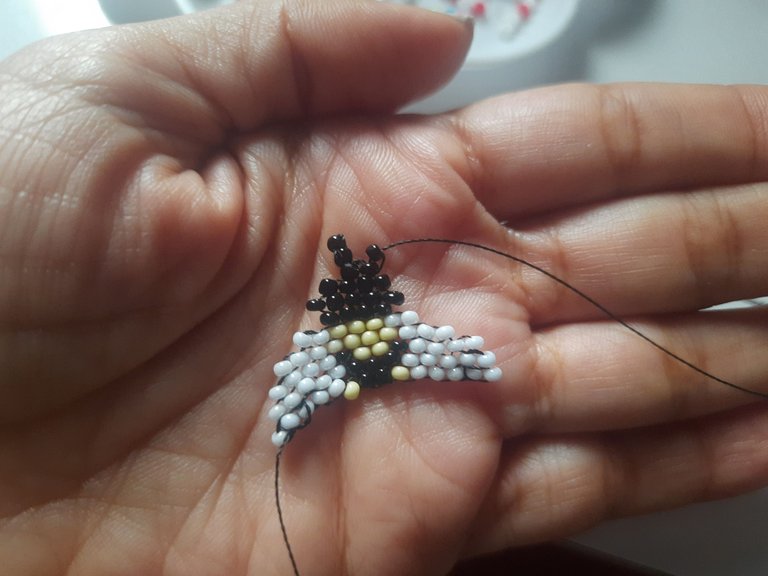
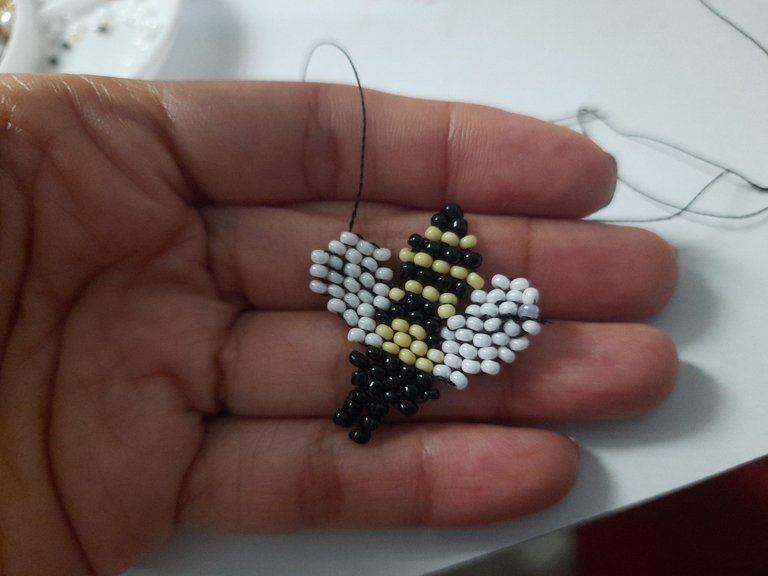
Terminaremos la otra ala tal cual hicimos la primera y luego vamos a colocar una argolla en una de las antenas de nuestra abeja y podemos guindarla en un collar y así hemos terminado nuestro hermoso día de abeja reina.
Finally in the lower part we go in decreasing we will place four white we will leave a space and we will place three yellows we leave another space and place again four white we go up and place four white, and to culminate the wing 2 white to make the tip.
Let's go now with the body part and we will place on top of the yellow ones, in increasing form four black ones we return in increasing form 5 yellow ones and in decreasing form 4 black ones to culminate the tip with two black ones in the center which makes the sting of our bee.
We will finish the other wing as we did the first one and then we will place a ring on one of the antennae of our bee and we can hang it on a necklace and so we have finished our beautiful queen bee day.
Resultado: / Result:
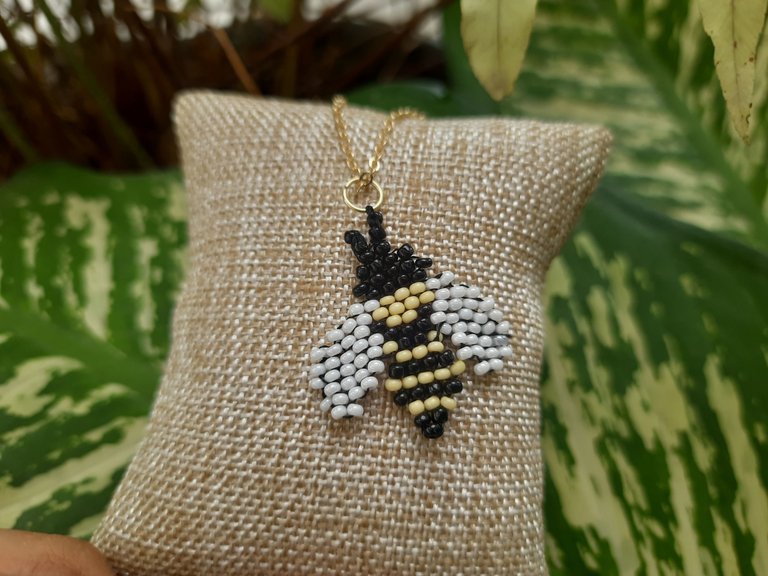
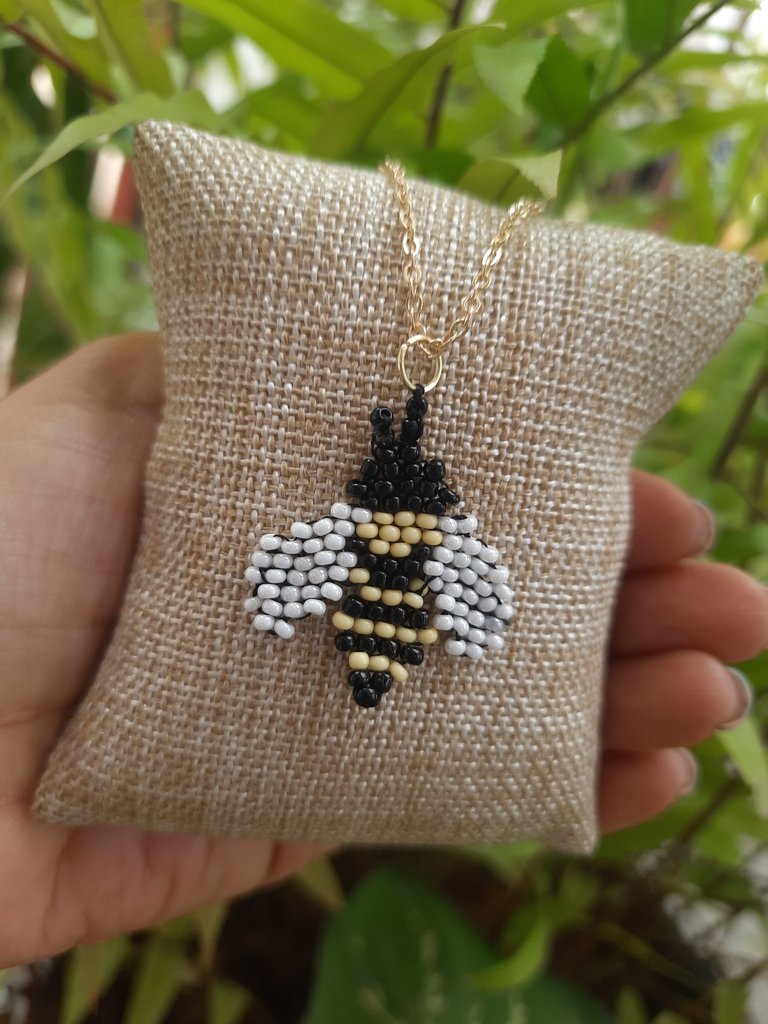
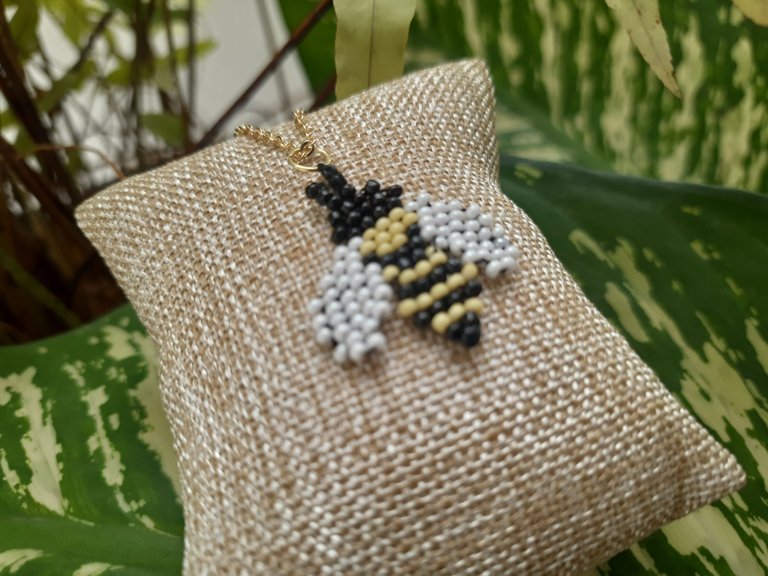
Así ha quedado listo nuestro accesorio dedicado a nuestro fanart y así ha quedado nuestro sencillo tutorial, espero que sea de su agrado, tanto como me ha gustado a mi esta pequeña y hermosa creación y mi participación al concurso de arte de @Splinterlands
Gracias por estar aquí y ser parte de mi blog y de la comunidad @jewelry 😉
This is how our accessory dedicated to our fanart and our simple tutorial is ready, I hope you like it, as much as I liked this beautiful little creation and my participation to the @Splinterlands art contest.
Thank you for being here and being part of my blog and the @jewelry community 😉.
Les invito a suscribirse a la comunidad de @Jewelry y poder así mostrar todas sus creaciones de accesorios, tanto de adultos como de niños; nos encanta ver y apoyar a todos los artesanos, manualistas y orfebres, puedes crear accesorios para damas, caballeros y niños, así que tu creatividad es el límite 😉
I invite you to subscribe to the @Jewelry community to showcase all your accessory creations for both adults and children; we love to see and support all the artisans, crafters and goldsmiths, you can create accessories for ladies, gents and kids, so your creativity is the limit 😉.
"Los accesorios tienen el poder de hacer sentir a la mujer única y especial"
Accessories have the power to make a woman feel unique and special"
Fotos principal editada con Canva.
Separadores de mi Autoría
Fotos de mi Autoría derechos reservados
Cámara: Samsung M31
Traducido con www.DeepL.com/Translator (versión gratuita)
Photos edited with Canva
Separators by me
Photos by me Author's rights reserved
Camera: Samsung M31
Translated with www.DeepL.com/Translator (free version)


Crafting this to perfection must have been a tedious job, we applaud you for finishing the pendant in one piece.
selected by @ibbtammy
Hermosa abejita. Tengo tiempo que no práctico bisutería
Gracias amiga, espero que te animes a hacer bisutería 😉
Quedó lindo el dije, suerte en el concurso 🥹🙏🏽
Gracias amiga 🤗
Delegate Tokens and HP to Fallen Angels to earn weekly rewards!
Delegate | Join to the guild
Thanks ❤️
That's really creative idea for the Fanart of nectar queen. Amazing.
Thanks for sharing! - @isaria
