Concurso: First time making a pencil case // Primera vez haciendo una cartuchera [EN-ES]
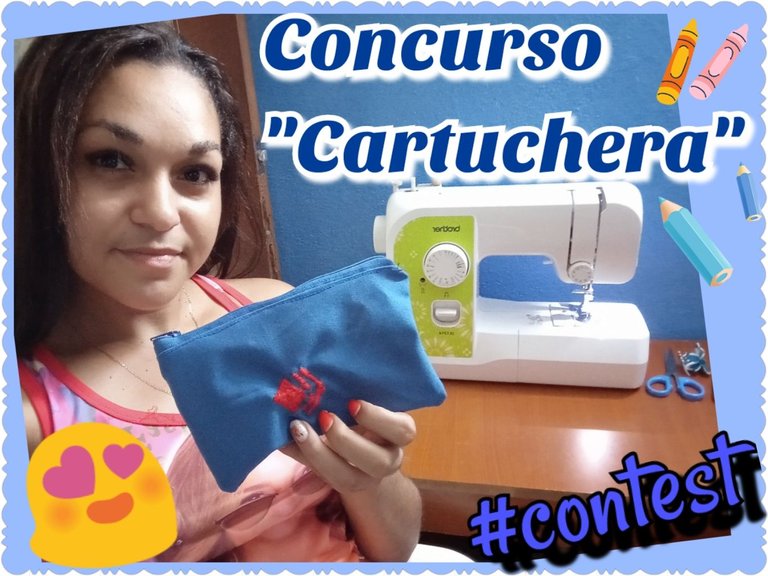
Hello my dear creators, I decided to participate in the Back to School Contest and create a school pencil case. I had never made any, so it was a challenge for me, after all it was not so difficult. My sewing machine was happy because I hadn't used it for a long time, at the beginning of buying it I had that enthusiasm to sew and sew, but little by little the desire to sew went away, but you see, thanks to this contest I became active again.
Hola mis queridos creadores, me animé a participar en el Concurso: regreso a clases y crear una cartuchera escolar. Nunca había hecho ninguna, por lo que fue un reto para mí, después de todo no fue tan difícil. Mi máquina de coser se puso contenta porque llevaba mucho tiempo que no la usaba, al principio de comprármela tenía ese entusiasmo de coser y coser, pero poco a poco se me fueron esfumando las ganas, pero ya ven, gracias a este concurso me activé otra vez.
I remember my time in elementary school, which is where pencil cases are most used because there are many school activities of crafts and paintings, my parents always bought me many colors, crayons, tempera, everything, I was very lucky, I had a beautiful pencil case that had many divisions that I loved. Here in my country when you go to first grade, there is a reading, writing and arithmetic contest and I won first place in my town where 3 schools participated, I still have the award stored in a box of old things.
What I want to get to, when it was time to distribute the prizes, the first three places were given a classroom full of gifts so that they could choose what they liked the most in the order of the winners. There was everything from big dolls, babies, cars to girls' clothes, and I had to go in first, you don't know what I got... boxes of crayons, coloring pens, crayons and those coloring stuff. Ahh and I had to go in alone, when I came out and my mom saw me, she wanted to kill me, with so many beautiful things I came to choose those things I had in the house. But what was I going to do, that's how innocent children are. At that time there was everything, now with the economic situation in Cuba where everything costs an arm and a leg, it wouldn't be bad for some children to have some of these boxes.
Recuerdo mis tiempos de la escuela primaria, que es donde más se usan las cartucheras porque se hacen muchas actividades escolares de manualidades y pinturas, mis padres siempre me compraban muchos colores, crayolas, temperas, de todo, fui muy afortunada, tenía una cartuchera preciosa de las que tenían muchas divisiones que me encantaba. Aquí en mi país cuando cursas primer grado, se realiza un concurso de lectura, escritura y cálculo y yo obtuve el primer lugar de mi localidad donde participaban 3 escuelas, todavía conservo el reconocimiento por ahí guardado en una caja de cosas viejas.
A lo que quiero llegar, a la hora de repartir los premios, a los tres primeros lugares los entraban para un aula repleta de regalos para que escogieran lo que más les gustara por el orden de los ganadores. Había de todo, desde muñecas grandes, bebés, carros hasta ropa de niñas, y yo tenía que entrar primero, a que no saben que fue lo que cogí… cajitas de plumones, colores, crayolas y esas cosas de colorear. Ahh y tenía que entrar sola, cuando salí y mi mamá me vio, me quería matar, con tantas cosas lindas yo venía a escoger esas cosas que tenía en la casa. Pero que iba a hacer, así son los niños de inocentes. En aquella época había de todo, ahora con la situación económica que hay en Cuba que todo cuesta un ojo de la cara, no les vendría mal a unos cuantos niños unas cartucheras de estas.
Well, anyway, I'll tell you how I made my pencil case, or rather, my little cousin's because I gave it to him to keep his markers in.
Bueno, a lo que iba, les cuento como hice mi cartuchera, o, mejor dicho, la de mi primito porque se la regalé para que guardara sus marcadores.
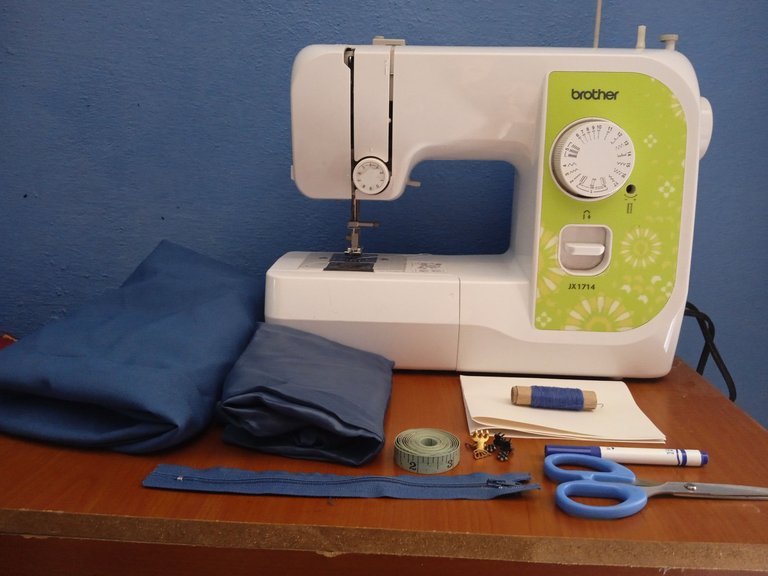
Materials // Materiales
To make the pencil case I used my sewing machine basically, two types of fabric, a thicker one for the outside and a thin satin one for the inside lining, scissors, a marker and a pattern sheet, blue and red thread, measuring tape, pins and a zipper 18 cm long.
Para realizar la cartuchera utilicé mi máquina de coser fundamentalmente, tela de dos tipos, una más gruesa para la parte de afuera y una fina de satín para el forro de adentro, tijeras, un marcador y una hoja para el patrón, hilo azul y rojo, cinta métrica, alfileres y una cremallera de 18 cm de largo.
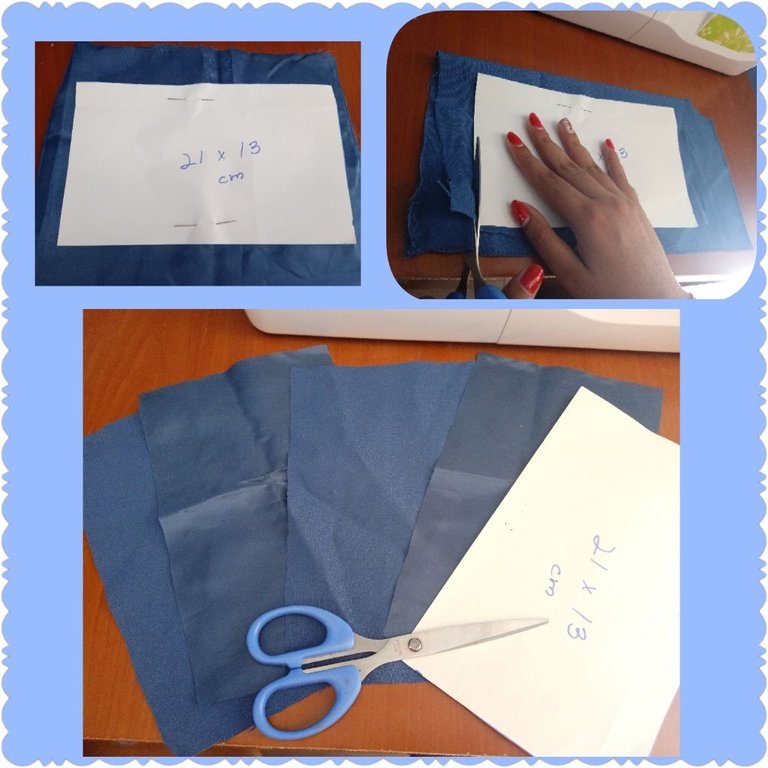
Step by step // Paso a paso
First, we make the pattern, measure 21 cm long x 13 cm wide with the tape measure and cut it out.
Primeramente, realizamos el patrón, medimos 21 cm de largo x 13 cm de ancho con la cinta métrica y recortamos.

With the help of the pins, we adhere the pattern to the fabric, I placed the double fabric to make the work faster and not have to cut each rectangle one by one.
Con ayuda de los alfileres, adherimos el patrón a la tela, coloqué la tela doble para hacer el trabajo más rápido y no tener que picar uno a uno cada rectángulo.
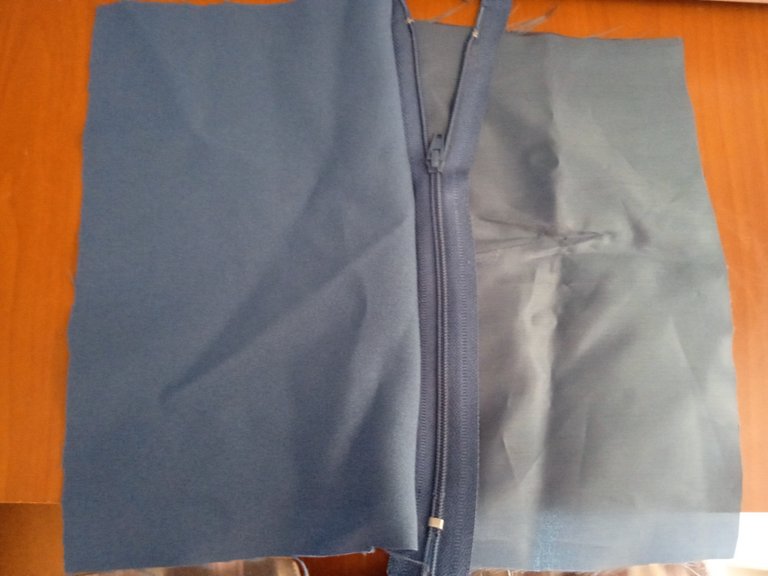
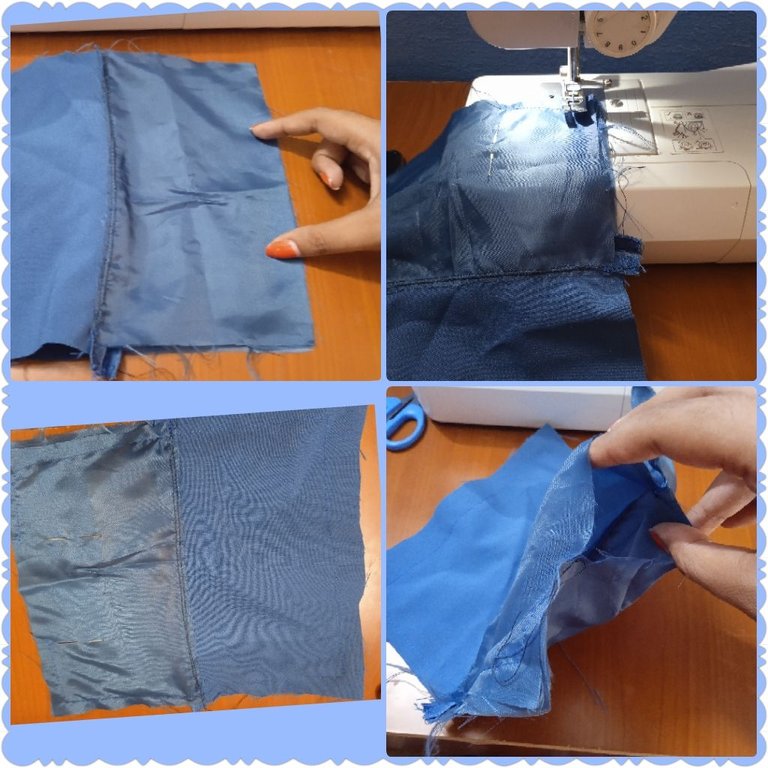
We take the inner lining and place the zipper upwards, on top we place the fabric that we want to be seen outside and we place it upside down, in my case it didn't matter because it is a fabric of a solid color, that is, it will look the same. And we go to sew the edge that I point out in the illustration.
Tomamos el forro interior y colocas la cremallera hacia arriba, encima situamos la tela que queremos que se vea afuera y la colocamos al revés, en mi caso daba igual porque es una tela de un color enterizo, o sea, que se va a ver igual. Y nos dirigimos a coser el borde que señalo en la ilustración.
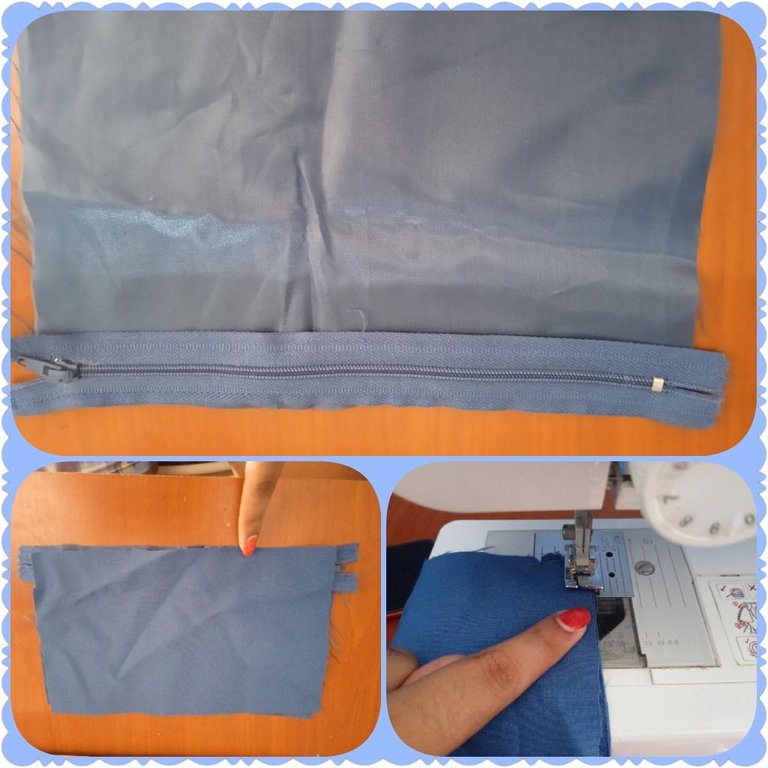
This is how it looks already sewn.
Así es como se ve ya cosido.
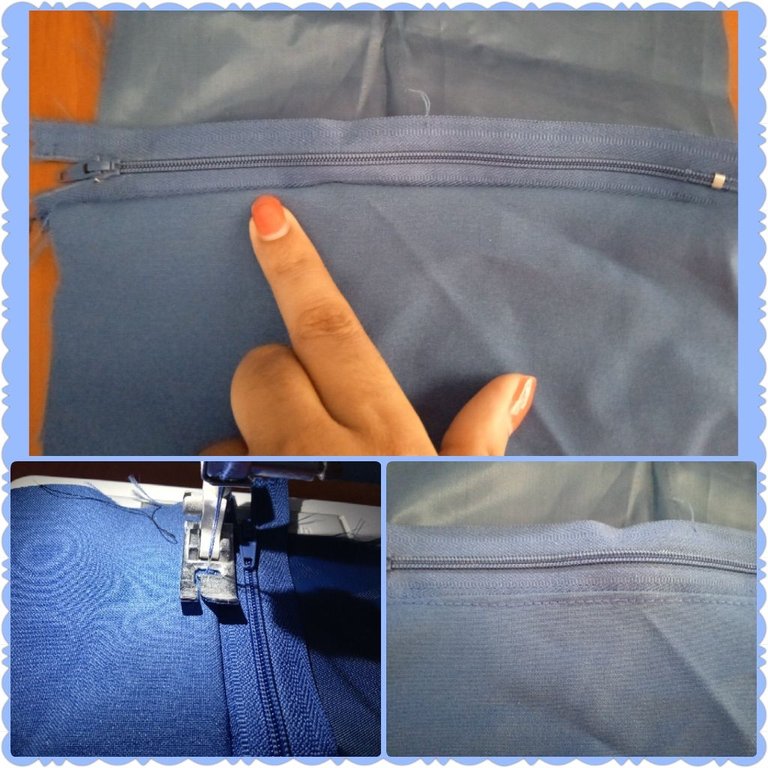
We make a backstitch on the zipper edge, so it looks much better and at the same time reinforces the seam.
Hacemos un pespunte en la orilla de la cremallera, así se ve mucho mejor y a la vez refuerza la costura.
Then we place the other inner lining underneath.
Luego colocamos el otro forro interior por debajo.
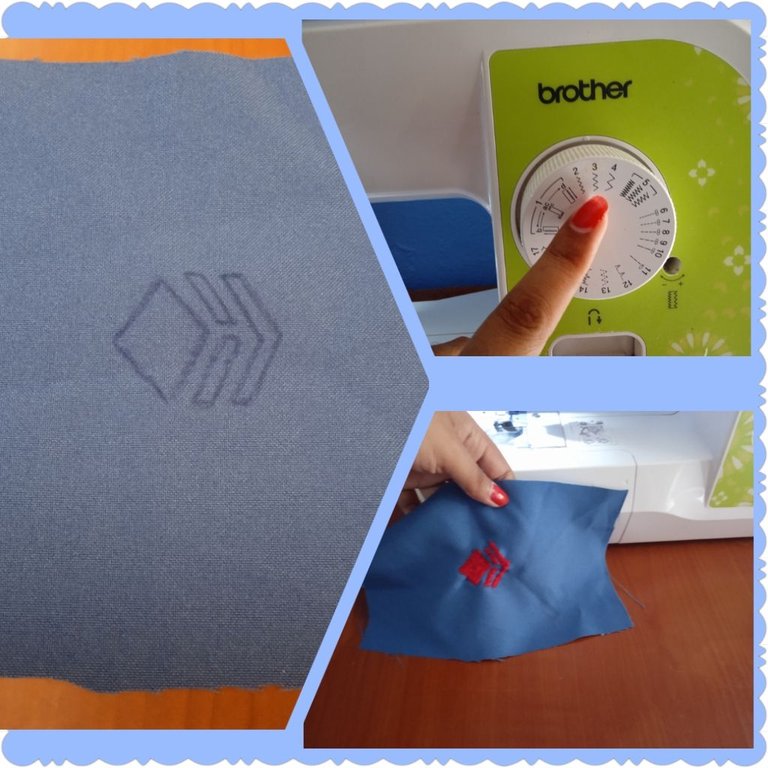
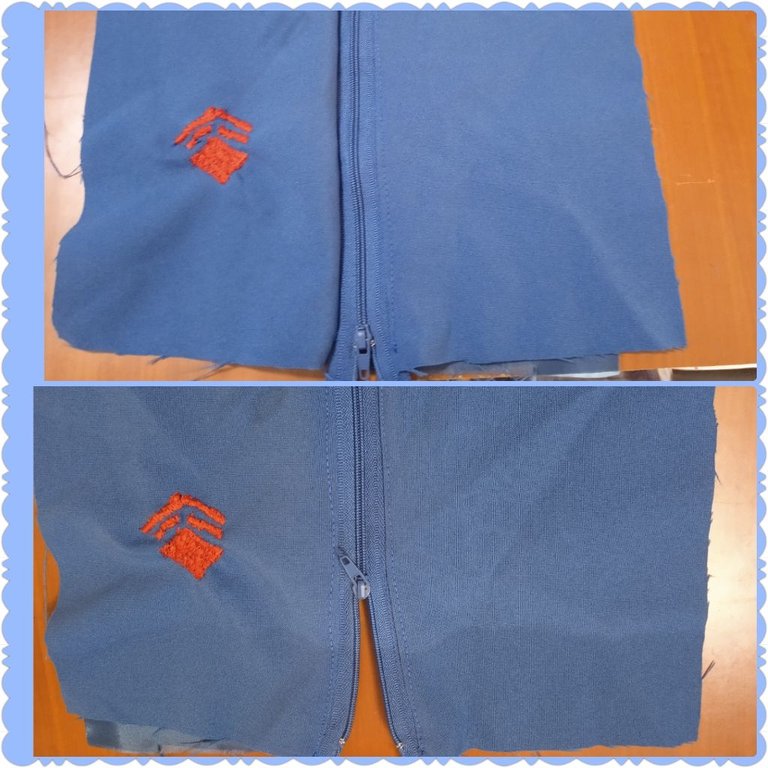
Before placing the other outside part I wanted to decorate it a little and I drew the Hive logo to try to embroider it, I say try because it did not come out very well, it is the third time I try to embroider, it is a little difficult because I do it right here on the sewing machine and I have to stretch the fabric well and move it at the same time.
Antes de ubicar la otra parte exterior quise decorarlo un poco y dibujé el logotipo de Hive para intentar bordarlo, digo intentar porque no me salió muy bien, es la tercera vez que pruebo bordar, es un poco difícil porque lo hago aquí mismo en la máquina de coser y tengo que estirar bien la tela e ir moviéndola al mismo tiempo.
At the end I placed the top part as shown upside down so that the logo can be seen on the outside and we sew the whole edge next to the zipper.
Al terminar coloqué la parte superior como les muestro al revés para que se vea el logo en el exterior y cosemos todo el borde junto a la cremallera.

I show you what it looks like.
Les muestro como se ve.
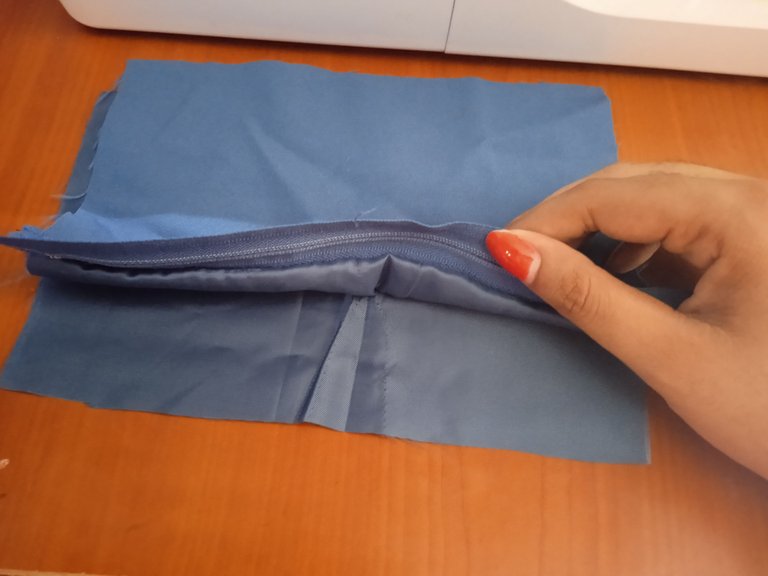
We separate the two parts of the inside for one side and the outside for the other.
Separamos las dos partes del interior para un lado y las del exterior para el otro.
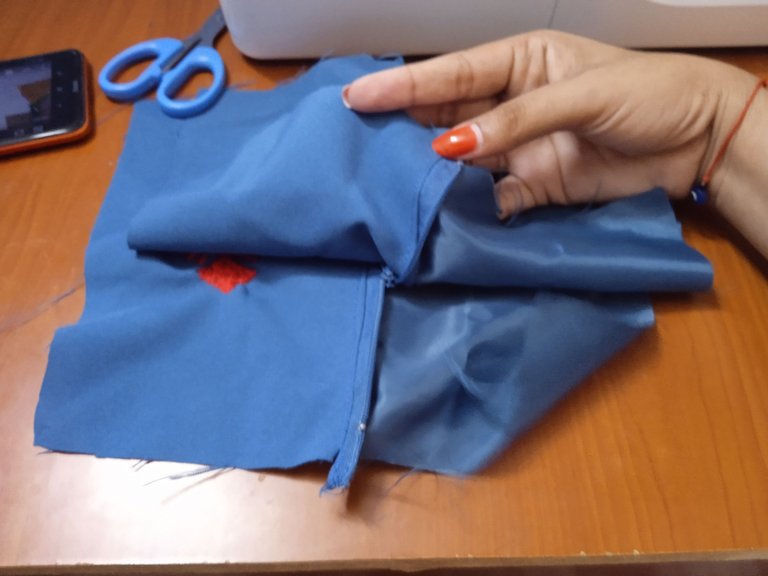
Leave a small space as I show you with my fingers and sew the rest of all the edges, that's where we will flip it over.
Dejamos un pequeño espacio como les muestro con los dedos y cosemos el resto de todos los bordes, por ahí es por donde lo voltearemos.
When we have it right side out, we sew the little piece that was left unsewn and ... we finish the pencil case.
Cuando ya lo tengamos al derecho, cosemos el pedacito que se quedó sin coser y … terminamos la cartuchera.
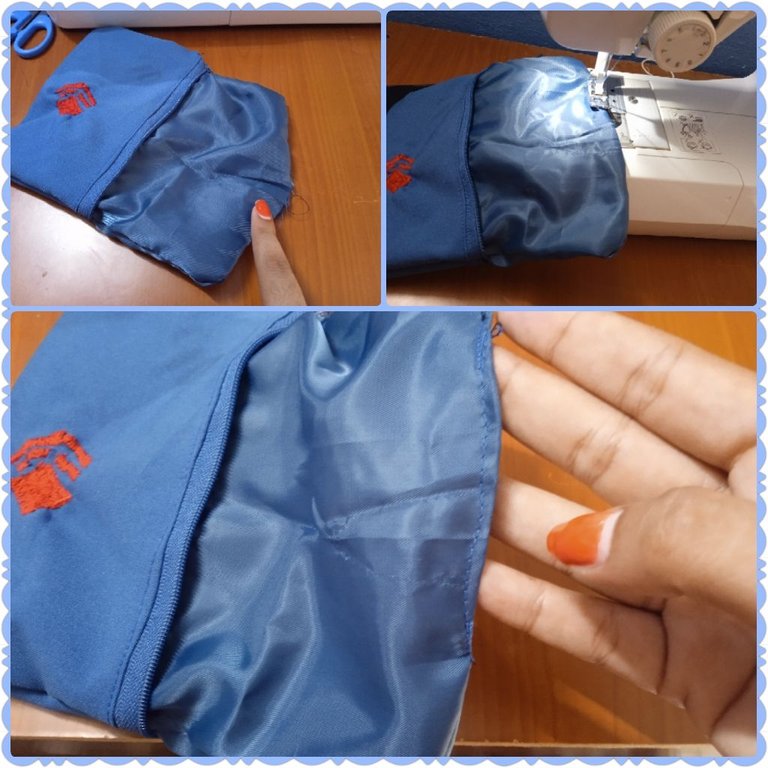
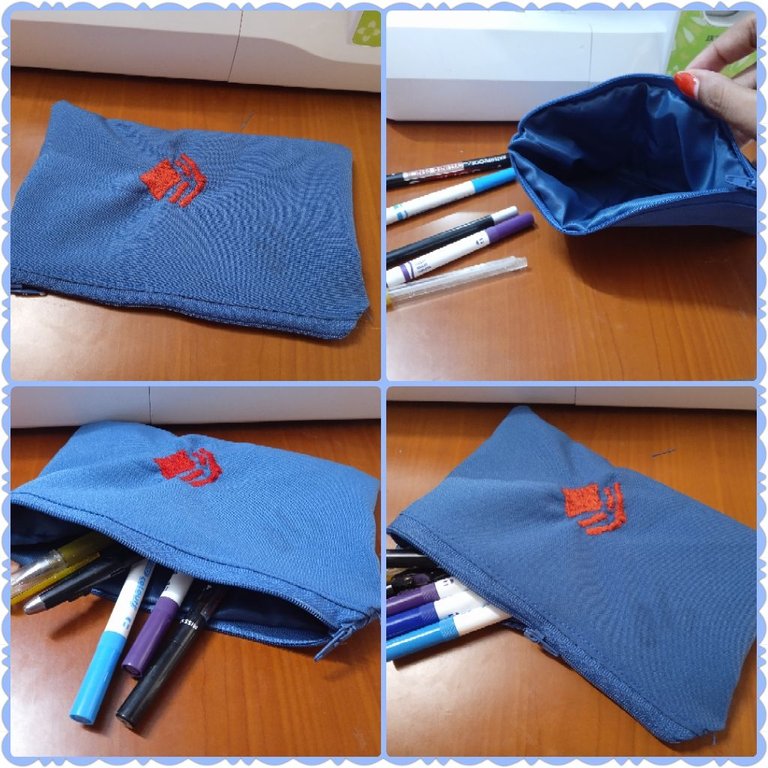
The pencil case is now ready to store the markers and other utensils we want to use
Ya está lista la cartuchera para guardar los marcadores y otros utensilios que deseemos.
What did you think, in the end it was not so difficult my first pencil case, little by little I will get better, especially the embroidery jjj. I hope you find this tutorial useful and can make your own, my little cousin liked it, he was happy, greetings to all, feel free to comment.
Que les pareció, al final no fue tan difícil mi primera cartuchera, poco a poco me va a salir mejor, sobre todo el bordado jjj. Espero les sirva este tutorial y puedan hacer las suyas, a mi primito le gustó, se puso feliz, un saludo a todos, siéntanse libres de comentar.
English is not my native language, translated by DeepL
Congratulations @yale95reyra! You have completed the following achievement on the Hive blockchain And have been rewarded with New badge(s)
Your next target is to reach 2750 upvotes.
You can view your badges on your board and compare yourself to others in the Ranking
If you no longer want to receive notifications, reply to this comment with the word
STOPCheck out our last posts:
@yale95reyra
https://leofinance.io/threads/view/hive-130560/re-leothreads-2scuu9qx1
https://twitter.com/hivediy47901/status/1710874232781971580
Hola Yale, qué ingenioso te ha quedado el bordado del logo de Hive me ha encantado, te dejé un mensaje en el post del concurso que dejaste por alla tu enlace
Gracias que bueno que te gustó el logo, quedó más o menos jjj pudo haber quedado mejor