RECETARIO DE GATITOS CONCURSO PURR-FECT DIYHUB KITTEN RECIPES PURR-FECT DIYHUB CONTEST
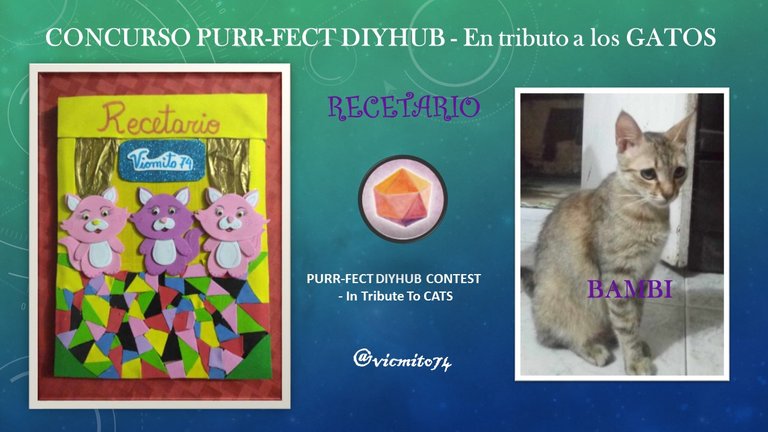
Nuevamente la comunidad @Diyhub nos invita a los amantes del bricolaje a un nuevo concurso para homenajear a los gatitos en la celebración de su mes, en esta oportunidad yo me sumo con un recetario de gatitos con el fin de también homenajear a mi hermosa Bambi. Les cuento el por que un recetario, resulta que hace poco inicie un curso comunitario de pastelería, y una de la partes a evaluar, es de que manera guardo o archivo las recetas que estamos elaborando en la formación como pasteleros, la instructora nos pidió hacer un recetario, y yo aproveché la oportunidad para hacerlo de este hermoso motivo "GATOS", como siempre aproveché la ocasión de reciclar, cartón y retazos de foami que tengo en casa, la idea del collage era la ideal para hacer uso del material, espero sea del agrado de todos mi proyecto, a continuación les muestro el paso a paso.
Once again the @Diyhub community invites DIY lovers to a new contest to honor the kittens in the celebration of their month, this time I join with a kitten recipe book in order to also honor my beautiful Bambi. I tell you why a recipe book, it turns out that I recently started a community pastry course, and one of the parts to evaluate is how I store or file the recipes that we are preparing in training as pastry chefs, the instructor asked us to do a recipe book, and I took the opportunity to do it with this beautiful motif "CATS", as I always took the opportunity to recycle, cardboard and pieces of foami that I have at home, the idea of the collage was the ideal one to make use of the material, I hope everyone likes my project, then I show you the step by step.
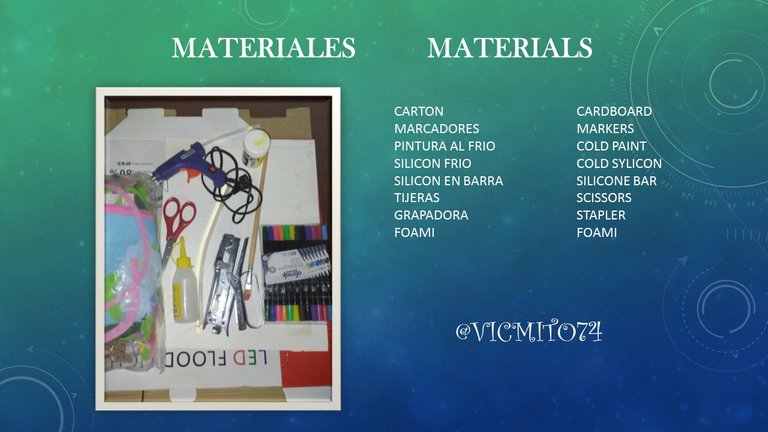
Los materiales son los protagonistas para la elaboración de cualquier bricolaje que se quiera realizar, desde el mas sencillo, hasta el mas difícil de conseguir, sin dejar de tomar en cuenta a aquellos que han cumplido alguna función y se les pueda dar una nueva vida a través del reciclaje. Los utilizados para este proyecto, son: Cartón, marcadores. silicón frio y en barra, tijeras grapadora, foami, papel de seda, pintura al frio pincel.
The materials are the protagonists for the elaboration of any DIY that you want to do, from the simplest to the most difficult to achieve, without failing to take into account those that have fulfilled some function and can be given a new life to a through recycling. Those used for this project are: Cardboard, markers. cold and bar silicone, scissors, stapler, foami, tissue paper, cold paint brush.

PASO A PASO / STEP BY STEP
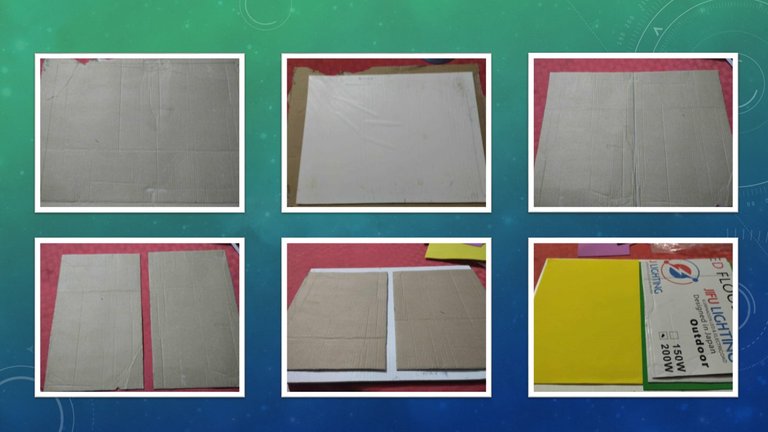
Paso 1: Te trazan en el cartón, dos rectángulos de 28 cm de alto por 21 cm de ancho, se cortan para luego ser forrados con el foami.
Step 1: Two rectangles 28 cm high by 21 cm wide are drawn on the cardboard, cut and then lined with foam.
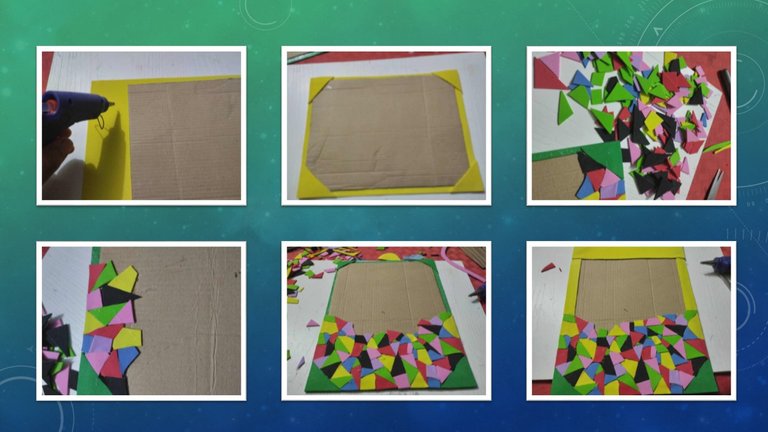
Paso 2: Una vez forrados los rectángulos con el silicón, se toman los recortes de foami de varios colores, se cortan en trocitos y con la pistola de silicón de barra, se proceden a pegar en el cartón ya forrado hasta casi la mitad del rectángulo como se muestra en las imágenes, se cortaron tiras de foami amarillo, las mismas se pegaron en el borde del rectángulo.
Step 2: Once the rectangles have been lined with silicone, the various colored foam cutouts are taken, cut into small pieces and with a silicone gun, they are glued onto the already lined cardboard up to almost half of the rectangle. As shown in the images, strips of yellow foam were cut and glued to the edge of the rectangle.
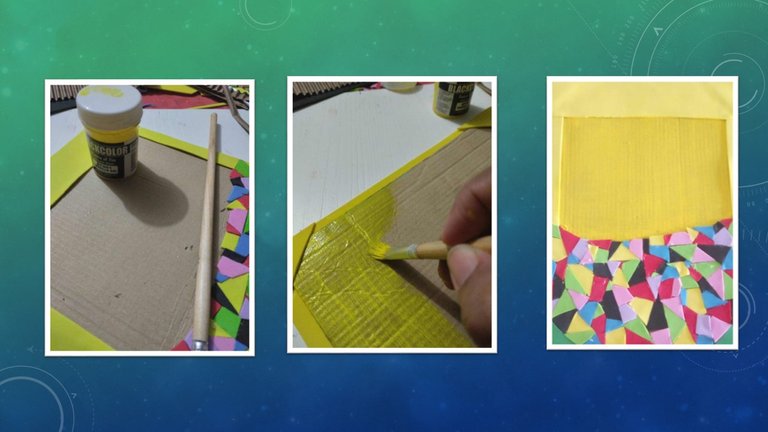
Paso 3: Con la pintura al frio de color amarillo, con un pincel se pintó la parte del cartón, con la finalidad de dar un mejor acabado a la parte frontal del recetario. Se le echaron tres capas de pintura para poder cubrir bien el cartón.
Step 3: With yellow cold paint, the cardboard part was painted with a brush, in order to give a better finish to the front of the recipe book. Three layers of paint were added to cover the cardboard well.
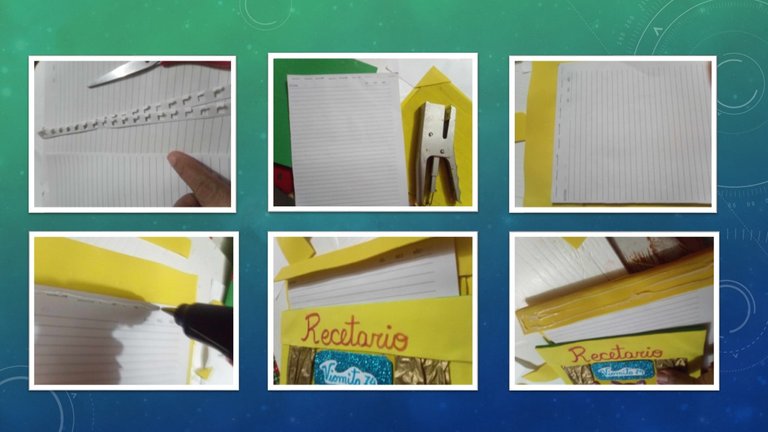
Paso 4: Ya listas, pintadas y forradas las dos tapas del recetario. se procedio a colocarle las hojas recicladas de cuadernos viejos, es este caso se usaron de una libreta de espiral. Se cortaron los bordes de las hojas para quitar los excedentes, luego con una grapadora se unieron las hojas con la caratula trasera, luego con un poco de silicón caliente se pego una tira de foami para lograr mas estabilidad de las hojas al momento de ser pegadas a la caratula. La tira de 12 cm de ancho, sirvió para cubrir las grapas y poder pegar las dos caratulas del recetario, tal y como se muestra en las imágenes.
Step 4: The two covers of the recipe book are ready, painted and lined. We proceeded to place the recycled sheets of old notebooks, in this case a spiral notebook was used. The edges of the sheets were cut to remove the excess, then with a stapler the sheets were joined with the back cover, then with a little hot silicone a strip of foam was glued to achieve more stability of the sheets at the time of being glued to the cover The 12 cm wide strip served to cover the staples and to be able to glue the two covers of the recipe book, as shown in the images.
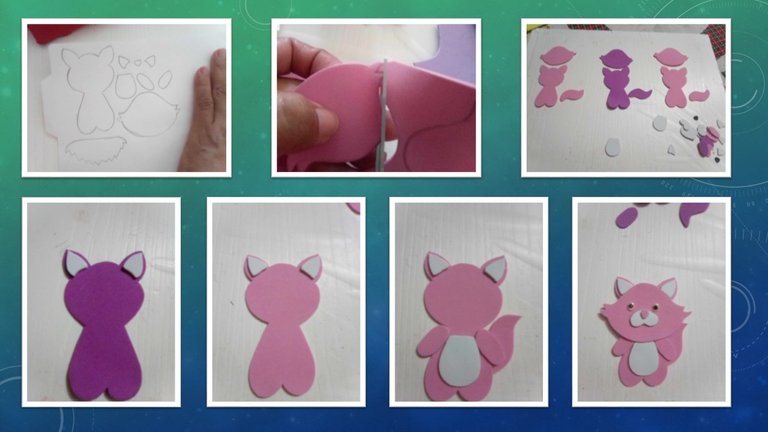
Paso 5: Para la elaboración de los gatitos en foami, se tizo un molde, el cual se corto y trazo en el foami, pieza por pieza, una vez cortadas todas las piezas, se procedió al ensamblaje de las mismas, una vez terminadas, se le colocaron sus ojitos y con los marcadores, se les dibujaron las, cejas, pestañas, pecas y líneas en sus orejas, patas, colas y barriga.
Step 5: For the elaboration of the kittens in foami, a mold was drawn, which was cut and traced in the foami, piece by piece, once all the pieces were cut, they were assembled, once finished, they were placed their eyes and with the markers, they drew their eyebrows, eyelashes, freckles and lines on their ears, legs, tails and belly.
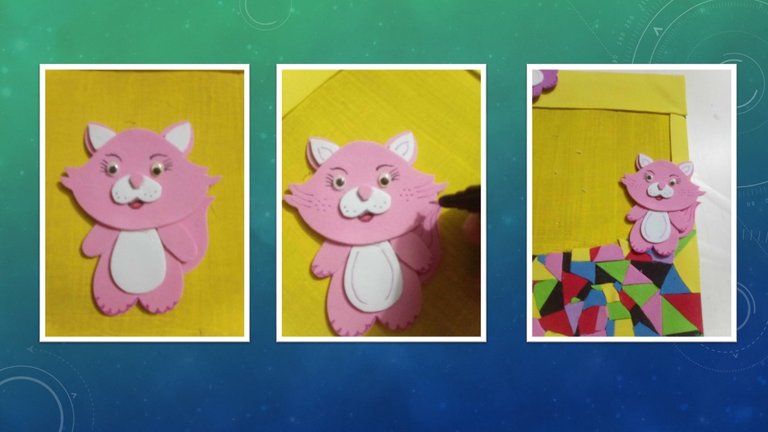
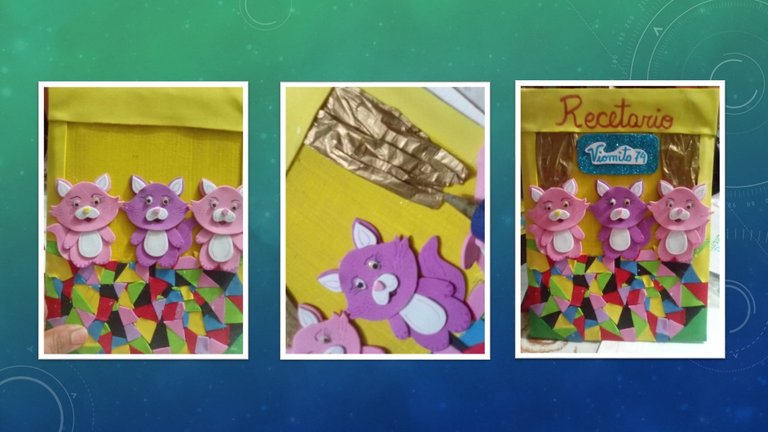
Paso 6: Una vez terminados mis gatitas, se pegaron en la parte frontal, sobre el collage, para adornar se le colocaron dos pedazos de papel seda dorados, con el fin de hacerle unas cortinas, se agrego el nombre del proyecto y el mío de usuario.
Step 6: Once my kittens were finished, they were glued to the front, on the collage, to decorate, two pieces of golden tissue paper were placed, in order to make curtains, the name of the project and mine as a user were added.
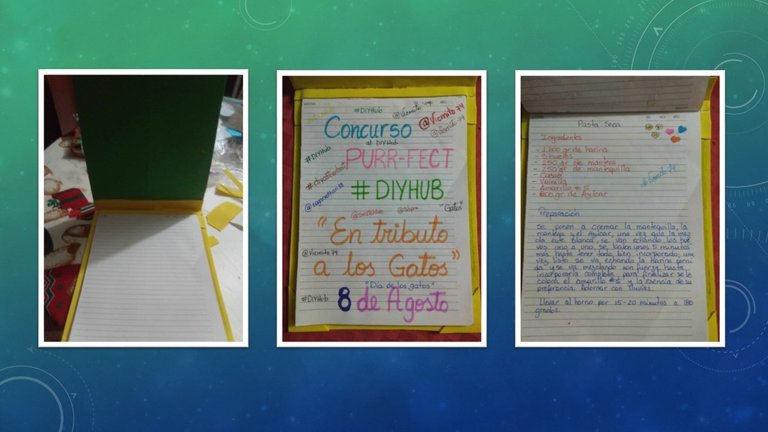
Acá, pueden ver como quedo por dentro mi recetario, espero haya sido de su completo agrado, ya que fue elaborado con mucho entusiasmo y amor, para ser usado durante el curso de pastelería, del cual les iré contando mis vivencias a través de #HIVEBLOG
Here, you can see how my recipe book was inside, I hope it was to your liking, since it was prepared with a lot of enthusiasm and love, to be used during the pastry course, of which I will tell you about my experiences through #HIVEBLOG
@tipu curate
Upvoted 👌 (Mana: 0/63) Liquid rewards.
Thank you.
They look great but not as great as Bambi. Good luck with the contest.
Yes, my Bambi is beautiful and very elegant, thank you for your appreciation. Blessings!
Hola @vicmito74 👋 saludos.
Te quedó muy lindo tu cuaderno recetario. Me encanta el detalle de la cortina en seda dorado y esas gatitas tan coquetas. Te deseo mucha suerte en el concurso.
Hola @creacioneslelys gracias, aprecio mucho tu comentario, gracias por pasar por aquí, espero ver tu participación pronto,
Si Dios quiere 👥
Que cosa más linda quedé enamorada este recetario te felicito.
Bambi está muy hermosa con esa súper pose😽😽😽😽
Gracias amiga, que bueno te gusto, si ella es muy elegante, gracias por pasar.
Me encanta cuando veo proyectos que fomentan el reciclaje. Una forma muy original de elaborar un recetario. Suerte!
Gracias linda, si es algo que encanta hacer, reciclar es un acto de amor.