(ENG/ESP) My participation in the contest: Nice avocado-shaped pencil case / Mi participación en el concurso: Simpática cartuchera con forma de aguacate 🥑
ENGLISH CONTENT
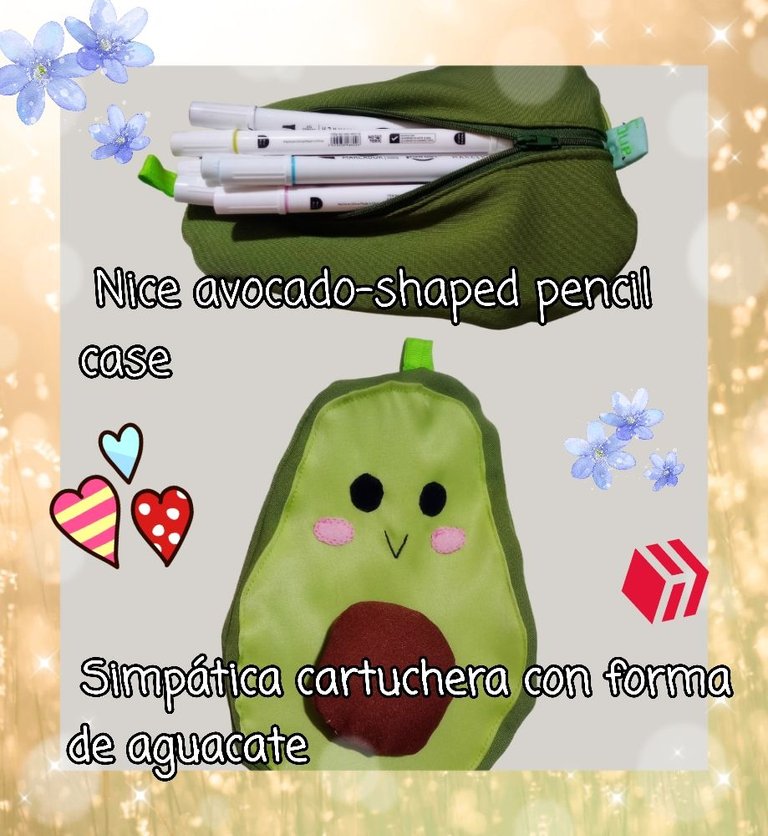
Hello to all crafts and sewing lovers! With great joy I join the fascinating pencilcases from the Hive Diy community, after being away from sewing for a long time. For my participation I made an avocado-shaped pencil case.
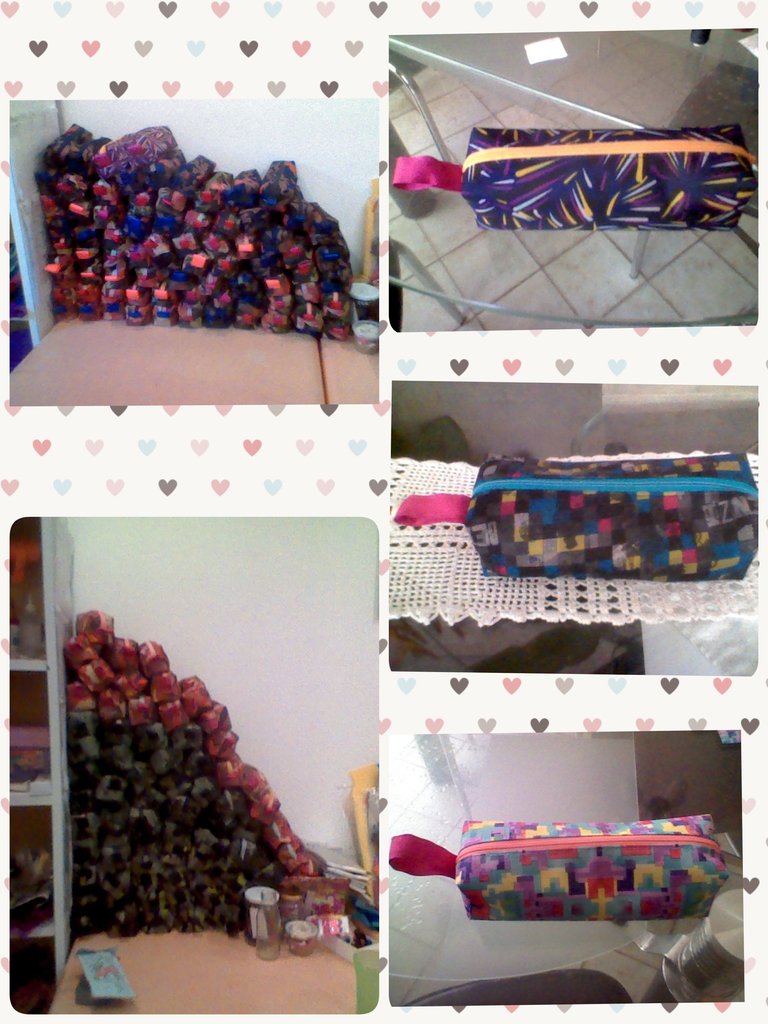
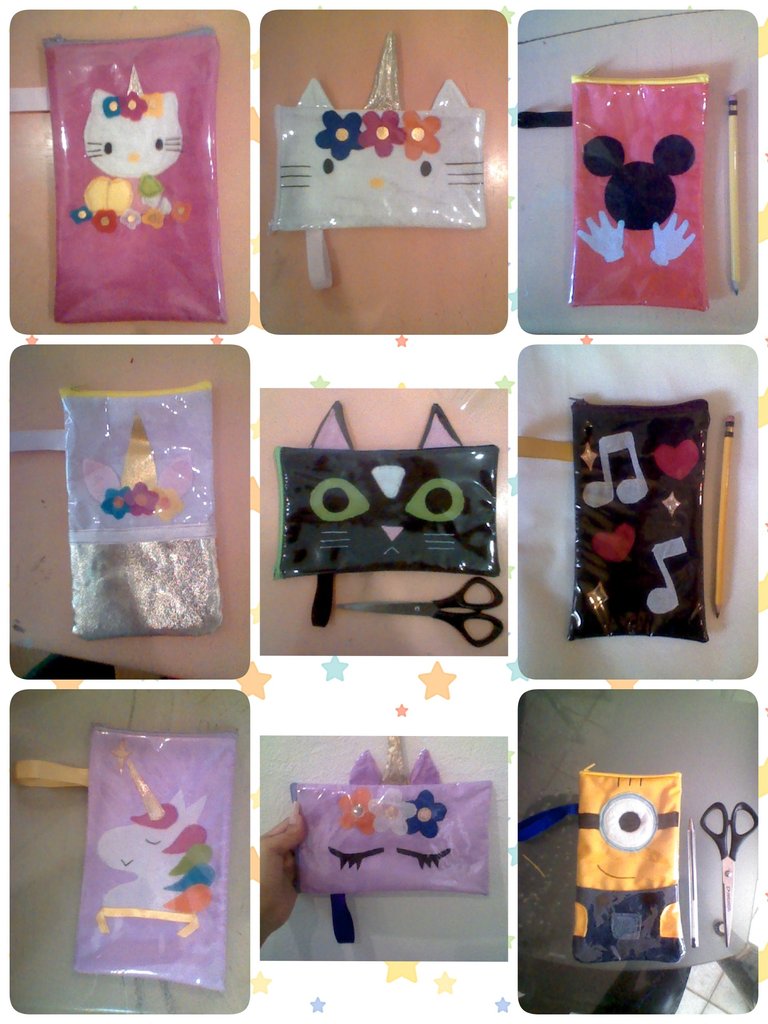
But before I tell you about the procedure, let me tell you a little about myself. When I was little, like many children, I was lucky to have nice school supplies and among them were pencil cases. As an adult, due to my abilities, I would end up working for a bookstore with the position of designer and seamstress and for more than a year, I was in charge of making multiple pencil cases that were subsequently sold in the bookstore and in some of its branches. For me, that job was quite fun, since as I was the only seamstress, they gave me complete freedom when it came to sewing and creating designs, so I sat for long hours drawing, cutting and sewing creative and eye-catching pencil cases. In general, I used to make two types of holsters: rectangular and "bombone" type. The first ones were my favorites since it was where I dedicated myself to putting together the figures of the characters that were in fashion, mostly unicorns; but depending on the design, the completion time could be longer. On the other hand, the "bombone" type were easier to make, so in one week I was able to make a small "mountain" of stacked holsters that my employers liked to see at the end of the week. I remember that stage of my life fondly because my job, as I mentioned, was great. That's why, when I found out about this contest I knew I had to participate, the "pencil case maker" part of me was crying out for it ha ha.
 |  |
|---|
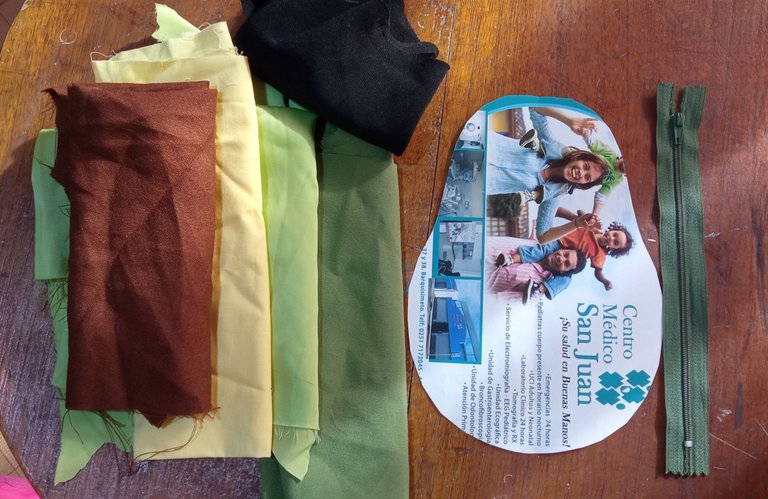
The good thing about the workshop was that the necessary material to make the cartridge cases was available. More for the contest, I thought about making what I could from the materials I had at home, since since I had time without dedicating myself fully to sewing, I eventually stopped buying materials. Since I did not have plastic material (which was what I usually used for rectangular pencil cases), nor rigid fabric to make a candy pencil case, I thought about making a pencil case that combined aspects of both types of pencil cases: Similar to the candy pencil case in terms of its shape, but with a more elaborate design, as he used to do with the rectangular ones. The only closure I managed to find was a green one and looking through my fabrics, I found some pieces that could be used to make an avocado-shaped pencil case, ideal for the closure I had at my disposal.
🥑 Materials: 🥑
- Yellow, black, brown, light and dark green fabric.
- 20cm closure.
- Magic closure (velcro).
- Wadding or filling.
- Pattern.
🥑 Procedure: 🥑
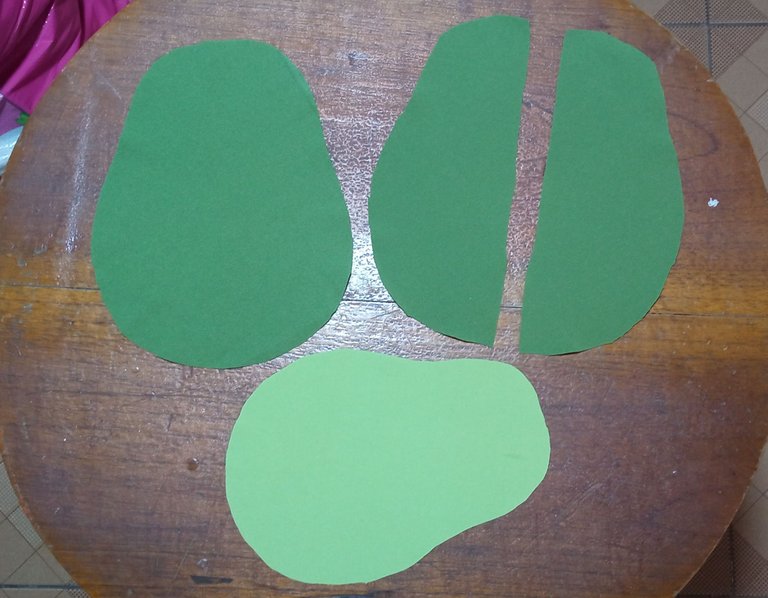
The first thing I did was draw the shape of the avocado on a piece of magazine, to be my pattern (If you are not very skilled at drawing, you can search online). Then, I cut the corresponding pieces: Two dark green pieces (front and back of the holster), a smaller light green part (the "flesh" of the avocado), two yellow pieces (front and back of the lining), two brown circular pieces (the avocado seed) and two small black circles (the eyes).
 |  |
|---|
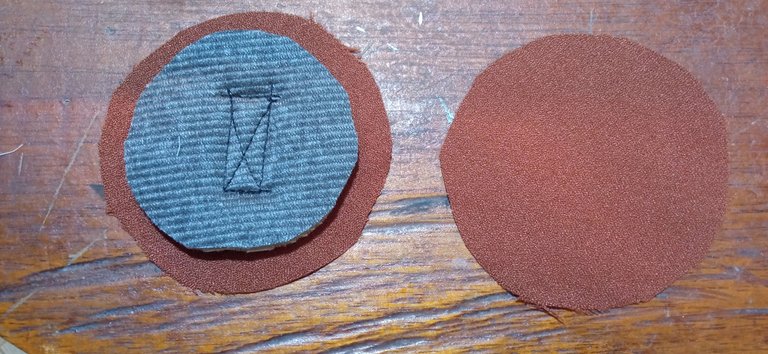
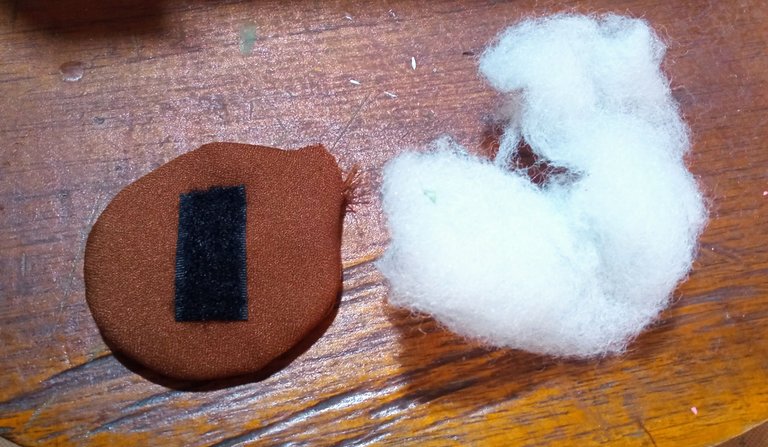
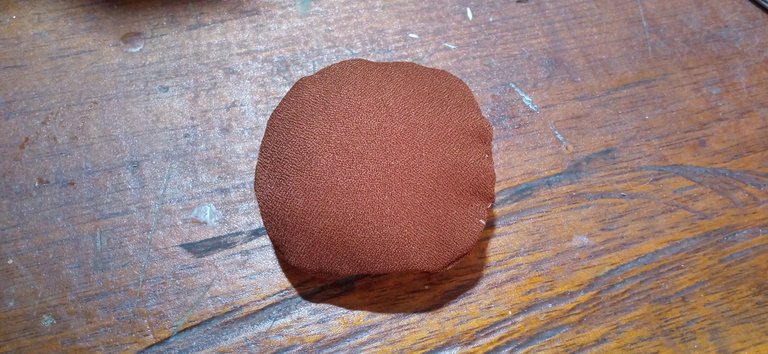
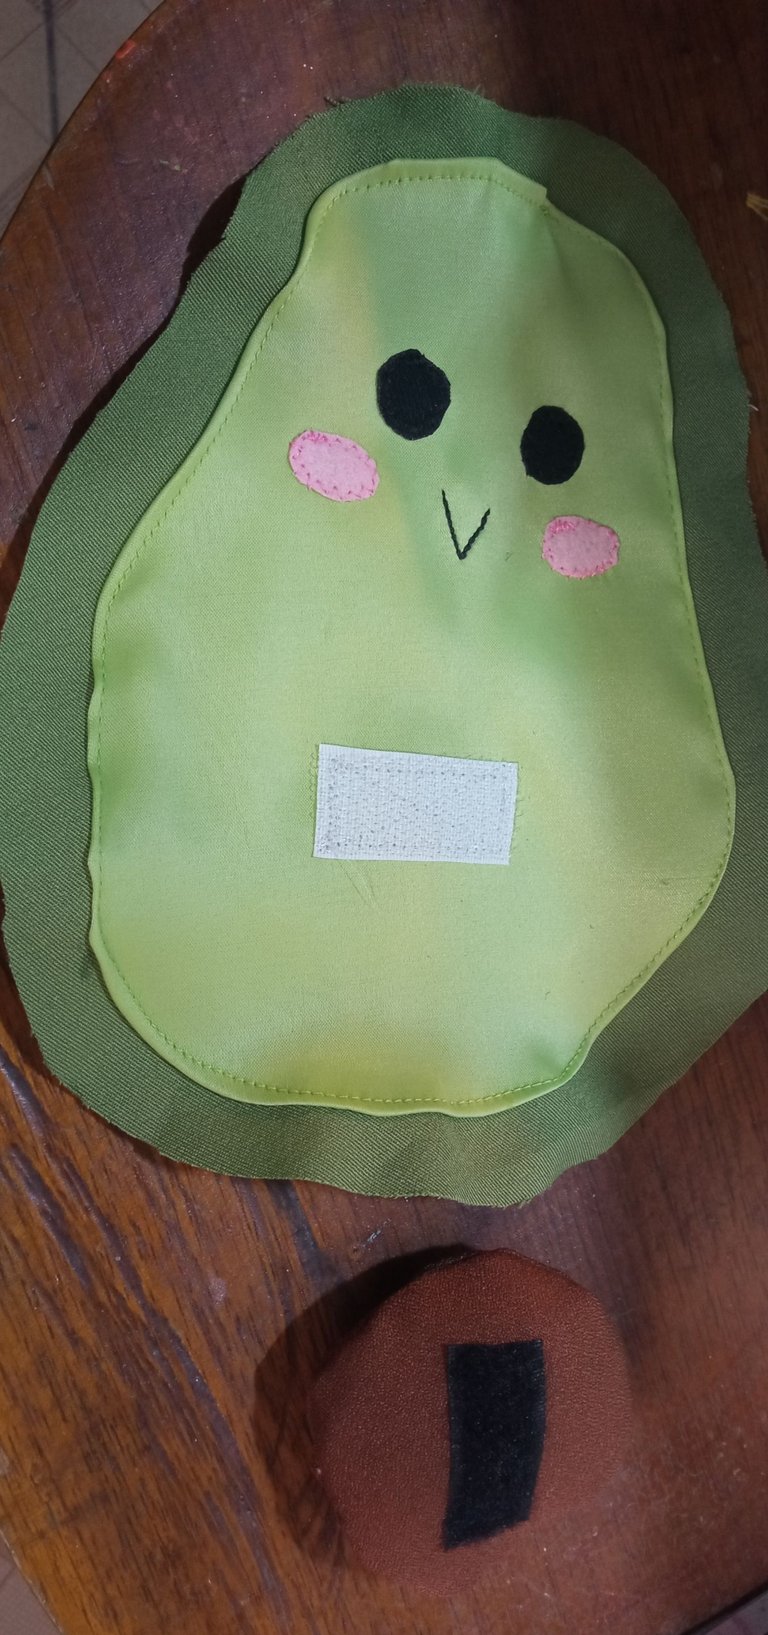
The first piece I sewed was the avocado seed. To do this, I sewed a piece of foam rubber that I had left over (to maintain the spherical shape) and a piece of the magic closure or Velcro, on one of the pieces of brown fabric, leaving a small opening. When I turned the piece over, I proceeded to insert a little filling to give volume to the seed and closed the opening with a hand seam (I'm not good with that ha ha). Having the seed ready. A quite interesting idea that you can apply is that instead of filling the seed, you can put a smaller closure on it, to serve as a pocket and thus be able to put some small school supplies, such as an eraser or a pencil sharpener.
 |  |  |
|---|
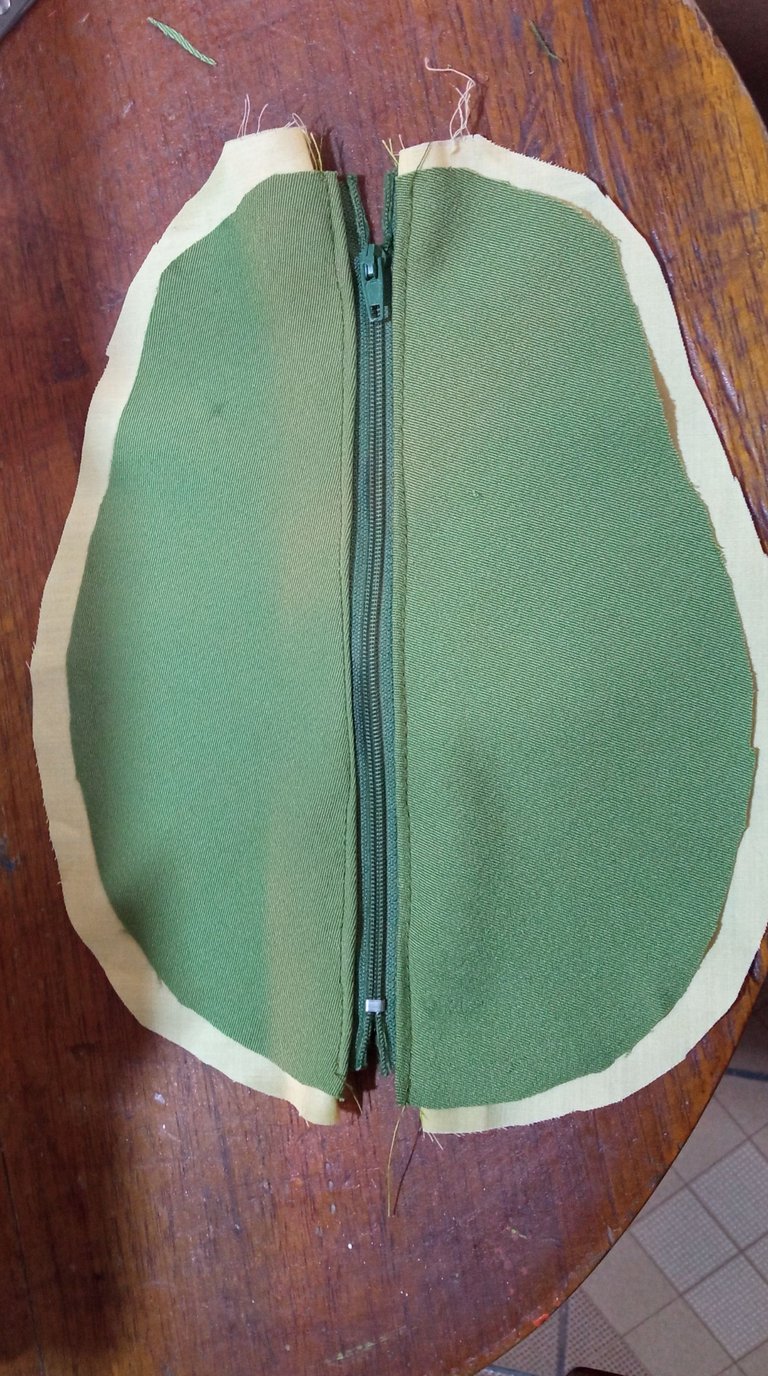
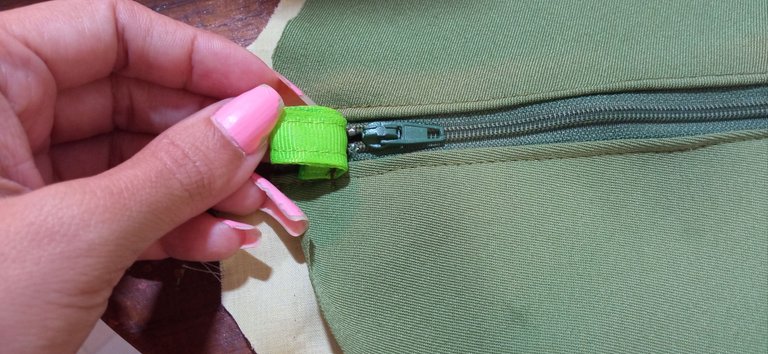
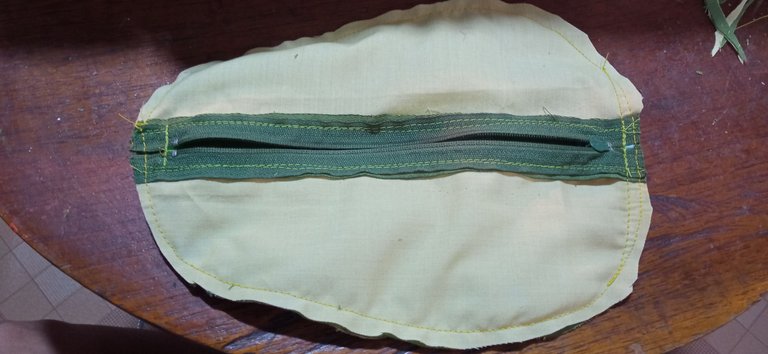
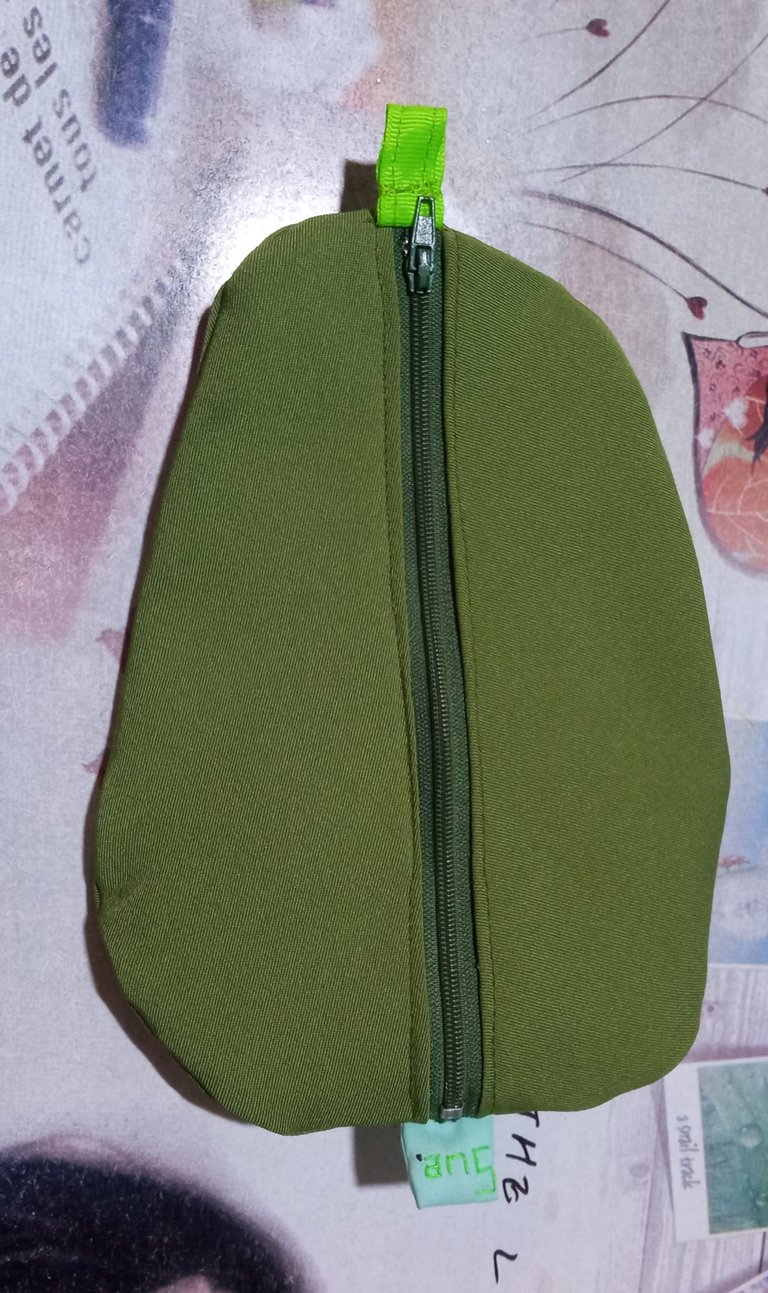
I then went on to sew the closure on the piece corresponding to the back of the holster (which is divided into two), trying to sew the pieces corresponding to the lining to it. I don't know how to explain in detail how to sew a zipper, but I try to sew the edges of the fabric to the edge of the zipper and after turning it over, make a seam like a tread. With this I had the back of the holster ready.
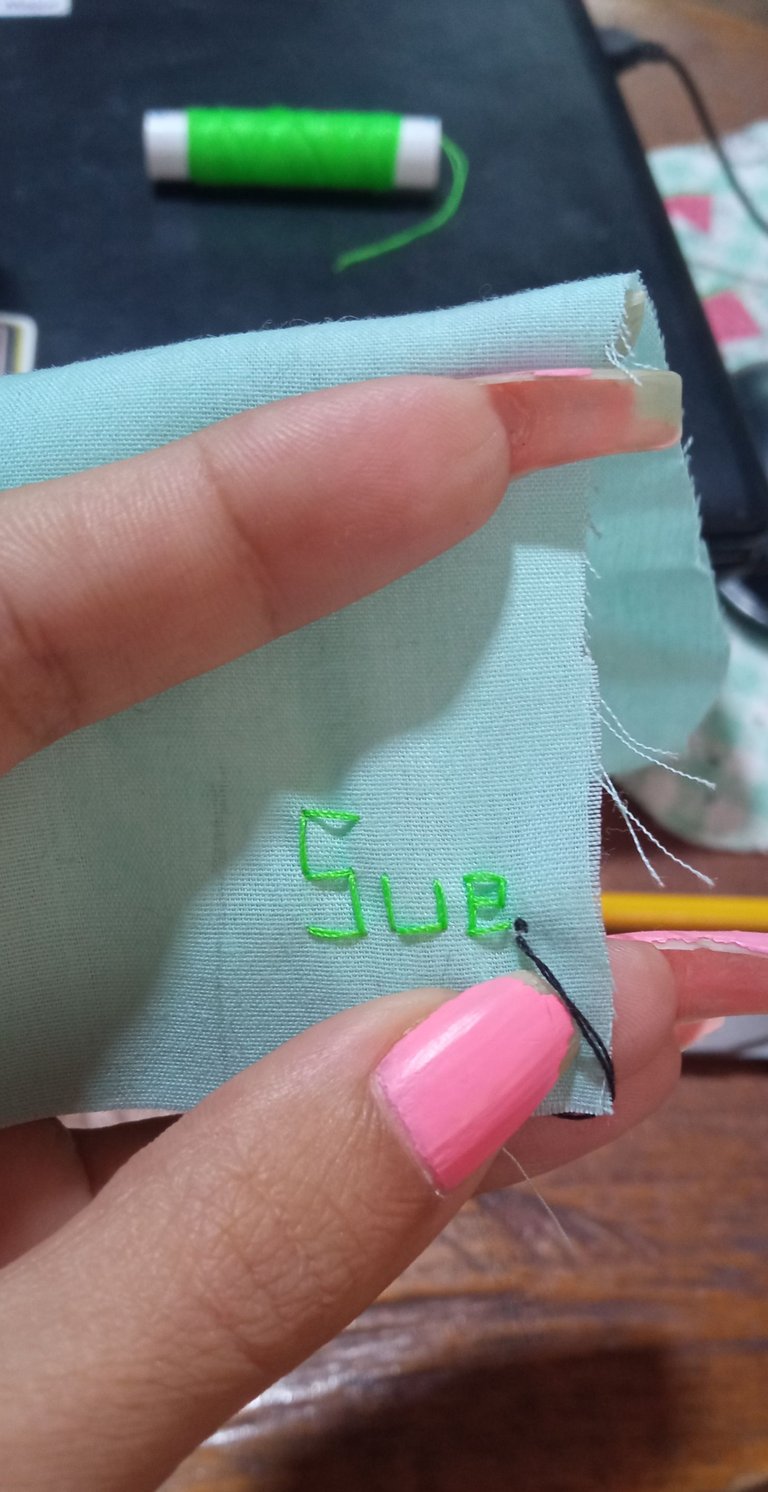
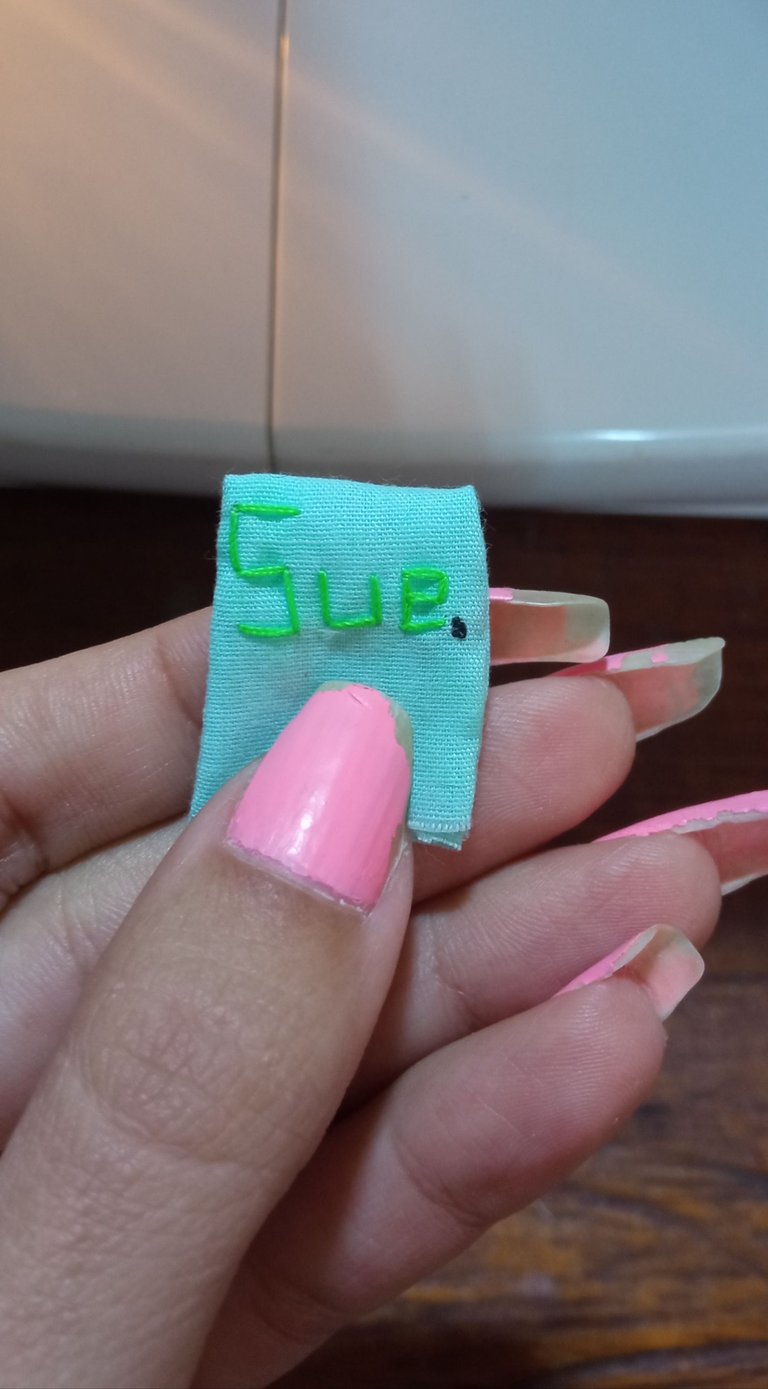
Additionally, I usually attach a label to my creations with my brand Suecitos. (Sue. for short), which I usually embroider on a piece of fabric. This time was no exception. Since I didn't get my embroidery drum (many of my things are still packed after a move), I had to improvise, but luckily, I was able to make my label without any problem.
 |  |
|---|
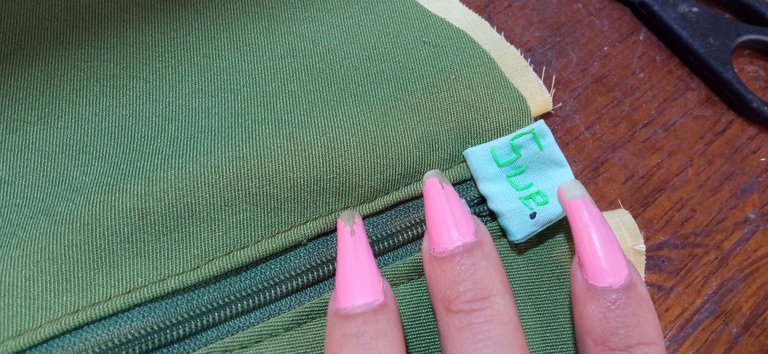
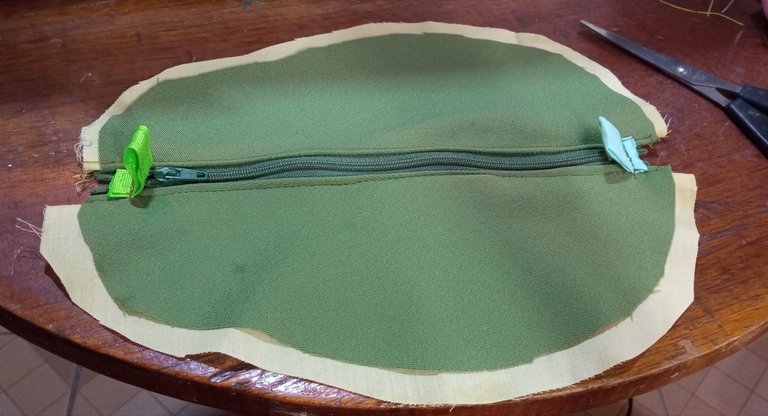
I sewed this label on one of the edges of the closure and on the other side, I placed a piece of gross tape, to compensate.
 |  |  |
|---|
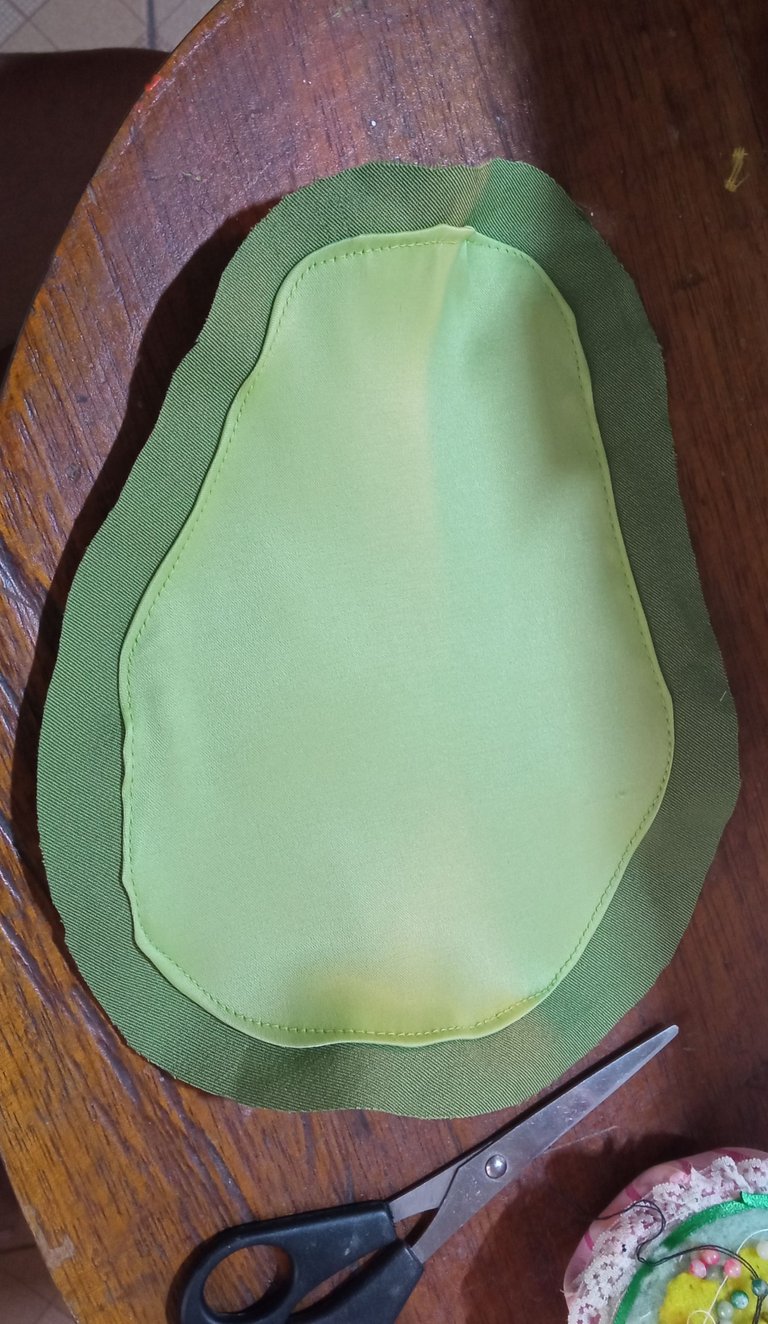
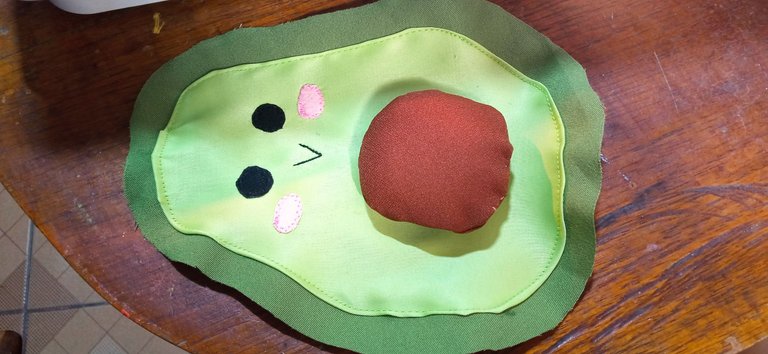
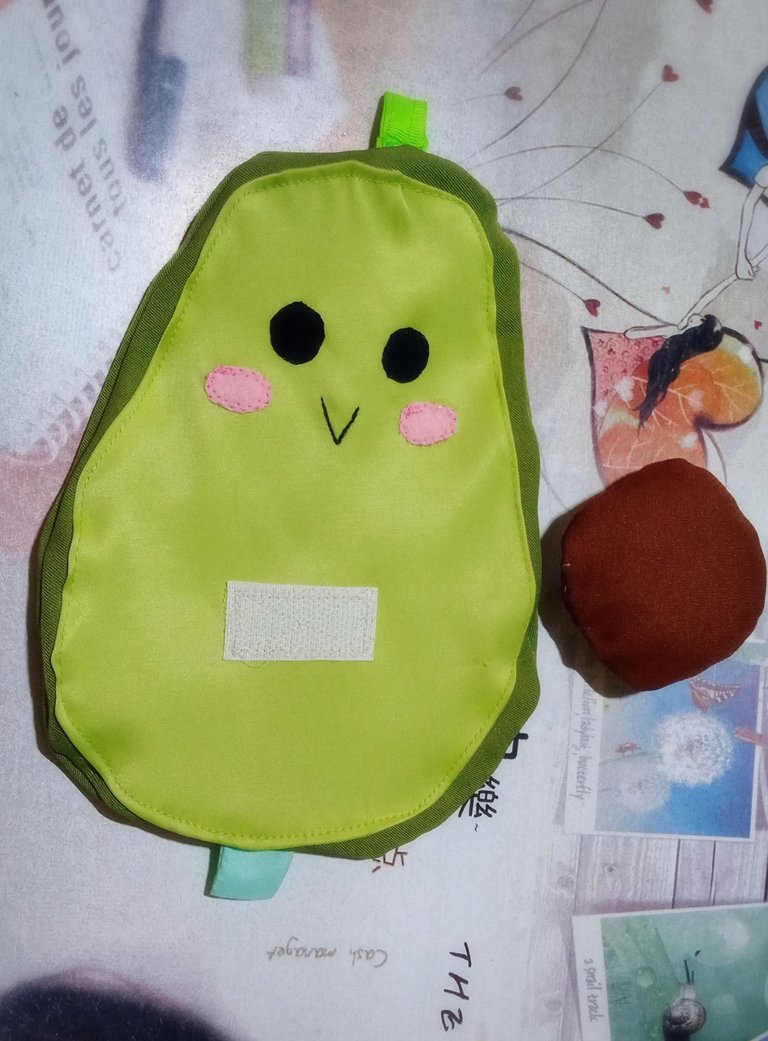
For the front part, I started by sewing the light green piece on the dark green piece, on which I sewed the pieces corresponding to the eyes with a zig zag seam, adding some additional pink pieces (made with felt), so that they were the blush of the cheeks. In the central part of this piece, I placed the other part of the velcro so that I could place and remove the seed piece.
 |  |  |
|---|
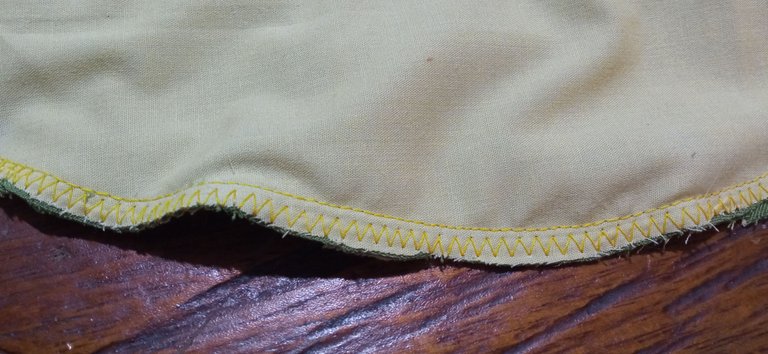
Once the back and front of the holster were ready, the next thing was to join them. Since I didn't have a bias to place on the edge, I proceeded to make a zig zag seam.
 |  |
|---|
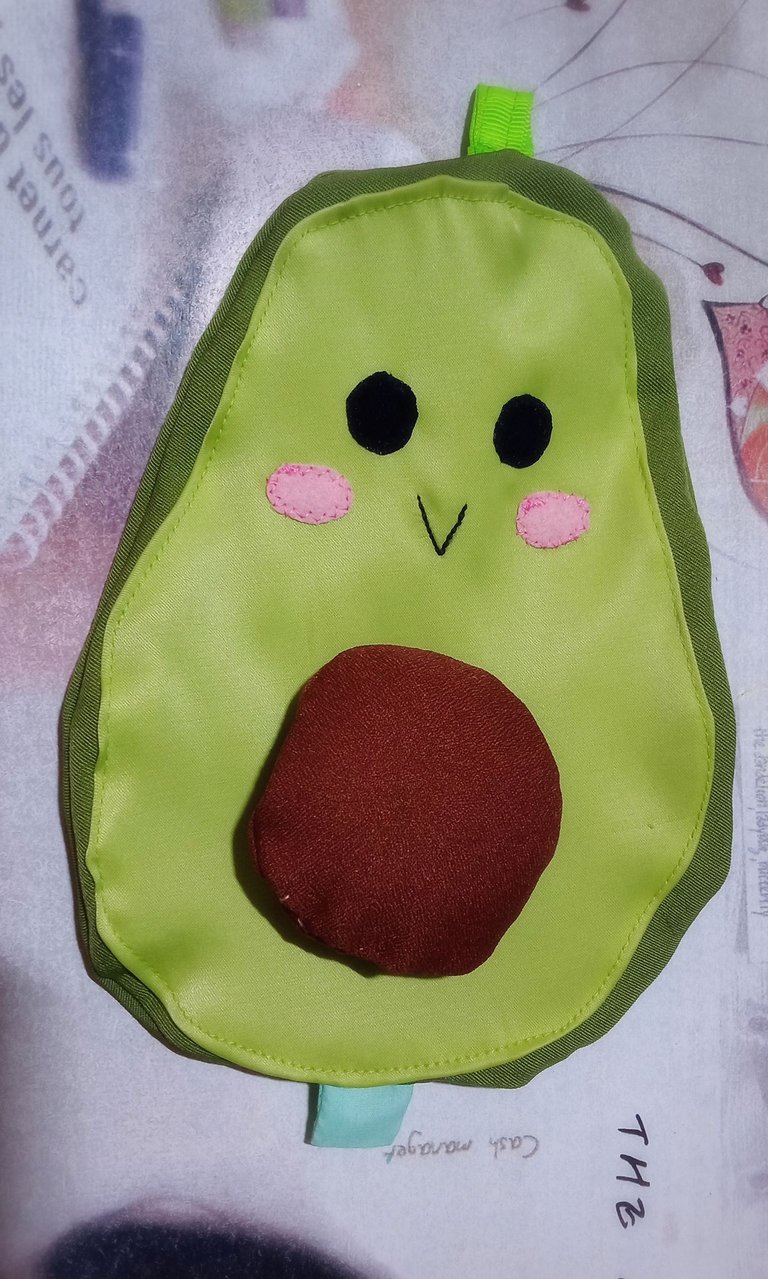
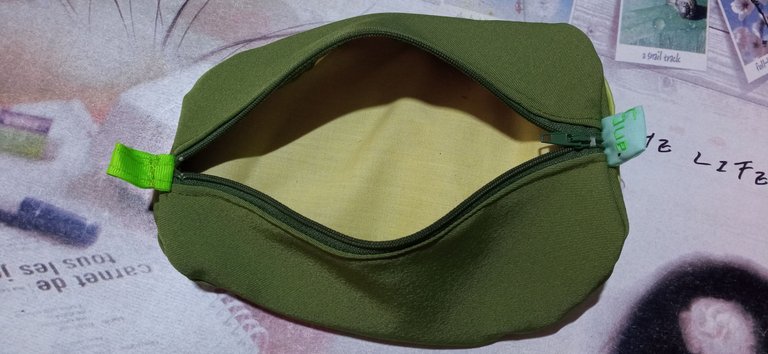
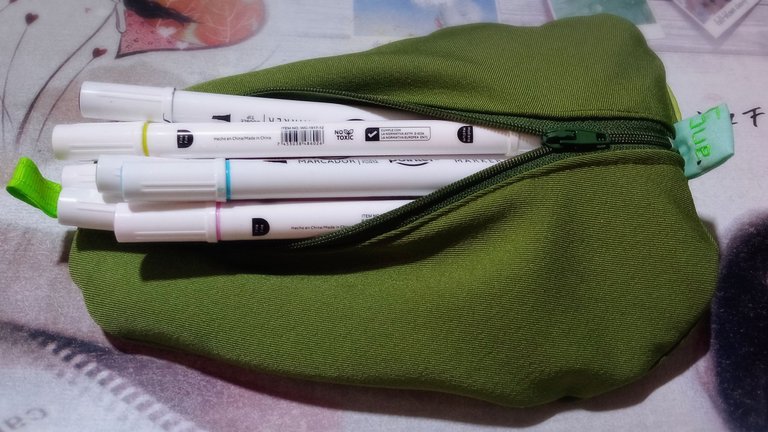
The holster was then flipped over and ready to use. Since I made it quite large, not only does it fit the dozen markers I have, but there is room for much more. I really enjoyed doing this project. My idea is to buy material and make this type of creative pencil cases, to be able to offer them through my virtual store.
 |  |  |
|---|
 |  |
|---|
Thank you very much for visiting my publication. I hope you found it interesting.
Until next time!

CONTENIDO EN ESPAÑOL
¡Hola a todos los amantes de las manualidades y de la costura! Con mucha alegría me uno al fascinante concurso de cartucheras de la comunidad de Hive Diy, luego de estar un largo rato apartada de la costura. Para mi participación elaboré una cartuchera forma de aguacate.
Pero antes de hablarles del procedimiento, permítanme comentarles un poco sobre mí. Cuando era pequeña, como muchos niños, tuve la dicha de tener útiles escolares lindos y entre ellos, estaban las cartucheras. Ya de adulto, debido a mis capacidades, acabaría trabajando para una librería con el puesto de diseñadora y costurera y durante más de un año, estuve a cargo de elaborar múltiples cartucheras que posteriormente, eran vendidas en la librería y en algunas de sus sucursales. Para mí, aquel trabajo era bastante divertido, ya que como era la única costurera, me daban completa libertada a la hora de coser y crear los diseños, por lo que me sentada largas horas a dibujar, cortar y coser cartucheras creativas y llamativas. Por lo general solía hacer dos tipos de cartucheras: rectangulares y tipo "bombón". Las primeras eran mis favoritas ya que era donde me dedicaba a armar las figuras de los personajes que estuvieran de moda, en su mayoría los unicornios; pero dependiendo del diseño, el tiempo de realización podía ser mayor. En cambio, Las tipo "bombón" eran más fáciles de realizar, por lo que lograba hacer en una semana una pequeña "montaña" de cartucheras apiladas que a mis empleadores, les gustaba ver al final de la semana. Esa etapa de mi vida la recuerdo con cariño porque mi trabajo como mencioné, era genial. Por eso, cuando me enteré de éste concurso supe que tenía que participar, mi parte de "cartucheramaker" me lo pedía a gritos ja ja
| |
|---|
Lo bueno del taller, era que tenía disposición el material necesario para hacer las cartucheras. Más para el concurso, pensé en elaborar lo que pudiera a partir de los materiales que tuviese en casa, puesto que como tenía tiempo sin dedicarme de lleno a la costura, dejé eventualmente de comprar materiales. Como no contaba con material plástico (que era lo que solía usar para las cartucheras rectangulares), ni tela rígida para elaborar una cartuchera bombón, pensé en hacer una cartuchera que combinase aspectos de ambos tipos de cartucheras: Parecida a la bombón en cuanto a su forma, pero con un diseño más elaborado, como solía hacer con las rectangulares. El único cierre que logré encontrar, fue uno de color verde y revisando entre mis telas, conseguí algunos trozos que podían servirme para realizar una cartuchera con forma de aguacate, ideal para el cierre que tenía a disposición.
🥑 Materiales: 🥑
- Tela amarilla, negra, marrón, verde claro y oscuro.
- Cierre de 20cm.
- Cierre mágico (velcro).
- Guata o relleno.
- Patrón.
🥑 Procedimiento: 🥑
Lo primero que hice fue dibujar la forma del aguacate en un trozo de revista, para que fuese mi patrón (Si no son muy diestros en el dibujo, pueden buscar por internet). Luego, corté las piezas correspondientes: Dos piezas de color verde oscuro (parte delantera y trasera de la cartuchera), una parte más pequeña de color verde claro (la "pulpa" del aguacate), dos piezas de color amarillo (parte delantera y trasera del forro), dos piezas circulares de color marrón (la semilla del aguacate) y dos círculos pequeños de color negro (los ojos).
| |
|---|
La primera pieza que cosí, fue la semilla del aguacate. Para ello, cosí un trozo de goma espuma que tenía sobrante (para mantener la forma esférica) y una pieza del cierre mágico o velcro, en una de las piezas de tela color marrón, dejando una pequeña abertura. Al voltear la pieza, procedí a introducirle un poco de relleno para darle volumen a la semilla y cerré la abertura con una costura a mano (no soy buena con eso ja ja). Teniendo lista la semilla. Una idea bastante interesante que pueden aplicar, es que en lugar de rellenar la semilla, se le puede colocar un cierre más pequeño, para que sirva de bolsillo y así poder meter algún material escolar pequeño, como un borrador o un sacapuntas.
| | |
|---|
Pasé luego a la costura del cierre en la pieza correspondiente a la parte trasera de la cartuchera (la que está dividida en dos), procurando coser al mismo, las piezas correspondientes al forro. No sé como explicar a detalle cómo coser un cierre, pero procuro coser los bordes de la tela al borde del cierre y tras voltear, hacer una costura a modo de pisado. Ya con esto tuve listo la parte trasera de la cartuchera.
De forma adicional, suelo colocar a mis creaciones, una etiqueta con mi marca Suecitos. (Sue. para abreviar), la cual suelo realizar bordado en un trozo de tela. Ésta vez no fue la excepción. Como no conseguí mi tambor para bordar (muchas de mis cosas siguen embaladas luego de una mudanza), me tocó improvisar, pero por suerte, pude elaborar mi etiqueta sin problema.
| |
|---|
Cosí ésta etiqueta en uno de los bordes del cierre y del otro lado, coloqué un trozo de cinta gross, para compensar.
| | |
|---|
Para la parte delantera, comencé cosiendo la pieza de color verde claro sobre la pieza verde oscuro, sobre la cual, cosí con una costura tipo zig zag las piezas correspondientes a los ojos, añadiendo unas piezas adicionales de color rosado (hechas con fieltro), para que fuesen el sonrojo de las mejillas. En la parte central de ésta pieza, coloqué la otra parte del velcro y así, poder colocar y quitar la pieza de la semilla.
| | |
|---|
Ya teniendo listas la parte trasera y delantera de la cartuchera, lo siguiente fue unirlas. Como no tenía sesgo para colocarle en el borde, procedí a hacer una costura en zig zag.
| |
|---|
Luego, se volteéla cartuchera y estuvo lista para usarse. Como la hice bastante grande, no sólo cabe la docena de marcadores que tengo, sino que queda espacio para mucho más. Realmente disfruté la realización de éste proyecto. Mi idea es comprar material y hacer éste tipo de cartucheras creativas, para poder ofrecerlos a través de mi tienda virtual.
| | |
|---|
| |
|---|
Muchas gracias por haber visitado mi publicación. Espero que les haya parecido interesante.
¡Hasta una próxima oportunidad!
Congratulations @suezoe! You have completed the following achievement on the Hive blockchain And have been rewarded with New badge(s)
Your next payout target is 8000 HP.
The unit is Hive Power equivalent because post and comment rewards can be split into HP and HBD
You can view your badges on your board and compare yourself to others in the Ranking
If you no longer want to receive notifications, reply to this comment with the word
STOPTo support your work, I also upvoted your post!
Check out our last posts:
Thank you so much! 💚
That's great @suezoe! We're here to encourage you to achieve your next goals on Hive!
@suezoe
https://inleo.io/threads/view/hive-130560/re-leothreads-2mq82q166
Thank you so much! 💚
Gracias por la información, lo tendré en consideración 😌💚
Quedé enamorada de todas tus creaciones. Está muy bonita la cartuchera en forma de aguacate. Muy original. Suerte 🍀
Muchas gracias, me alegra mucho que mi trabajo fuese de tu agrado 🤗 Disfruté bastante volviendo a hacer una cartuchera, fue como volver a esos días ja ja lo bueno es que me he animado a hacer más, a lo mejor me anime a hacer más frutas y verduras je je Gracias por visitar la publicación, por comentar y por tus buenos deseos 😘💚
Éxitos!!! 👋
Wow, eres realmente buena en esto. La bolsa para bolígrafos tiene muy buena pinta y estoy segura de que a los niños les encantará.
This post has been selected by the Hive Learners Community team and will receive support from the lazypanda. Kindly click on the banner to visit our community and check out our Discord channel here.
Gracias, es una actividad muy divertida 😊 también pienso que sería del agrado de los niños. Muchas gracias por visitar la publicación y por comentar 🤗💚
Que lindo!!
¡Gracias! 💚
Saludos @suezoe. Muy linda figura de aguacate 🥑 para una cartuchera. Además, son exquisitos. ¡Felicidades!, y ¡Suerte!
¡Hola! 😄 ¡Muchas gracias! Me alegra que te gustase el resultado 😁 Ciertamente los aguacates son muy sabrosos y adoro su color 💚 También gracias por visitar la publicación, por comentar y pro tus buenos deseos 🤗✨
Amiga que hermosa cartuchera ❤️, me encanta tu creatividad, me has inspirado para intentar hacer algo similar 🤭. Espero poder llevarlo a cabo en mi tiempo libre y distraerme un poco. Espero que puedas llevar a cabo tu deseo de venderlos en tu tienda virtual, serán todo un éxito, y más si lo haces con mucho amor. Saludos
Hola 😊 Gracias 💚 Me gusta crear cosas lindas 😉 ¡Excelente! Me satisface saber que te motivaste a intentarlo, yo sé que te va a quedar preciosa 😌 Tómate tu tiempo, es bueno usar éste tipo de actividades para relajarnos y no sólo eso, sin darnos cuenta eso aumenta nuestra imaginación y sube nuestra autoestima al poder finalizar cada proyecto 🤗 Muchísimas gracias por haber visitado mi publicación y por comentar. Besos 😘💚