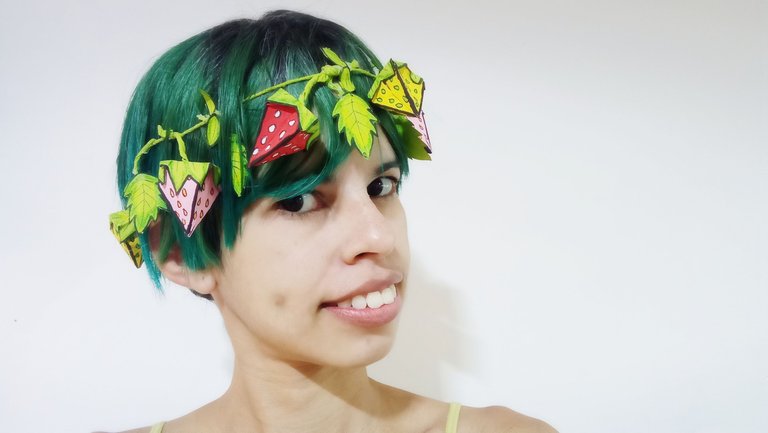
(ENG/ESP) Making a crown with origami strawberries / Haciendo una corona con fresas de origami 🍓
ENGLISH CONTENT
Hello all craft lovers! I've been wanting to participate in these lovely community contests for a couple of months, but something always happens and I end up doing nothing 😅 And even though I found out in advance about the new contest, it was at the last minute that I was able to dedicate myself to it. But that didn't discourage me, I had an idea in mind and decided to give it a try. That's how I made a hair crown with origami strawberries.
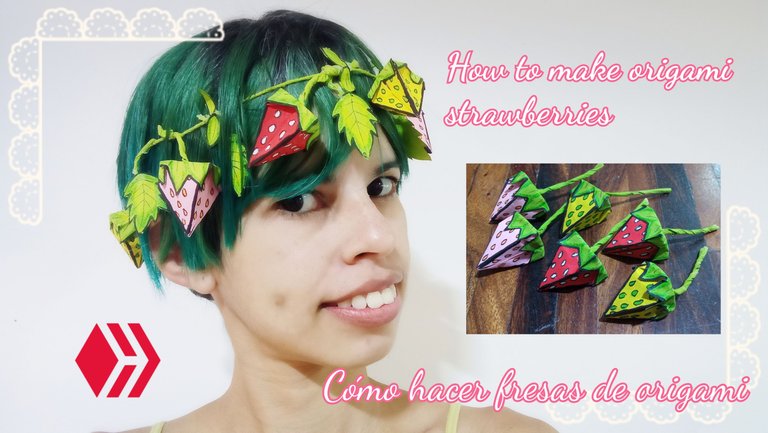
There were many options to choose from, but I fell in love with the strawberry design, since it is one of my favorite fruits. I also thought about making the crown because I like a style of clothing called Lolita Fruit, where fruit accessories and decorations predominate, so I didn't see the bad idea that at the end of the contest, I could use the piece a couple of times in my head when I went for a walk (I'm like that, I once made a paper bird for my hair... I'll do a tutorial on that accessory later 😆).
🍓 Materials: 🍓
- Origami paper (I used craft paper).
- White glue.
- Hot or cold silicone.
- Wick or rope.
🍓 Procedure: 🍓
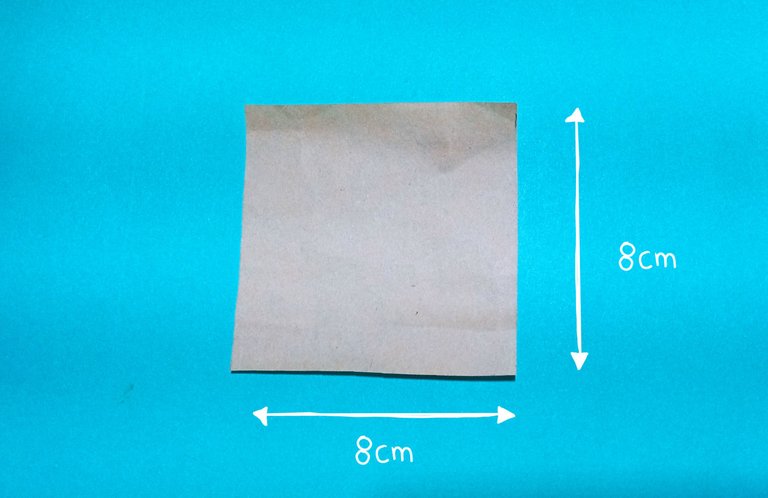
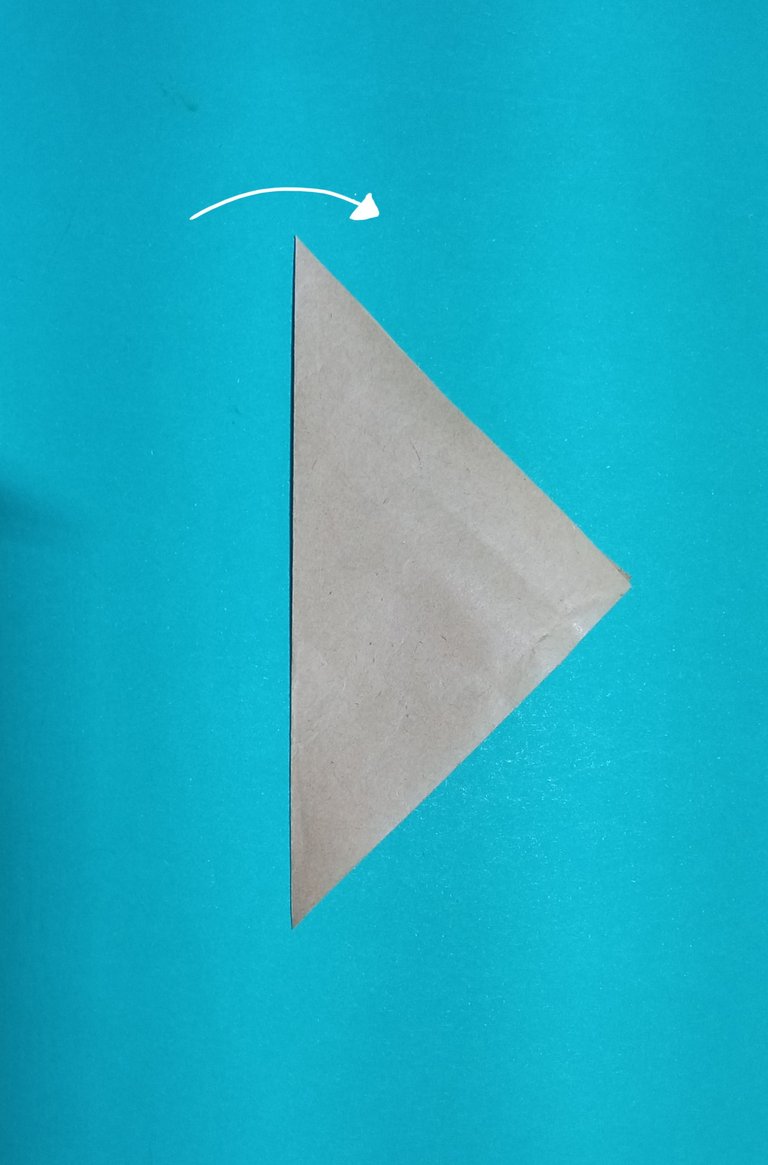
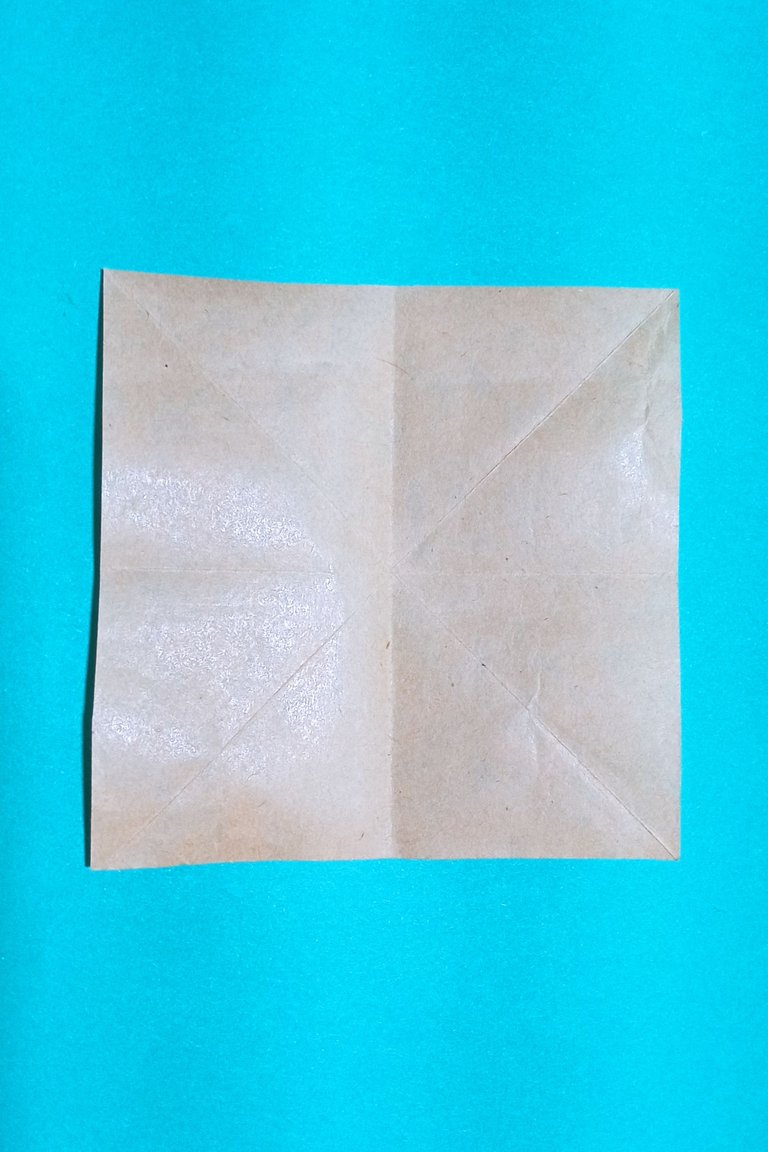
The first thing I did was cut a square 8 cm high and wide. The size depends on the project. Then, I folded diagonally on both sides, to obtain an X-shaped fold in the paper.
 |  |  |
|---|
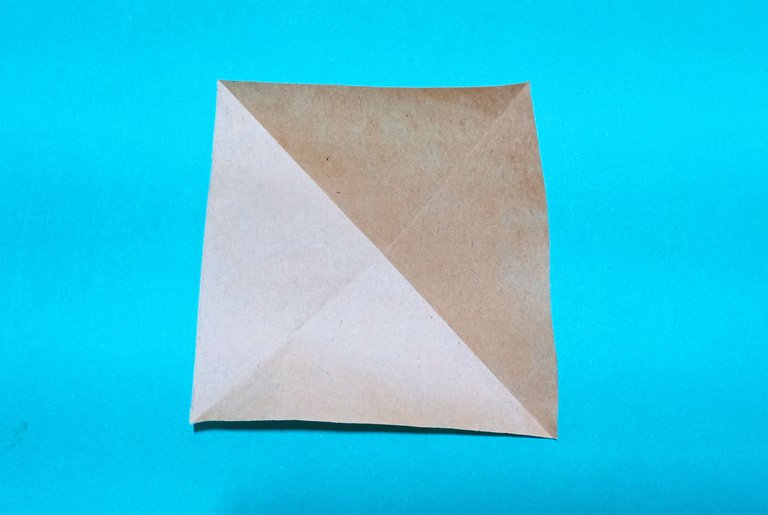
We open the piece and fold from one side to the other (both top and bottom), to obtain another fold, but in the shape of a cross.
 |  |
|---|
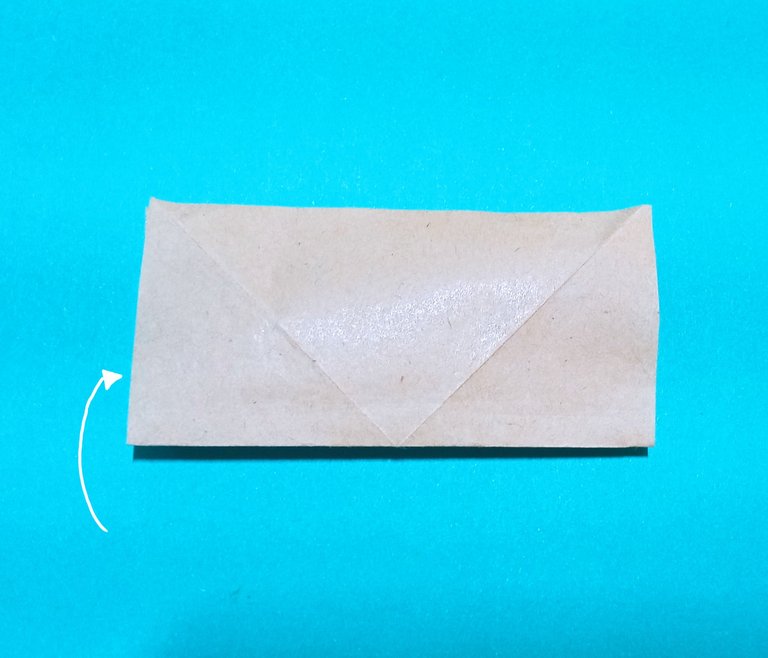
Thanks to these folds, we can push the piece as indicated in the images below, achieving a rhombus.
 |  |
|---|
The next thing is to fold the corners as seen in the image, making them coincide with the center mark. Once this is done, the piece is turned over and the procedure is repeated on the other side, obtaining a shape similar to an arrow.
 |  |  |
|---|
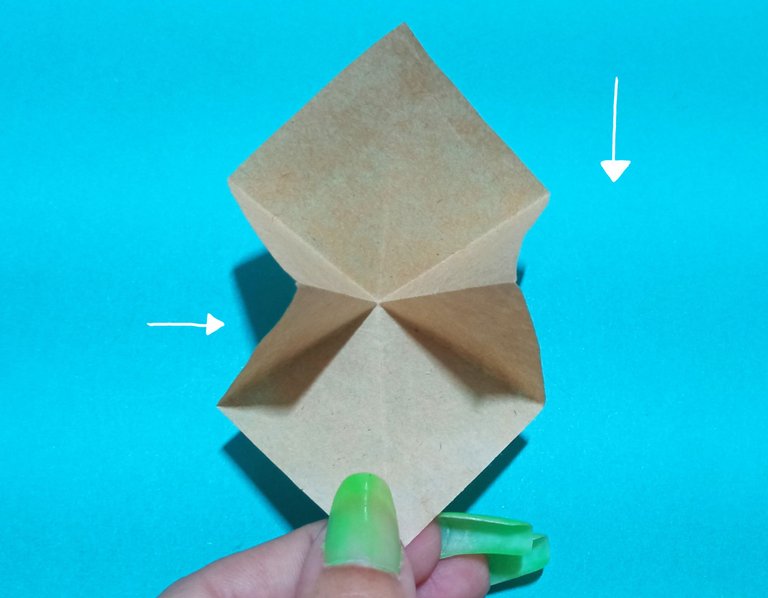
At the top of the piece, we fold the corners once again, overlapping a little over the folds that we had already made previously, ensuring that the corners that we are folding coincide with each other on both sides. Again, we turn the piece over and repeat the steps.
 |  |  |
|---|
For the next part, I rotated the piece for convenience. Proceeding to open the tabs and step so that it looks like the image. We do the same on the other side and as expected, we turn the piece and repeat.
 |  |
|---|
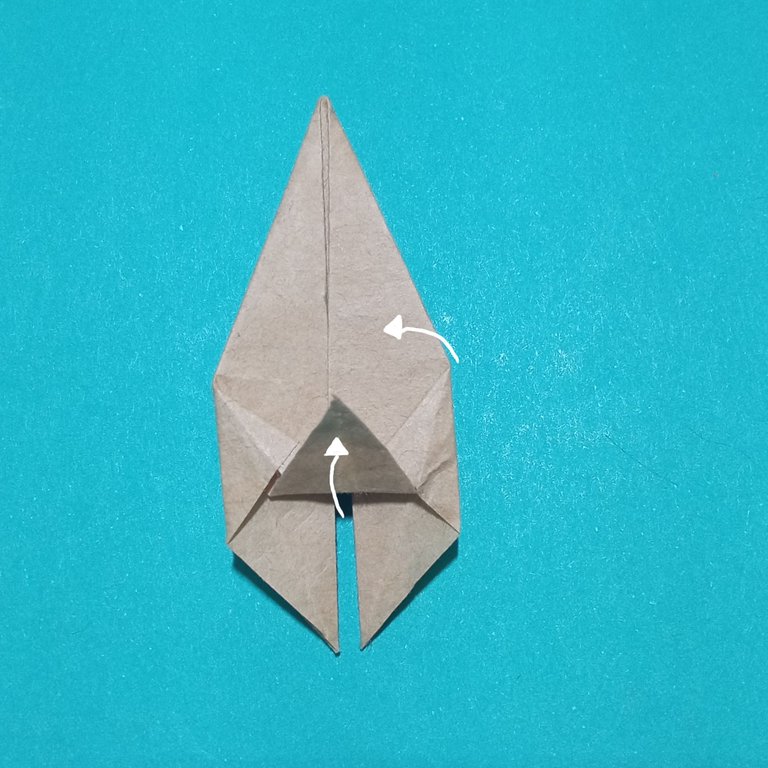
The next thing is to lift the tab that we created when doing these steps, both on the front and back. Then, we unfold the piece as seen in the second image (on both sides), to show smoother faces.
 |  |  |
|---|
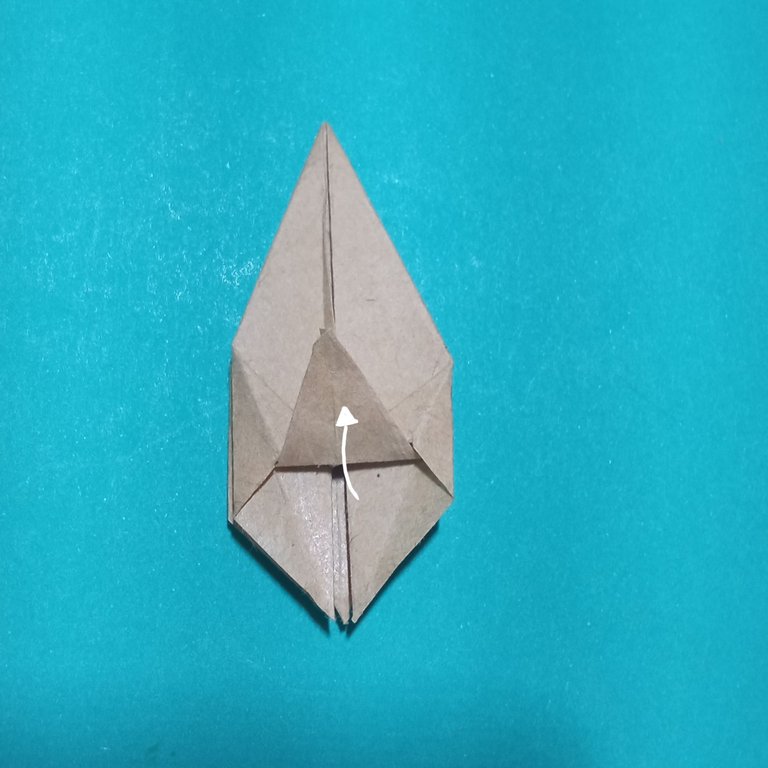
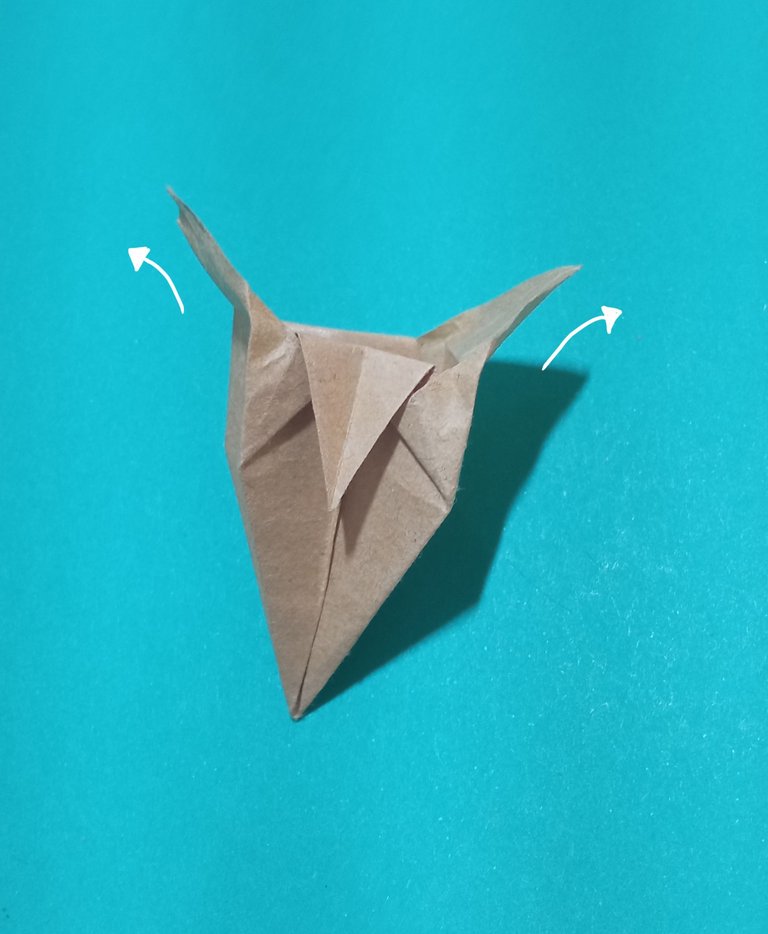
Again, we will have to lift both tabs and fold.
 |  |
|---|
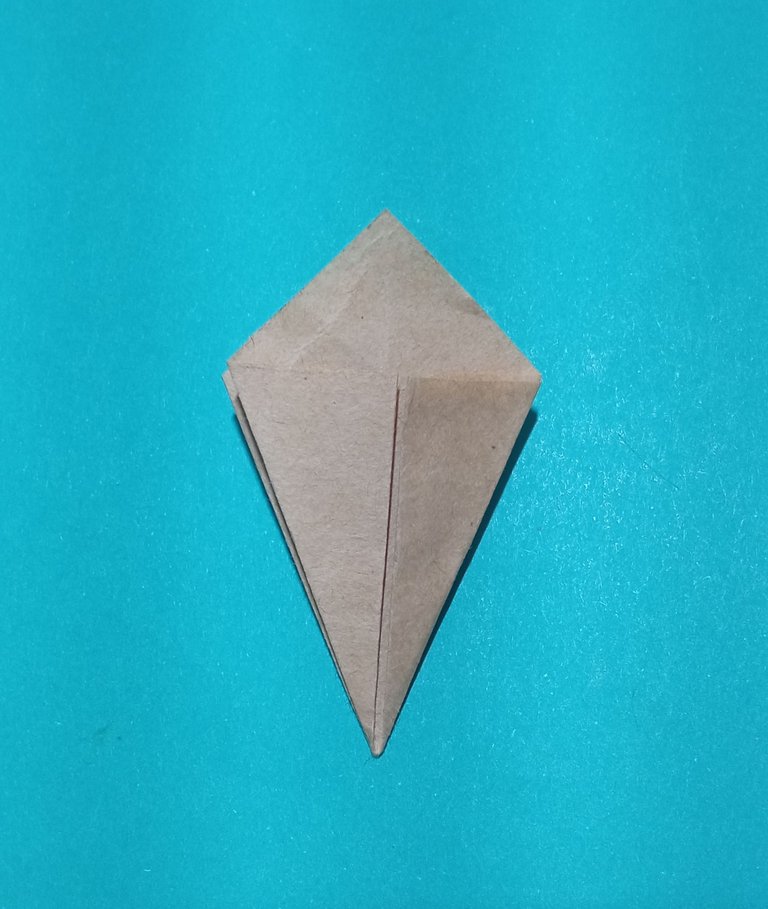
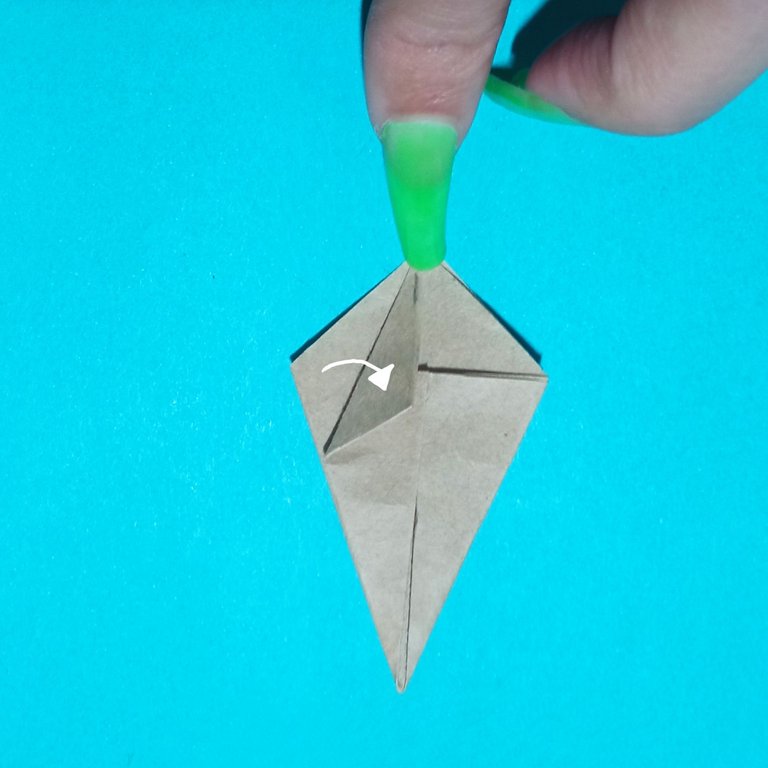
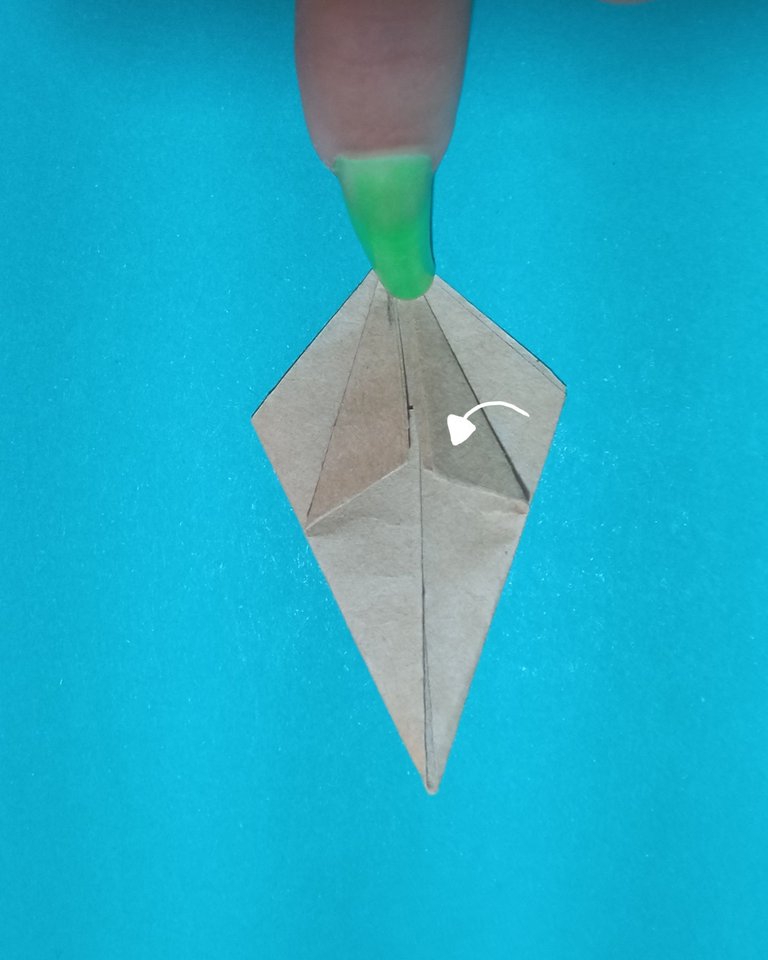
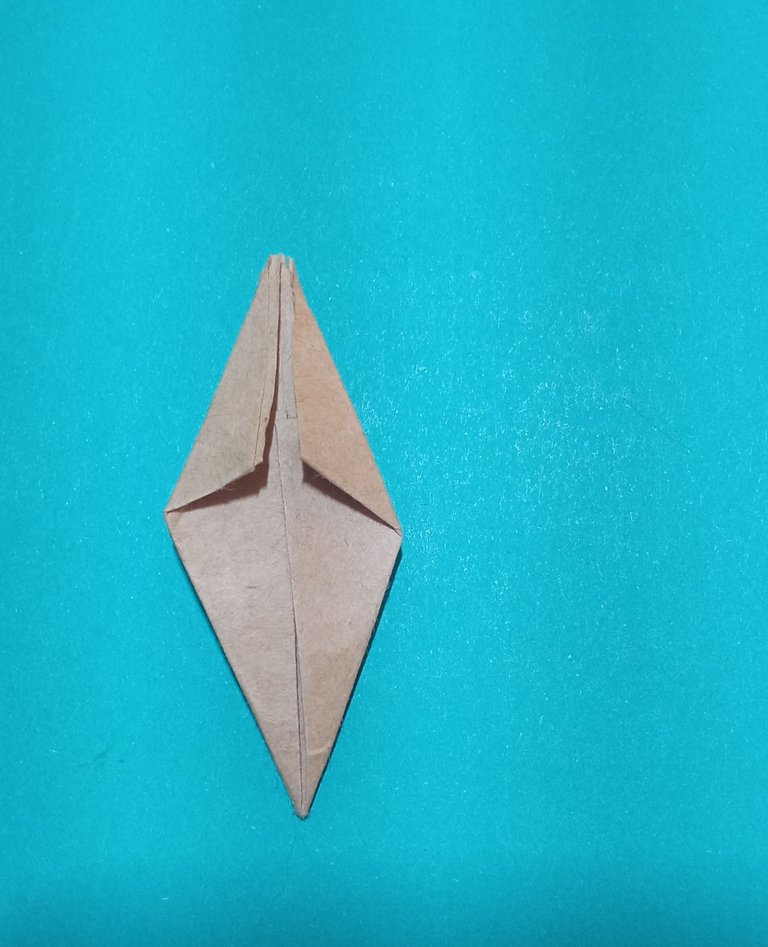
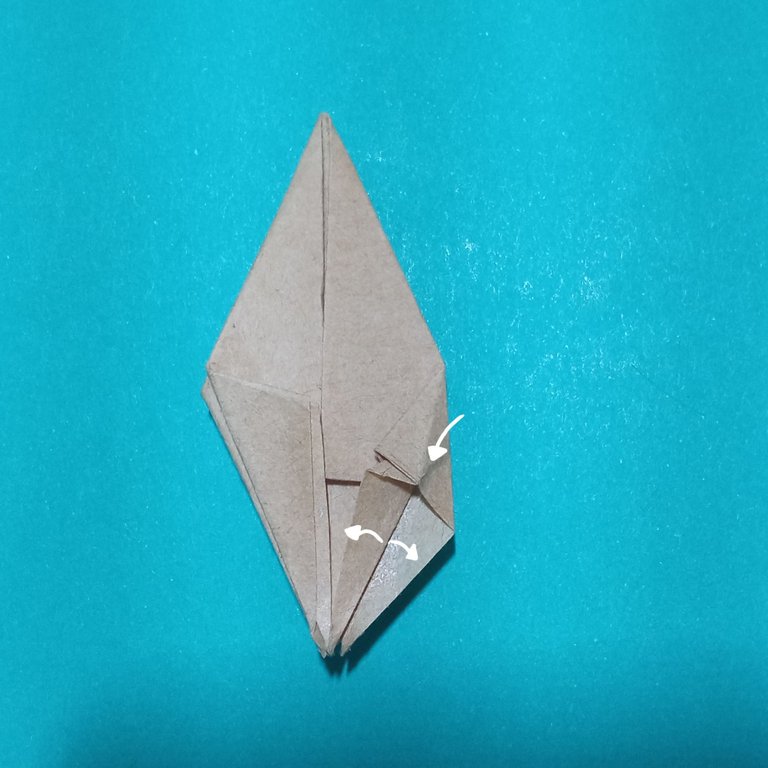
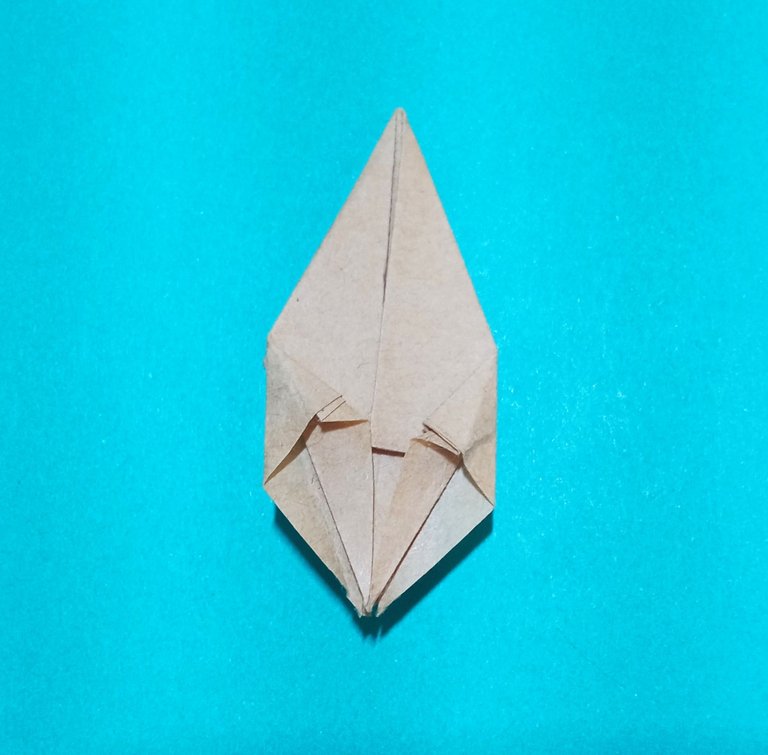
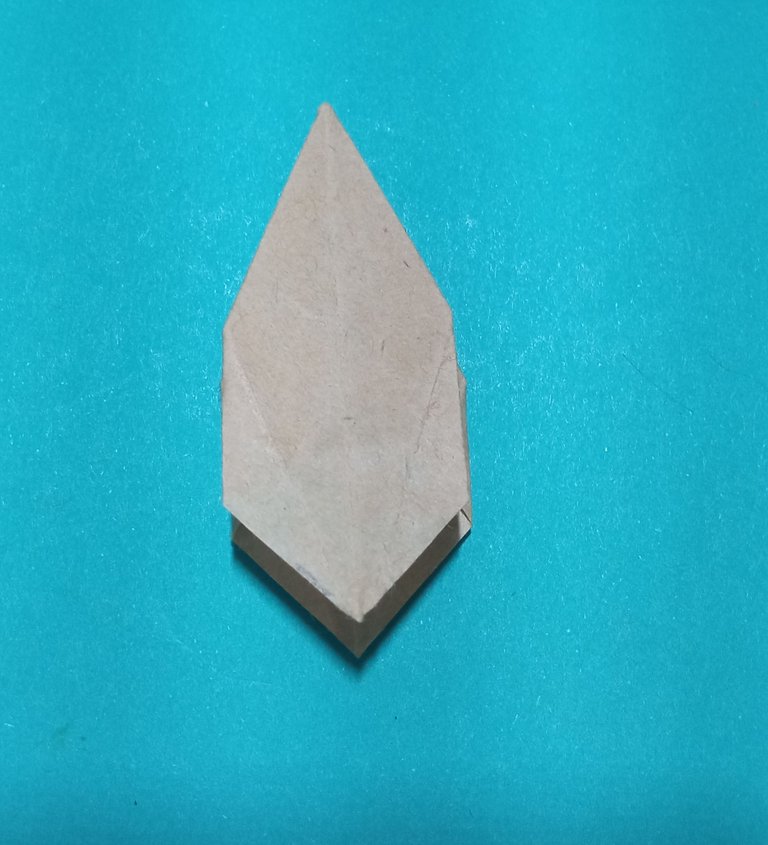
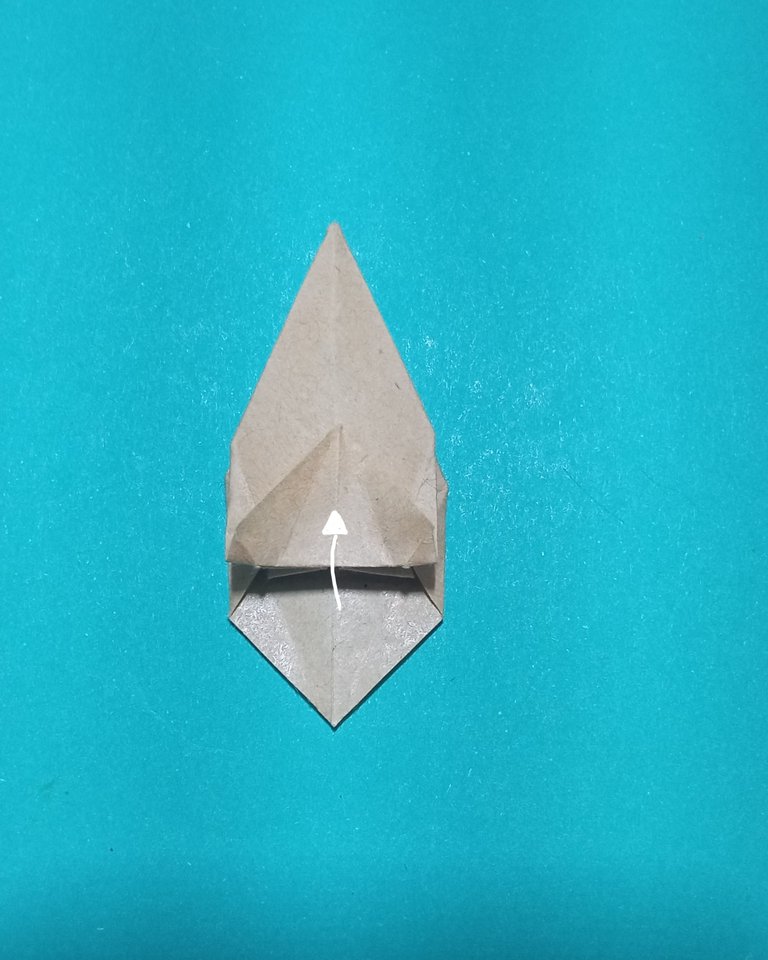
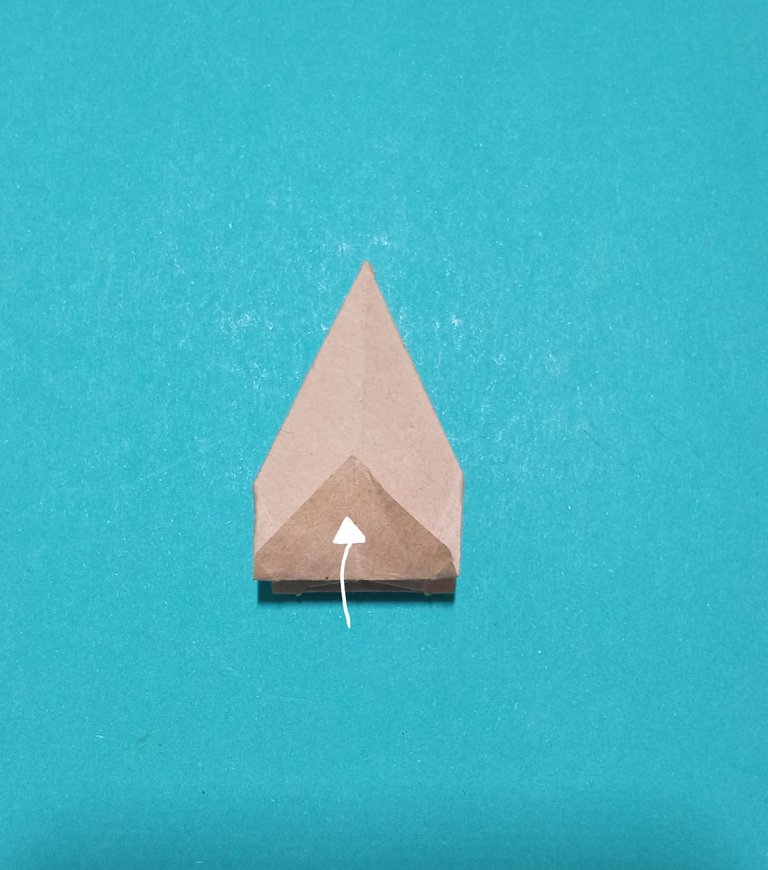
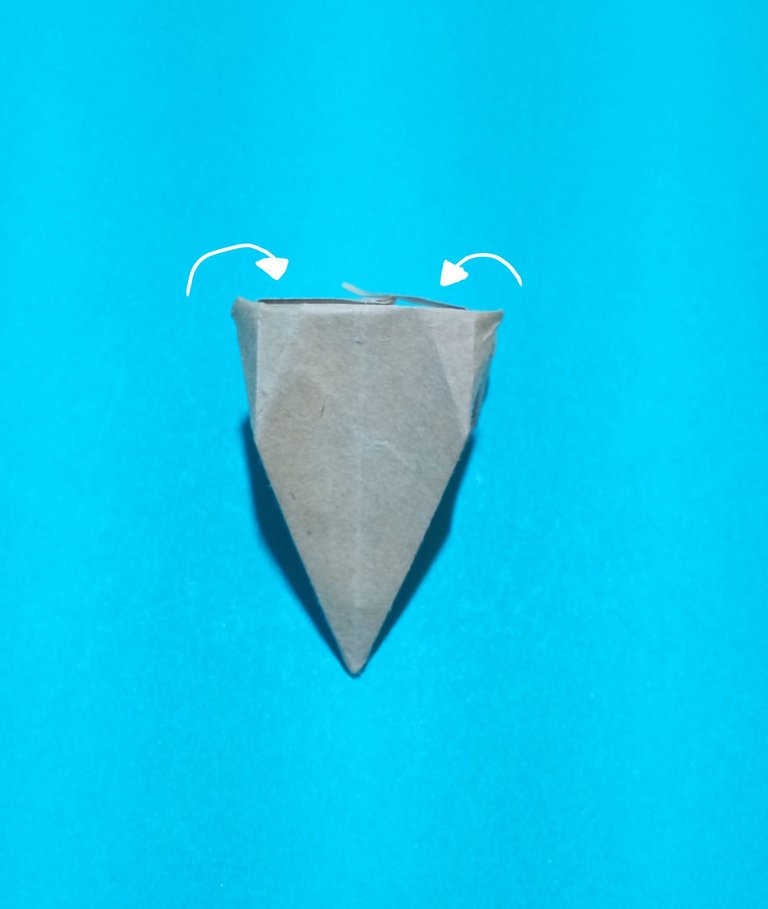
If we did the steps correctly, when we pull the tabs, we will have the shape of the strawberry. We bend these tabs towards the inside of the body of the strawberry.
 |  |
|---|
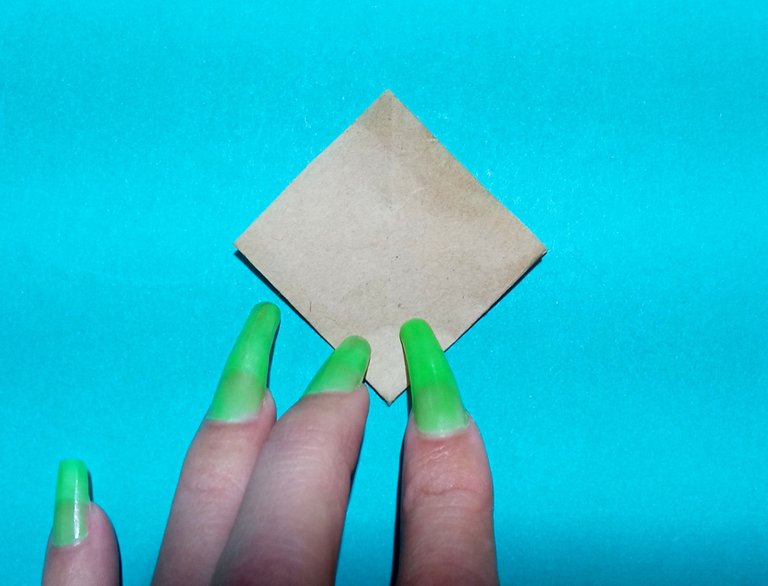
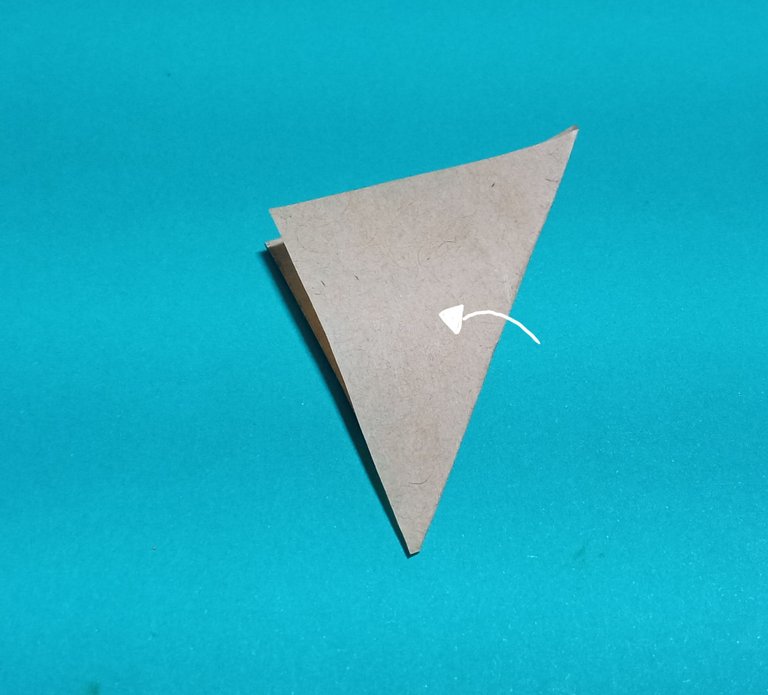
To make the strawberry leaves. Another smaller square is cut, which we will proceed to fold diagonally three times.
 |  |
|---|
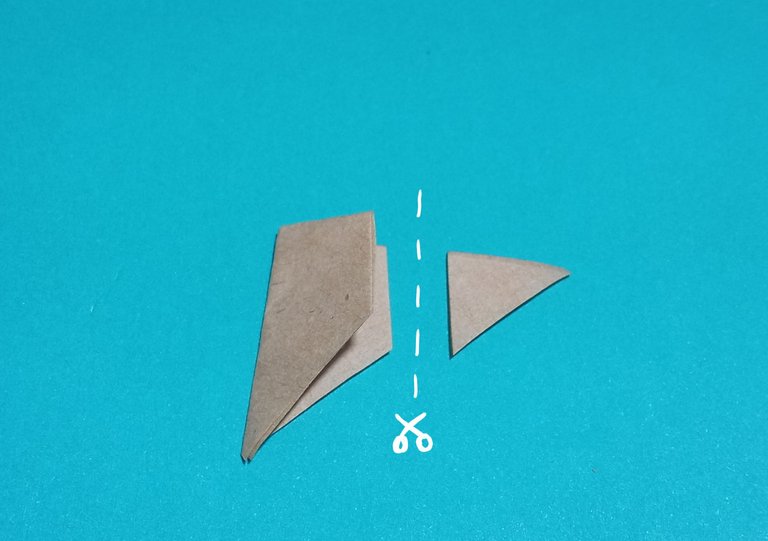
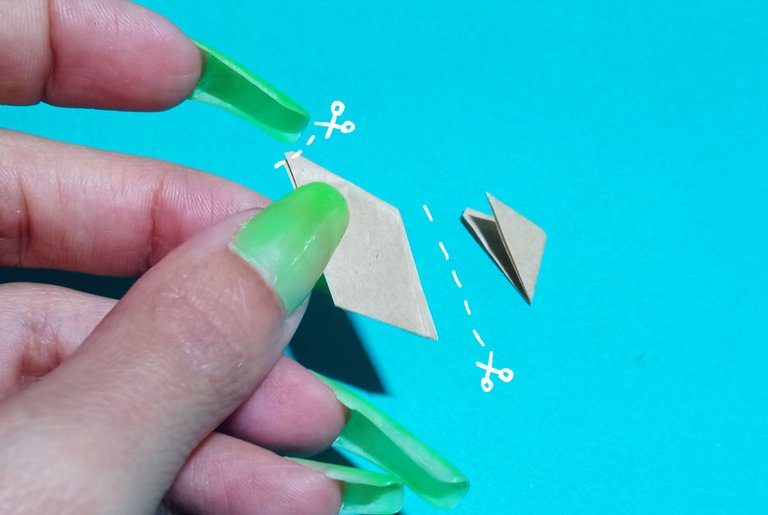
Without opening the piece, we proceed to make the cuts as seen below and when we open it, we will have a star-shaped leaf.
 |  | 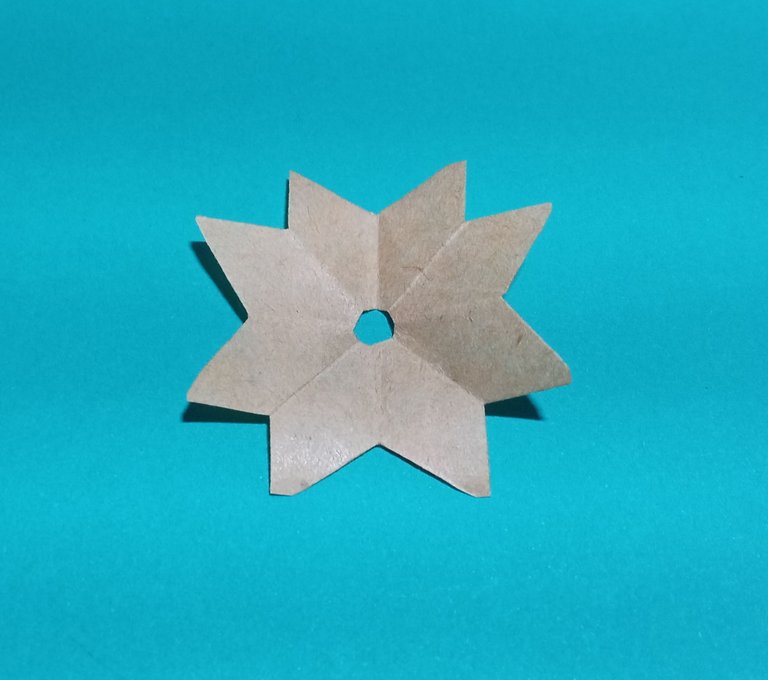 |
|---|
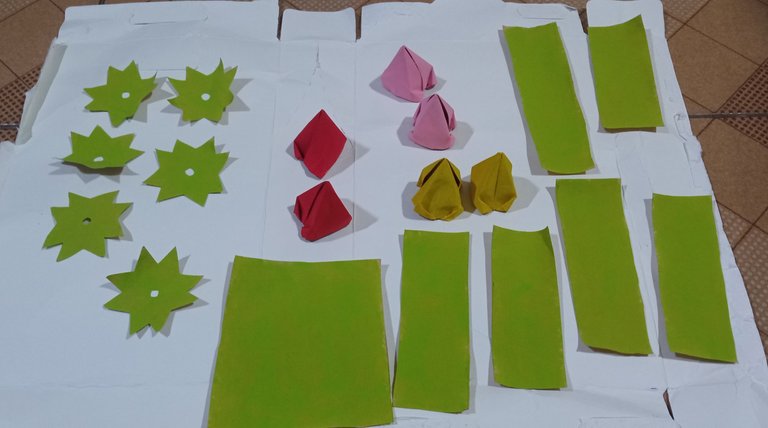
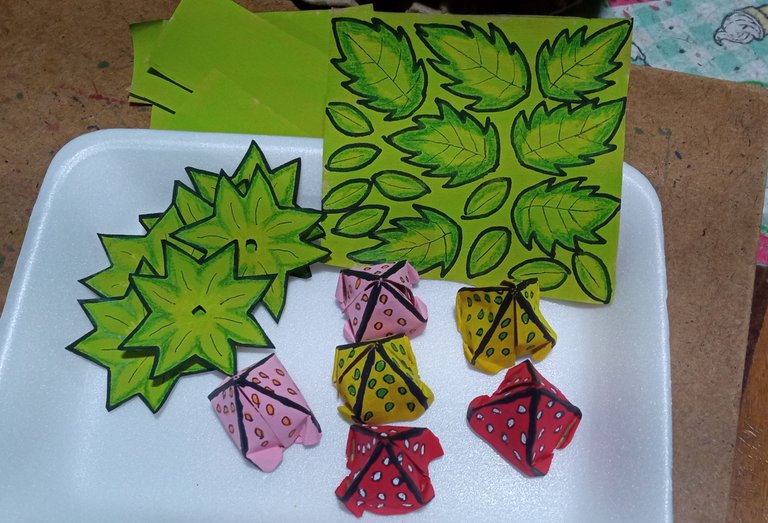
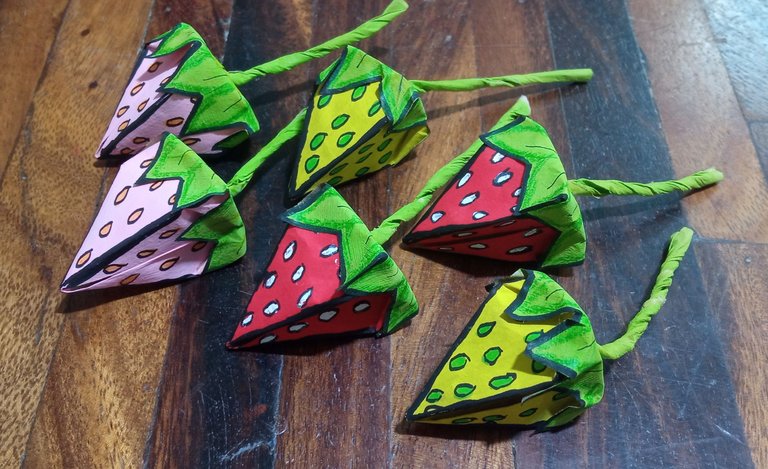
With this we can now say that the strawberry is almost finished. In my case, I did this procedure about six times and since the paper I used was an opaque color, I decided to paint it to have more colorful strawberries. I also painted some strips of paper (without measurement), green, to make the stems of the strawberries and some decorative leaves. I used markers and wooden crayons to give a shadow effect to the strawberries, making them more attractive for what I had in mind.
 |  |
|---|
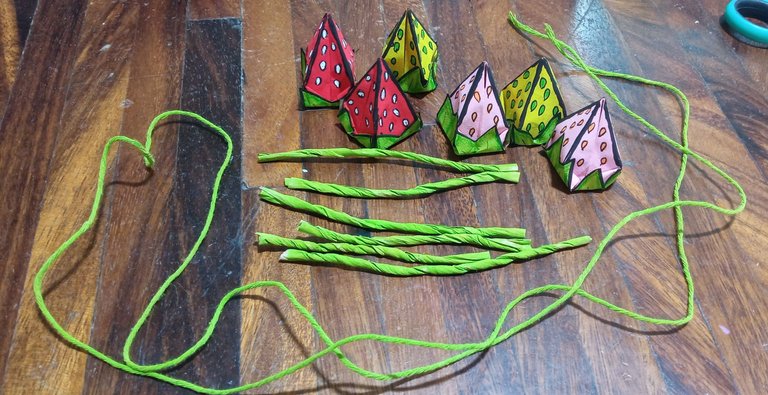
I also painted the wick and with white glue, I glued the star-shaped leaves on top of the strawberries, as well as rolled the pieces of paper for the stems.
 |  |
|---|
With the hot silicone, I glued the stems to the strawberries and placed them on the wick to my liking, as well as the leaves that I made separately.
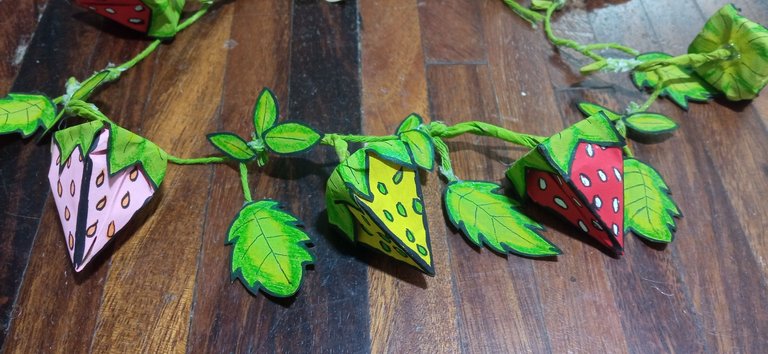
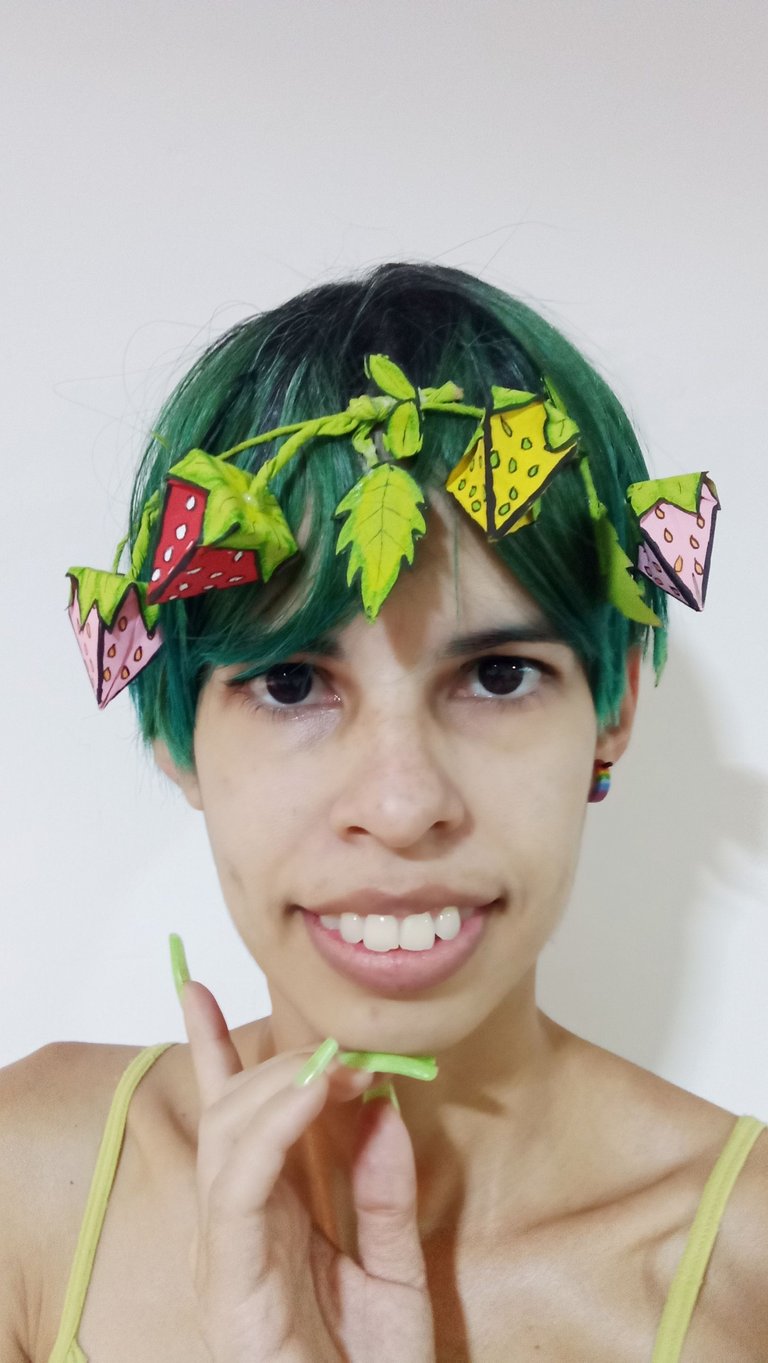
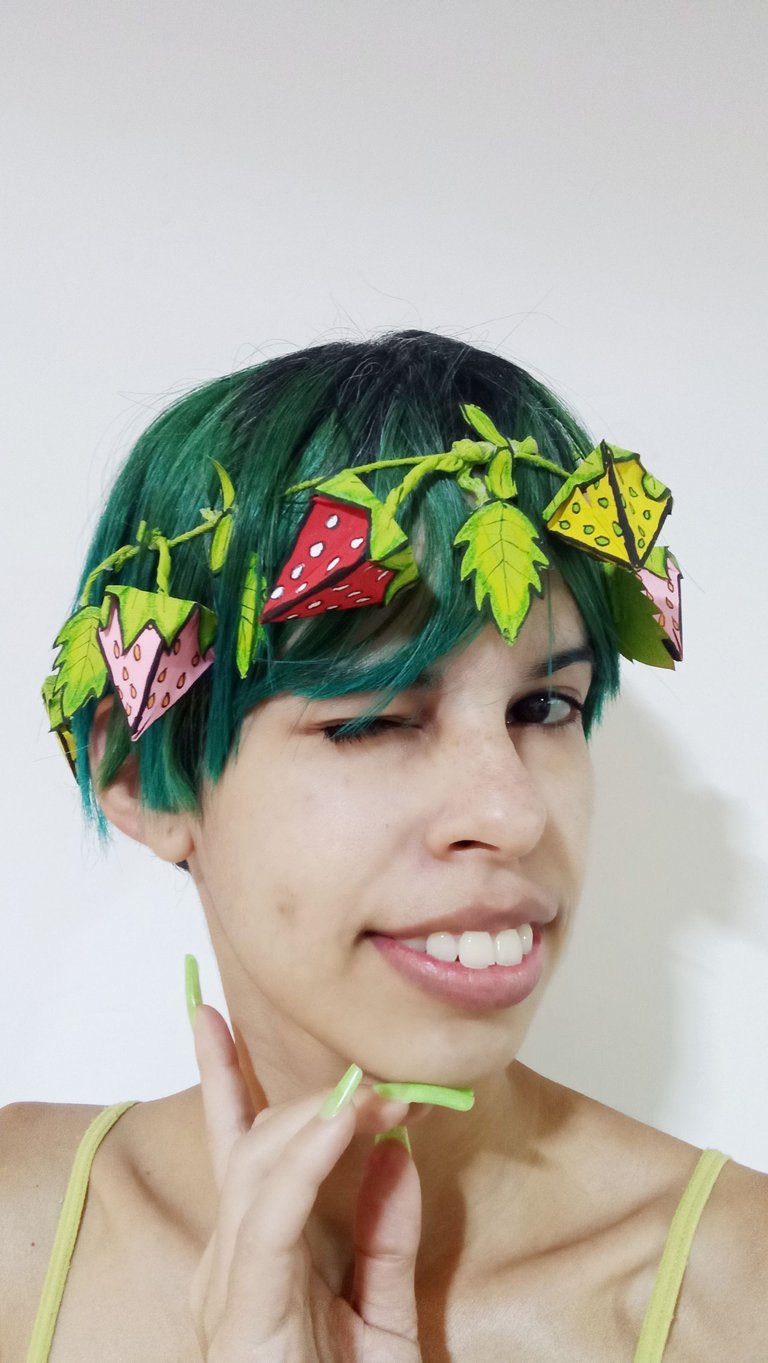
I made a simple knot at each end of the wick, so that it would fit the size of my head, but that it could be adjusted if I used it with a wig. I can mention that I loved the result, so I plan to repeat it with other fruits. I will try to use this accessory only when the weather is good, because it would be a shame if it got damaged in the rain he he
 |  |
|---|
Thank you very much for visiting my publication. I hope you found it interesting.
Until next time!

CONTENIDO EN ESPAÑOL
¡Hola a todos los amantes de las manualidades! Tengo un par de meses queriendo participar en estos concursos tan encantadores de la comunidad, pero siempre ocurre algo y acabo por no hacer nada 😅 Y a pesar de que me enteré con tiempo del nuevo concurso, fue a último momento que pude dedicarme a él. Pero eso no me desanimó, tenía una idea en mente y decidí intentarlo. Fue así como hice una corona para el cabello con fresas hechas de origami.
Habían muchas opciones para escoger, pero quedé enamorada del diseño de la fresa, ya que es una de mis frutas favoritas. También pensé, en elaborar la corona porque me gusta un estilo de vestimenta llamado Lolita Fruit, en donde predominan los accesorios y adornos de frutas, así que no vi mala la idea de que al acabar el concurso, pudiera usar la pieza un par de veces en mi cabeza cuando saliera a pasear (soy así, una vez me hice un pájaro de papel para el cabello... luego les hago un tutorial de ese accesorio 😆).
🍓 Materiales: 🍓
- Papel para origami (yo usé papel craft).
- Pegamento blanco.
- Silicón caliente o frío.
- Pabilo o una cuerda.
🍓 Procedimiento: 🍓
Lo primero que hice, fue cortar un cuadrado de 8 cm de altura y anchura. El tamaño depende del proyecto. Luego, doblé en diagonal de ambos lados, para obtener un doblez en forma de equis en el papel.
| | |
|---|
Abrimos la pieza y doblamos de un lateral a otro (tanto arriba como abajo), para obtener otro doblez, pero en forma de cruz.
| |
|---|
Gracias a estos dobleces, podemos empujar la pieza como se indica en las imágenes de abajo, logrando obtener un rombo.
| |
|---|
Lo siguiente, es doblar las esquinas como se ve en la imagen, haciendo que coincidan con la marca del centro. Una vez hecho esto, se voltea la pieza y se repite el procedimiento en el otro lado, obteniendo una forma parecida a una flecha.
| | |
|---|
En la parte superior de la pieza, doblamos las esquinas una vez más, sobreponiéndonos un poco sobre los pliegues que ya habíamos hecho anteriormente, procurando que las esquinas que estamos doblando, coincidan entre sí en ambos lados. De nuevo, volteamos la pieza y repetimos los pasos.
| | |
|---|
Para la siguiente parte, giré la pieza para mayor comodidad. Procediendo a abrir las pestañas y pisando para que se vea como en la imagen. Hacemos lo mismo en el otro lado y como es de esperarse, giramos la pieza y repetimos.
| |
|---|
Lo siguiente, es levantar la pestaña que creamos al hacer estos pasos, tanto en la parte delantera como trasera. Después, desplegamos la pieza como se ve en la segunda imagen (en ambas partes laterales), para mostrar unas caras más lisas.
| | |
|---|
De nuevo, tendremos que levantar ambas pestañas y doblar.
| |
|---|
Si hicimos los pasos correctamente, al jalar de las pestañas, tendremos la forma de la fresa. Estas pestañas, las doblamos hacia el interior del cuerpo de la fresa.
| |
|---|
Para realizar las hojas de la fresa. Se corta otro cuadrado más pequeño, el cual procederemos a doblar en diagonal tres veces.
| |
|---|
Sin abrir la pieza, procedemos a realizar los cortes como se ve en la parte de abajo y al abrirlo, tendremos una hoja en forma de estrella.
| | |
|---|
Con esto que llevamos, ya podemos decir que la fresa está casi terminada. En mi caso, hice éste procedimiento unas seis veces y como el papel que usé, era de un color opaco, decidí pintarlo para tener unas fresas más coloridas. También pinté unas tiras de papel (sin medida), de color verde, para realizar los tallos de las fresas y unas hojas de decoración. Utilicé marcadores y crayones de madera para darle un efecto de sombra a las fresas, siendo más vistosas para lo que tenía en mente.
| |
|---|
También pinté el pabilo y con pegamento blanco, pegué las hojas en forma de estrellas, en la parte superior de las fresas, así como también, enrollé los trozos de papel para los tallos.
| |
|---|
Con el silicón caliente, pegué los tallos a las fresas y ubiqué las mismas sobre el pabilo a mi gusto, al igual que las hojas que hice aparte.
Realicé un nudo sencillo en cada extremo del pabilo, para que quedara adecuado al tamaño de mi cabeza, pero que pudiera ser amoldado si llego a usarlo con una peluca. Puedo mencionar que adoré el resultado, así que tengo pensado repetirlo con otras frutas. Procuraré usar éste accesorio solo cuando haya buen clima, pues sería una lástima que se estropeara con la lluvia je je
| |
|---|
Muchas gracias por haber visitado mi publicación. Espero que les haya parecido interesante.
¡Hasta una próxima oportunidad!
The strawberries are so cute🥺... I love it❤
Well done.
Thank you so much. I'm very happy that you liked how the strawberries turned out 😊 You already know how to make them if you dare to make a fun fruit decoration😘💚
Fantastica idea está corona luces genial
¡Muchas gracias! Me alegro de saberlo 😄 Me encantan las decoraciones de frutas y quería colocar frutas variadas en esa corona, pero por los momentos, así quedamos porque tengo que aprender a hacer otras ja ja Gracias por visitar mi publicación y por comentar 💚✨
Amiga que hermosa manualidad 🥰, dedicación y paciencia son esenciales para elaborar estos cosas, y tu tienes esos dones. Siempre encantada de ver el contendió que compartes, saludos ❤️
La verdad, quedé fascinada con el resultado final, en cuanto pude hacer la primera fresa, no pude sacar de mi mente la idea de hacer esa corona 😆 Soy nueva haciendo origami y como tengo las uñas largas, se me hacía un poco complicado algunos pasos, pero fue bastante divertido, sobre todo la parte de pintar las piezas. Me alegro muchísimo que fuese de tu agrado 😊 Muchas gracias por haber visitado mi publicación y por tu lindo comentario 🤗💚
Bonito trabajo mi linda. Gracias por compartir en nuestra comunidad. Suerte en el concurso @suezoe ✨
!DIY
Me alegra mucho que te gustase mi corona de fresas 😘 Muchas gracias por visitar mi publicación, por comentar y por tus buenos deseos 🤗✨
You can query your personal balance by
!DIYSTATSNice work in origami very nice. Thanks for joining the contest in our community. Good luck and lots of success...
Thank you very much 😊 The contests they propose in the community are very dynamic and charming, I am glad to have been able to participate with a piece that I enjoyed making from start to finish. Also thanks for the good wishes 🤗💚
Una trabajo de mucha paciencia con un excelente resultado.
Gracias 😊 ayudó bastante el papel craft, ya que es muy delgado y cedía con facilidad, así que se me hizo muy divertido el proceso 😉 Muchas gracias por visitar mi publicación y por comentar 😉💚
Your origami strawberry crown is just looking like a wow. I like it a lot. I will definitely try to make it. You have laid out each step of your creation process in a very simple manner which is very instructive. Thanks for sharing such a beautiful crown with us.
Brilliant! 😍 I am very glad to have received your opinion on the tutorial. This is the first time I've posted how to make an origami piece, because I'm new to it and I wasn't sure if I could explain it properly, so I tried to make the instructions as painless as possible. I'm relieved to know that I did it 😌 I hope you can make them, they are really very easy and once you make one, you remember the procedure right away 😊 Thank you very much for visiting my post and for commenting 🤗💚
Contáctenos para saber más del proyecto a nuestro servidor de Discord.
Si deseas delegar HP al proyecto: Delegue 5 HP - Delegue 10 HP - Delegue 20 HP - Delegue 30 HP - Delegue 50 HP - Delegue 100 HP.
Muchísimas gracias por haber apoyado mi publicación 💚