Holozing Electric Rabbit Cosplayer
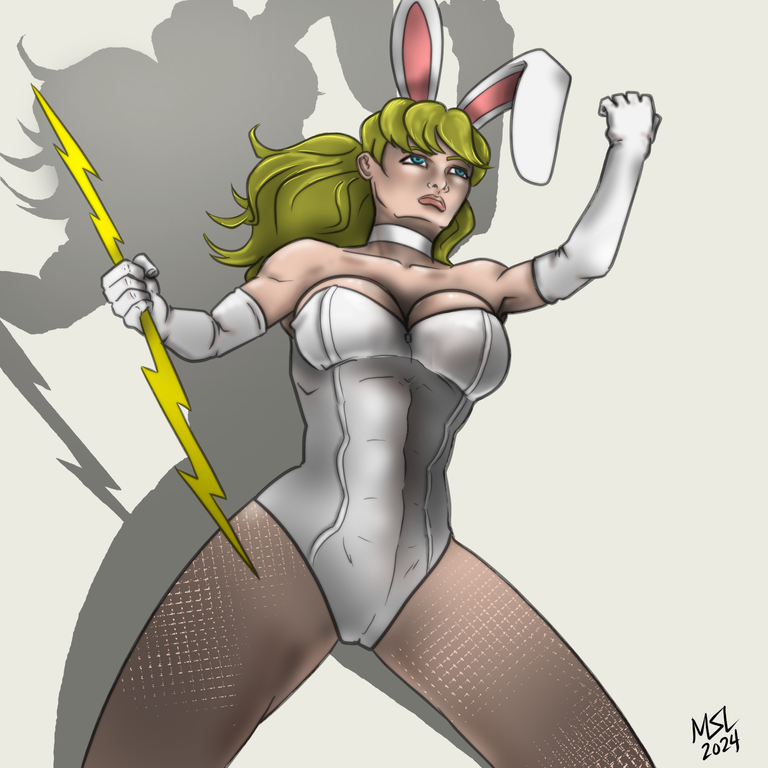
I'll just leave this here to give everyone some ideas for when Holozing has its first tournament/gaming convention. The cosplayers are just waiting for any excuse, am I right?
Created in Clip Studio Paint Pro on a Surface Pro 7+. Here is the timelapse video:
And here is a step-by-step breakdown:
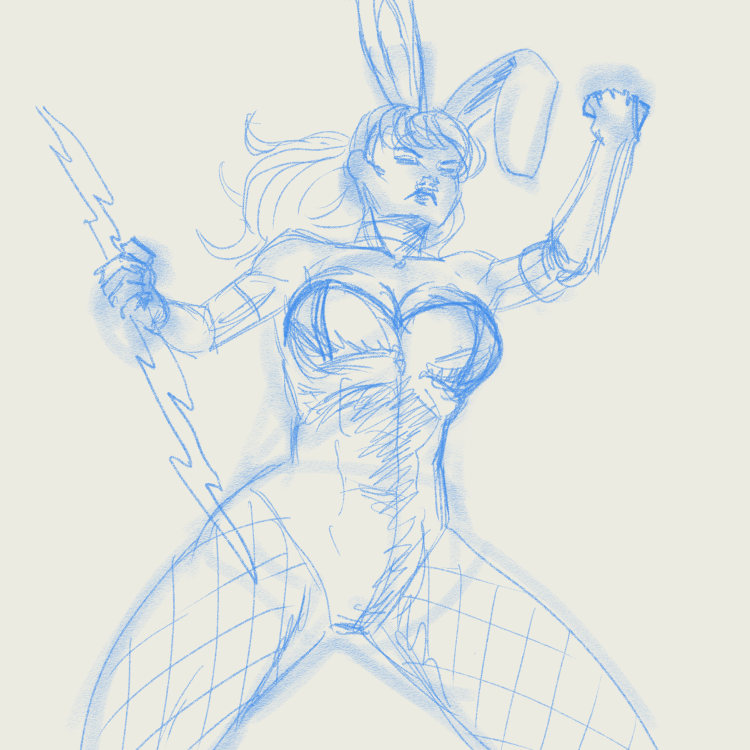
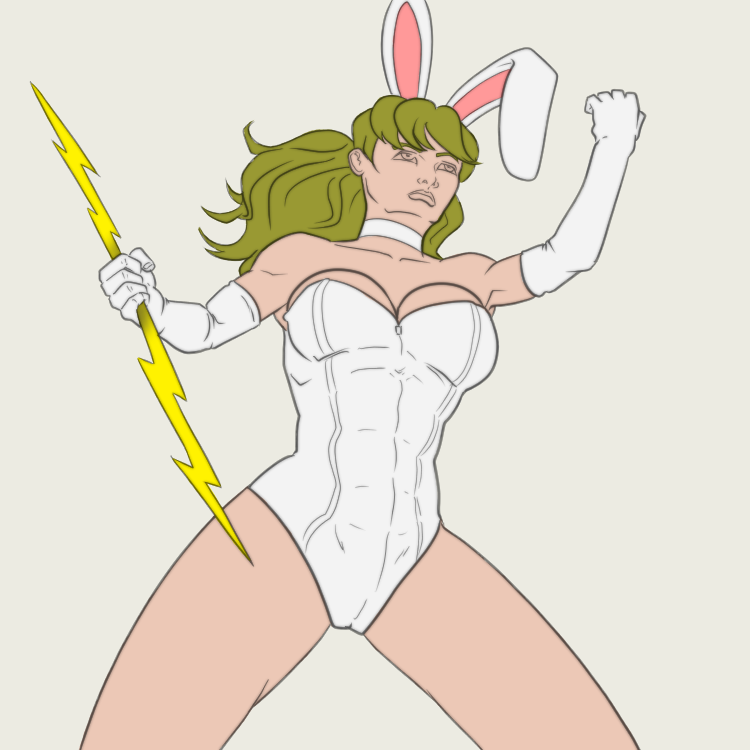
Step 1: Rough Draft
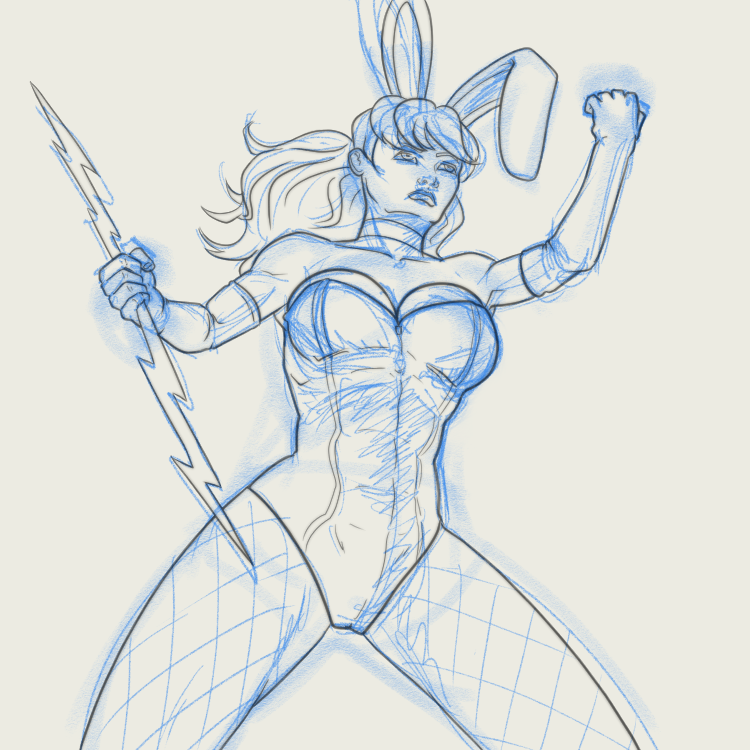
Step 2: Line art layer
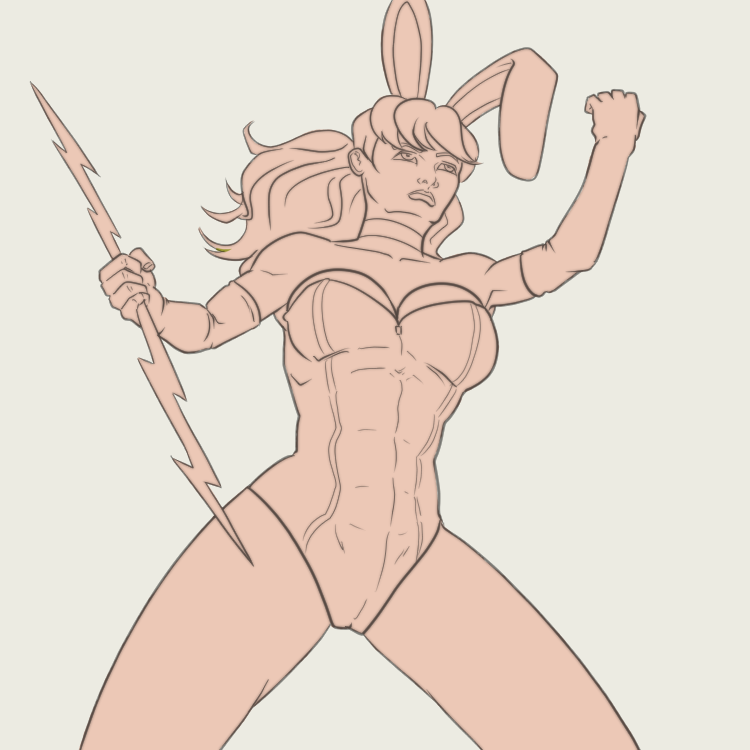
Step 3: Hide the rough layer and create a flat layer of the entire silhouette.
Step 4: Make separate color layers clipped to the main flat layer for hair, fur, lightning, and the pink section of ears.
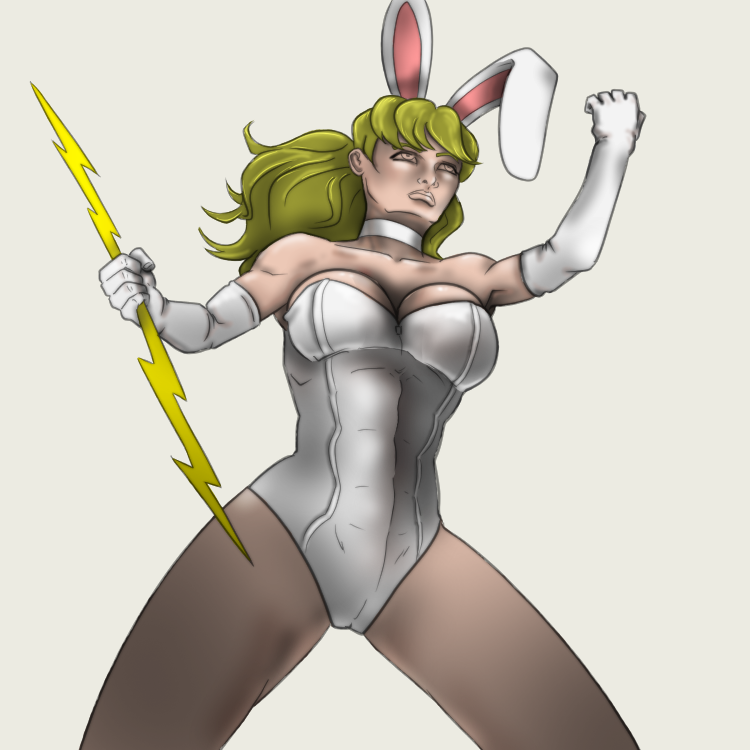
Step 5: Shading. Mostly just black airbrushing on a new multiply layer that is also clipped to the flat layer.

Step 6: A new overlay layer (again, clipped to main flat layer) for reflected light highlights.
Step 7: Background shadow. This is really easy to do and makes the figure much more interesting than just floating in white space for those of us that dislike creating backgrounds. Just duplicate the main flat layer, turn it completely black and reduce the opacity by 50%. Then scooch it over with the free transform tool.
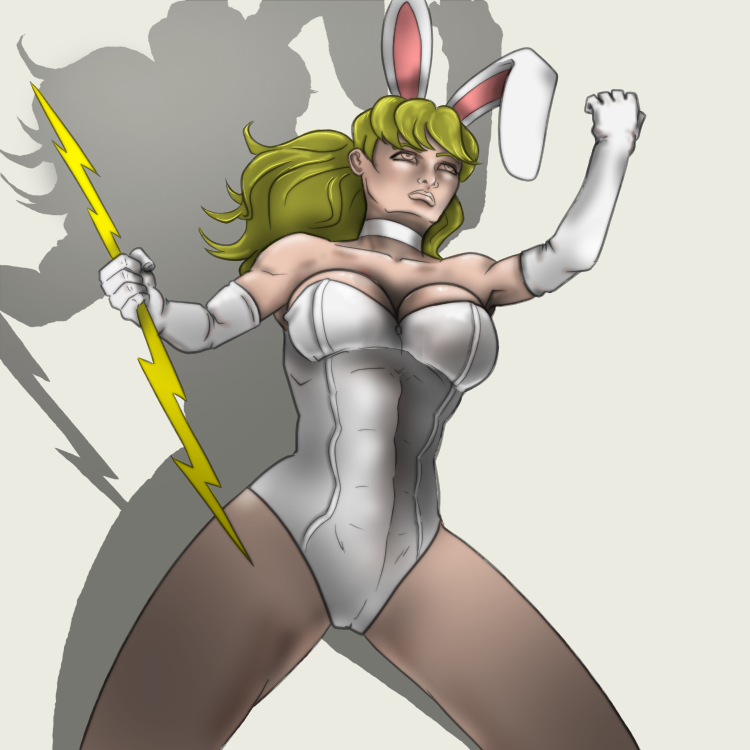
Step 8: Final steps. A detail layer for eyes and lips. Got this idea for making it look like she is wearing nylons when I was playing with the cross-hatching brushes. Selected her legs then using an off-white lightly brushed in that pattern with the "gauze cloud" brush. I think that works. Also, signed my art at the bottom.

Thanks for the step to step process
It looks really good
Great job!
Those bunny girl costumes may get a second life. You know you want to...