Digital Art / Famele Forest Healer & Grass racoon / Holozing Fanart (Eng -Esp)
Two souls in the Forest

English
Greetings Holozing community.
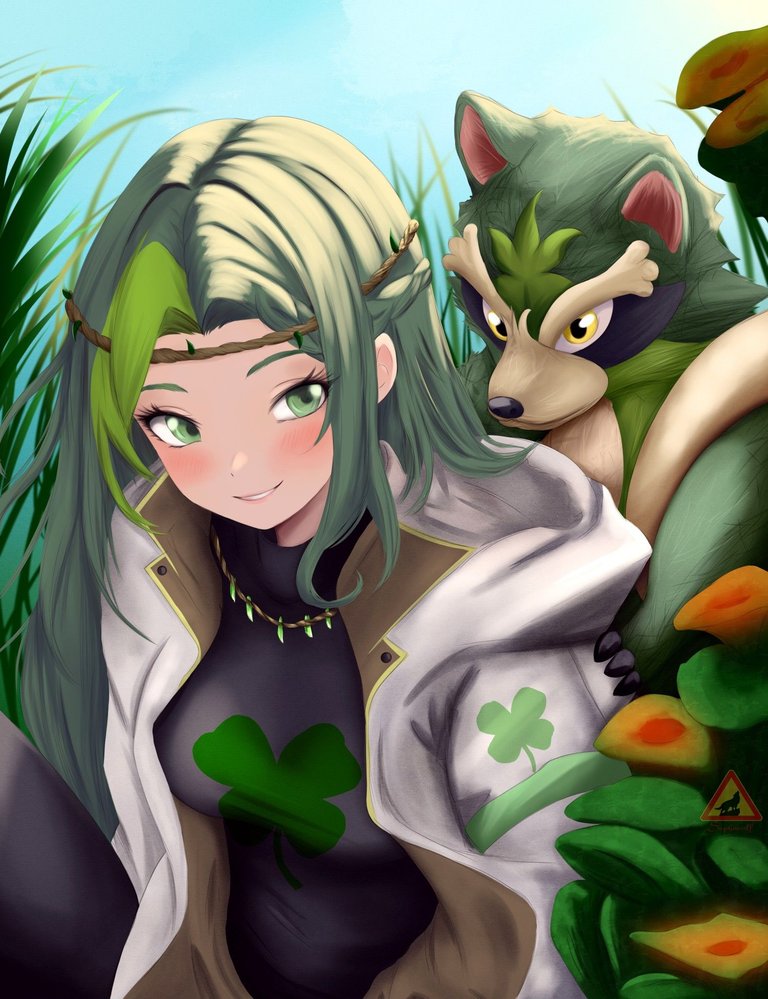
I am glad to be once again with you, Today I want to share with you an illustration of two characters.
I must say that drawing animals is not my forte but I did my best hehe .
As some of you may remember I already drew Forest Healer in another opportunity, I really liked that character and I wanted to draw her again, also adding other details that I didn't put in the first version.
This drawing took me much more time than I thought so I left aside other projects until I finished this one.
I really liked the result even though I'm not used to draw animals hehe.
I hope you like it friends.
Español
Saludos comunidad de Holozing.
Me alegra estar una vez más con ustedes, Hoy quiero compartirles una ilustración de dos personajes.
Debo decir que dibujar animales no es mi fuerte pero hice mi mejor intento jeje .
Como algunos recordaran ya dibuje a Forest Healer en otra oportunidad, realmente me gusto muchísimo ese personaje y quería volver a dibujarla, también agregar otros detalles que no puse en la primera versión.
Este dibujo me llevo mucho más tiempo del que pensé asi que deje de lado otros proyectos hasta terminar este.
Me gusto mucho el resultado a pesar de no estar acostumbrado a dibujar animales jeje
Espero les guste amigos.
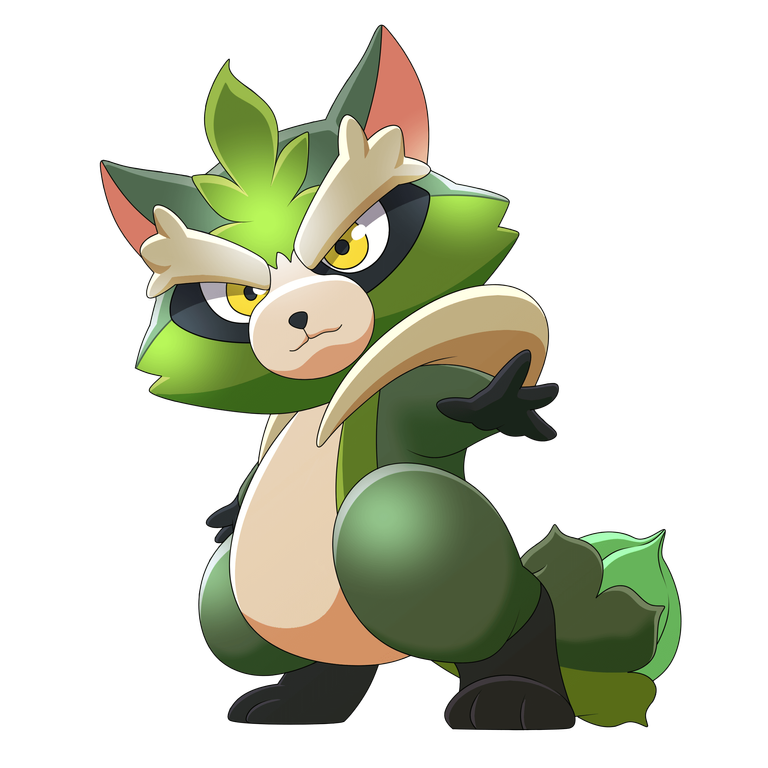
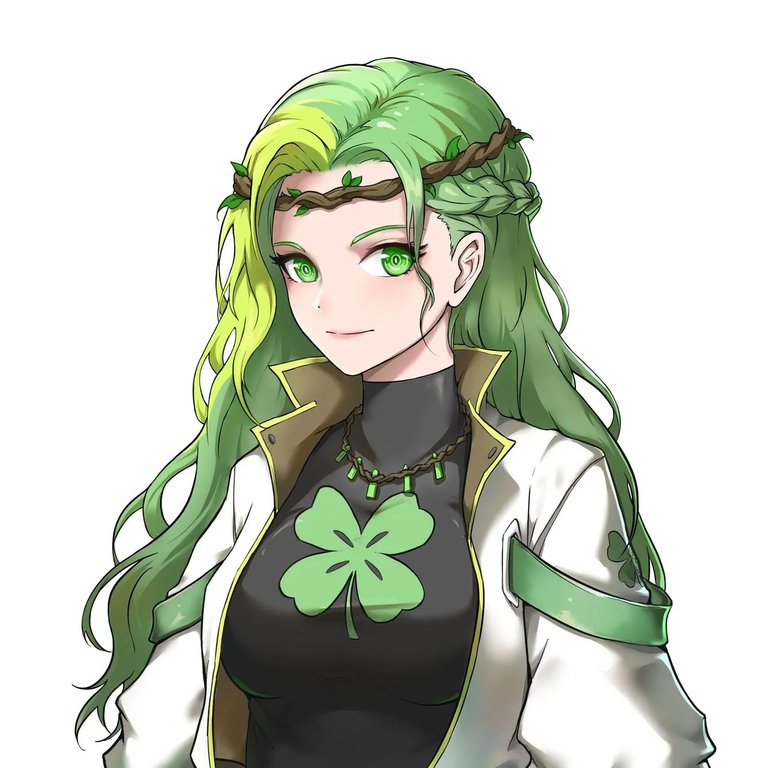
Reference
Process/Proceso
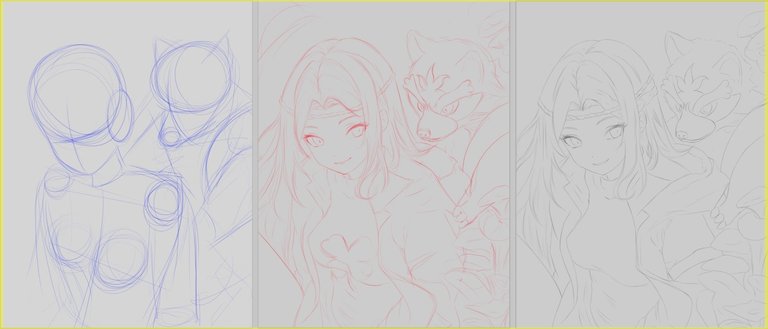
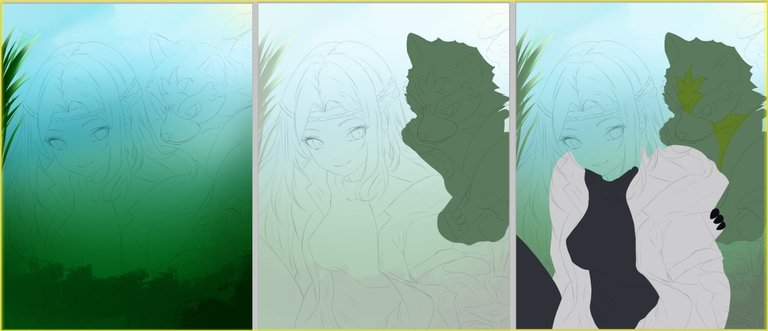
I knew what I wanted to achieve, I just had to find a way to achieve it.
I made the basic shape of the idea I had, for that I used the color blue and a 60% hardness brush the one I usually use in all the sketch.
In a new layer we make the sketch to differentiate I used a red color and the same brush.
With all this ready and corrected it is time to create the lineart, here we change the brush for one of 50% hardness and black color, I like that the lines are a little transparent, since with this they let pass some of the color and look more pleasing to the eye.
Sabía lo que quería lograr, solo debía conseguir una forma de lograrlo.
Hice la forma básica de la idea que tenía, para eso use el color azul y un pincel de dureza 60% el que suelo usar en todo el boceto.
En una nueva capa hacemos el boceto para diferenciar usé un color rojo y el mismo pincel.
Con todo esto listo y corregido es momento de crear el lineart, aqui cambiamos de pincel por uno de dureza 50% y color negro, me gusta que las líneas sean un poco transparente, ya que con esto ellas dejan pasar algo del color y se ven más agradables a la vista.
Before applying the base color on the characters, I thought it was a good idea to leave a basic background in the meantime.
This in order to make the deepest layers first.
We apply the base colors being two characters and the amount of details this step will take a long time if I want it to look good or at least acceptable.
Antes de aplicar el color base en los personajes, pensé que era buena idea dejar un fondo básico mientras.
esto con la finalidad de hacer primero las capas mas profundas.
Aplicamos los colores base al ser dos personajes y la cantidad de detalles, este paso llevará mucho tiempo si quiero que quede bien o al menos aceptable.
After a while...
Finish applying all the base color, in total I used about 15 different layers, in some of them I added textures to give it a better visual effect.
Después de un buen rato...
Termine de aplicar todo el color base, en total use unas 15 capas diferentes, en alguna de ellas agregue texturas para darle un mejor efecto visual.
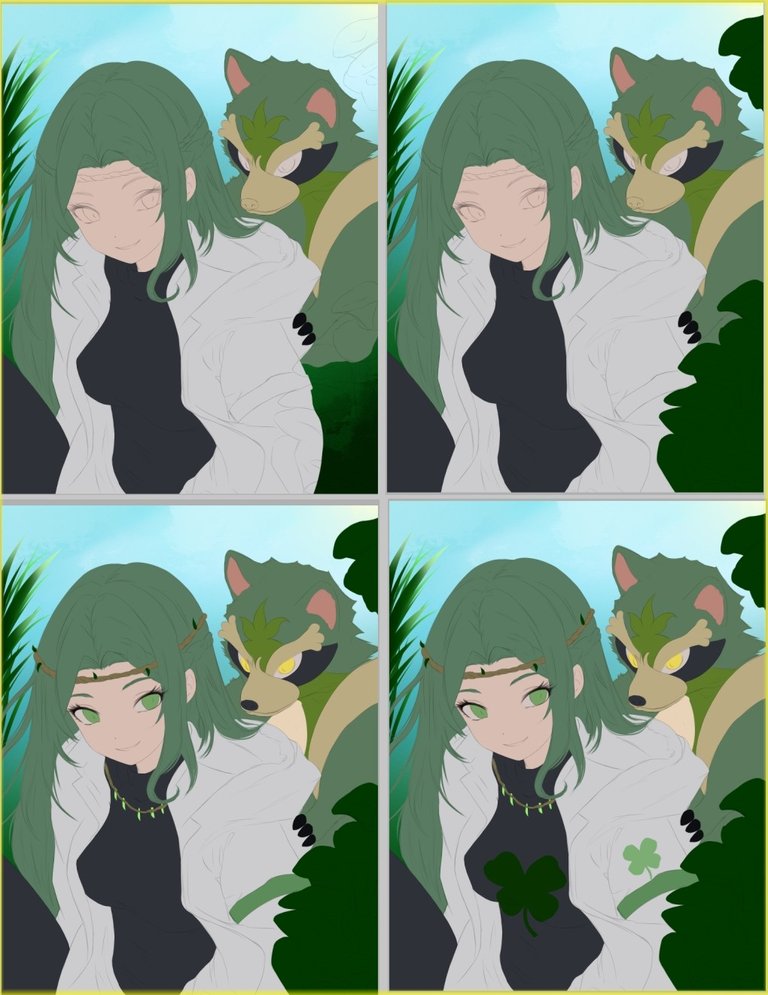
We apply the lights and shadows. We start with the raccoon applying the shadows and then small brush strokes to similar the hair, it is a little late but it is worth the result.
After finishing with the raccoon I continue with the girl, in the same way we go first with the layers of the background, in some areas it is important to leave very strong lights to give good relief.
Another detail that I want to emphasize is that the clover of her arm and her chest are in a layer with multiply effect so I make sure that it integrates better with the clothes.
Aplicamos las luces y sombras. Iniciamos con el mapache aplicando las sombras y luego pequeñas pinceladas para similar el pelo, es un poco tardío pero vale la pena el resultado.
Al terminar en parte con el mapache sigo con la chica, de igual forma vamos primero con las capas del fondo, en algunas zonas es importante dejar luces muy fuertes para darle buen relieve.
otro detalle que quiero resaltar es que el trébol de su brazo y su pecho estan en una capa con efecto multiplicar asi me aseguro que se integre mejor con la ropa.
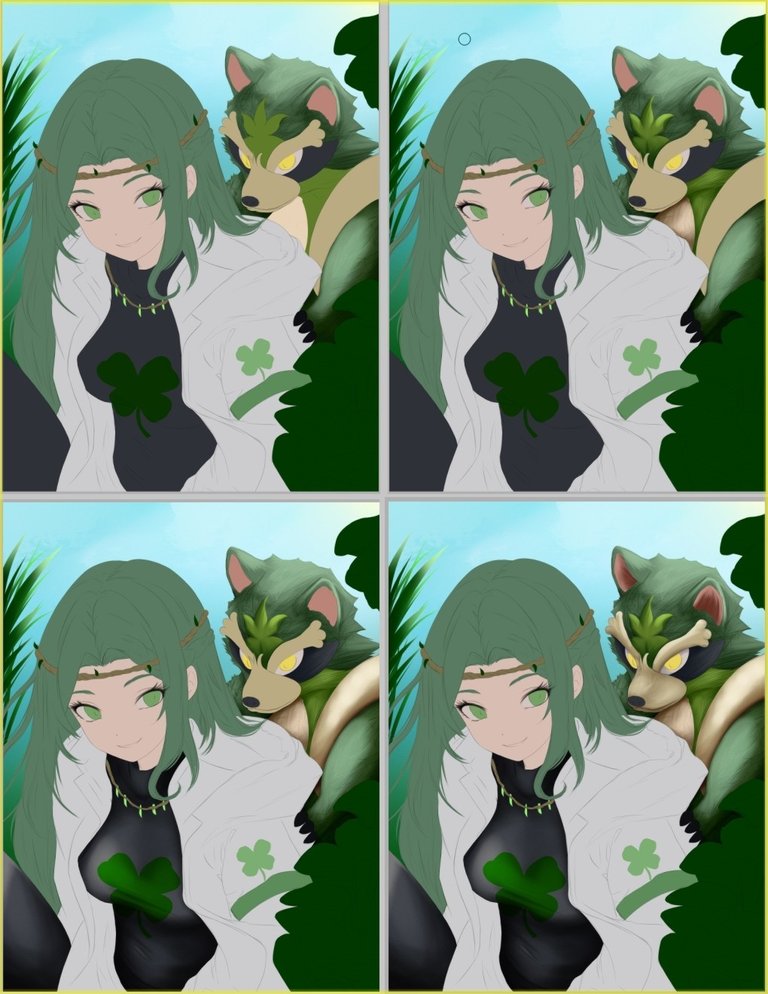
My favorite part was the hair, I spent a special time to get it just the way I wanted it and with strong yellow highlights.
After applying the details to the eyes and accessories, only the plants on the right side are left.
I didn't want to give them so much detail so they wouldn't take so much relevance in the drawing.
Mi parte favorita fue el cabello, dedique un tiempo especial a que este quedara como quería y con luces fuertes un tanto amarillas.
Después de aplicar los detalles a los ojos y accesorios, solo quedan las plantas del lado derecho.
No quise darles tanto detalle para que no tomaran tanta relevancia en el dibujo.
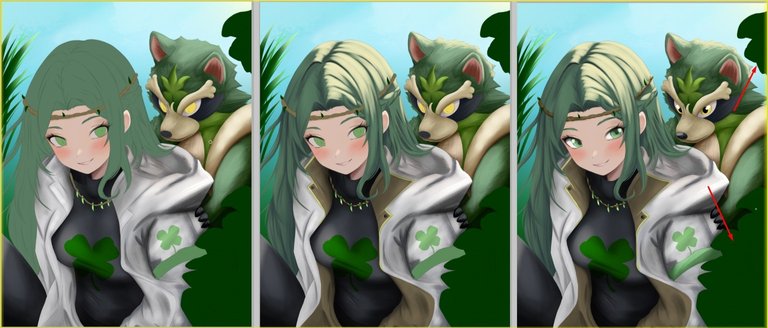
Finally I applied some blurred layers in the grass background, with this I wanted to achieve more depth.
I also made a small correction in the whole color palette to give it a little warmer touch.
Para finalizar aplique unas capas difuminadas en el fondo de hierba, con esto quería lograr más profundidad.
También hice una pequeña corrección en toda la paleta de colores para darle un toque un poquito más cálido.
Friends we are at the end, I want to tell you that my other illustration was in the holozing page, I am very happy to share a place in your page with very talented artists of the community.
See you cowboys!
Oh here I leave you the fanart page:
fanart
join holozing
Amigos llegamos al final, quiero comentarles que mi otra ilustración quedo en la pagina de holozing estoy muy feliz de compartir un lugar en su página junto a muy talentosos artistas de la comunidad.
Nos vemos vaqueros!
Oh aqui les dejo la pagina de fanarts:
fanart
Unete a Holozing
Tools:
- PaintTool SAI 2
- Inspiroy H640 Pen Tablets
- Corel photo paint x3
Dedicated to the memory of Akira Toriyama 1955-2024. Thank you for everything.
Dedicado a la memoria de Akira Toriyama 1955-2024. Gracias por todo.

Dedicado a la memoria de Akira Toriyama 1955-2024. Gracias por todo.
Did Master Akira Died ?? 😞 that was really sad..
Your art was cool Bro..
!PIZZA
I was writing my post when I heard the unfortunate news. :(
I know Akira Toriyama since I was learned how to read alphabet when the credits of dragon balls ending shown in TV, he is a like a hero of my childhood..
$PIZZA slices delivered:
@eustace-kidd(2/5) tipped @sephiwolf
Muy bonito excelente trabajo 👏😊
I love the expression on her face. It looks like they are ready to pounce at someone haha.
amazing as always bro, just heard the news today as well. All Akira fans are sad today
Tremendo trabajo mi brou, me gusto mucho la armonía entre los tonos verdes, sencillamente genial 💪🏽✌🏽
!MEME !GIF !WEED !LUV
@bpcvoter1, sorry! You need more $LUV to use this command.
The minimum requirement is 10.0 LUV balance.
More $LUV is available from Hive-Engine or Tribaldex
Credit: atheistrepublic
Earn Crypto for your Memes @ HiveMe.me!
Demons! this illustration is incredibly beautiful
Demons! this illustration is incredibly beautiful
Holo! We've chosen your wonderful artwork to be viewed on holozing.com/fanart, please let us know if you'd like it removed from there for any reason. Thank you!