Digital Art / Electric Rabbit Healer / Holozing Fanart (Eng -Esp)
Oh! look at a little lightning

English
Greetings holozing friends!
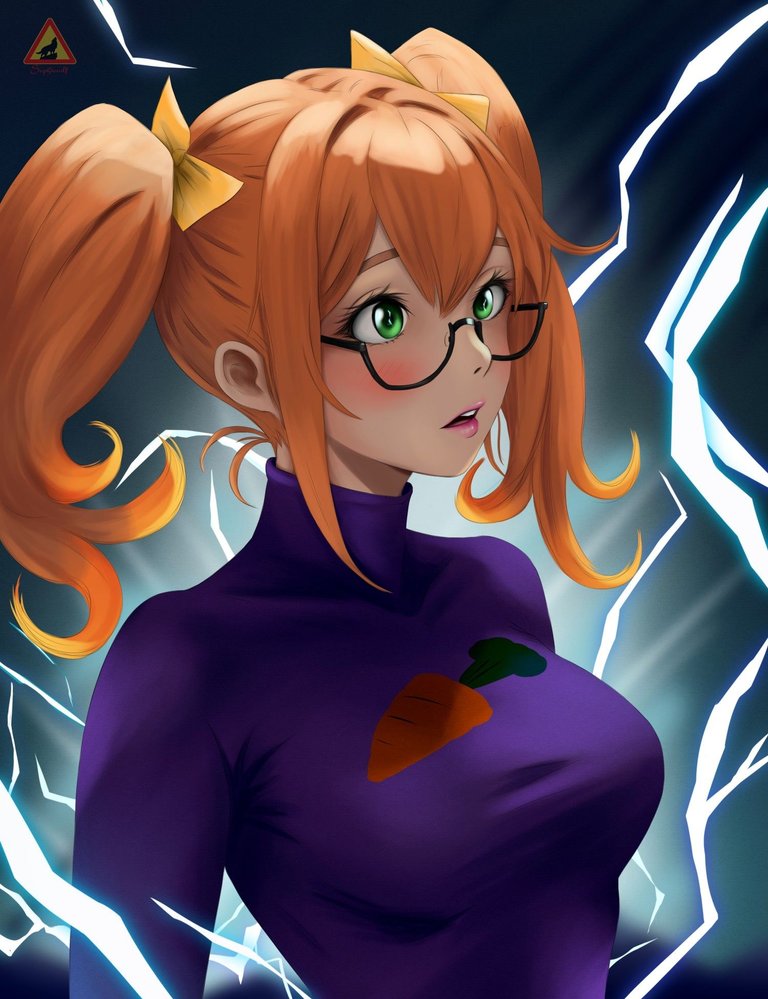
I hope you are very well, I want to share with you a Healer, inspired by the character Electric Rabbit.
To create this character I had several very good ideas which I tried to represent in an illustration.
Looking at the Electric Rabbit character I imagine that a human version of this would be a girl with glasses, orange hair, and obviously big teeth.
Also as the name says “electric” I looked for a way to represent that in my drawing along with a surprised expression.
Another detail that I want to highlight is that the character Electric Rabbit has a pink nose, I represented this in the color of the lips.
well friends the truth has many hidden details the final result I liked a lot.
Español
Saludos amigos de holozing!
Espero estén muy bien, Quiero compartir con ustedes un Healer, inspirado en el personaje Electric Rabbit.
Para crear este personaje tuve varias ideas muy buenas las cuales trate de representar en una ilustración.
Al ver el personaje Electric Rabbit imagino que una versión humana de este seria una chica con lentes, cabello naranja, y obviamente dientes grandes.
Tambien como su nombre dice "electric" busque una forma de representar eso en mi dibujo junto a una expresión de sorpresa.
otro detalle que quiero resaltar es que el personaje Electric Rabbit tiene su nariz de un tono rosado, esto lo represente en el color de los labios.
bueno amigos la verdad tiene muchos detalles ocultos el resultado final me gusto muchísimo.
Reference
Electric Rabbit

Process/Proceso
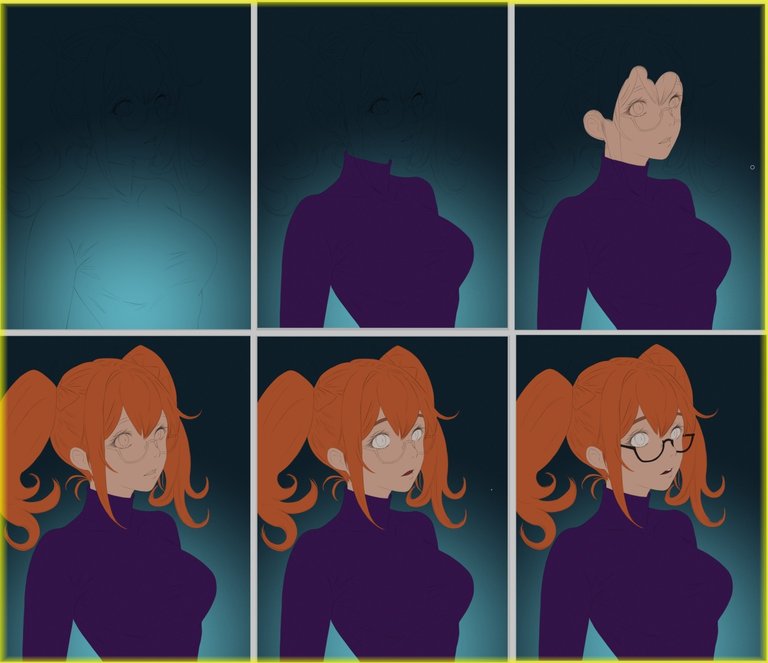
We start the sketch design with a basic shape in blue.
After that we create the sketch in red color.
Here I want to make a small parenthesis to tell you an interesting fact, I always show the sketch already ready but to get to this I discard many ideas and I also make many modifications, as you can see before finishing this sketch I decided to change it at the last minute.
Once the sketch is ready it's time to create the lineart, for this we use a black color, thin lines and 50% transparency.
Iniciamos el diseño del boceto con una forma básica en color azul.
Seguido de esto creamos el boceto en color rojo.
aqui quiero hacer un pequeño paréntesis para contarles un dato interesante, siempre muestro el boceto ya listo pero para llegar a esto descarto muchas ideas y también hago muchísimas modificaciones, como pueden ver antes de terminar este boceto decidí cambiarlo a ultima hora.
Una vez listo el boceto es momento de crear el lineart, para esto usamos un color negro lineas delgadas y transparencia del 50%.

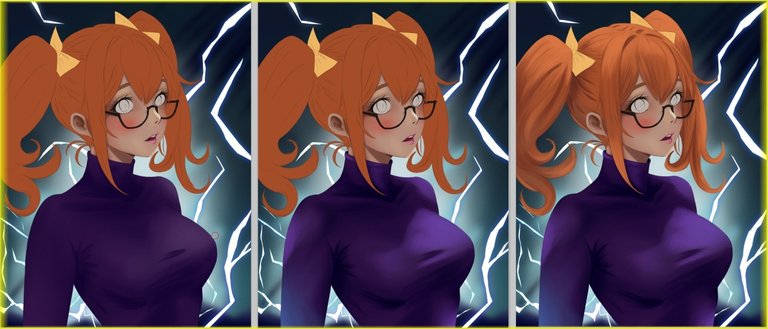
We add the base color, at this point we will keep in mind the colors of the original character.
Orange hair, purple clothes, green eyes and other details.
this step is important and requires time
Agregamos el color base, en este punto tendremos presente los colores del personaje original.
El cabello naranja, la ropa de un tono purpura, ojos verdes entre otros detalles.
Este paso es importante y requiere su tiempo.
Once the base color is ready, we add details to the background, a little bit blurred.
After this it is time to add lights and rays.
For the rays we need 2 different layers, the back layer in a blue color and then blurred, with this we achieve a white center and edges in blue tones.
Una vez listo el color base, agregamos detalles al fondo, un poco difuminados.
Seguido de esto es momento de agregar luces y rayos.
Para los rayos necesitamos 2 capas diferentes la capa de atrás en un color azul para luego difuminar, con esto logramos un centro blanco y bordes en tonos azul.
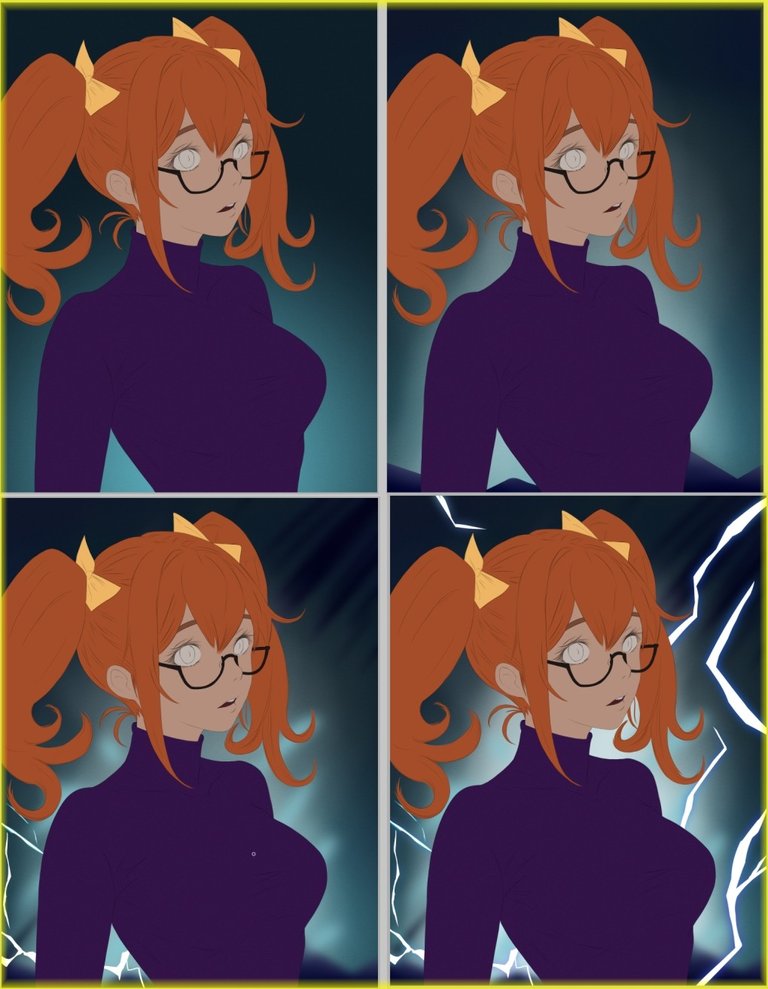
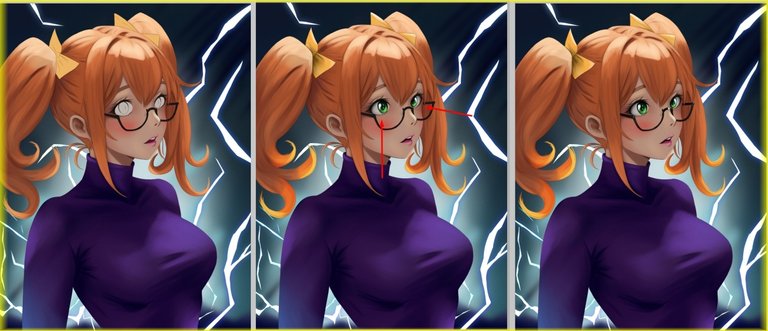
For the skin we start with soft shadows in reddish tones, in this step we also add details on her lips and cheeks.
as a final step for the skin we add highlights and much stronger shadows.
Para la piel iniciamos con sombras suaves en tonos rojizos, en este paso tambien agregamos detalles en sus labios y mejillas.
Como paso final para la piel agregamos luces y sombras mucho mas fuertes.
Before embossing the clothes we apply texture, with the fabric effect it looks very nice.
Now we can emboss the clothes, we start with soft shadows and increase the hardness and darkness of the colors.
To finish we add highlights and lights.
Antes de darle relieve a la ropa aplicamos textura, con el efecto de tela queda muy bien.
Ahora podemos dar relieve a la ropa, iniciamos con sombras suaves y aumentamos la dureza y oscuridad de los colores.
para finalizar agregamos brillos y luces.
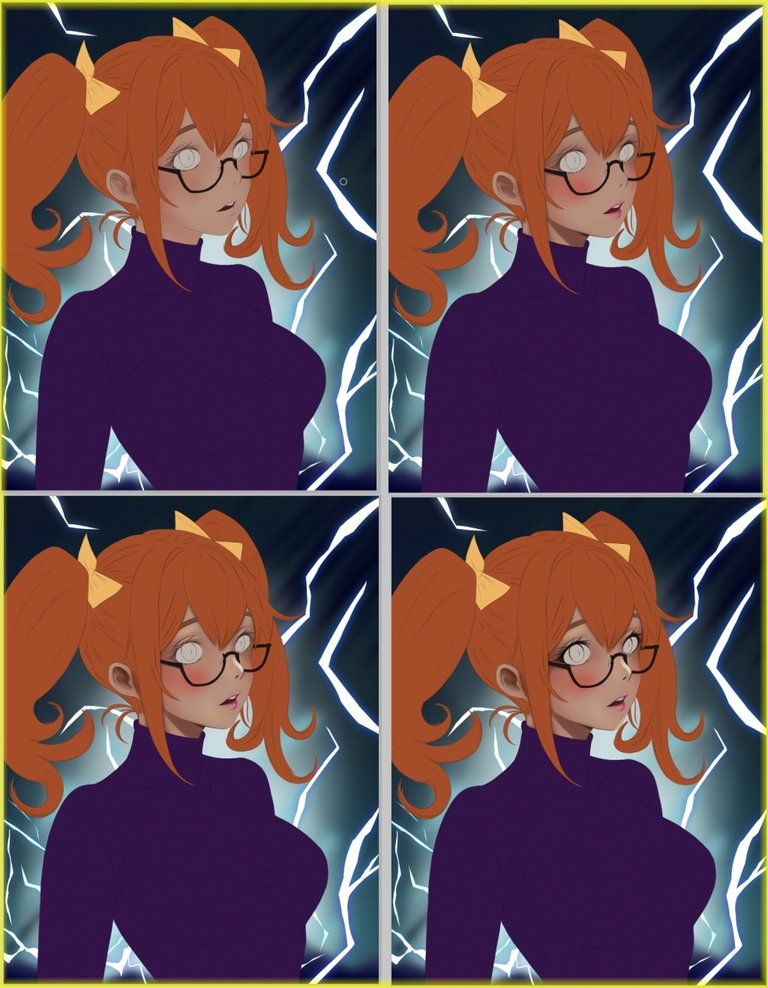
The eyes are the most important part of the drawing because with this we connect with the character.
Here I made a correction in the eyes, I felt they looked strange, I was looking for an expression of astonishment or surprise.
Los ojos son la parte mas importante del dibujo pues con esto conectamos con el personaje.
Aquí hice una corrección en los ojos sentía que se veían raros, estaba buscando darle una expresión de asombro o sorpresa.
To finish we add a pair of rays in front, using the same method as the previous ones.
And one more detail I felt that the clothes looked a bit simple so I added a drawing of a carrot so that it would integrate better with the multiply effect.
Para finalizar Agregamos un par de rayos en frente, usamos el mismo método que los anteriores.
Y otro detalle mas sentía que la ropa se veía un tanto simple asi que le agregue un dibujo de una zanahoria para que este se integrara mejor aplique el efecto multiplicar.
Friends we reached the end I hope you liked it, I liked this Healer a lot and I hope you did too.
I hope to be with you once again.
See you cowboys!
Amigos llegamos al final espero les haya gustado, este Healer me gusto mucho y espero que a ustedes tambien.
Espero estar una vez mas con ustedes.
Nos vemos vaqueros!
Tools:
- PaintTool SAI 2
- Inspiroy H640 Pen Tablets
- Corel photo paint x3
- https://www.deepl.com/translator

the shadins are crazy good men!
!WEED
Amazing!!!😻
Perfect!
Congratulations @sephiwolf! You have completed the following achievement on the Hive blockchain And have been rewarded with New badge(s)
Your next target is to reach 60000 upvotes.
You can view your badges on your board and compare yourself to others in the Ranking
If you no longer want to receive notifications, reply to this comment with the word
STOPCheck out our last posts:
Our Rep is low due to wrongful #Downvotes
USE #BILPCOIIN OR #BPC TO EARN BPC TOKENS
Via Tenor
Credit: filosof103
Earn Crypto for your Memes @ HiveMe.me!
lolztoken.com
ERROR: Joke failed.
@bpcvoter1, You need more $LOLZ to use this command. The minimum requirement is 0.0 LOLZ.
You can get more $LOLZ on HE.