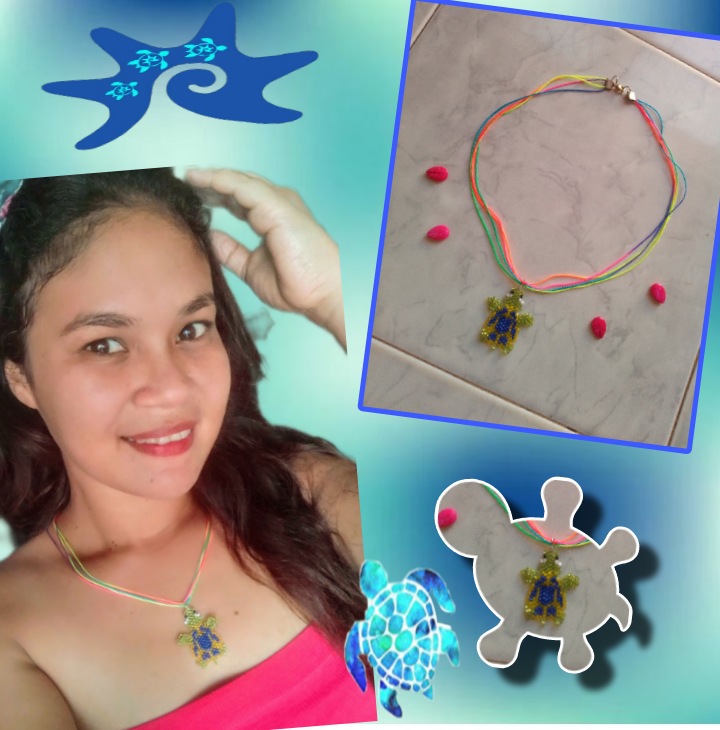
🌊🏖️Beach Contest: Colorful turtle pendant necklace.//Colorido collar con colgante de tortuga.🐢
(Edited)
Hermosa tarde tengan todos mis queridos amigos creadores de joyas, espero este muy muy bien y en gran bendición, es muy grato después de mucho tiempo saludarlos y retomar este hermoso arte, hoy con un motivo muy especial que es unirme al concurso de esta bonita comunidad, donde nos invitan a crear un accesorio playero.
Más información Aquí
Beautiful afternoon, all my dear jewelry-creating friends, I hope you are very well and blessed, it is very pleasant after a long time to greet you and return to this beautiful art, today, with a reason very special, which is joining the contest of this beautiful community, where they invite us to create a beach accessory.
More information Here
El mar para mí, es mi lugar favorito y siento una gran admiración todo lo que tenga que ver con él, me encanta el color y la paz que trasmite estar allí; cierro los ojos, y por momentos siento que estoy observando un precioso atardecer... Es por esto que los accesorios de playa en su gran variedad, no pasan desapercibidos, yo los encuentro a todos hermosos e impresionantes, así como el mar....
The sea for me is my favorite place and I feel great admiration for everything that has to do with it, I love the color and the peace that being there conveys, I close my eyes, and At times, I feel like I'm watching a beautiful sunset... This is why beach accessories in their great variety do not go unnoticed, I find them all beautiful and impressive, just like the sea...
No es la primera vez que hago un accesorio de playa, antes solía comprar a los vendedores que se encuentran en las orillas, solo para desarmarlos y volverlos a hacer, con el fin de aprender; pero si es la primera vez que realizo una figura con mostacillas utilizando la tecnica “Puntada de ladrillo”, técnica que antes imaginaba súper difícil y complicada, a decir verdad, no entendía para nada. Pero como dicen, no hay nada que con un poco de práctica y paciencia no pueda lograrse, así que me animé a realizar mi primera figura para mostrarles que si yo puedo, ustedes también pueden.
It is not the first time that I make a beach accessory, before I used to buy from the sellers who are on the shores, only to disassemble them and remake them, in order to learn; But it is the first time that I make a figure with beads using the “Brick Stitch” technique, a technique that I previously imagined was super difficult and complicated, to tell the truth, I did not understand at all. But as they say, there is nothing that with a little practice and patience cannot be achieved, so I decided to make my first figure to show you that if I can do it, you can too.
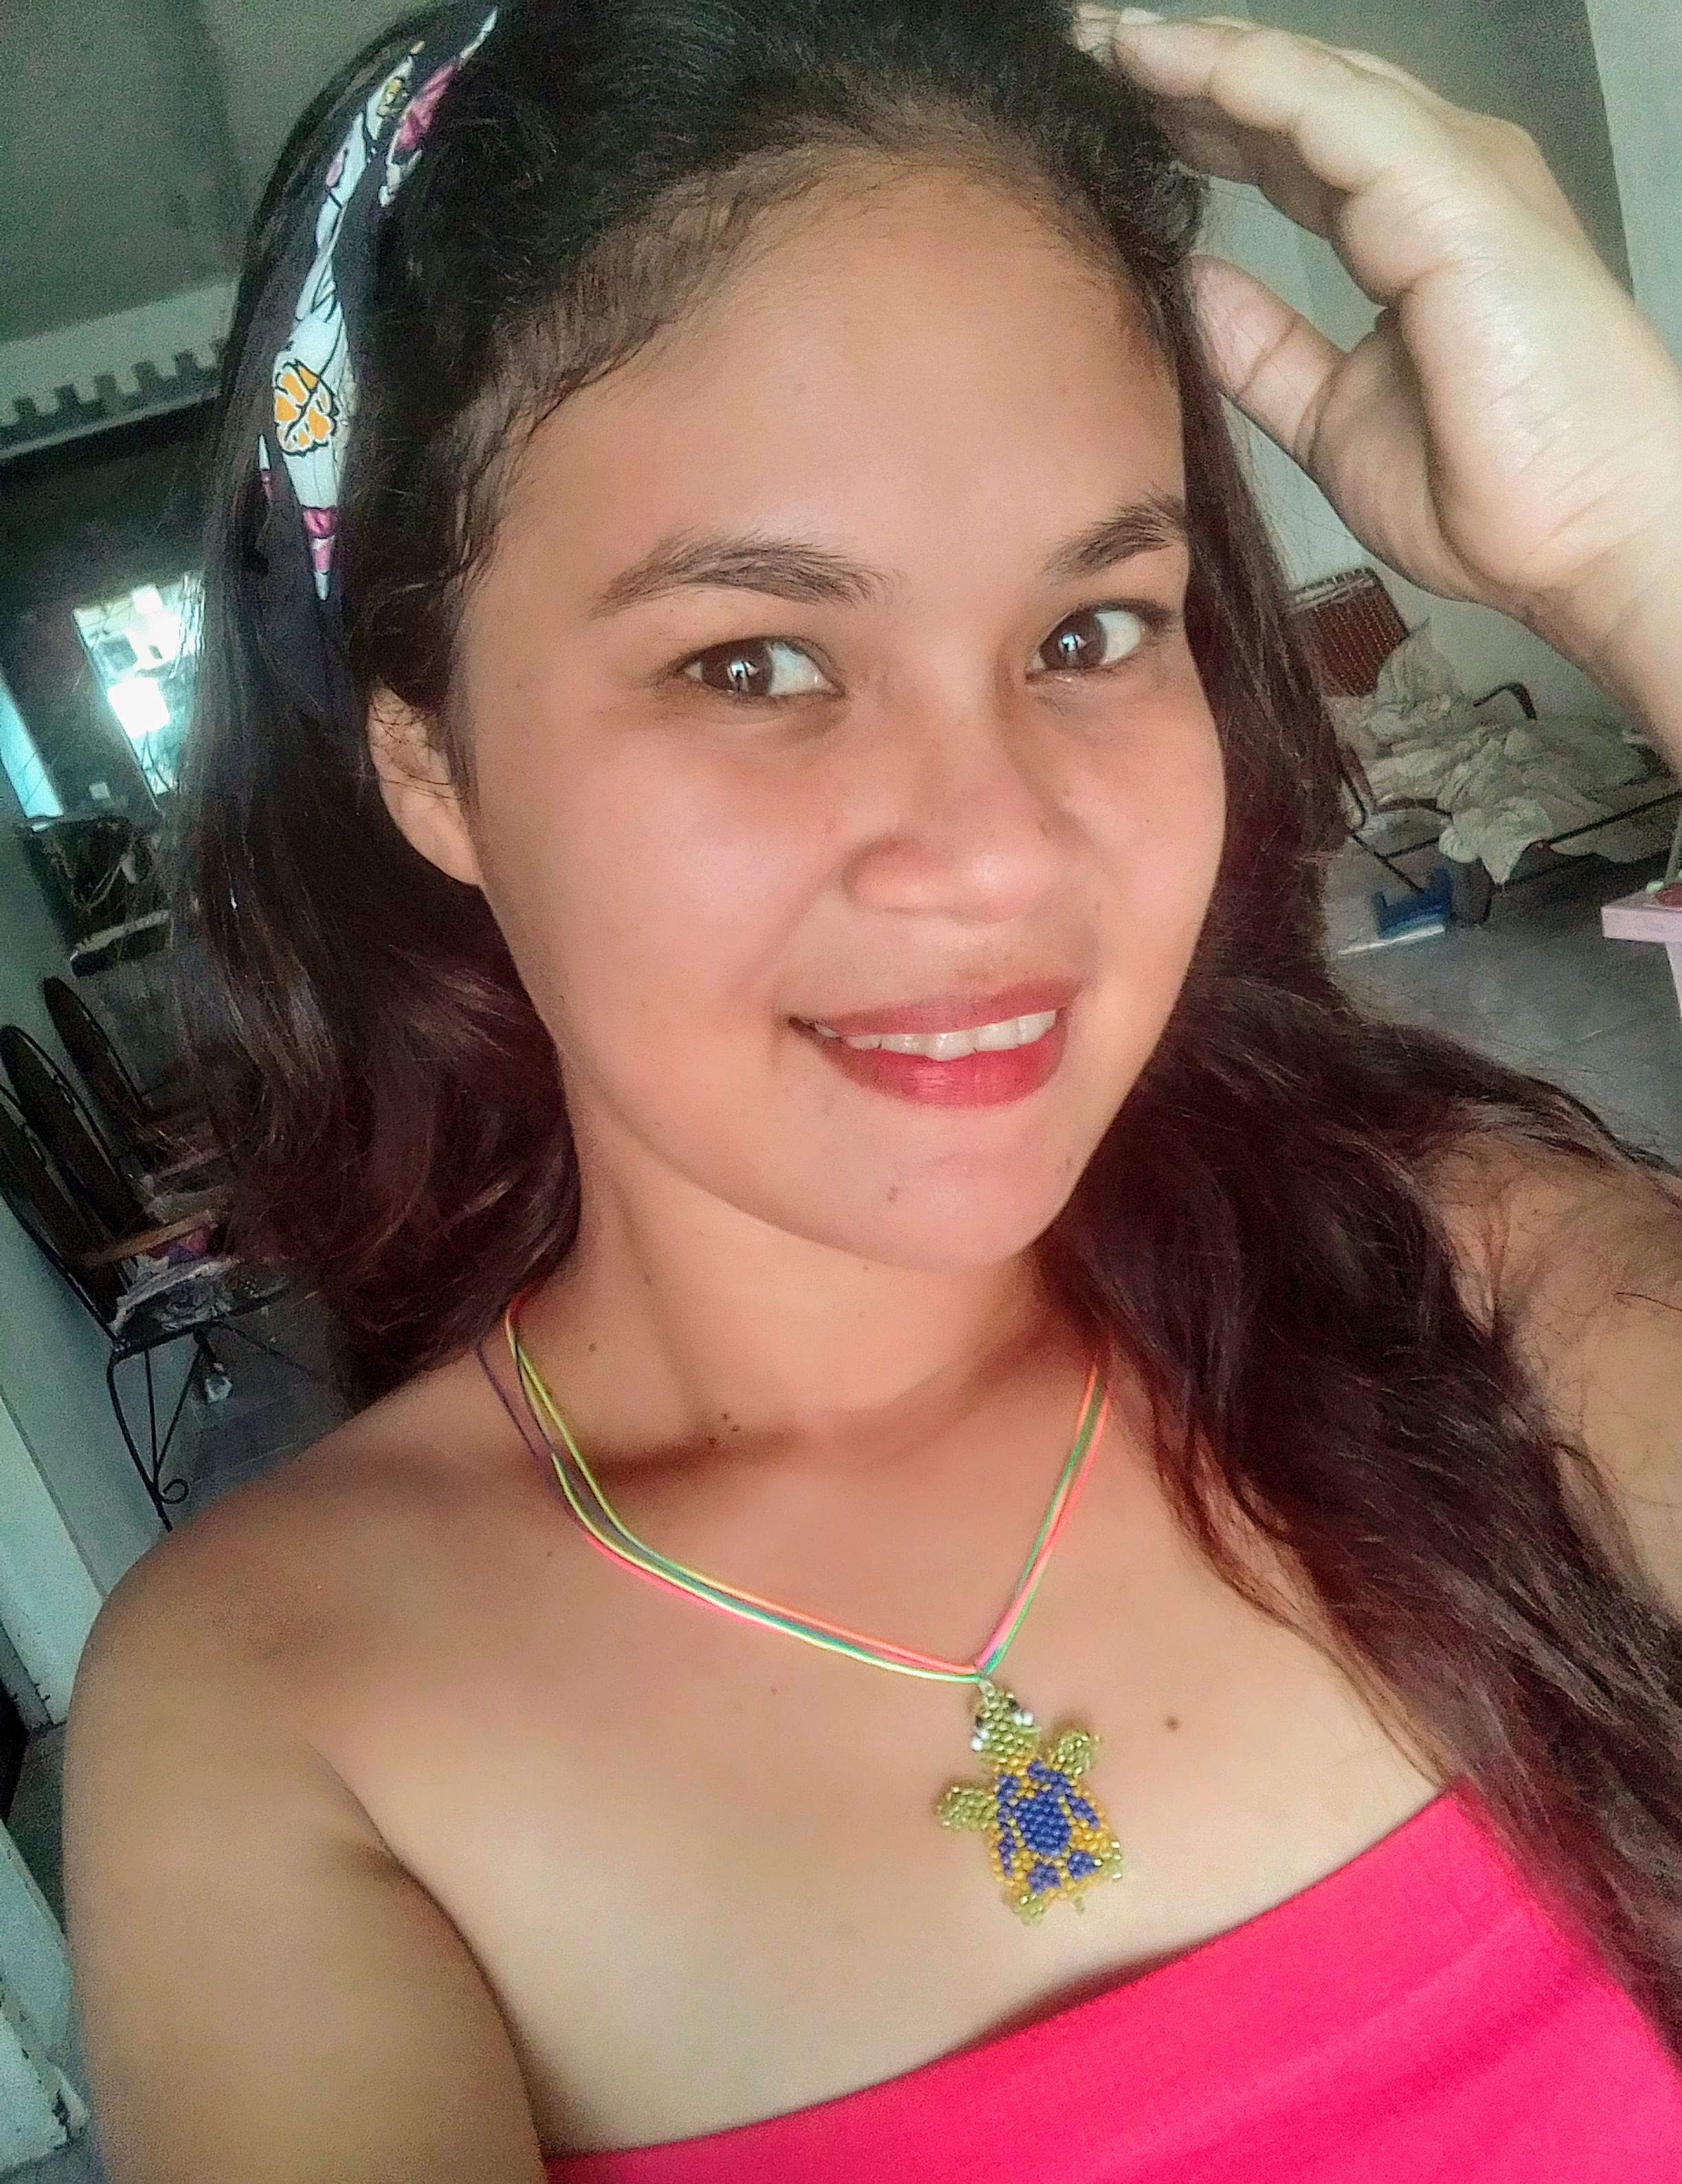
Al principio no estaba segura que hacer, quería hacer una pulsera con estrellas marinad, una cola de sirena, un llavero de delfín y es que como decidir por uno solo, si el mar está lleno de tantas cosas hermosas, que podemos llevarlas a la creación de un bellos accesorios. Al final decidí hacer bonito y colorido collar acompañado de un atractivo dije de tortuguita, muy cómodo que se ve hermoso y muy tierno, y puede resultar ideal para complementar un vestido en un día de playa. Te invito a ver cada paso de este tutorial y aprender como puedes realizarlo.
At first I wasn't sure what to do, I wanted to make a bracelet with marine stars, a mermaid tail, a dolphin keychain and how can I decide on just one, if the sea is full of so many beautiful things, that we can take them to the creation of beautiful accessories. In the end I decided to make a nice and colorful necklace accompanied by an attractive little turtle pendant, very comfortable that looks beautiful and very cute, and can be ideal to complement a dress on a day at the beach. I invite you to see each step of this tutorial and learn how you can do it.
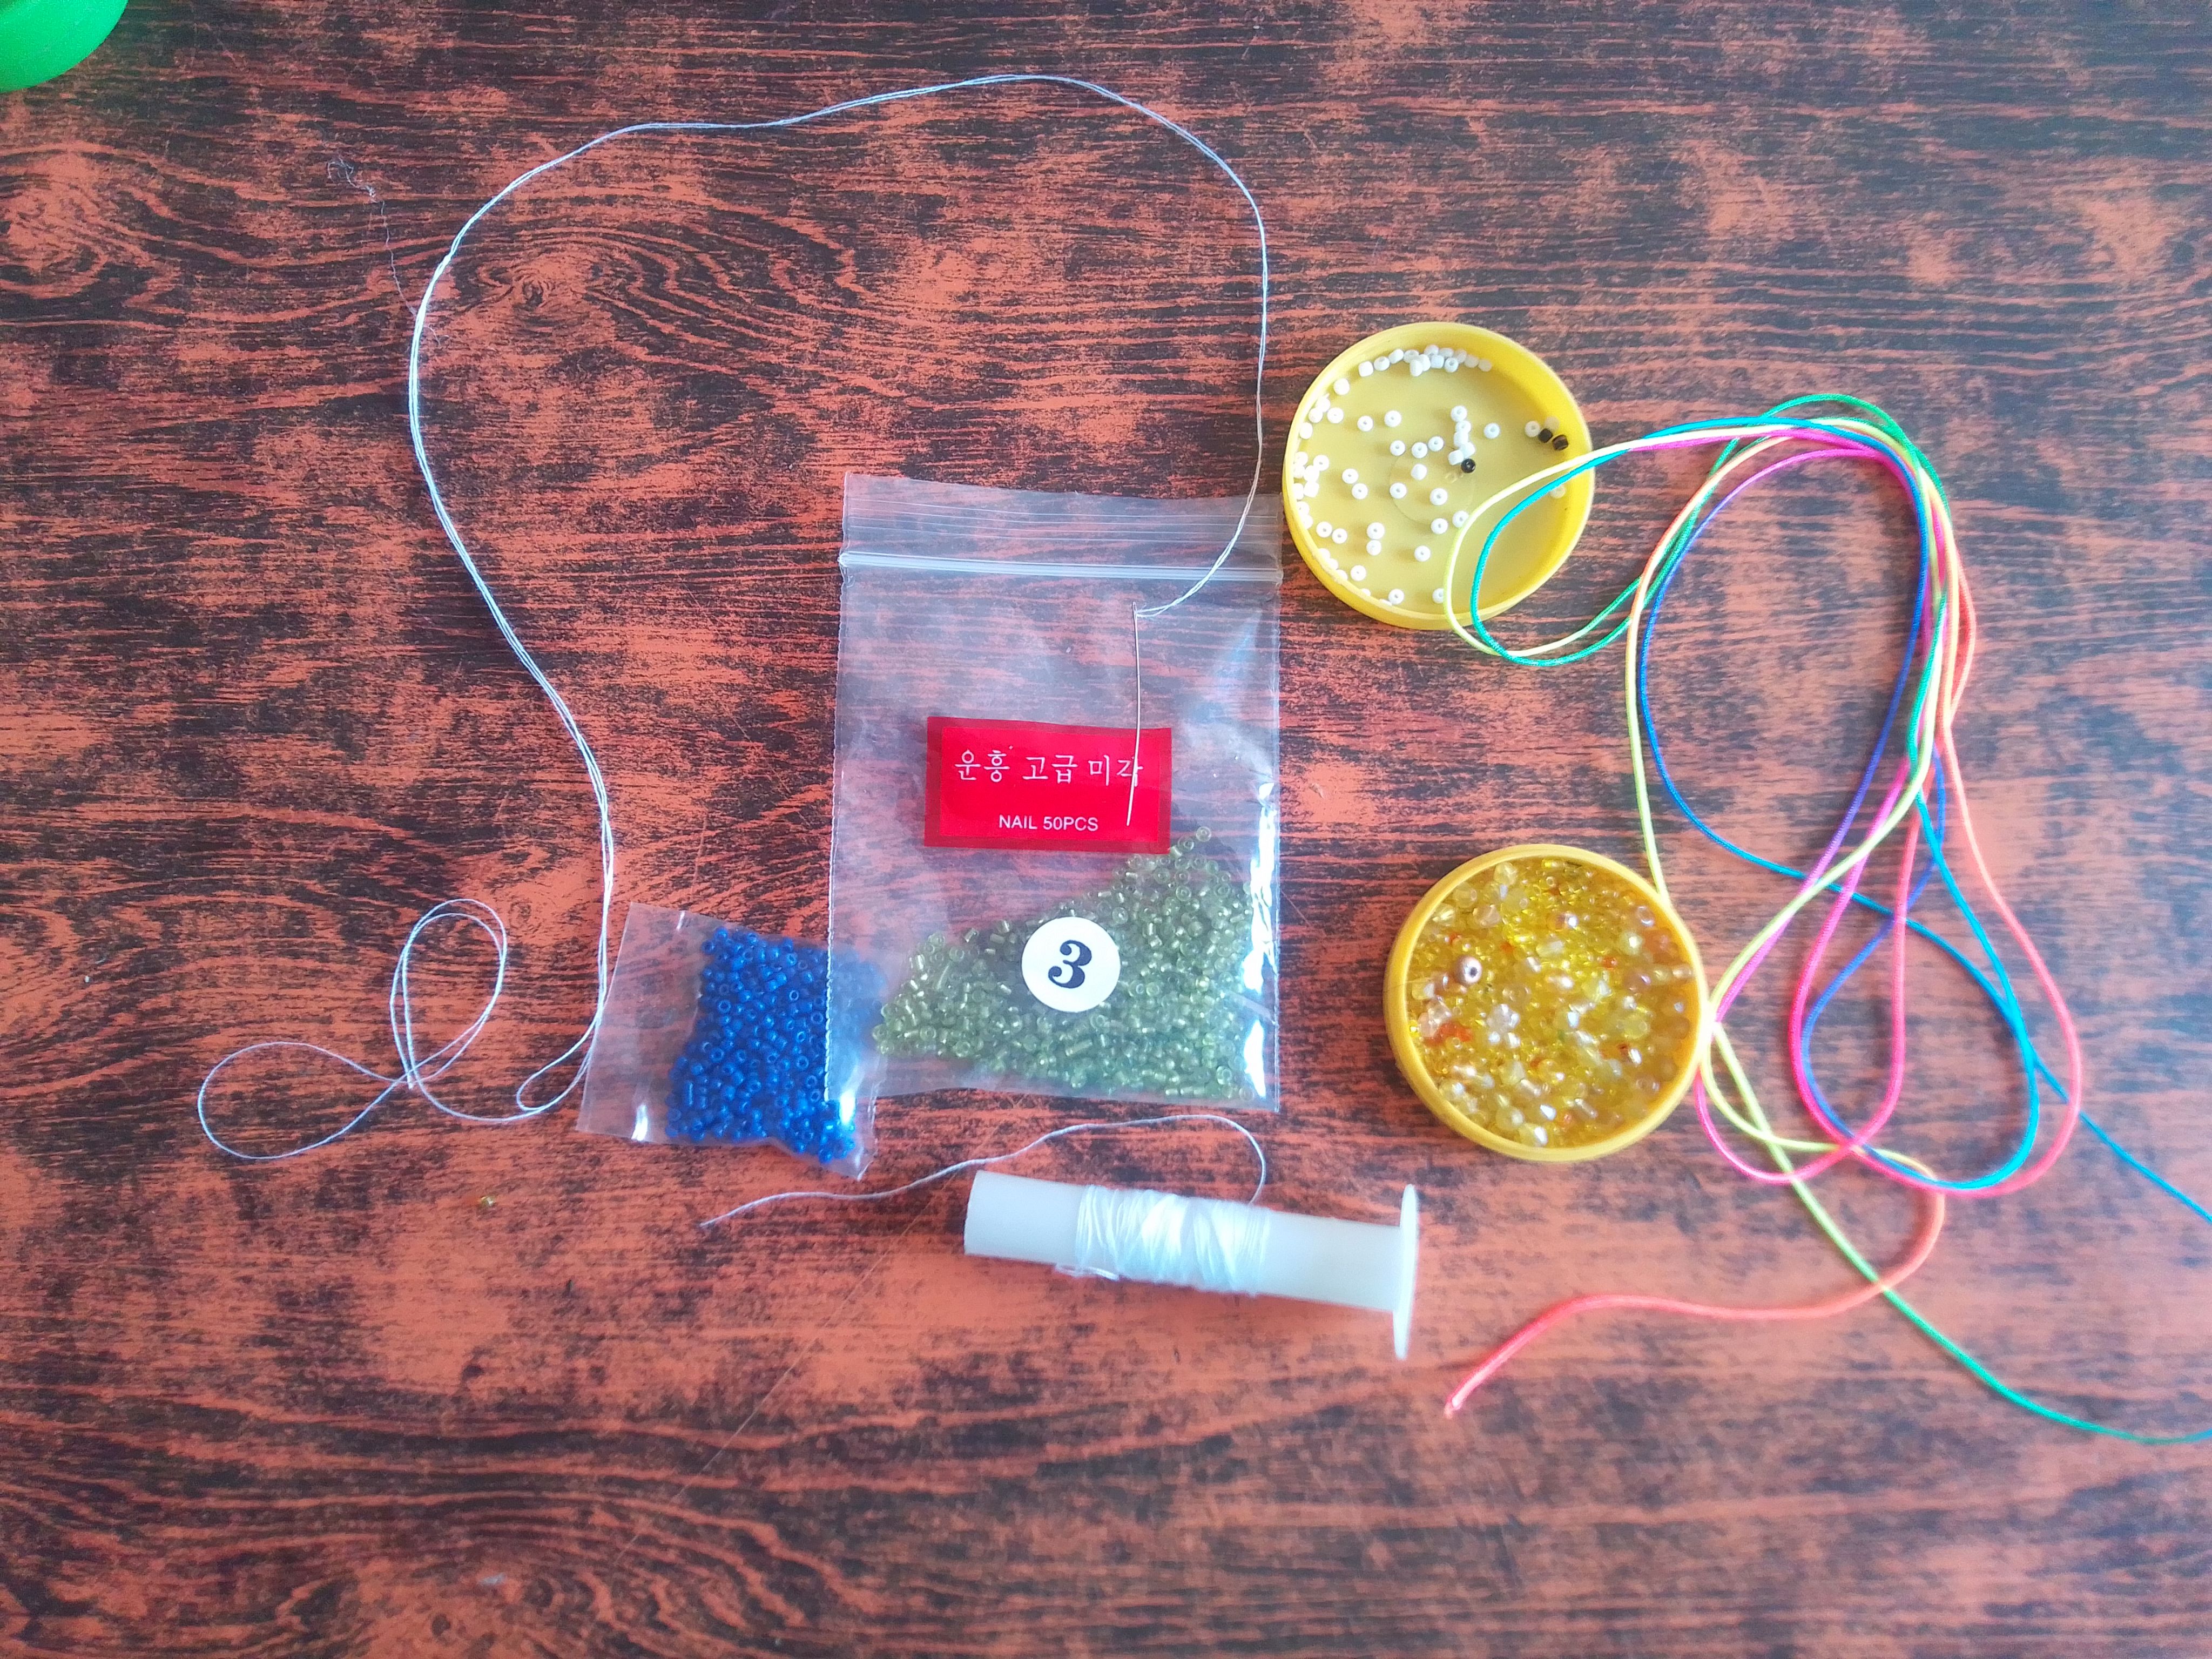
Materiales que necesitas:
Para esta linda creación necesitas, mostacillas del color de tu preferencia, hilo de coser o nylon fino, una aguja fina, hilo chino arcoiris, argollas pequeñas, sujetadores de pinzas, además del patrón de tortuguita que te facilitará contar y llevar una creación más prolija.
For this beautiful creation you need beads of the color of your choice, sewing thread or fine nylon, a fine needle, Chinese rainbow thread, small rings, clamp fasteners, in addition to the turtle pattern that will make it easier for you to count and carry a neater creation. .
(PROCEDIMIENTO)
Paso 01
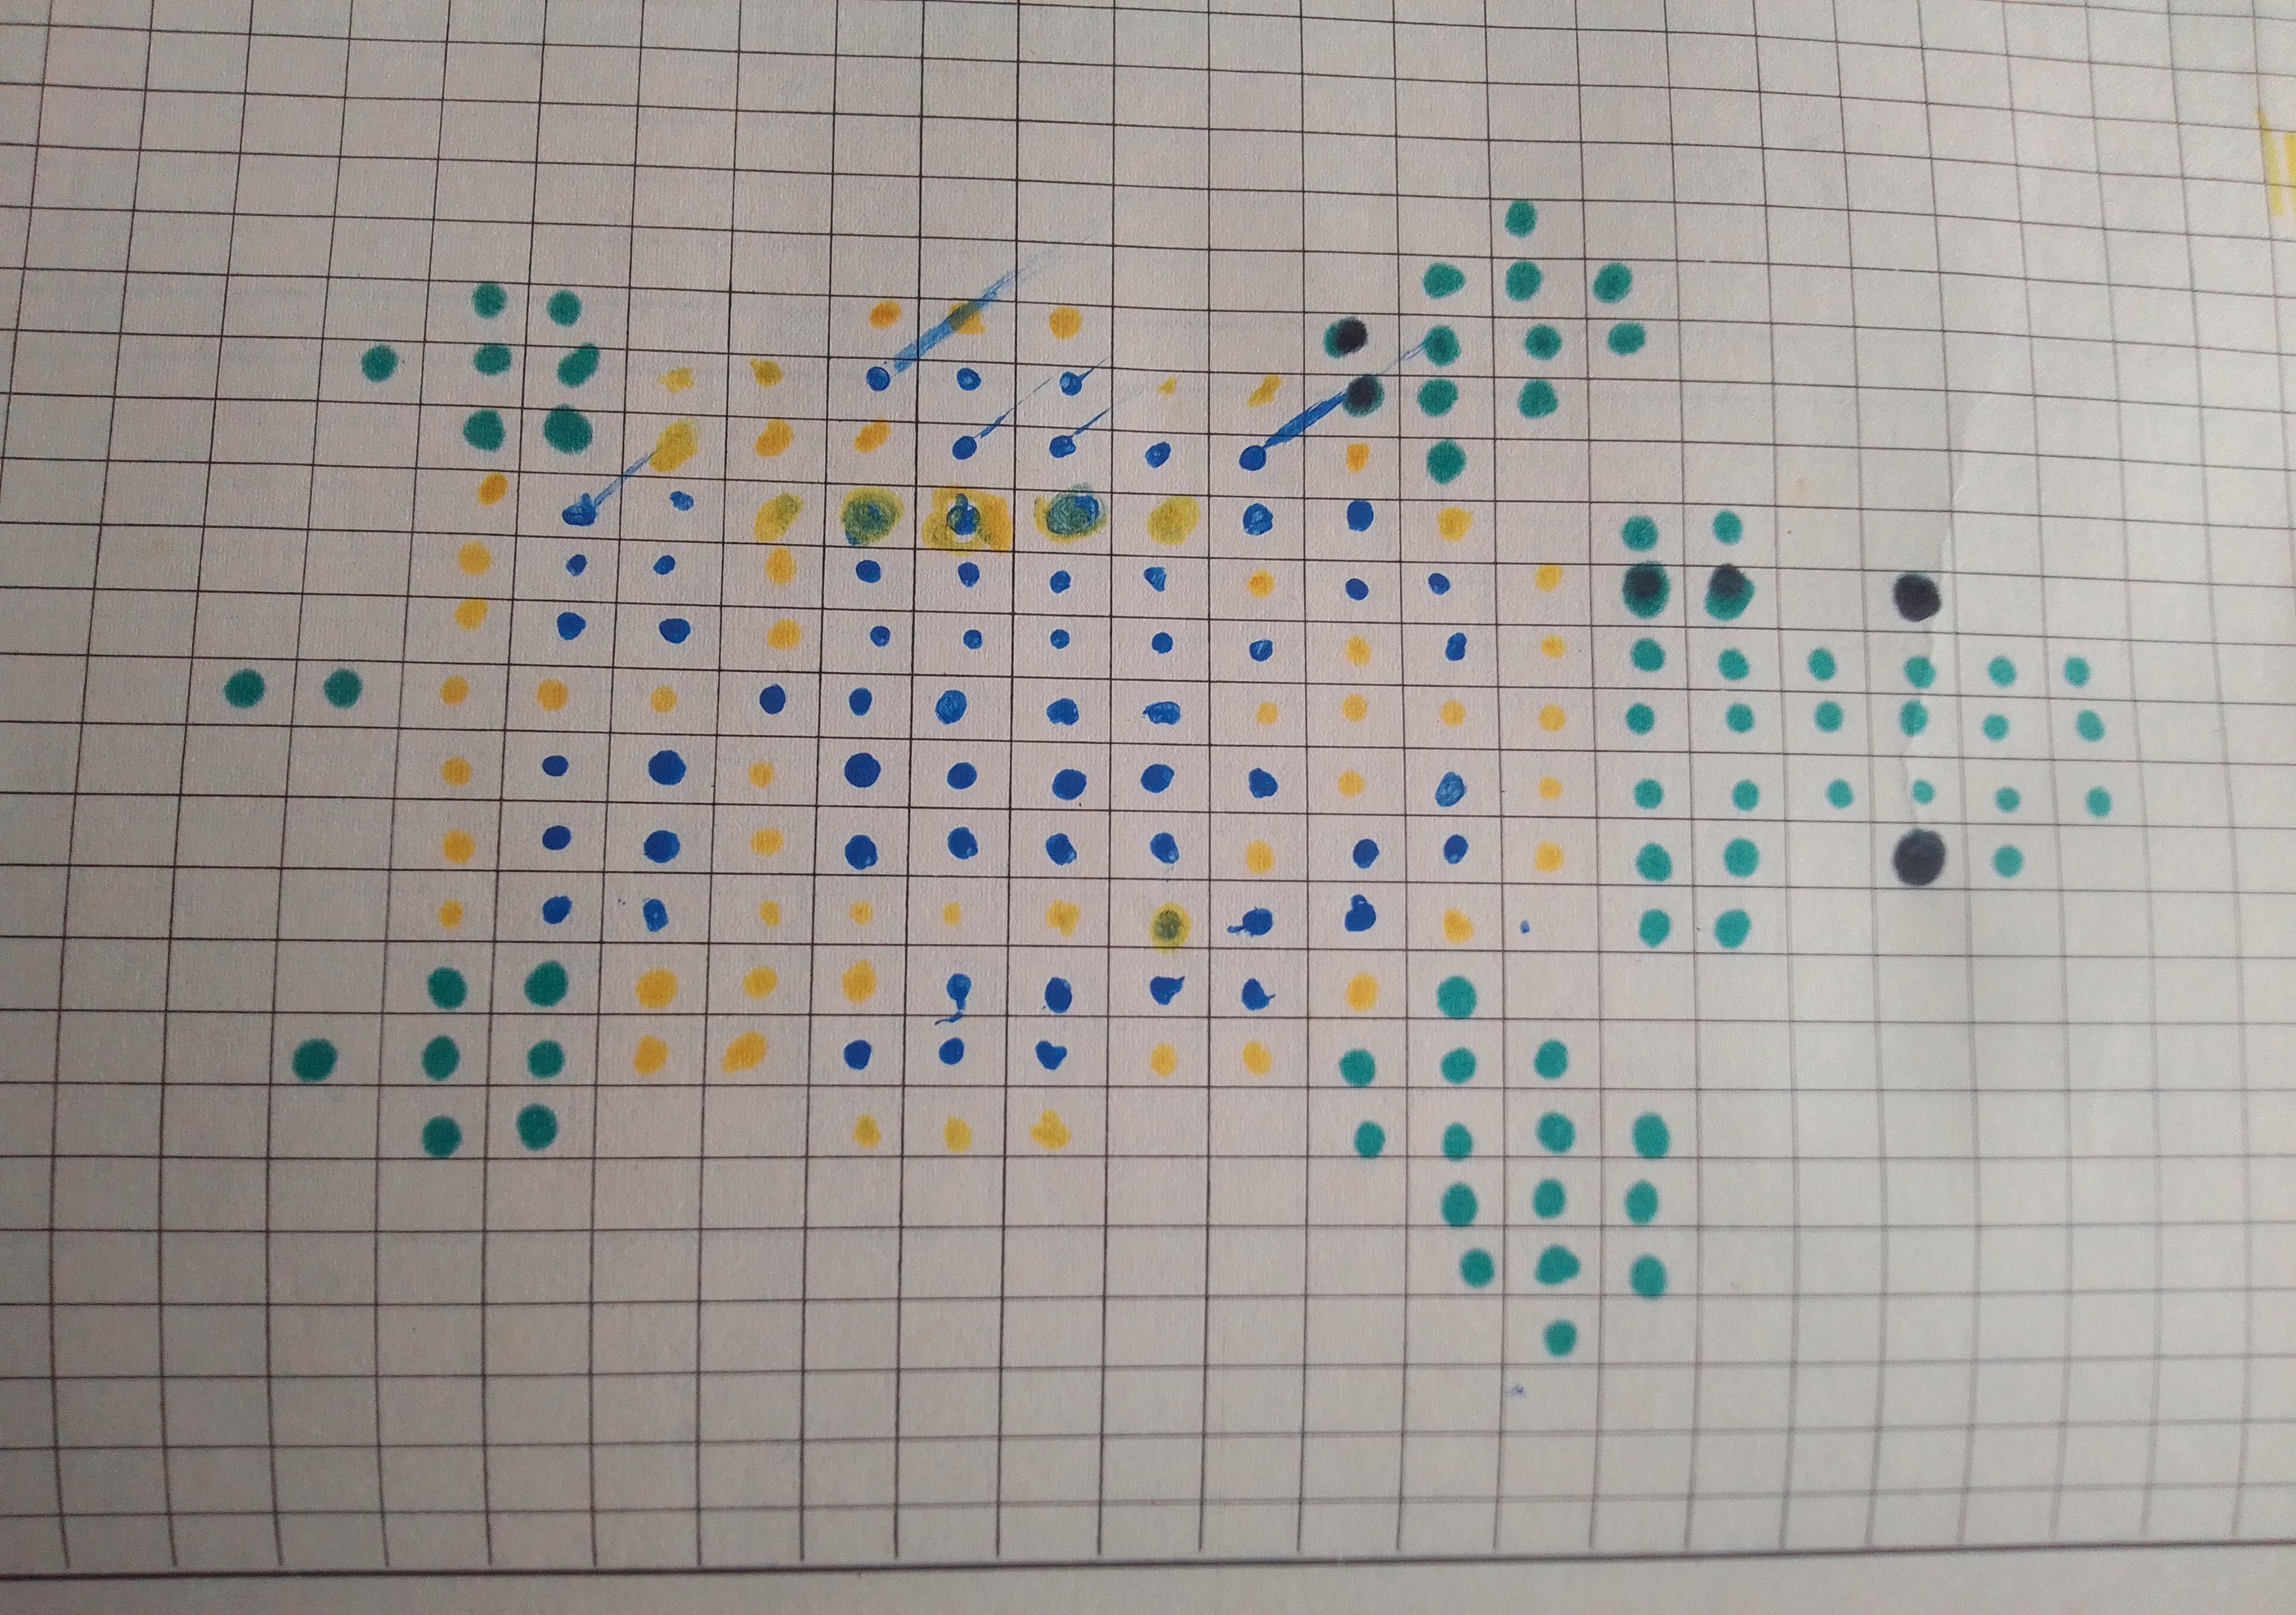
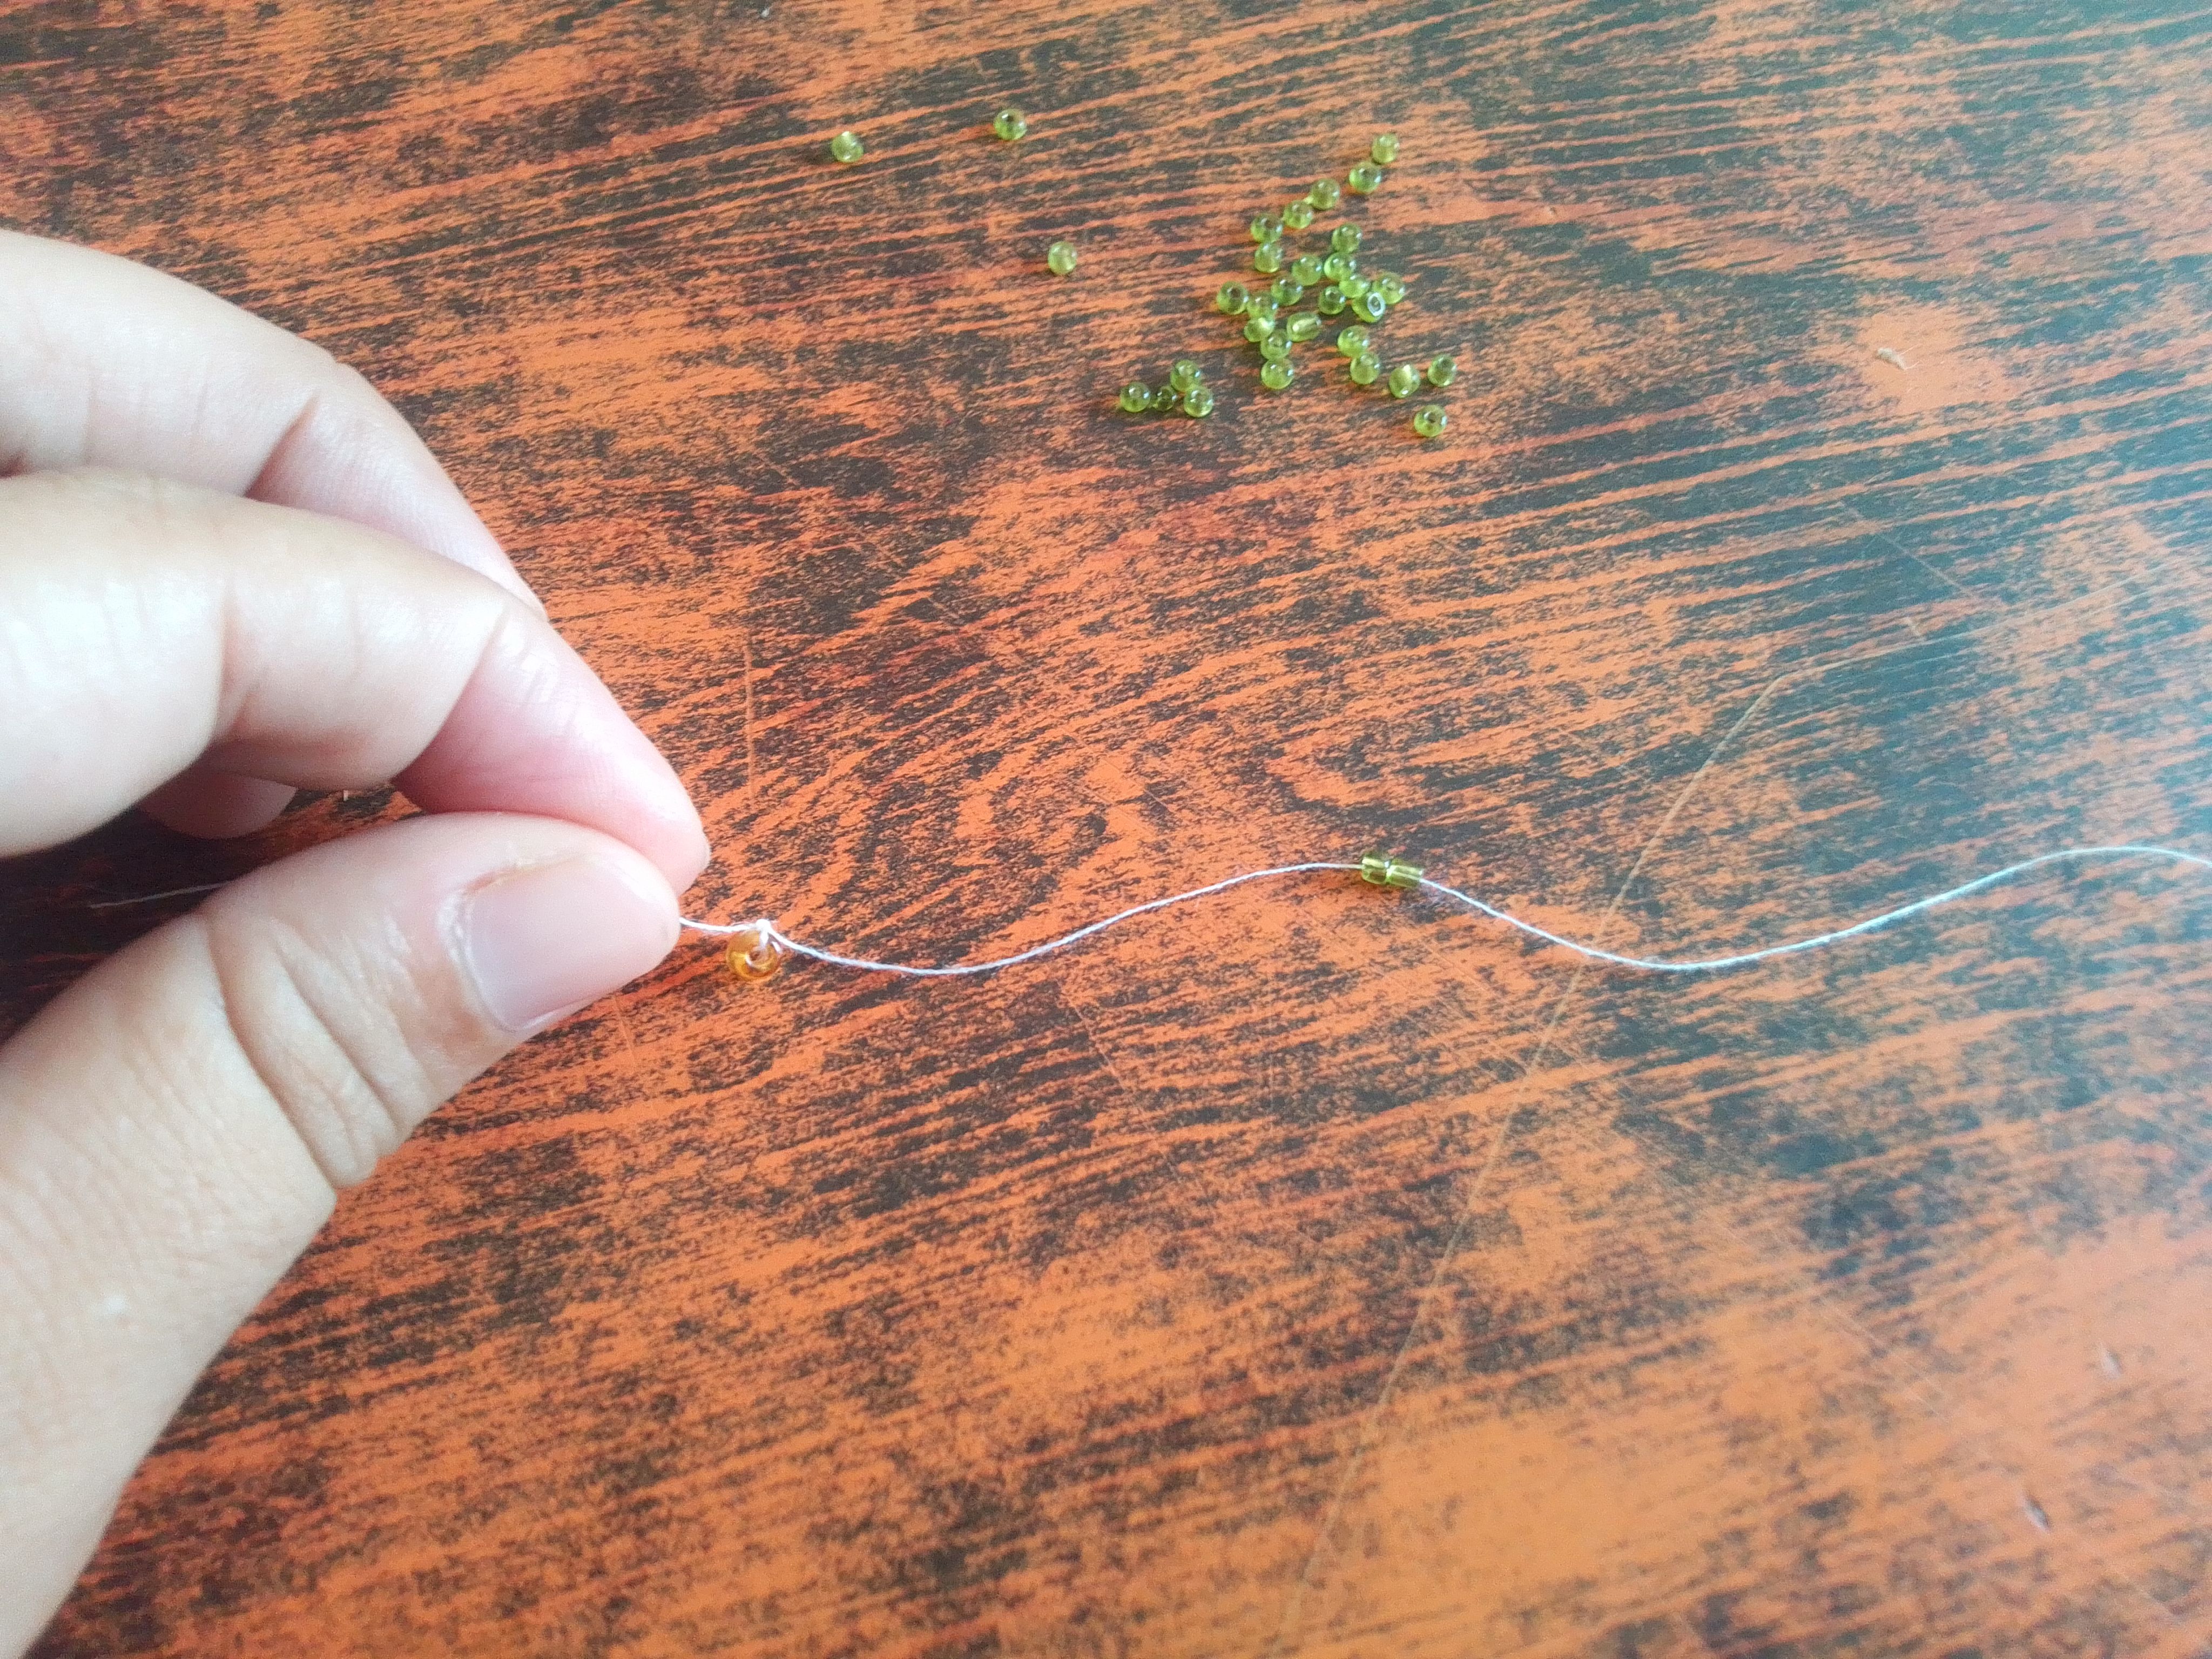
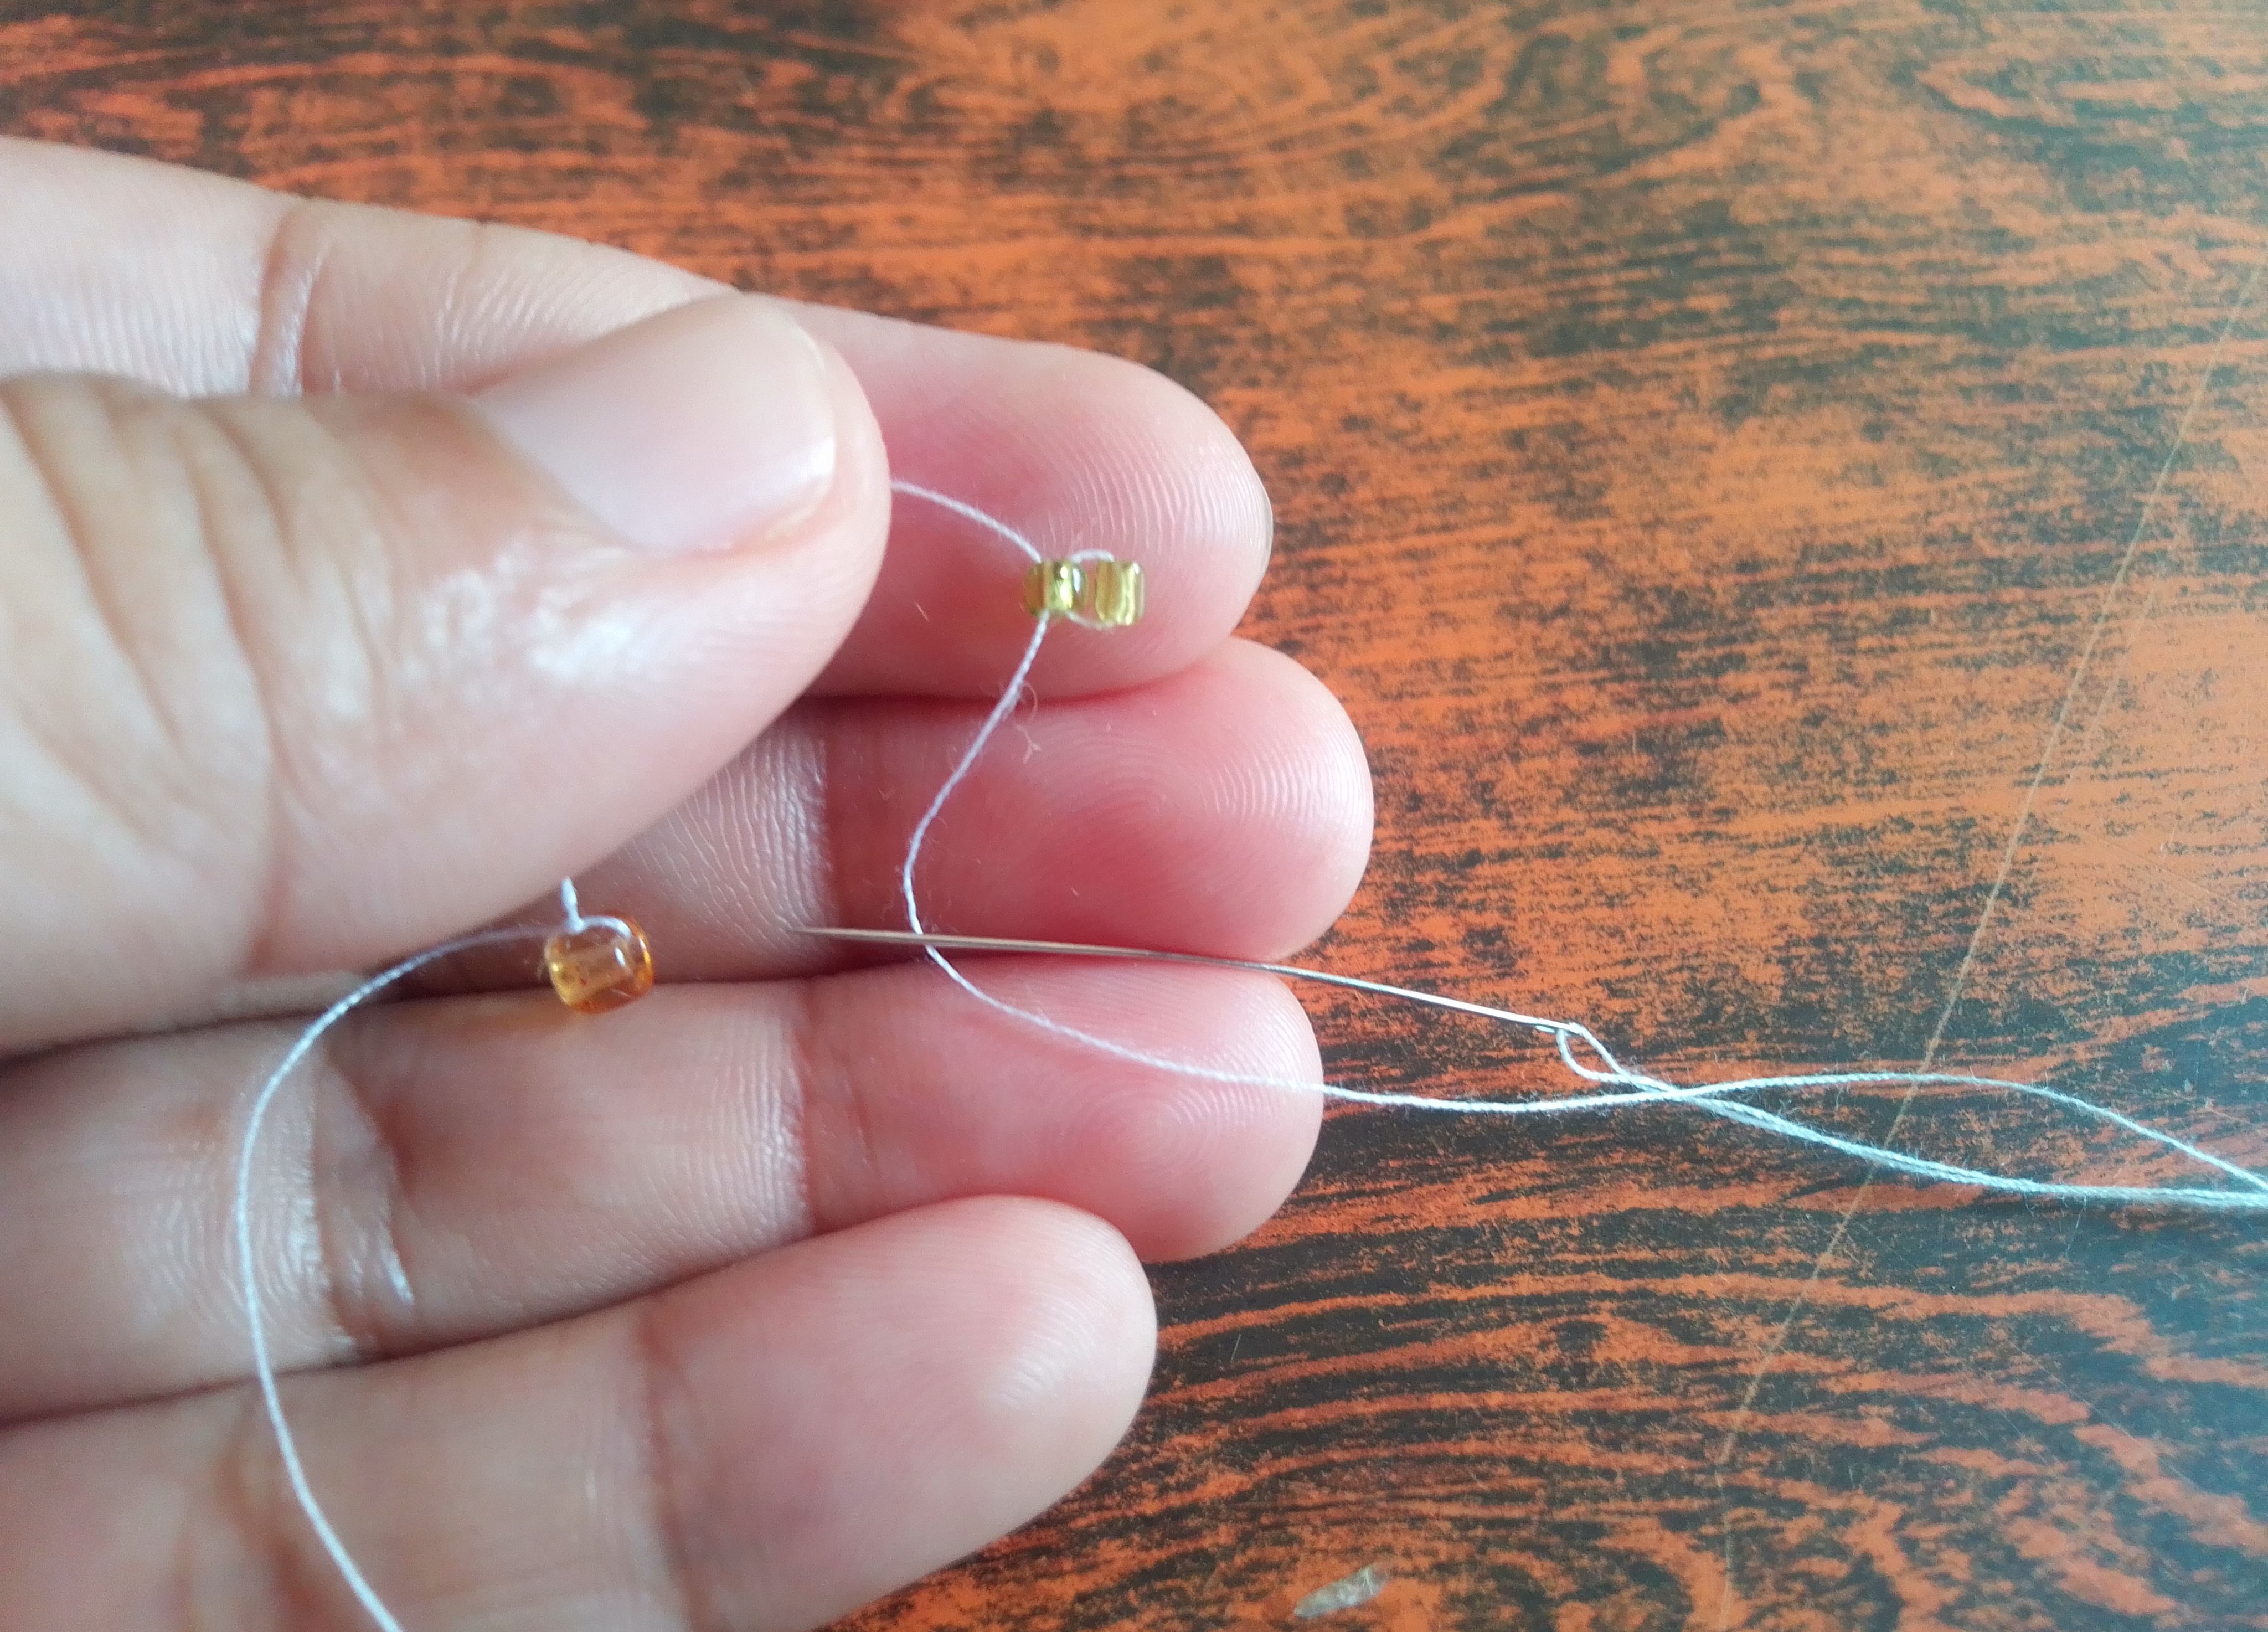
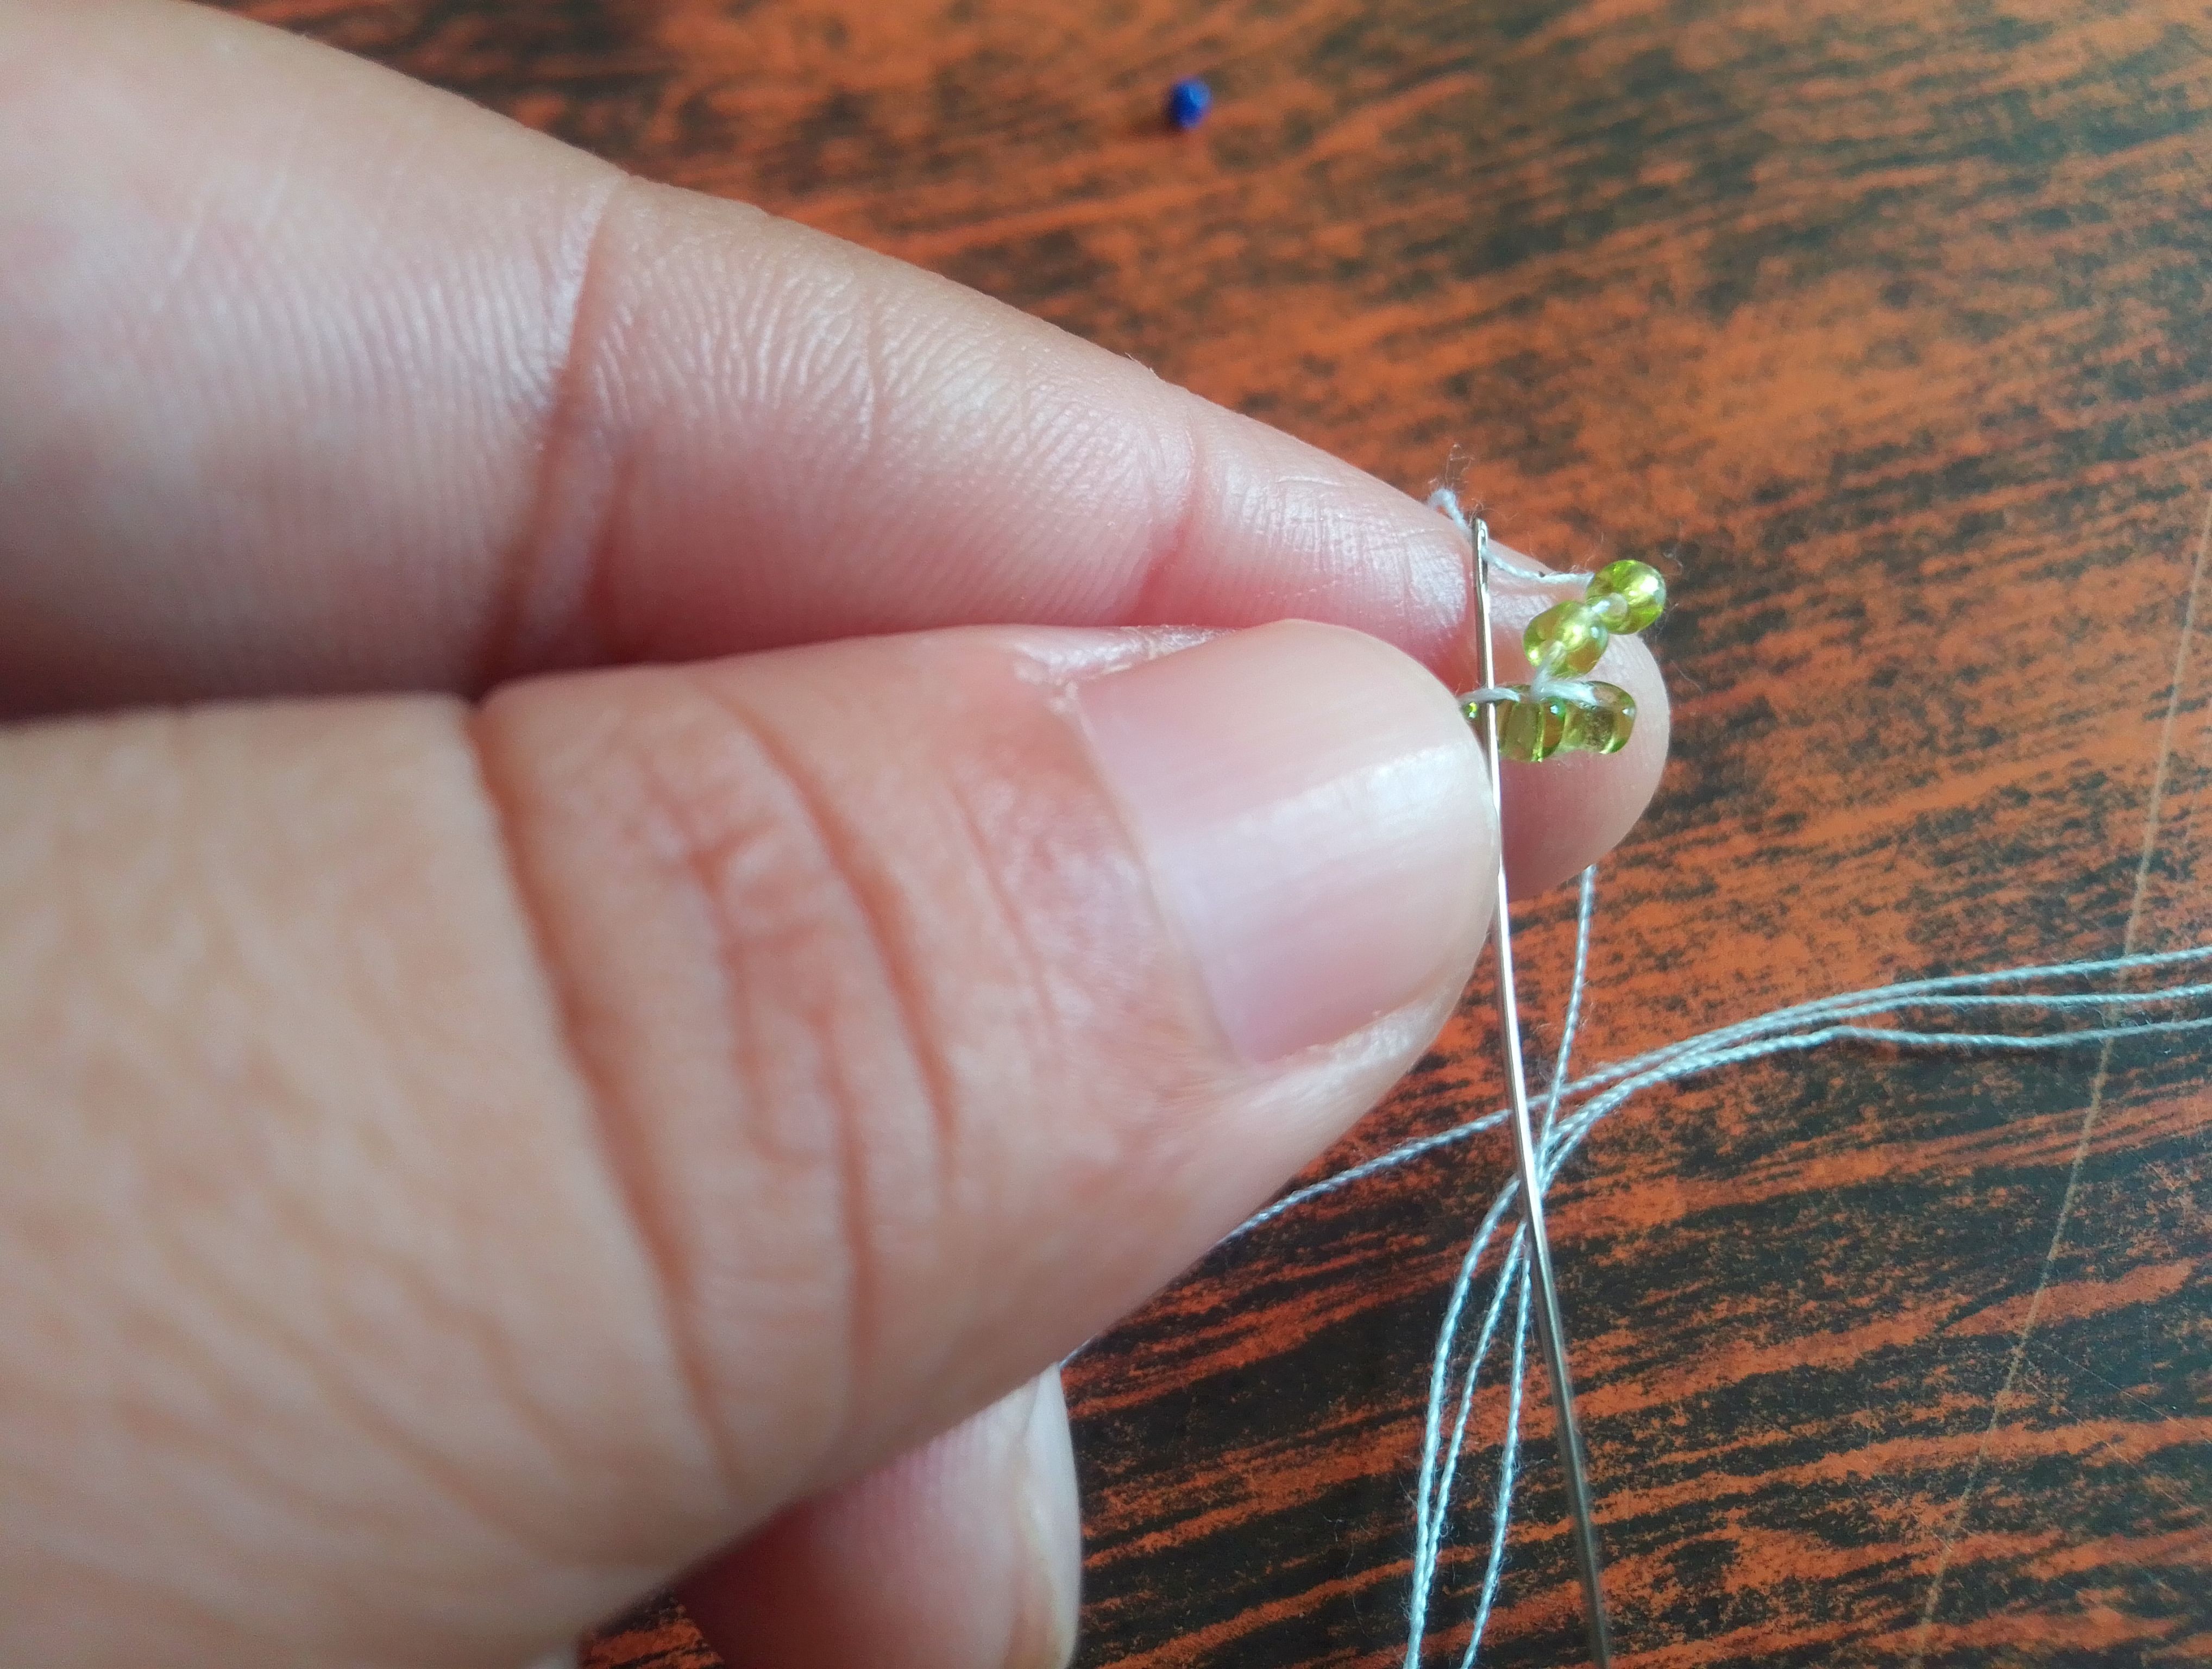
Muy bien, lo primero que en saber es que esta puntada de trabaja por líneas, por lo que iniciaremos la creación de esta tortuga, con la línea más larga del patrón, es decir, la línea de mostacillas del centro no son antes colocar un mostacillon la punta del hilo para que no se nos suelte el tejido. Iniciamos introduciendo dos mostacillas verdes y cruzamos la aguja con el hilo por el centro de la primera, apretamos y damos una vueltita más para reforzar.
Step 01
Very well, the first thing to know is that this stitch works by lines, so we will start the creation of this turtle, with the longest line of the pattern, that is, the line of beads from the center, but not before placing a bead on the end of the thread so that the fabric does not come loose. We start by introducing two green beads and cross the needle with the thread through the center of the first one, tighten and do one more turn to reinforce.
Paso 02
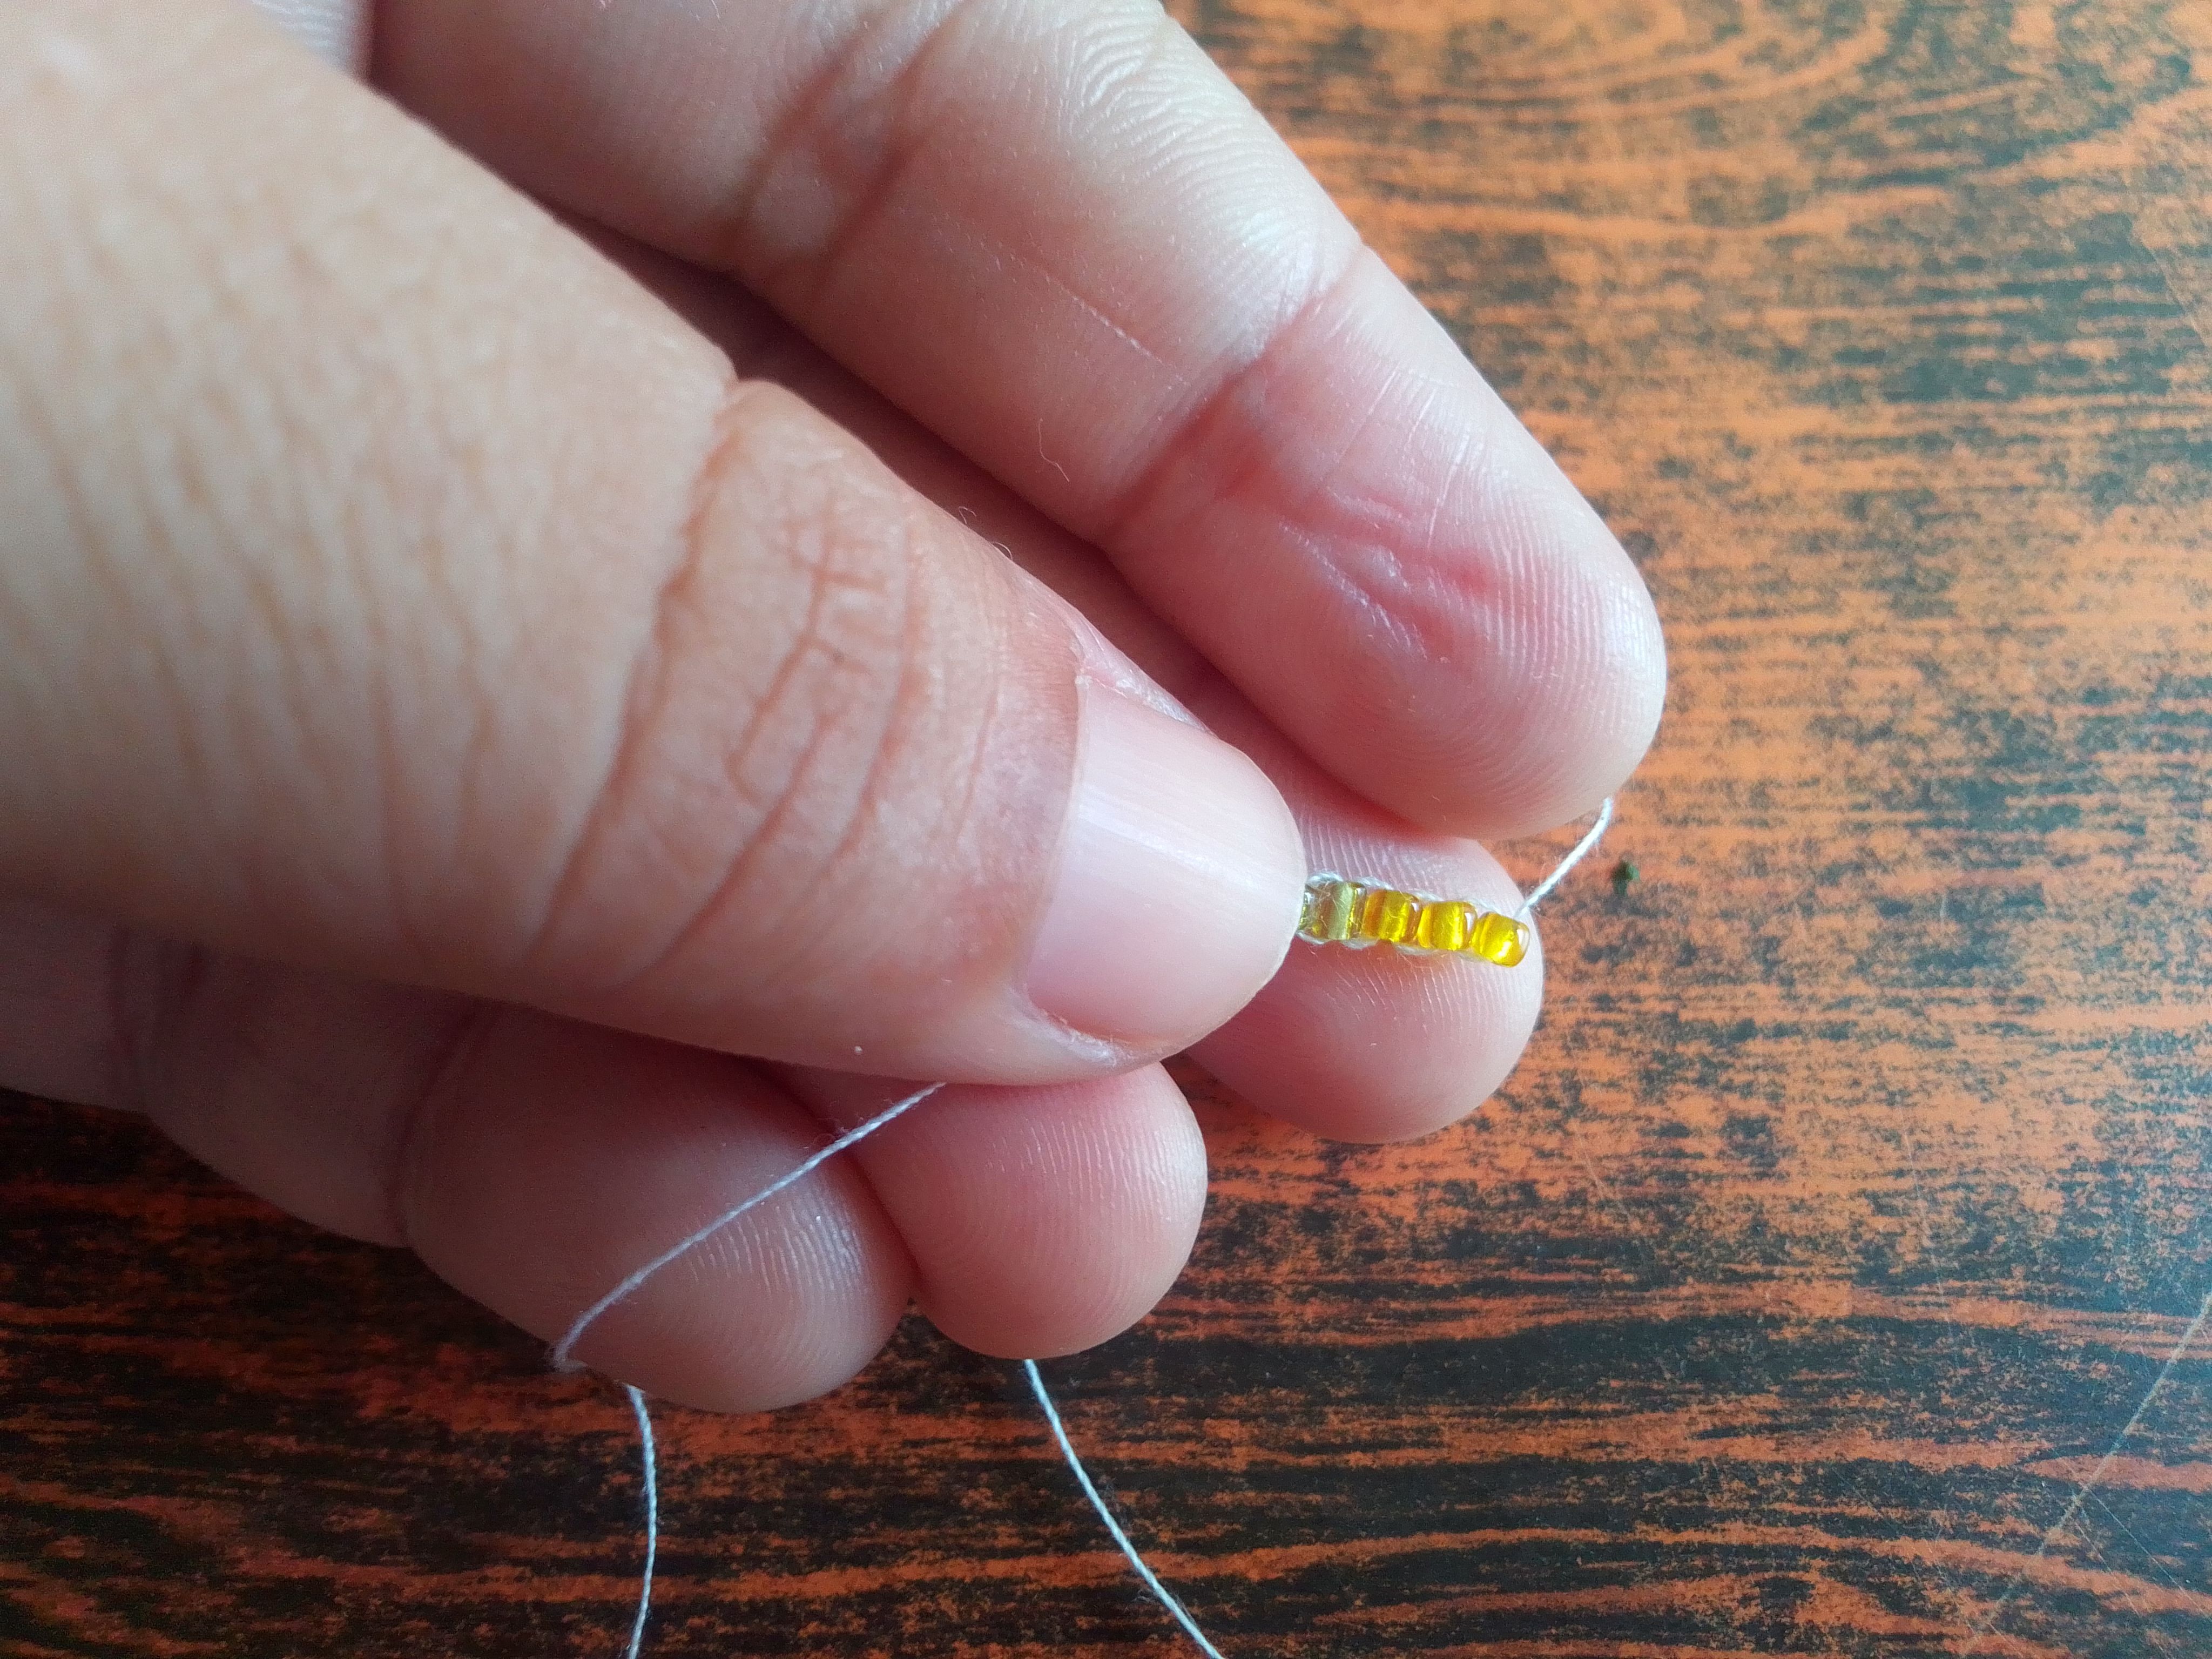
Ahora guiandonos por el patrón introduzco y con la misma técnica introduzco tres mostacillas amarillas y cinco azules.
Step 02
Now, guided by the pattern, I introduce and with the same technique I introduce three yellow beads and five blue beads.
Paso 03
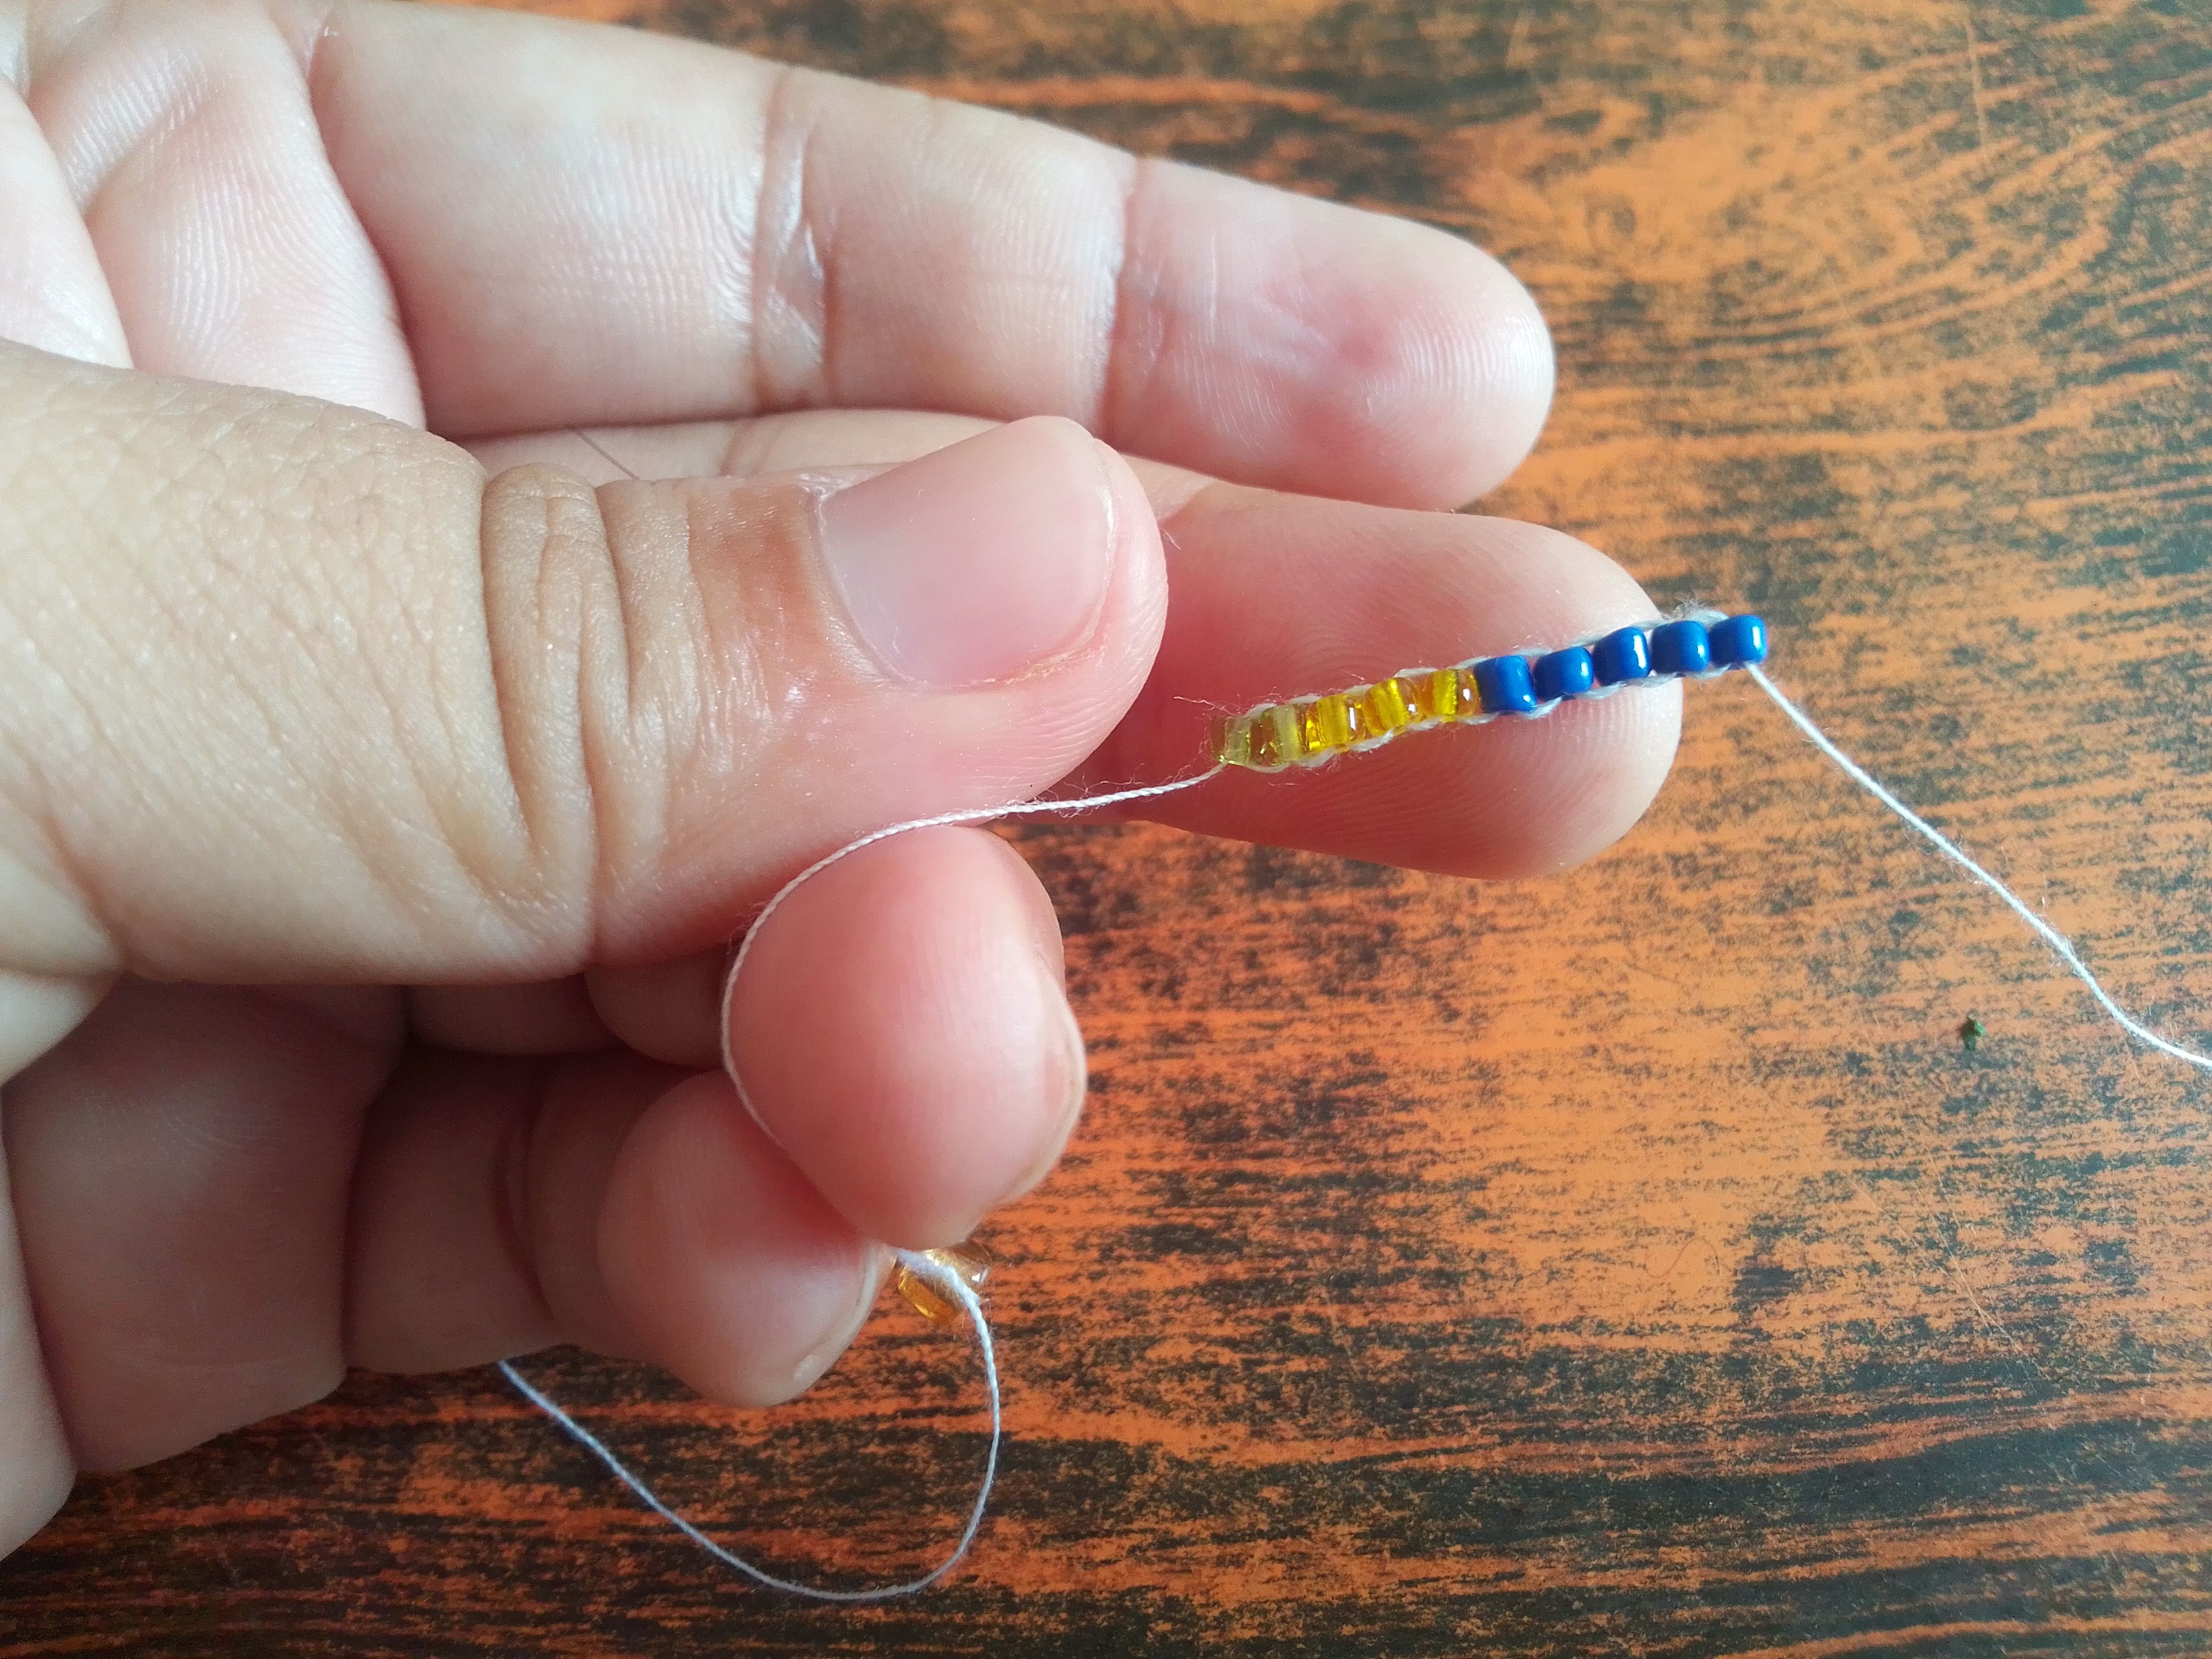
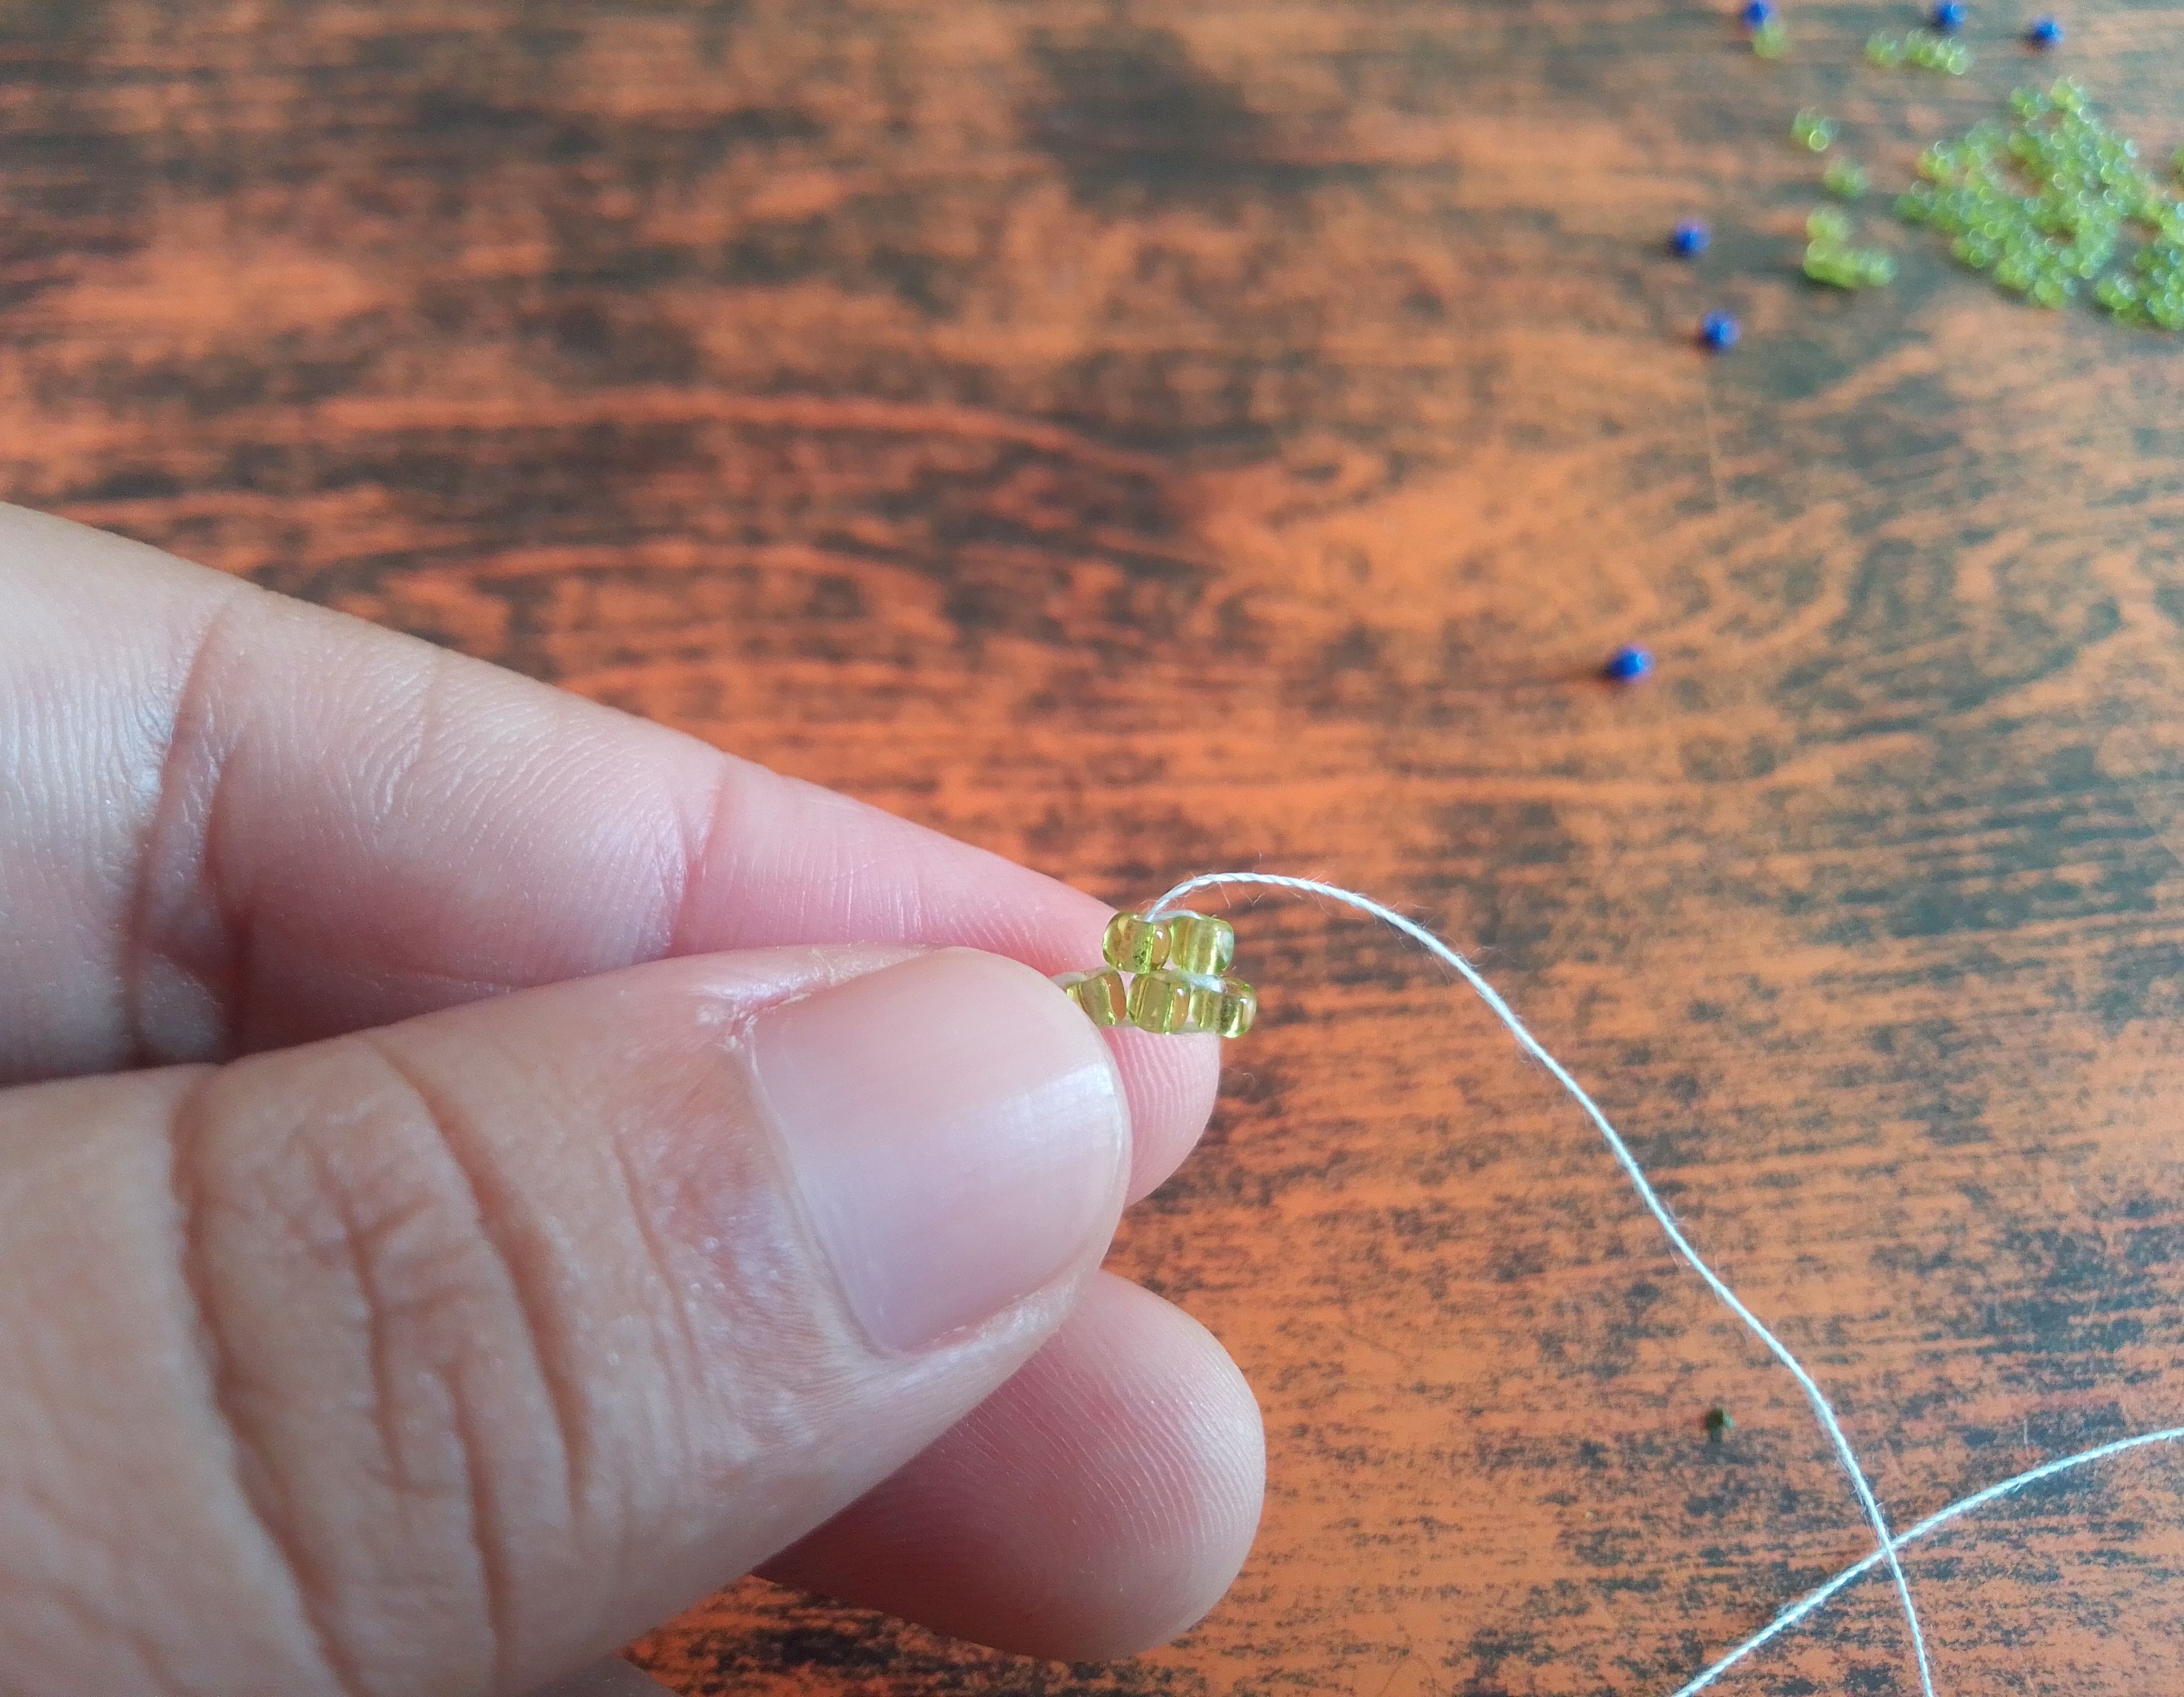
Ahora introduzco cuatro amarillas y seis verdes, recuerda ir girando dos veces para ajustar la línea de ser necesario. Listo ya tenemos la línea principal que nos va a guiar para hacer la primera parte de la figura.
Step 03
Now I introduce four yellow ones and six green ones, remember to turn twice to adjust the line if necessary. Ready, we now have the main line that will guide us to make the first part of the figure.

Paso 04
En este paso necesitamos tener un espacio, de manera, que la siguiente línea de mostacillas quede sobre el medio de la primera, así que lo que haremos será regresar el hilo por la penúltima mostacilla e introducir dos mostacillas verdes y paso la aguja por debajo del hilo que queda entre cada mostacilla y luego por arriba y el centro de la misma. Así el hilo es como un puente para sujetar el tejido de las siguientes mostacillas.
Step 04
In this step we need to have a space, so that the next line of beads is over the middle of the first, so what we will do is return the thread through the penultimate bead and introduce two green beads and pass the needle under the thread that remains between each bead and then above and in the center of it. Thus the thread is like a bridge to hold the fabric of the following beads.
Paso 05
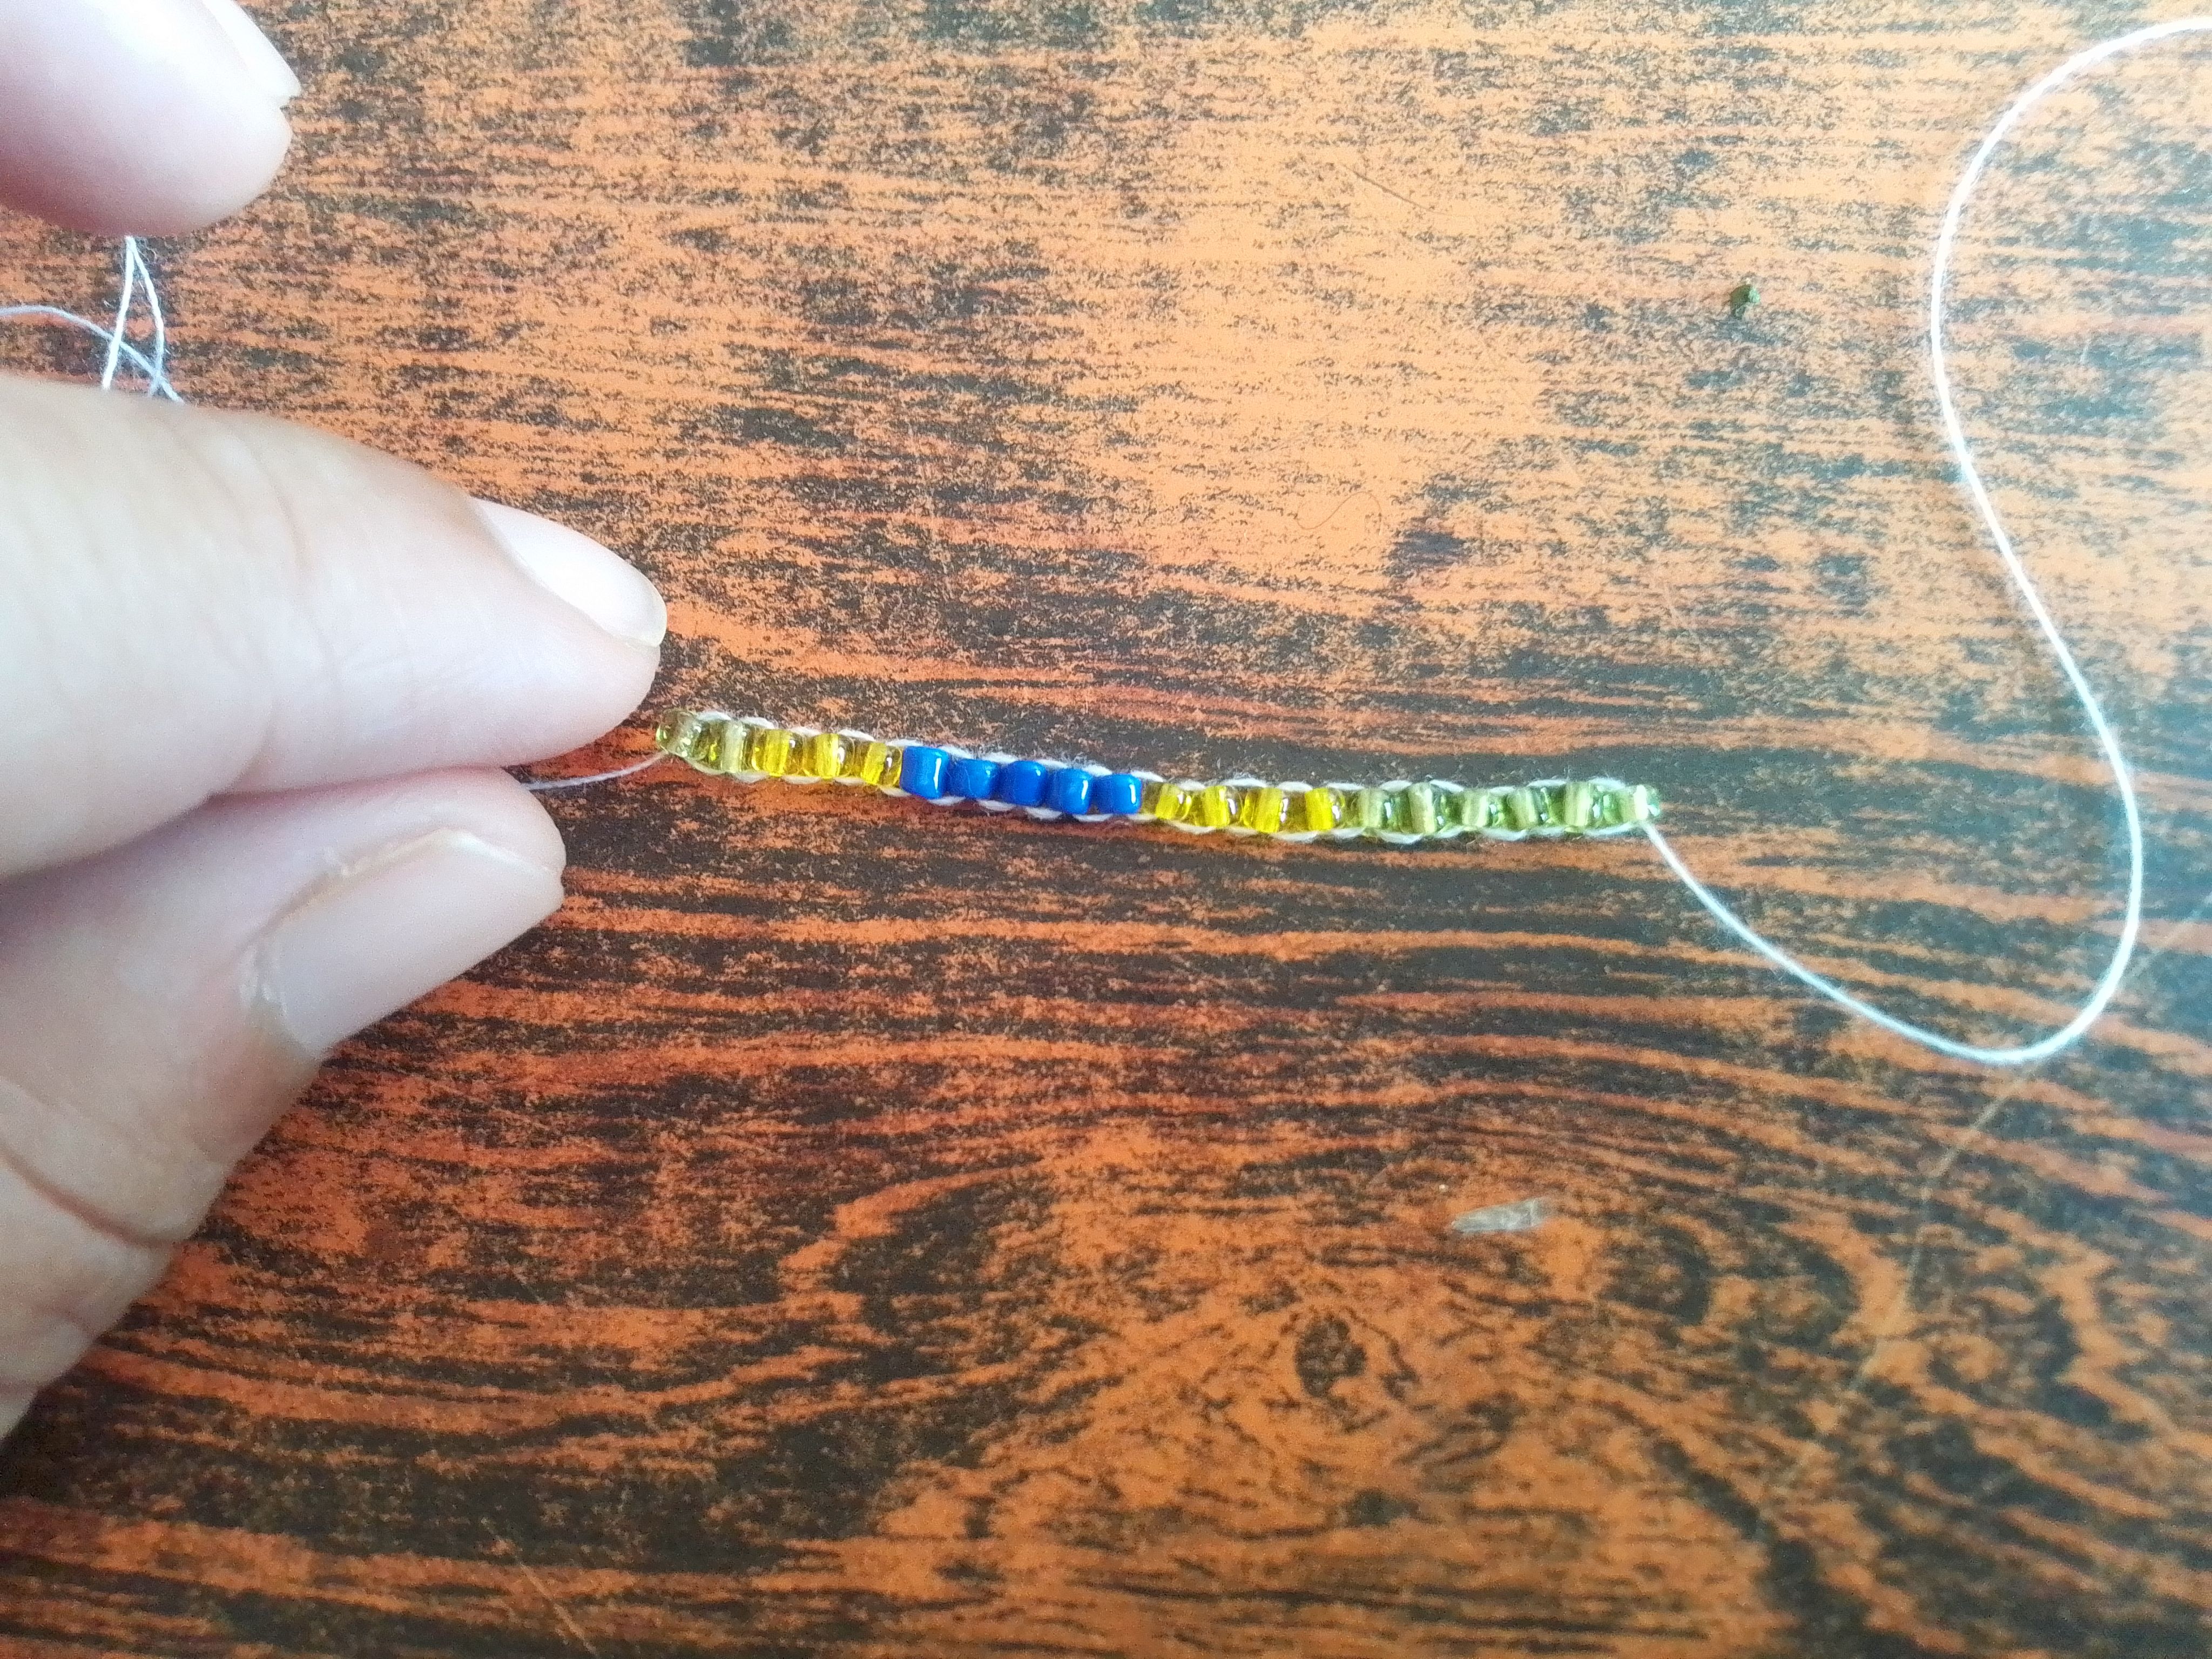
Volvemos, introduzco las siguientes cuatro mostacillas verdes, una por una, haciendo el giro por abajo del hilo y por el centro de la mostacilla de arriba. Luego en esta segunda línea sigue, una amarilla, una azul, una amarilla , cuatro azul, una amarilla, dos azules una amarilla.
Step 05
We return, I introduce the next four green beads, one by one, making the twist at the bottom of the thread and in the center of the top bead. Then in this second line it continues, one yellow, one blue, one yellow, four blue, one yellow, two blue, one yellow.
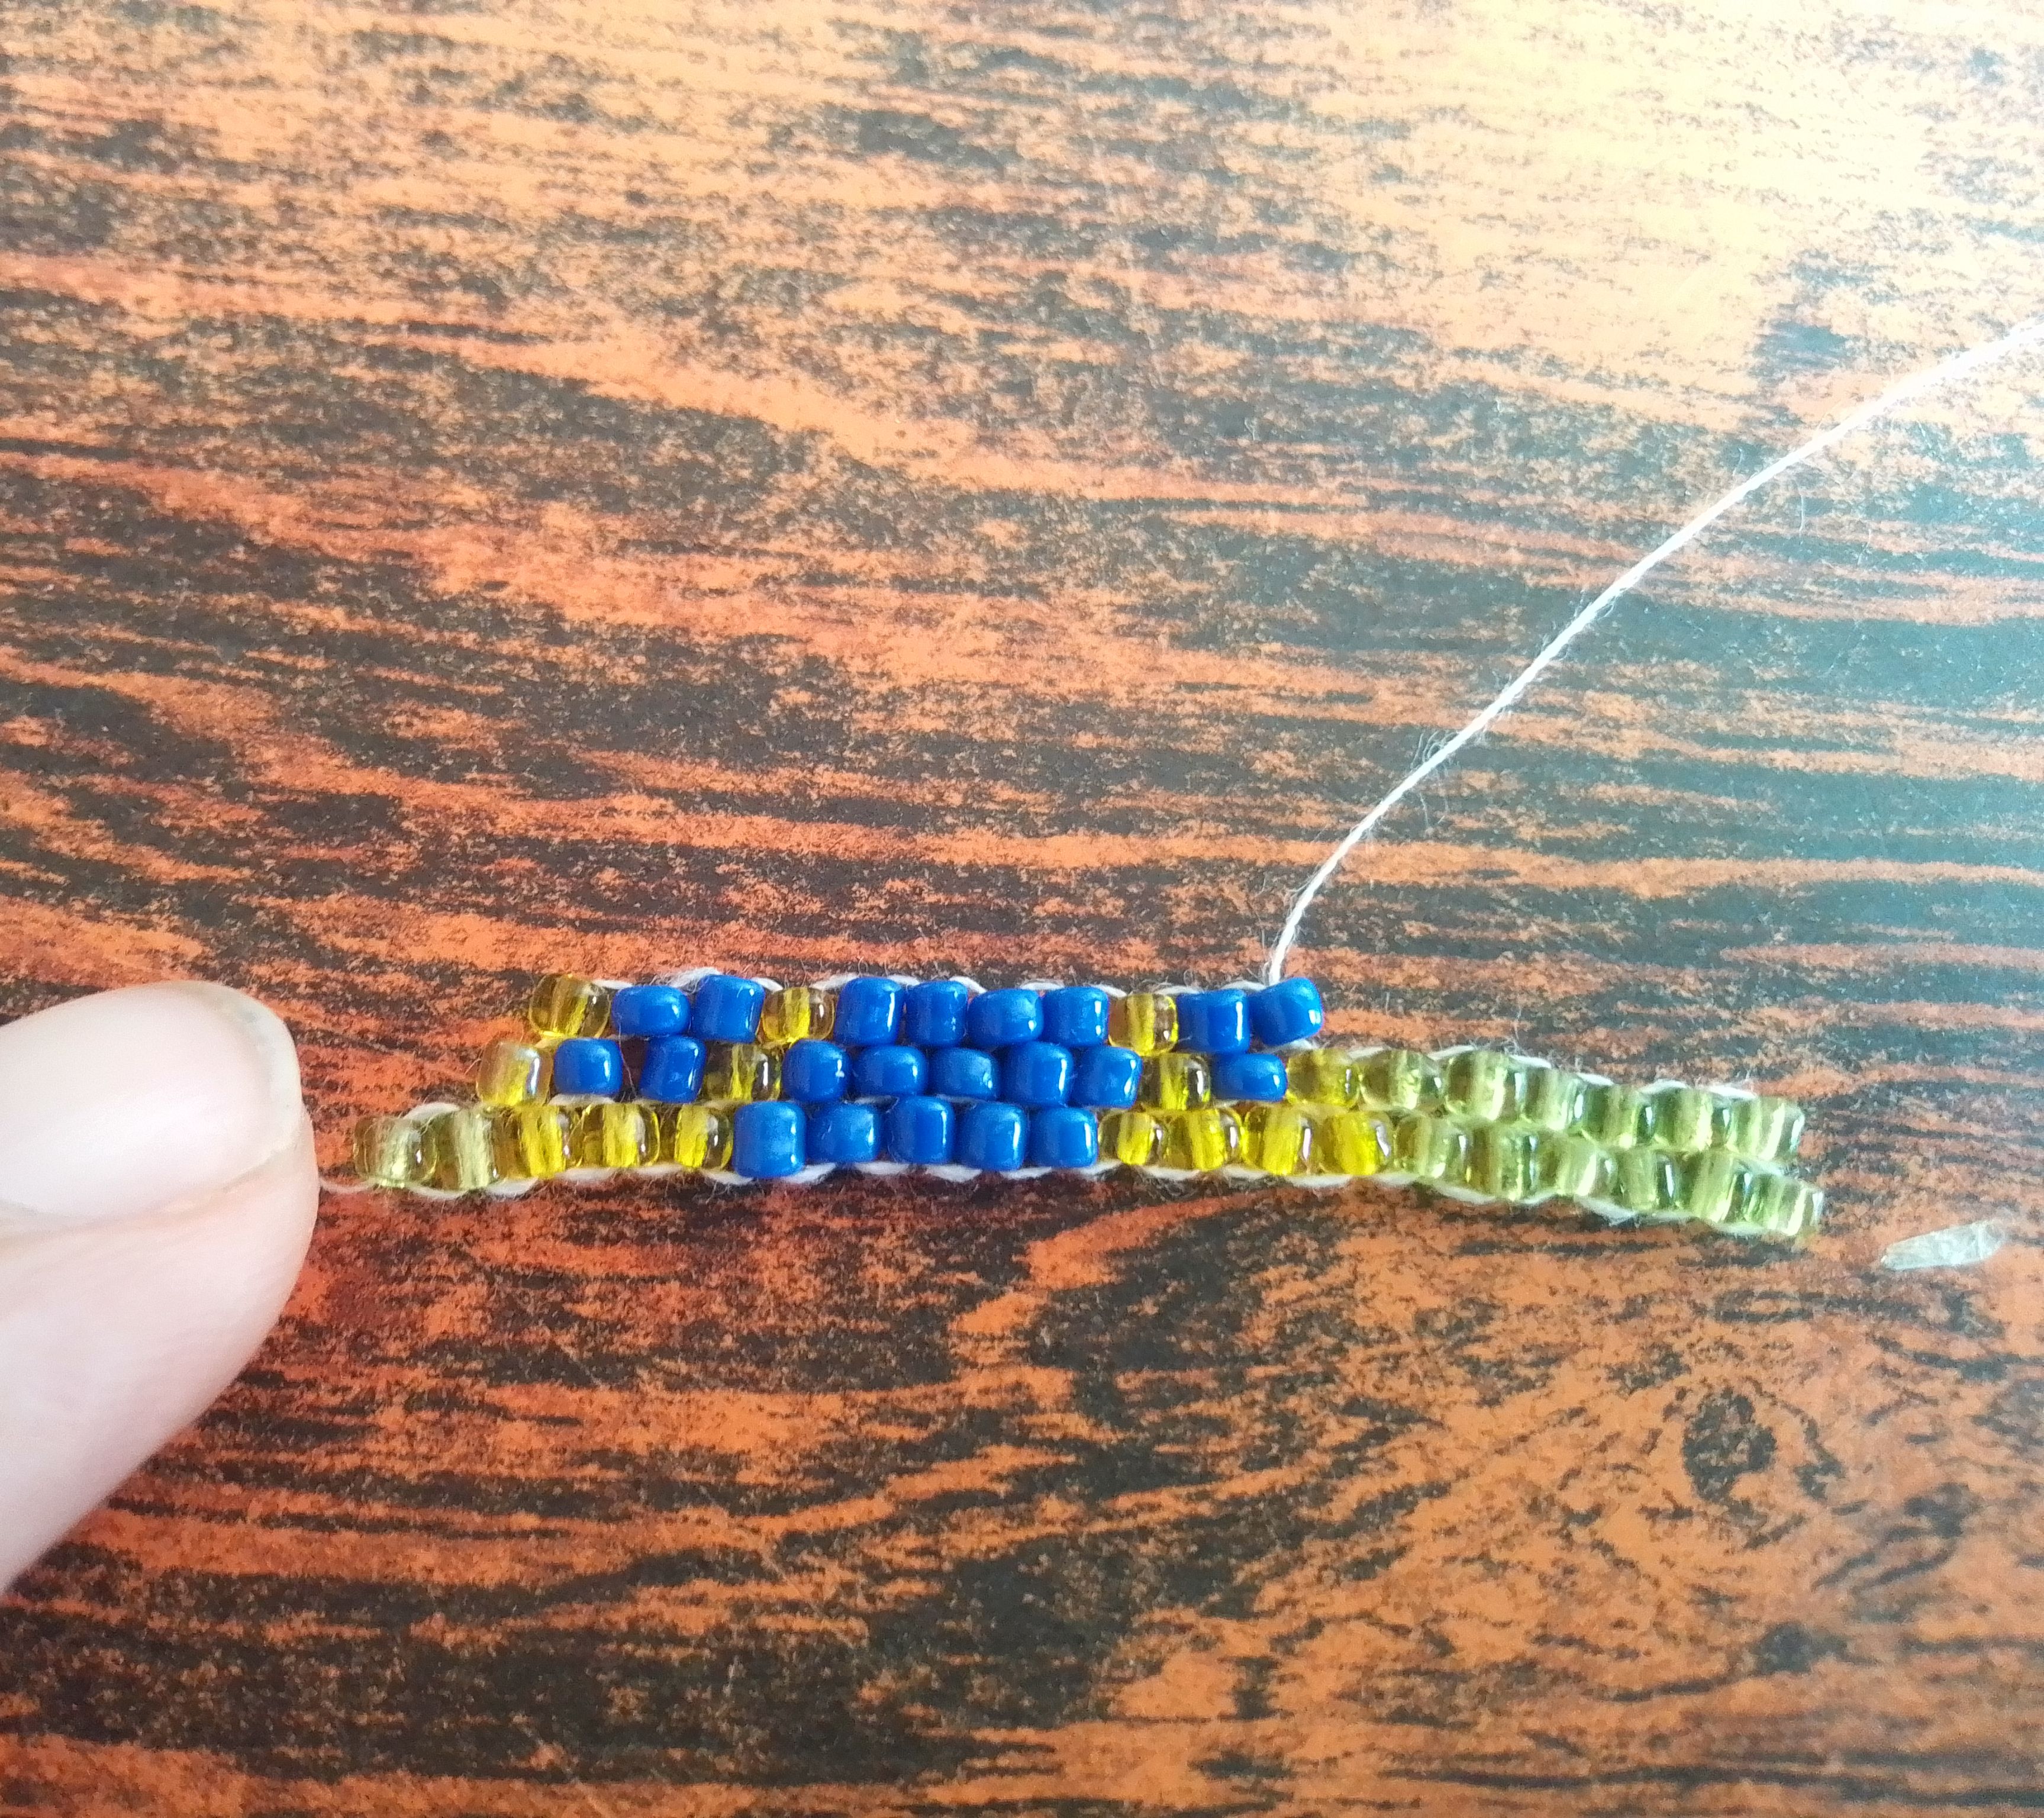
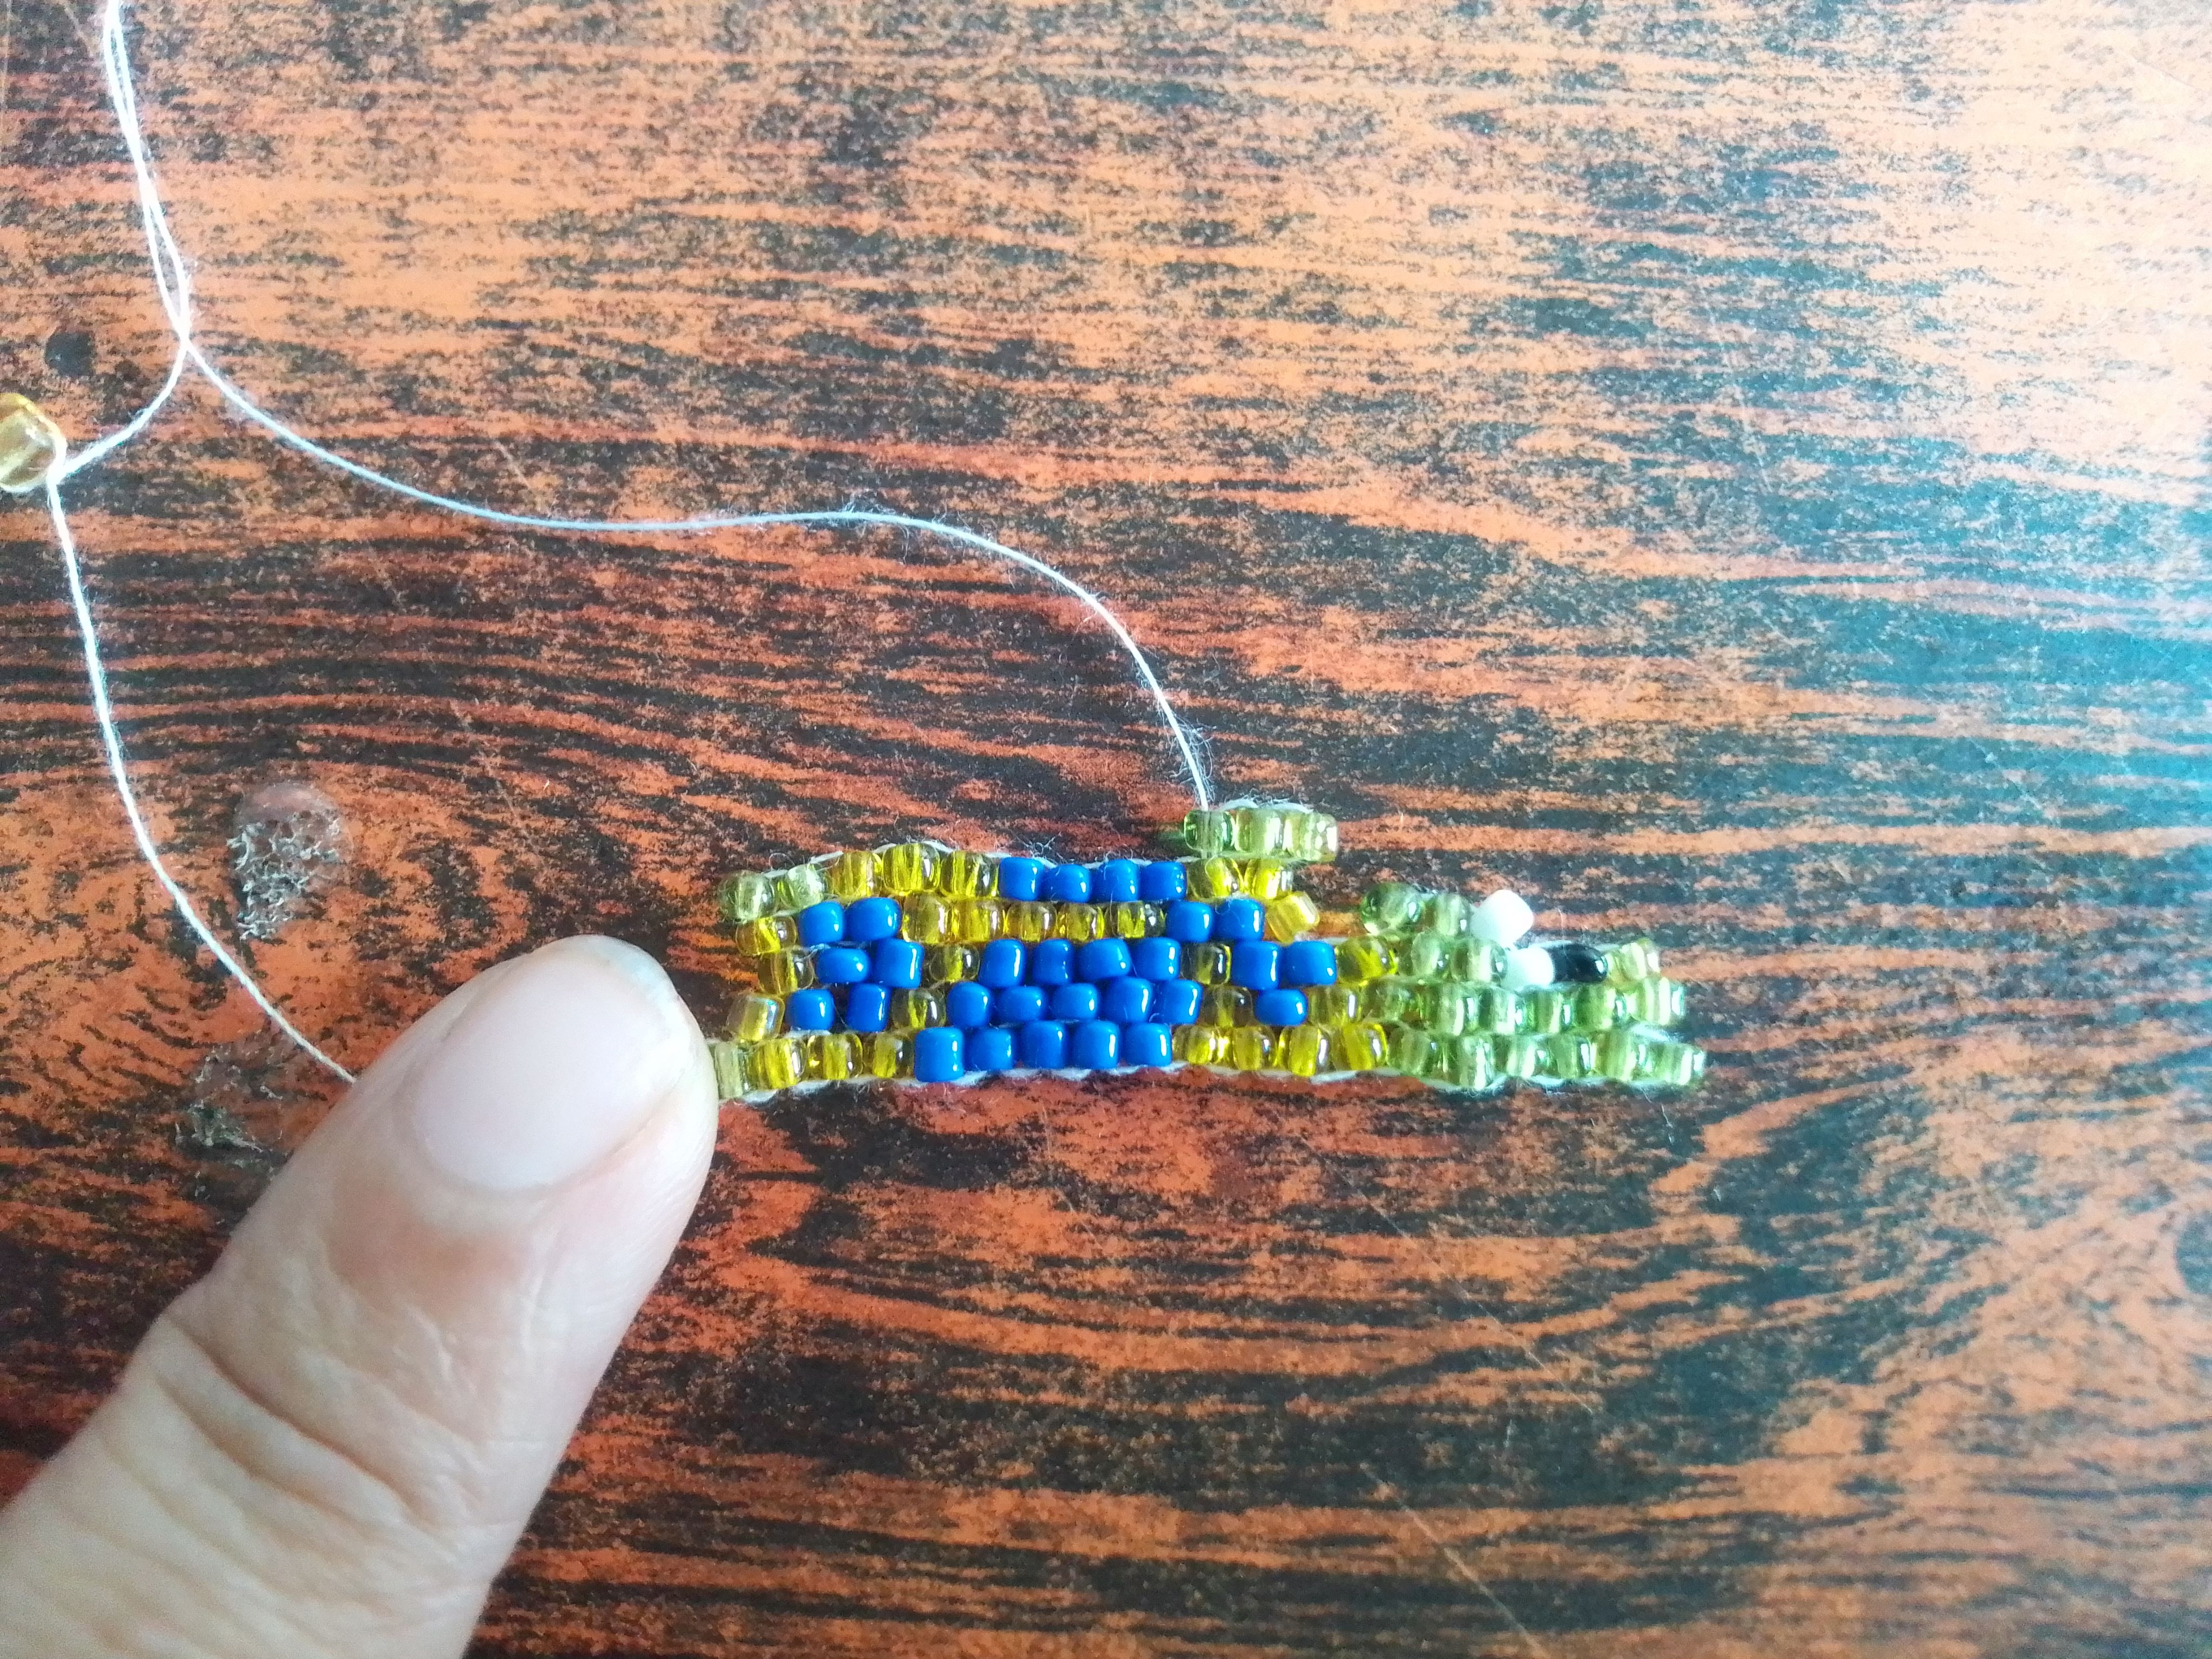
Paso 06
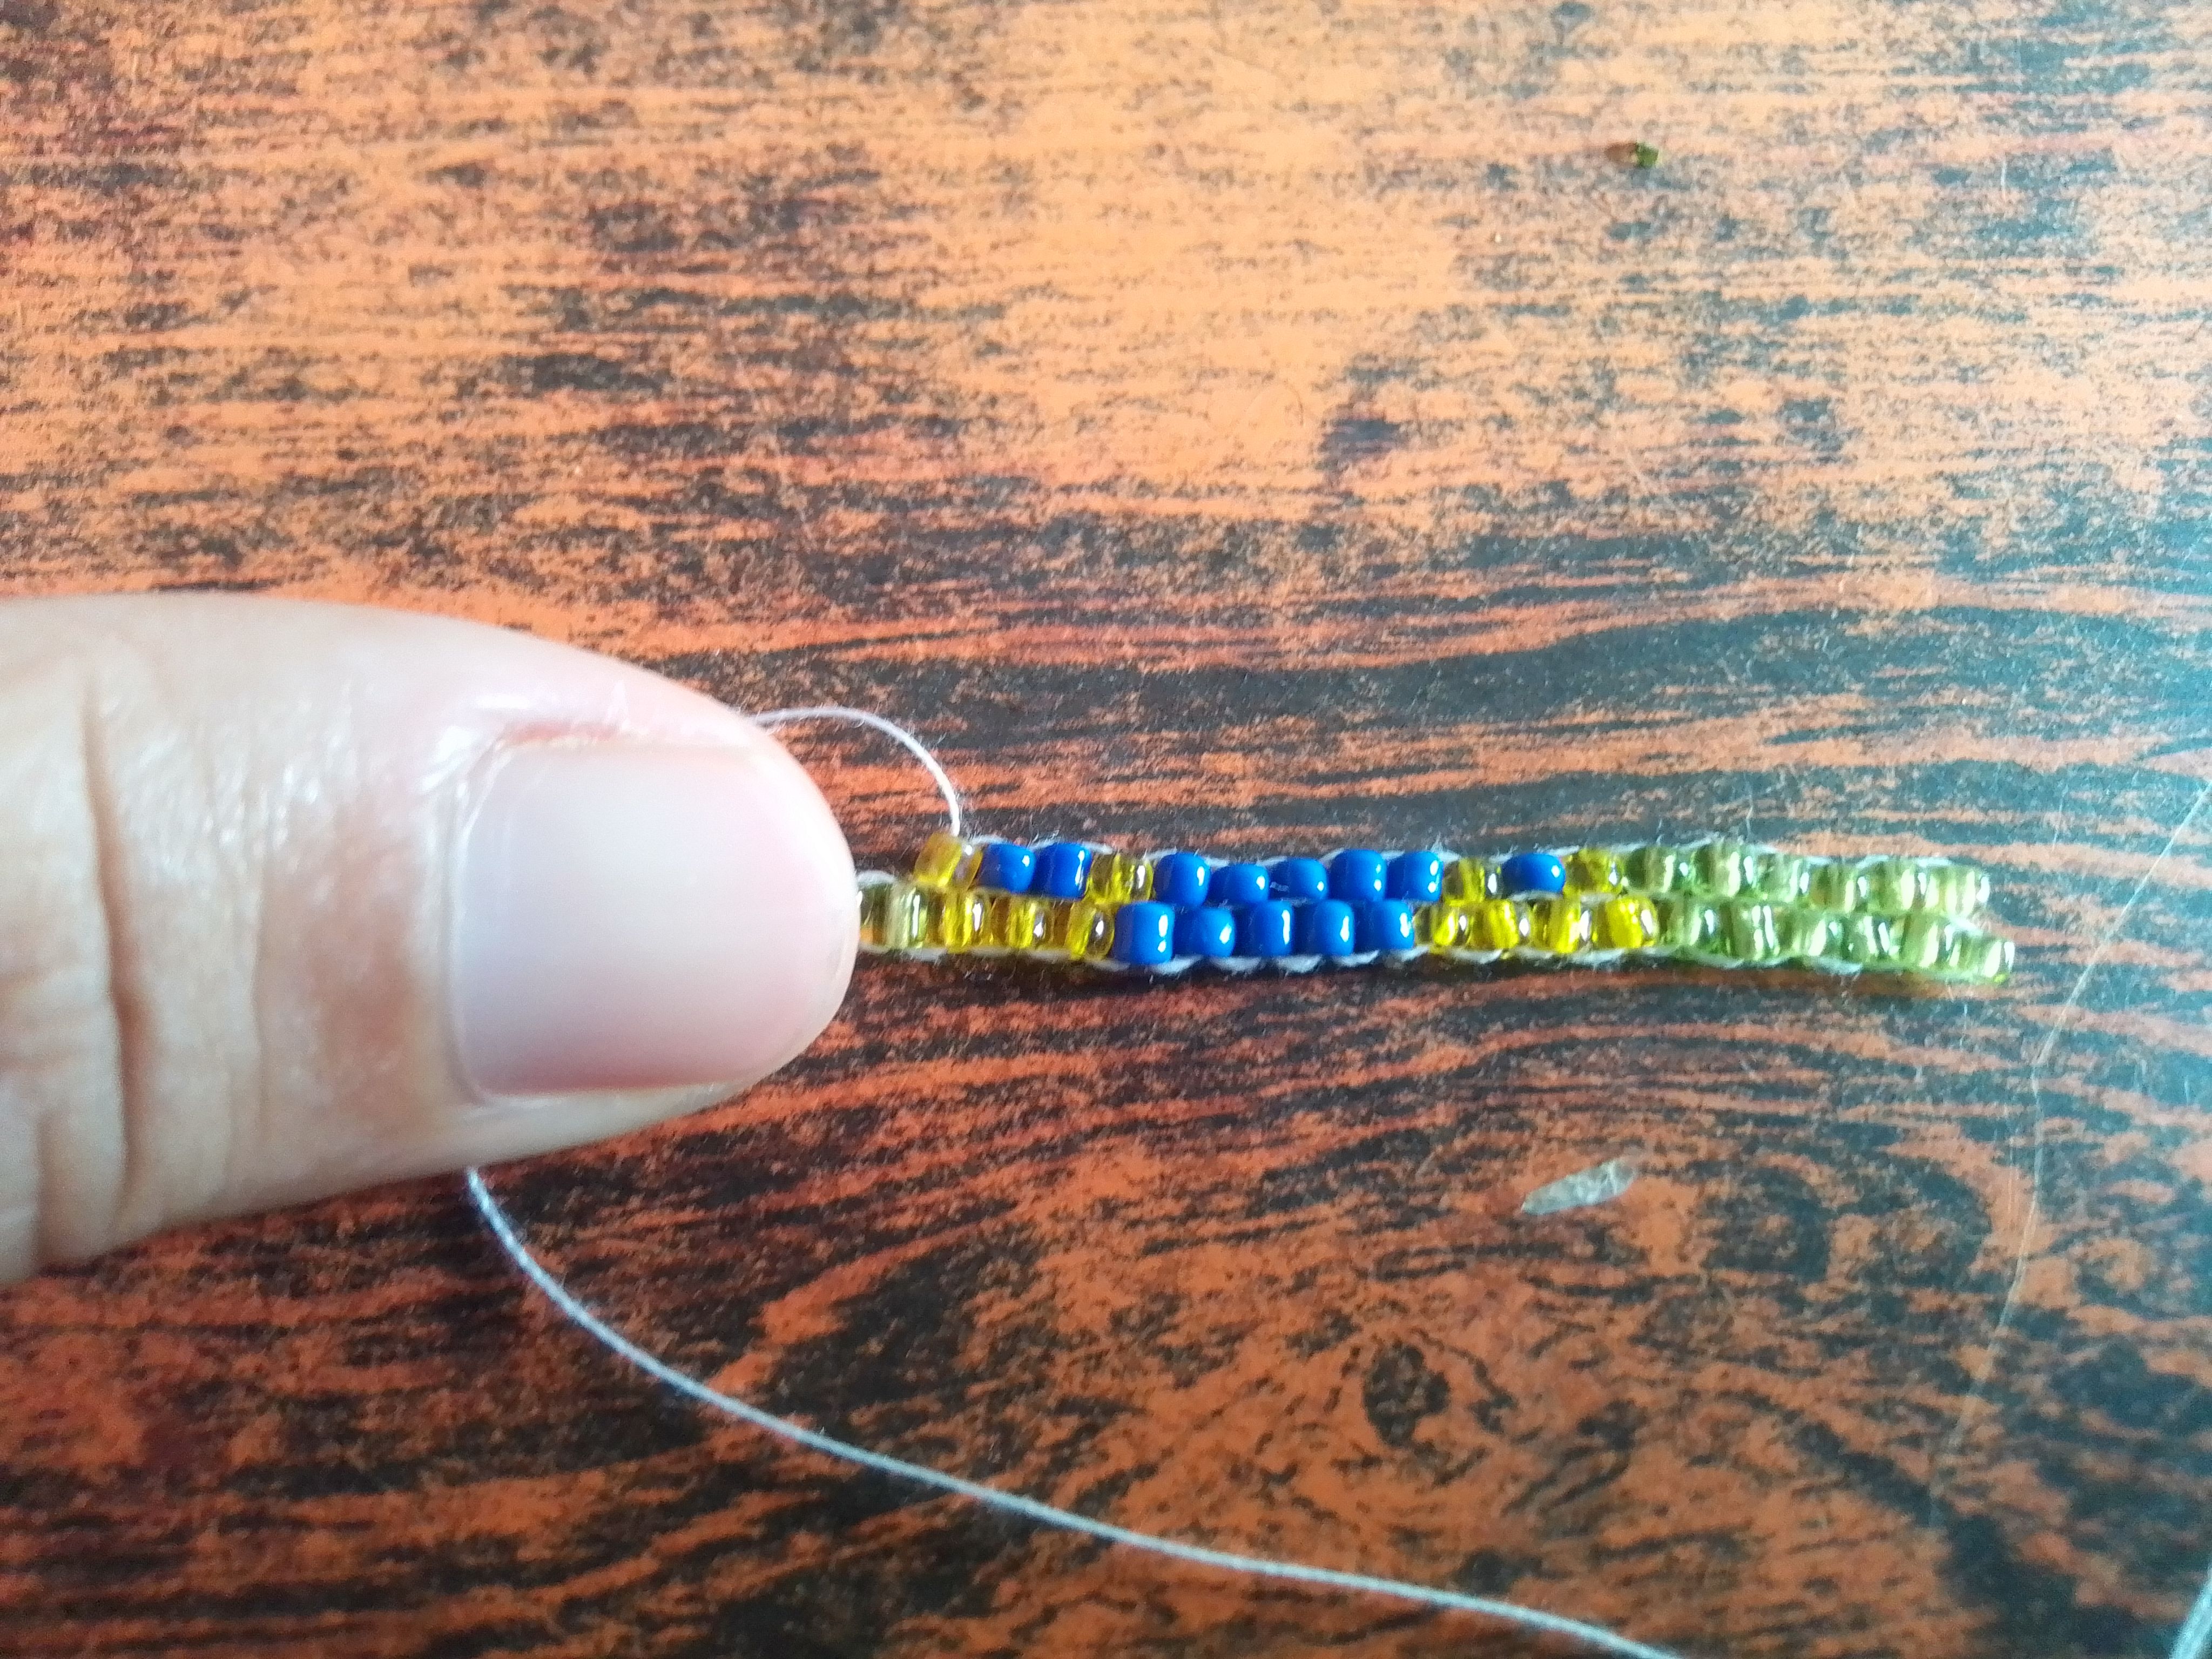
En está tercera línea, haremos un punto en forma de cruz, para poder dejar en espacio en el principio de la línea. Atravieso con la aguja hacia abajo, la mostacillon azul,cruzo hacia la amarilla y subo por la azul. Introduzco dos mostacillas una amarilla y una azul y comienzo el tejido de mi tercera línea. Que está vez está conformado por una amarilla, dos azules , una amarilla, cuatro azules, una amarilla, dos azules , una amarilla. Cruzamos por debajo de la amarilla de línea inferior, para salir a la verde. Introduzco dos verdes, una blanca y una negra para los ojitos.
Step 06
In this third line, we will make a point in the shape of a cross, to be able to leave space at the beginning of the line. I cross with the needle downwards, the blue mostacillon, I cross towards the yellow one and I go up the blue one. I introduce two beads, one yellow and one blue, and begin weaving my third line. Which this time is made up of one yellow, two blues, one yellow, four blues, one yellow, two blues, one yellow. We cross below the yellow of the lower line, to exit to the green. Then I introduce two green ones, one white and one black for the eyes.
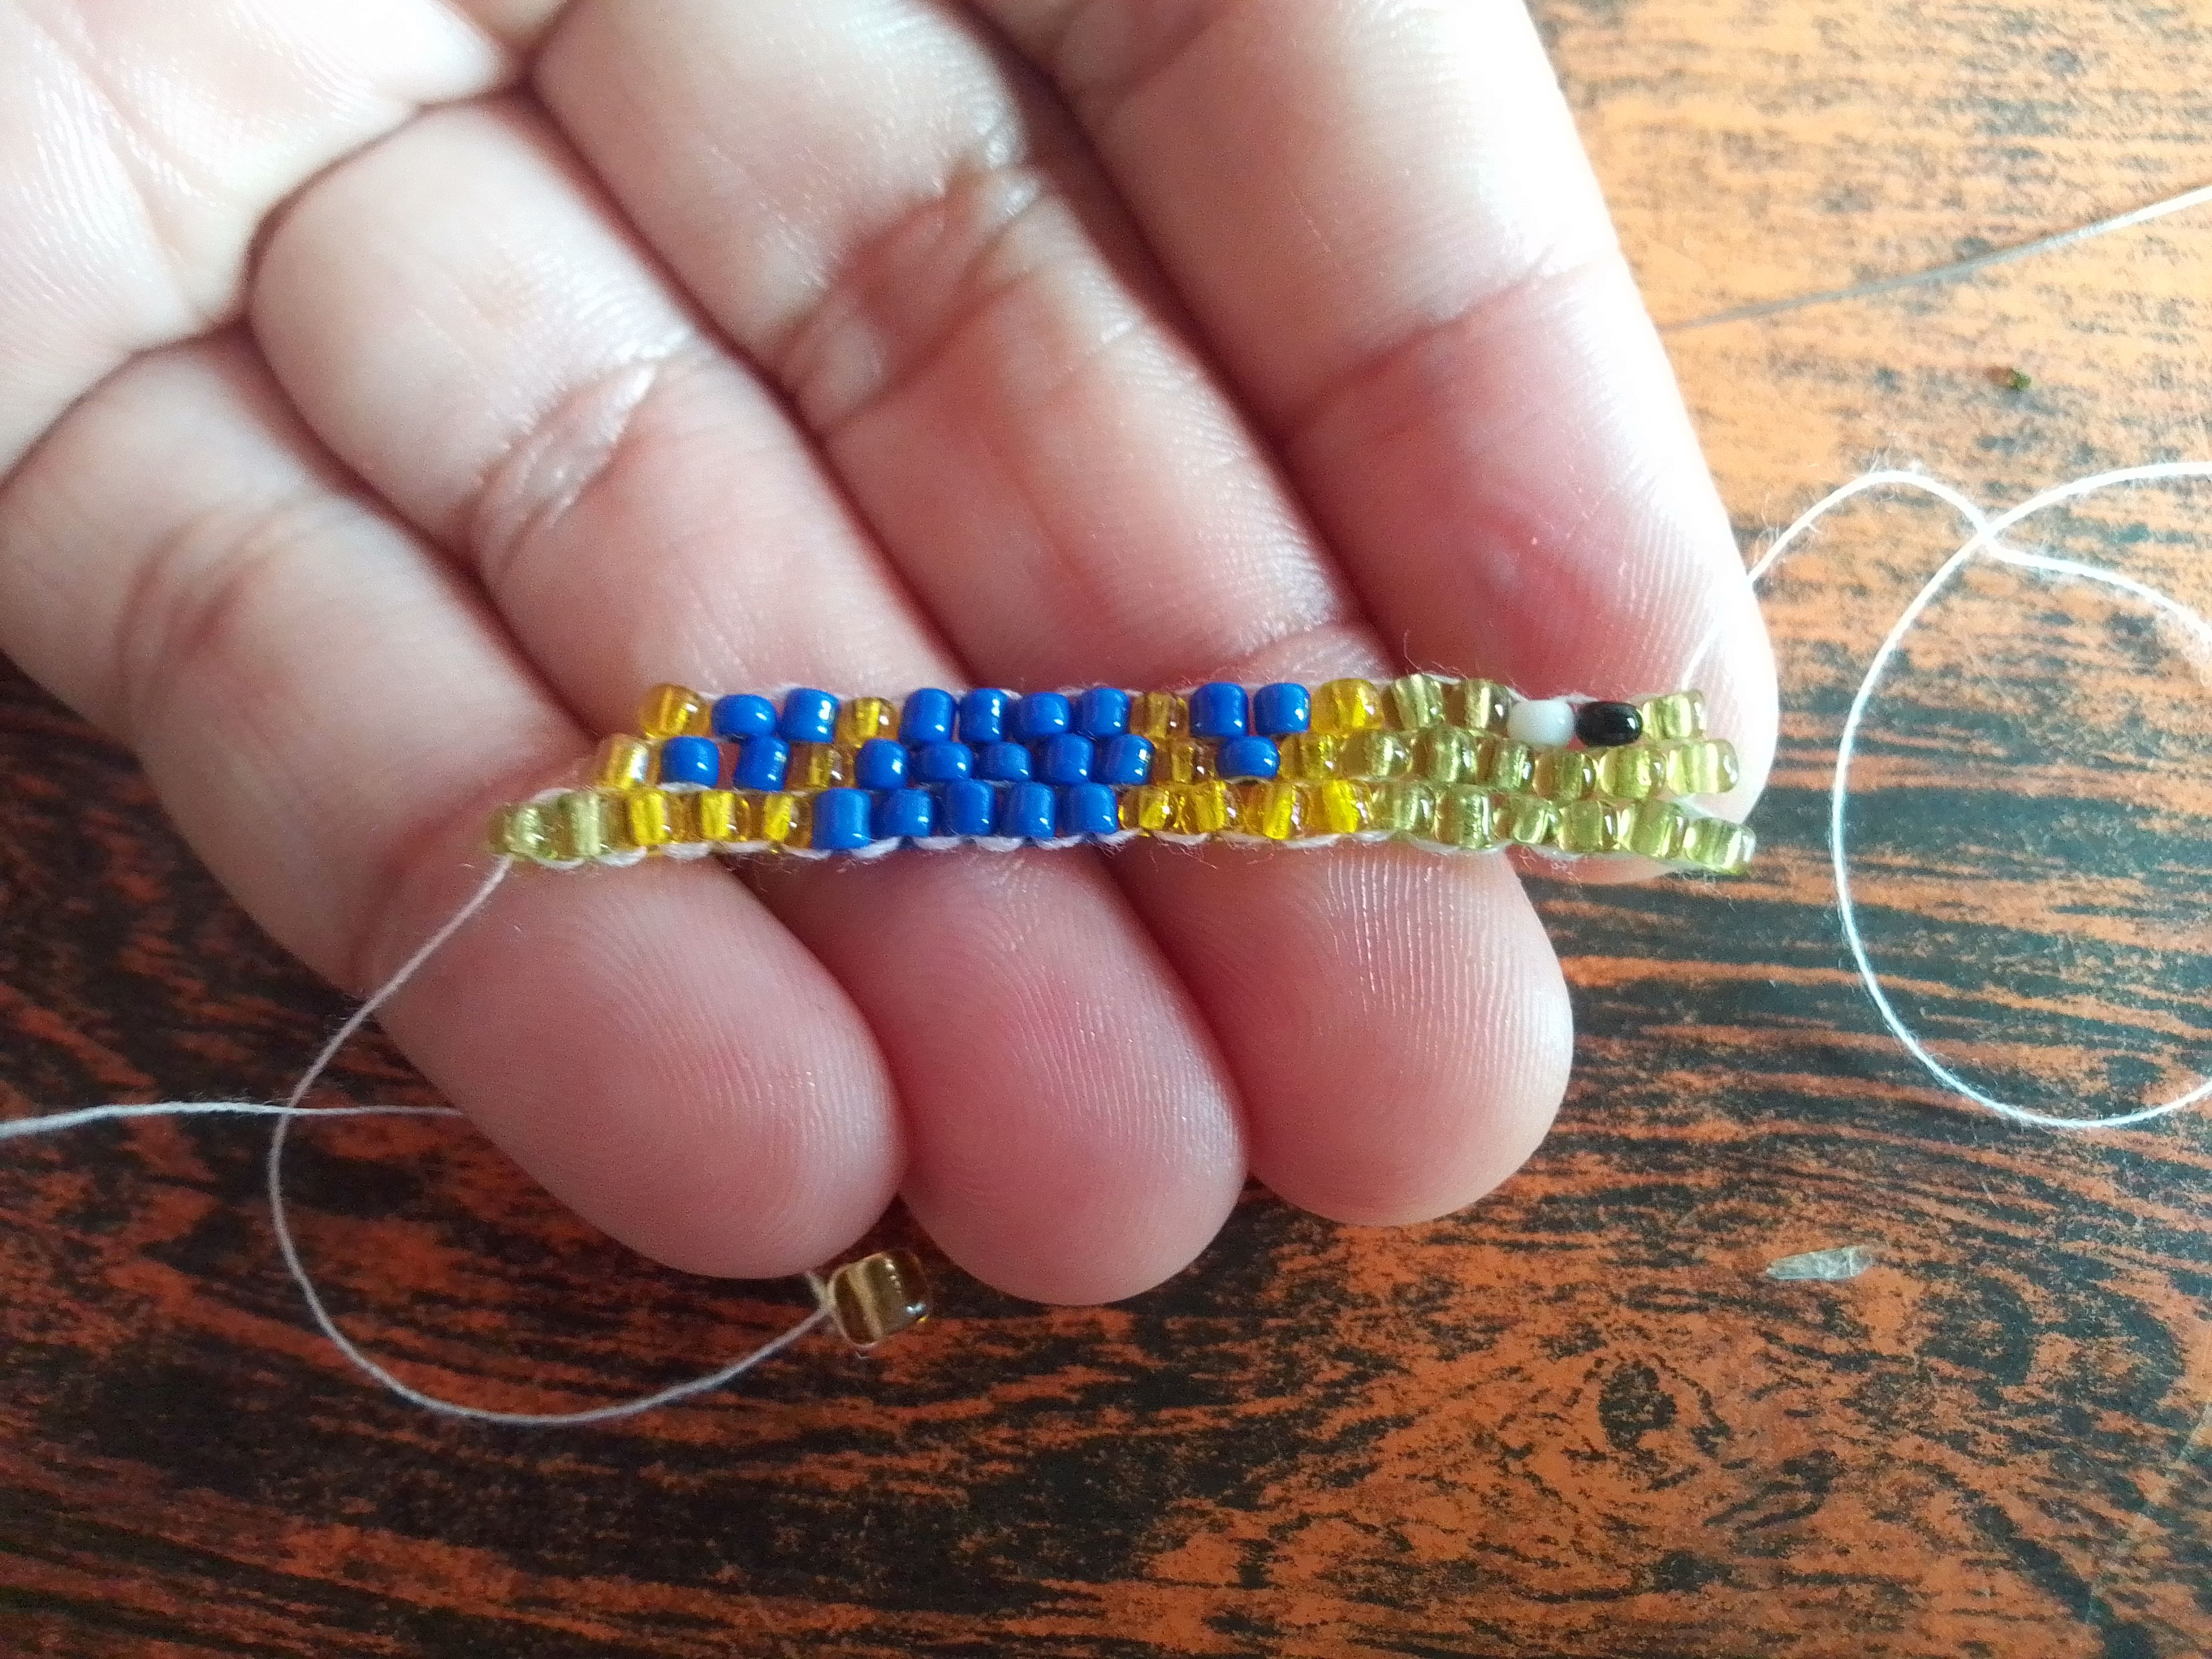
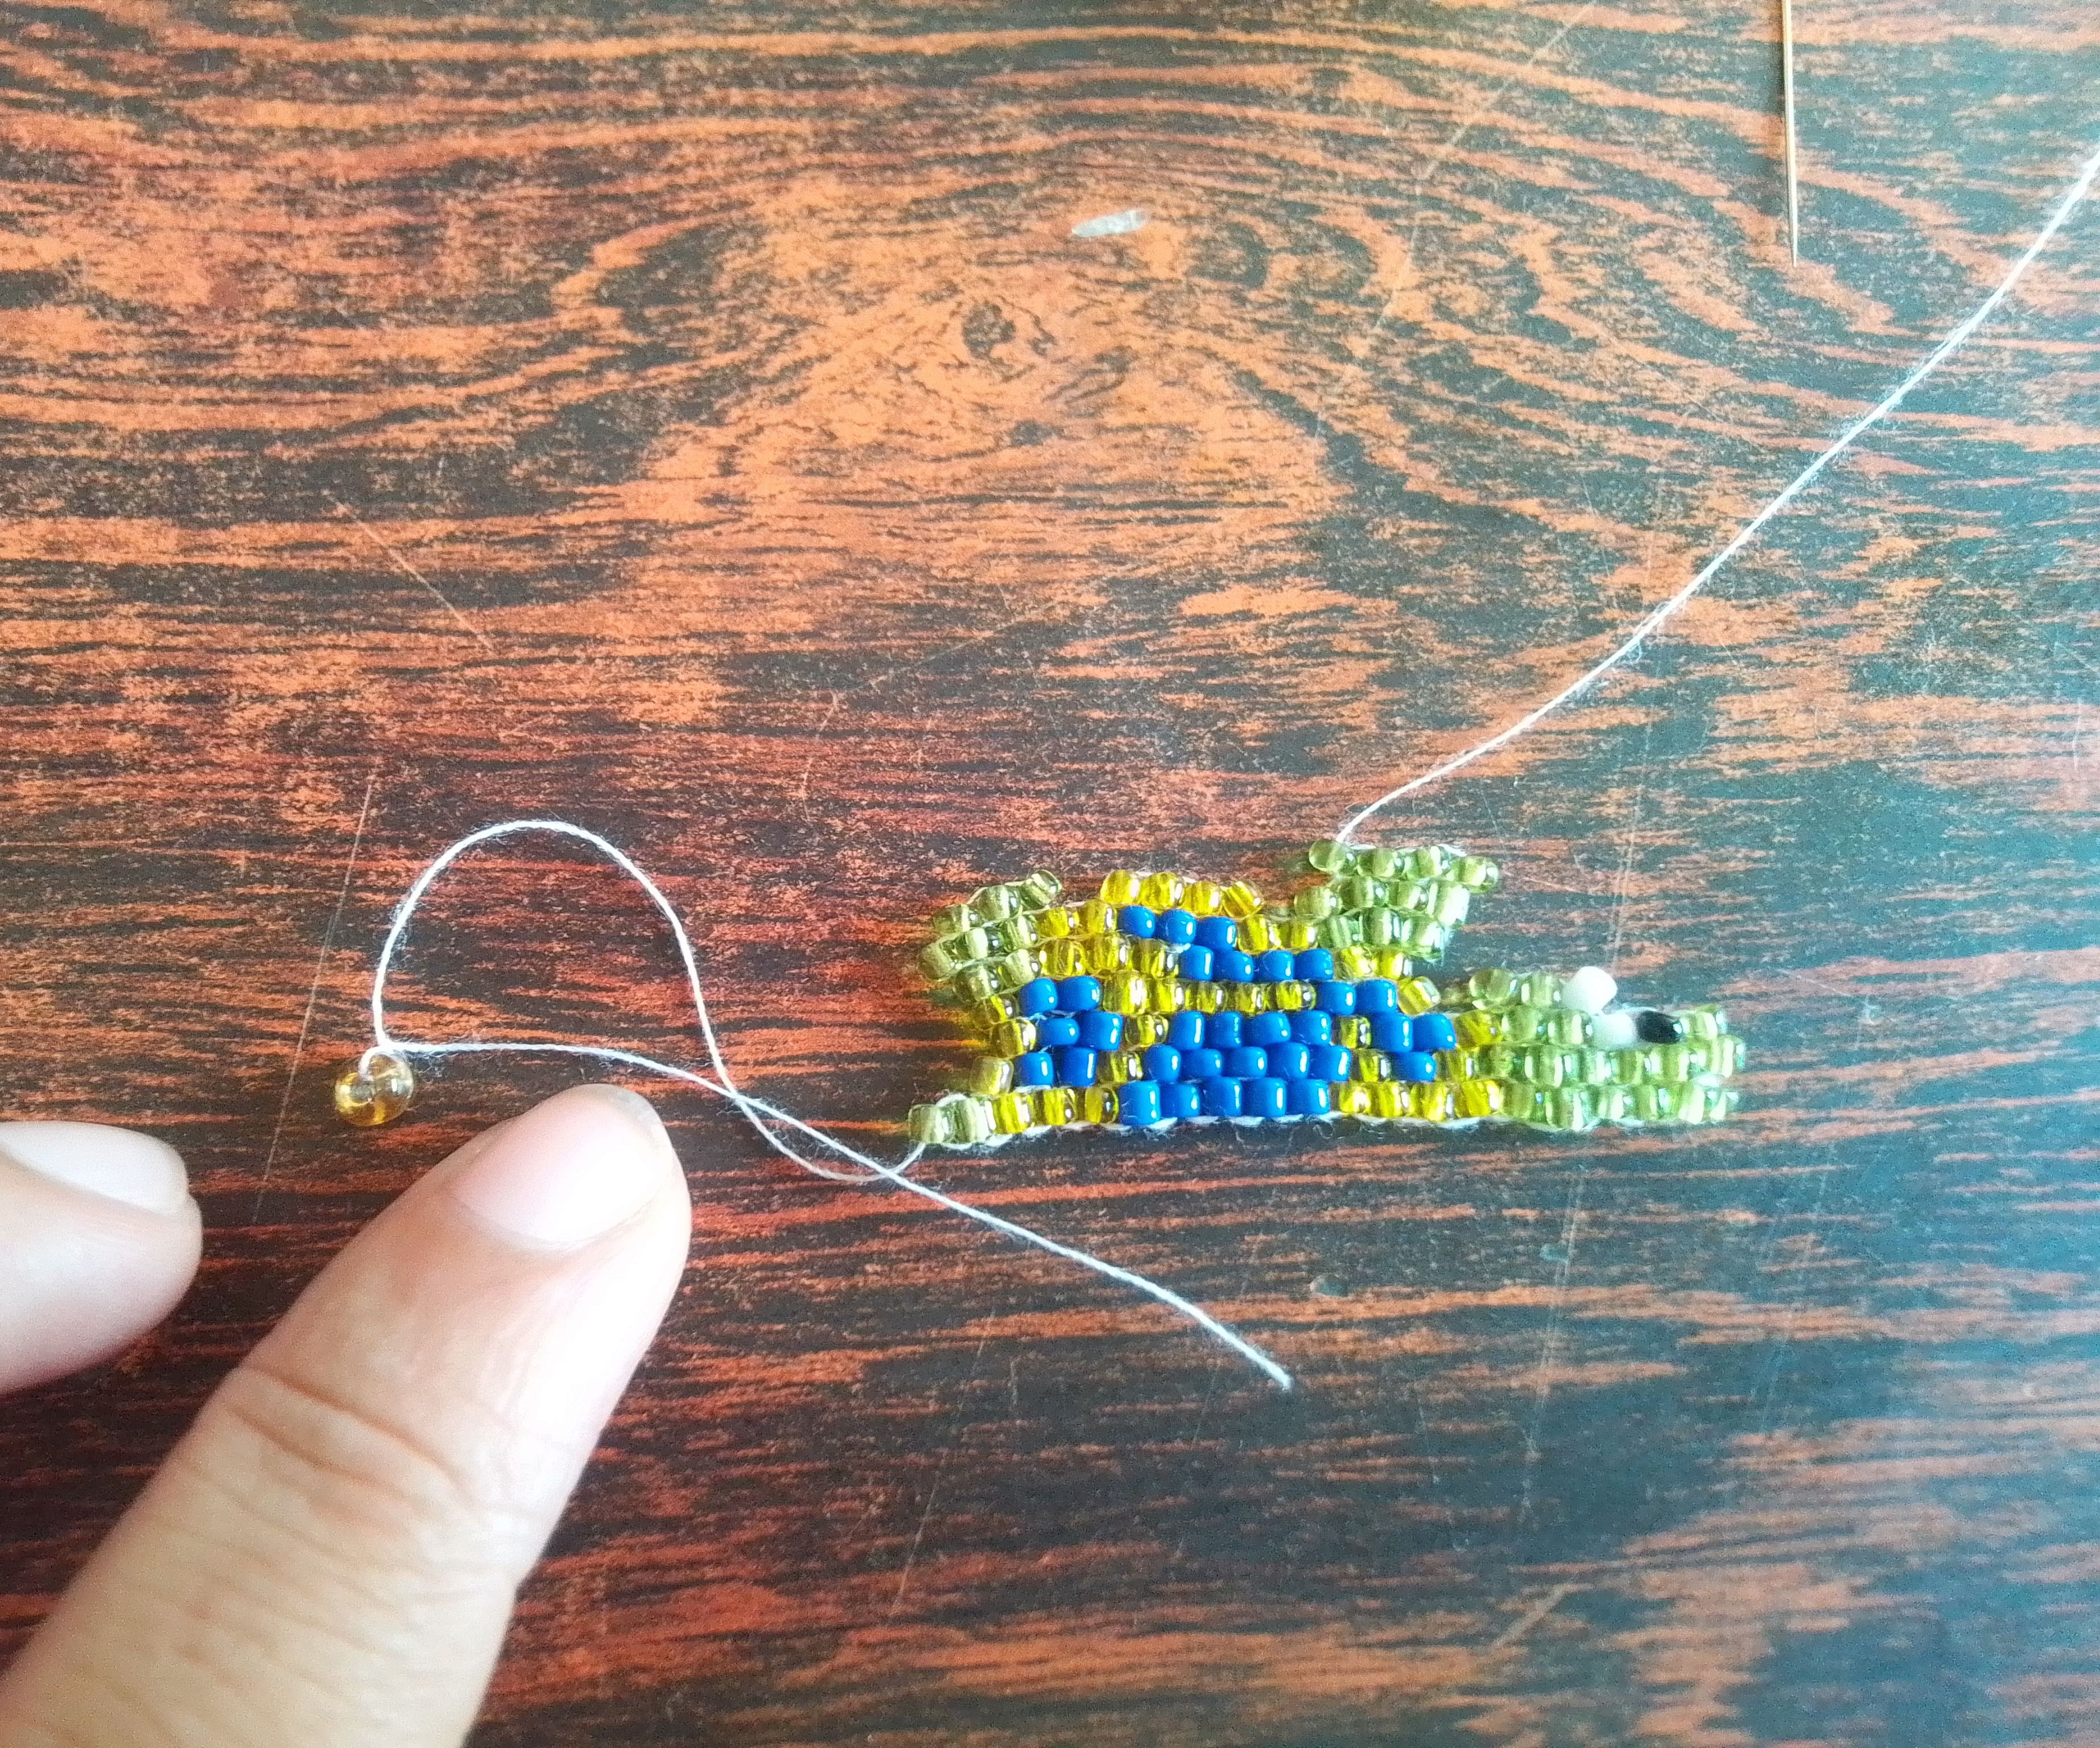
Paso 07
Continuo la cuarta línea, regresadome por la blaca, por abajo de las verdes o inferiores y subiendo hacia la blanca nuevamente . Introduzco una mostacilla blanca y una verde y cruzo por el hilo, continuando la línea con, una verde, dejamos el espacio, una amarilla, dos azules, cinco amarillas, dos azules, una amarilla.
Paso 08
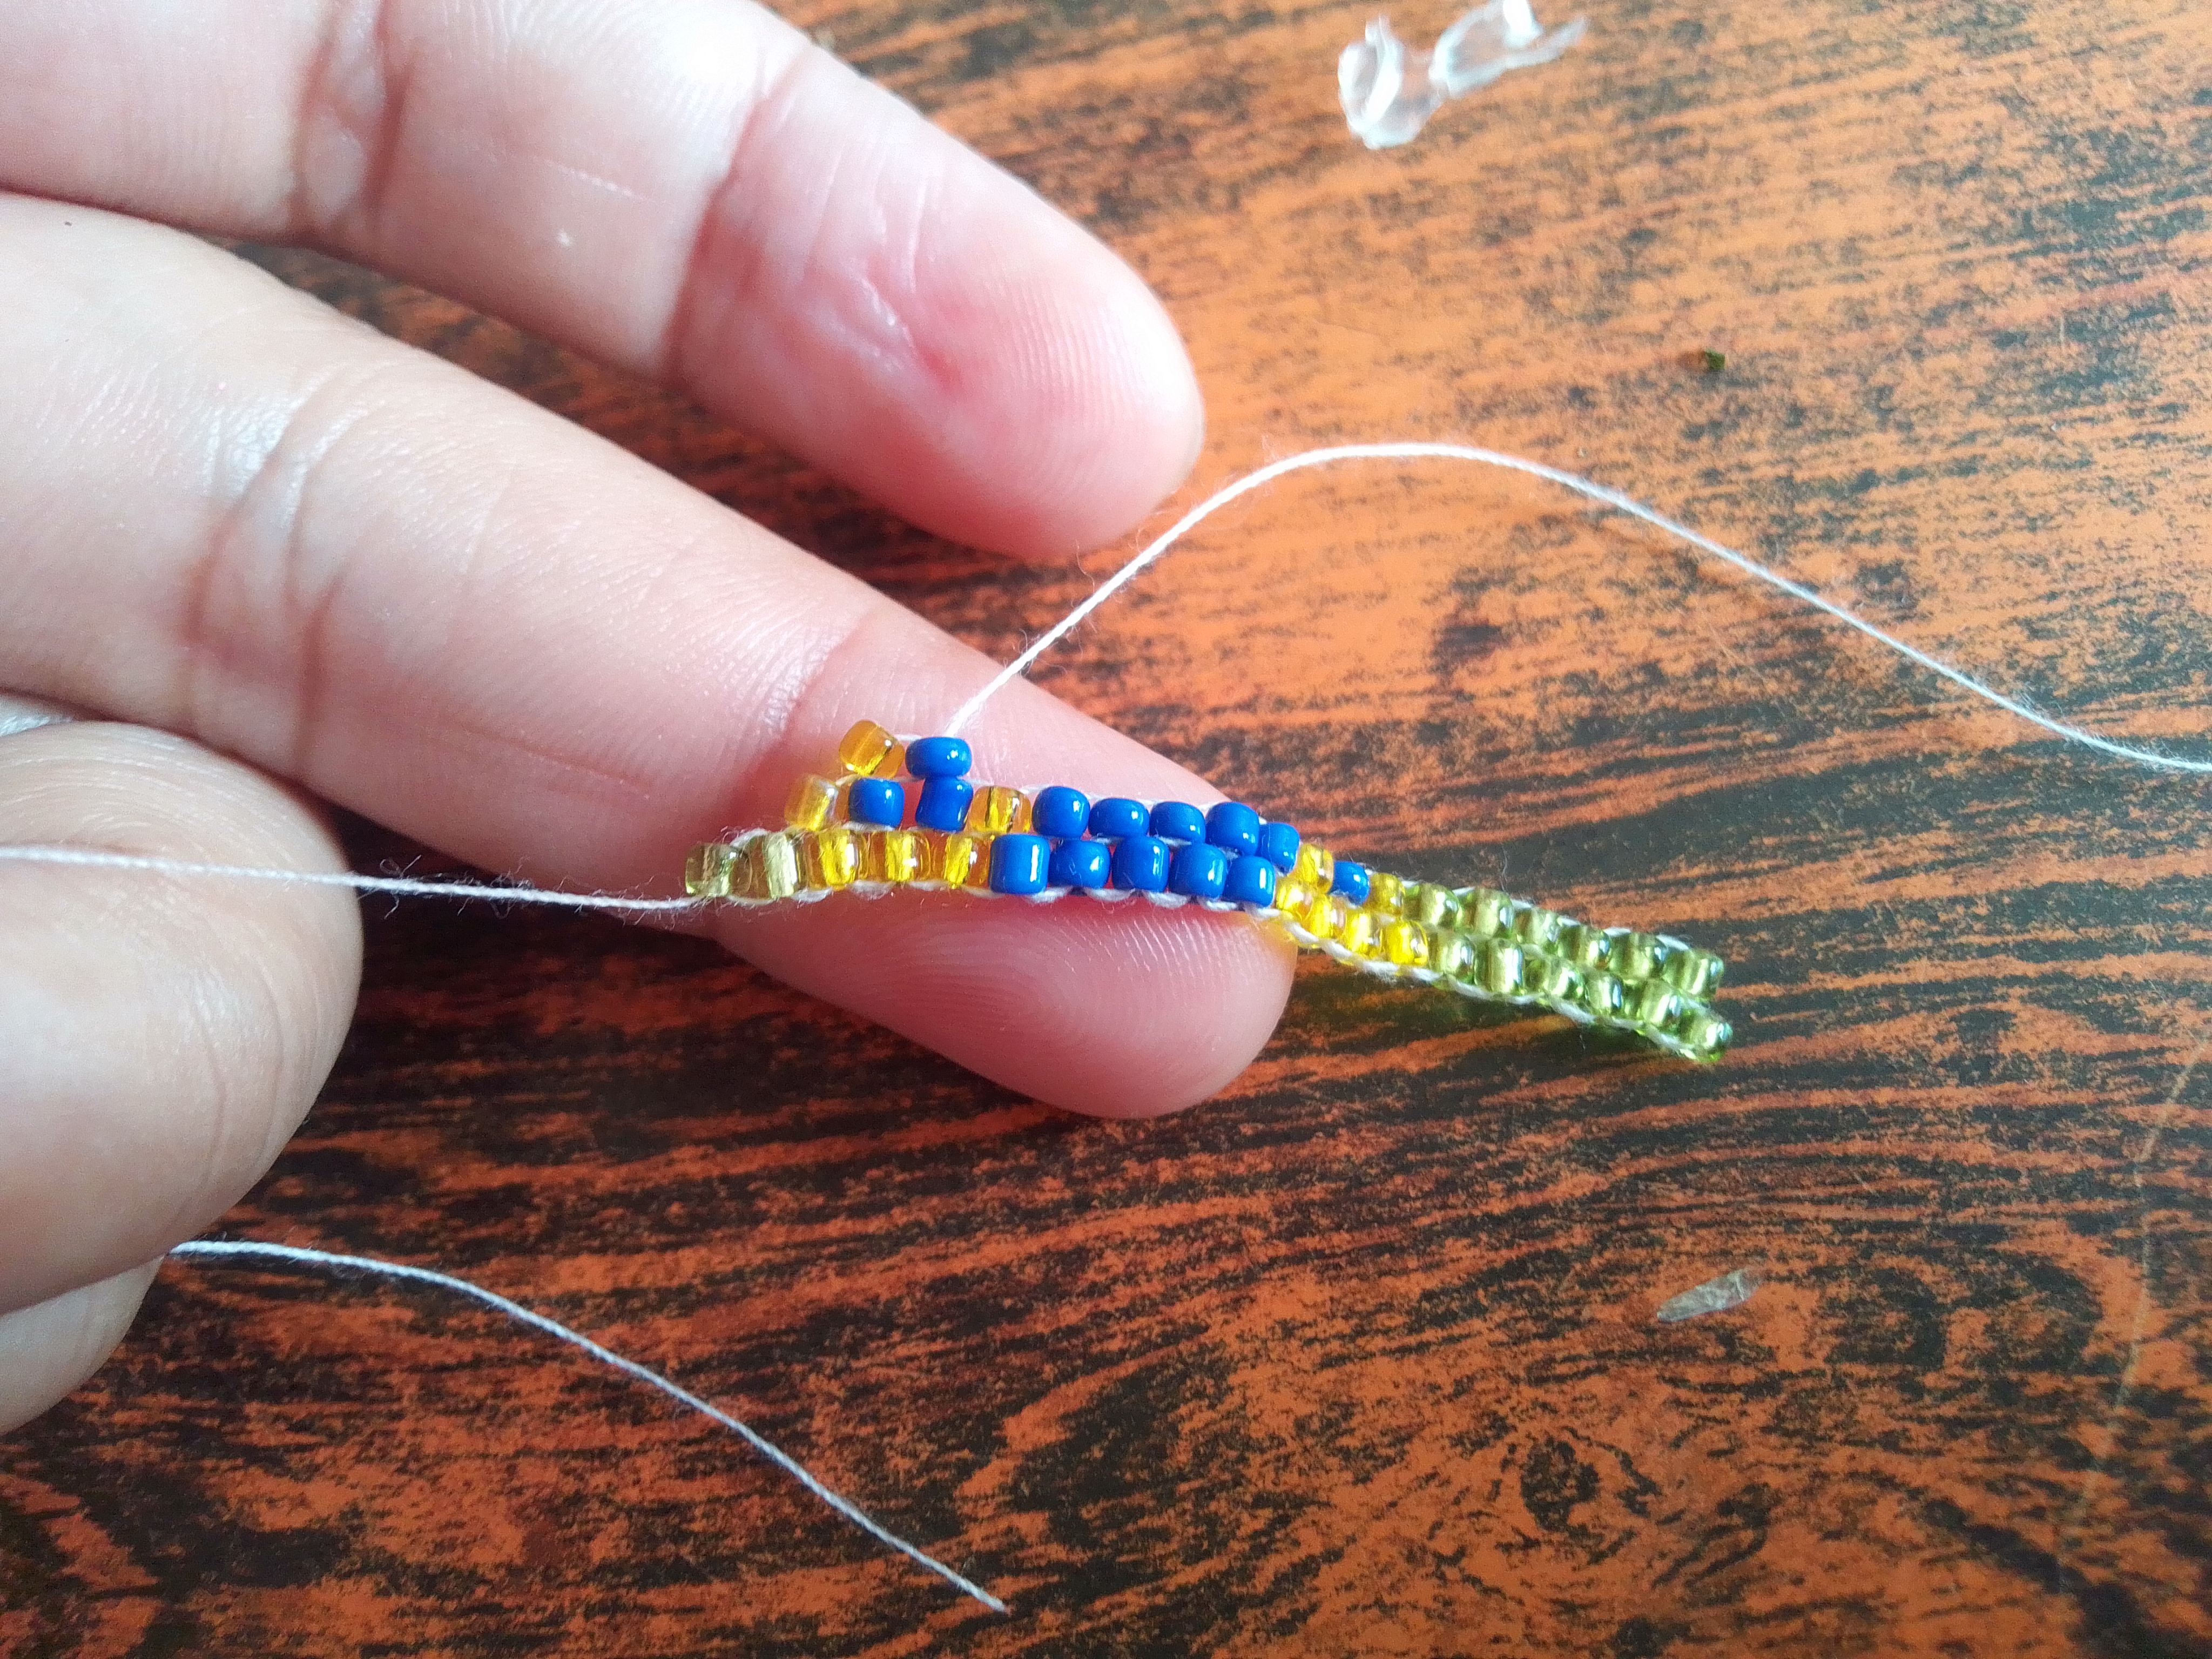
En la quinta insertamos dos verdes, tres amarillas cuánto azules, una amarilla y una verde. Aquí necesitamos correr dos espacios para formar las patitas, por lo que introduzco dos mostacillas verdes y paso por atrás del hilo de la última mostacilla. Bajo por la penúltima y subo. Cruzo una verde, dos amarilla, tres azules, dos amarillas y tres verdes, armando la sexta linea.
Step 08
In the fifth we insert two green ones, three yellow ones, how many blue ones, one yellow and one green. Here we need to run two spaces to form the legs, so I insert two green beads and pass behind the thread of the last bead. I go down the penultimate and go up. He crossed one green, two yellow, three blue, two yellow and three green, forming the sixth line.
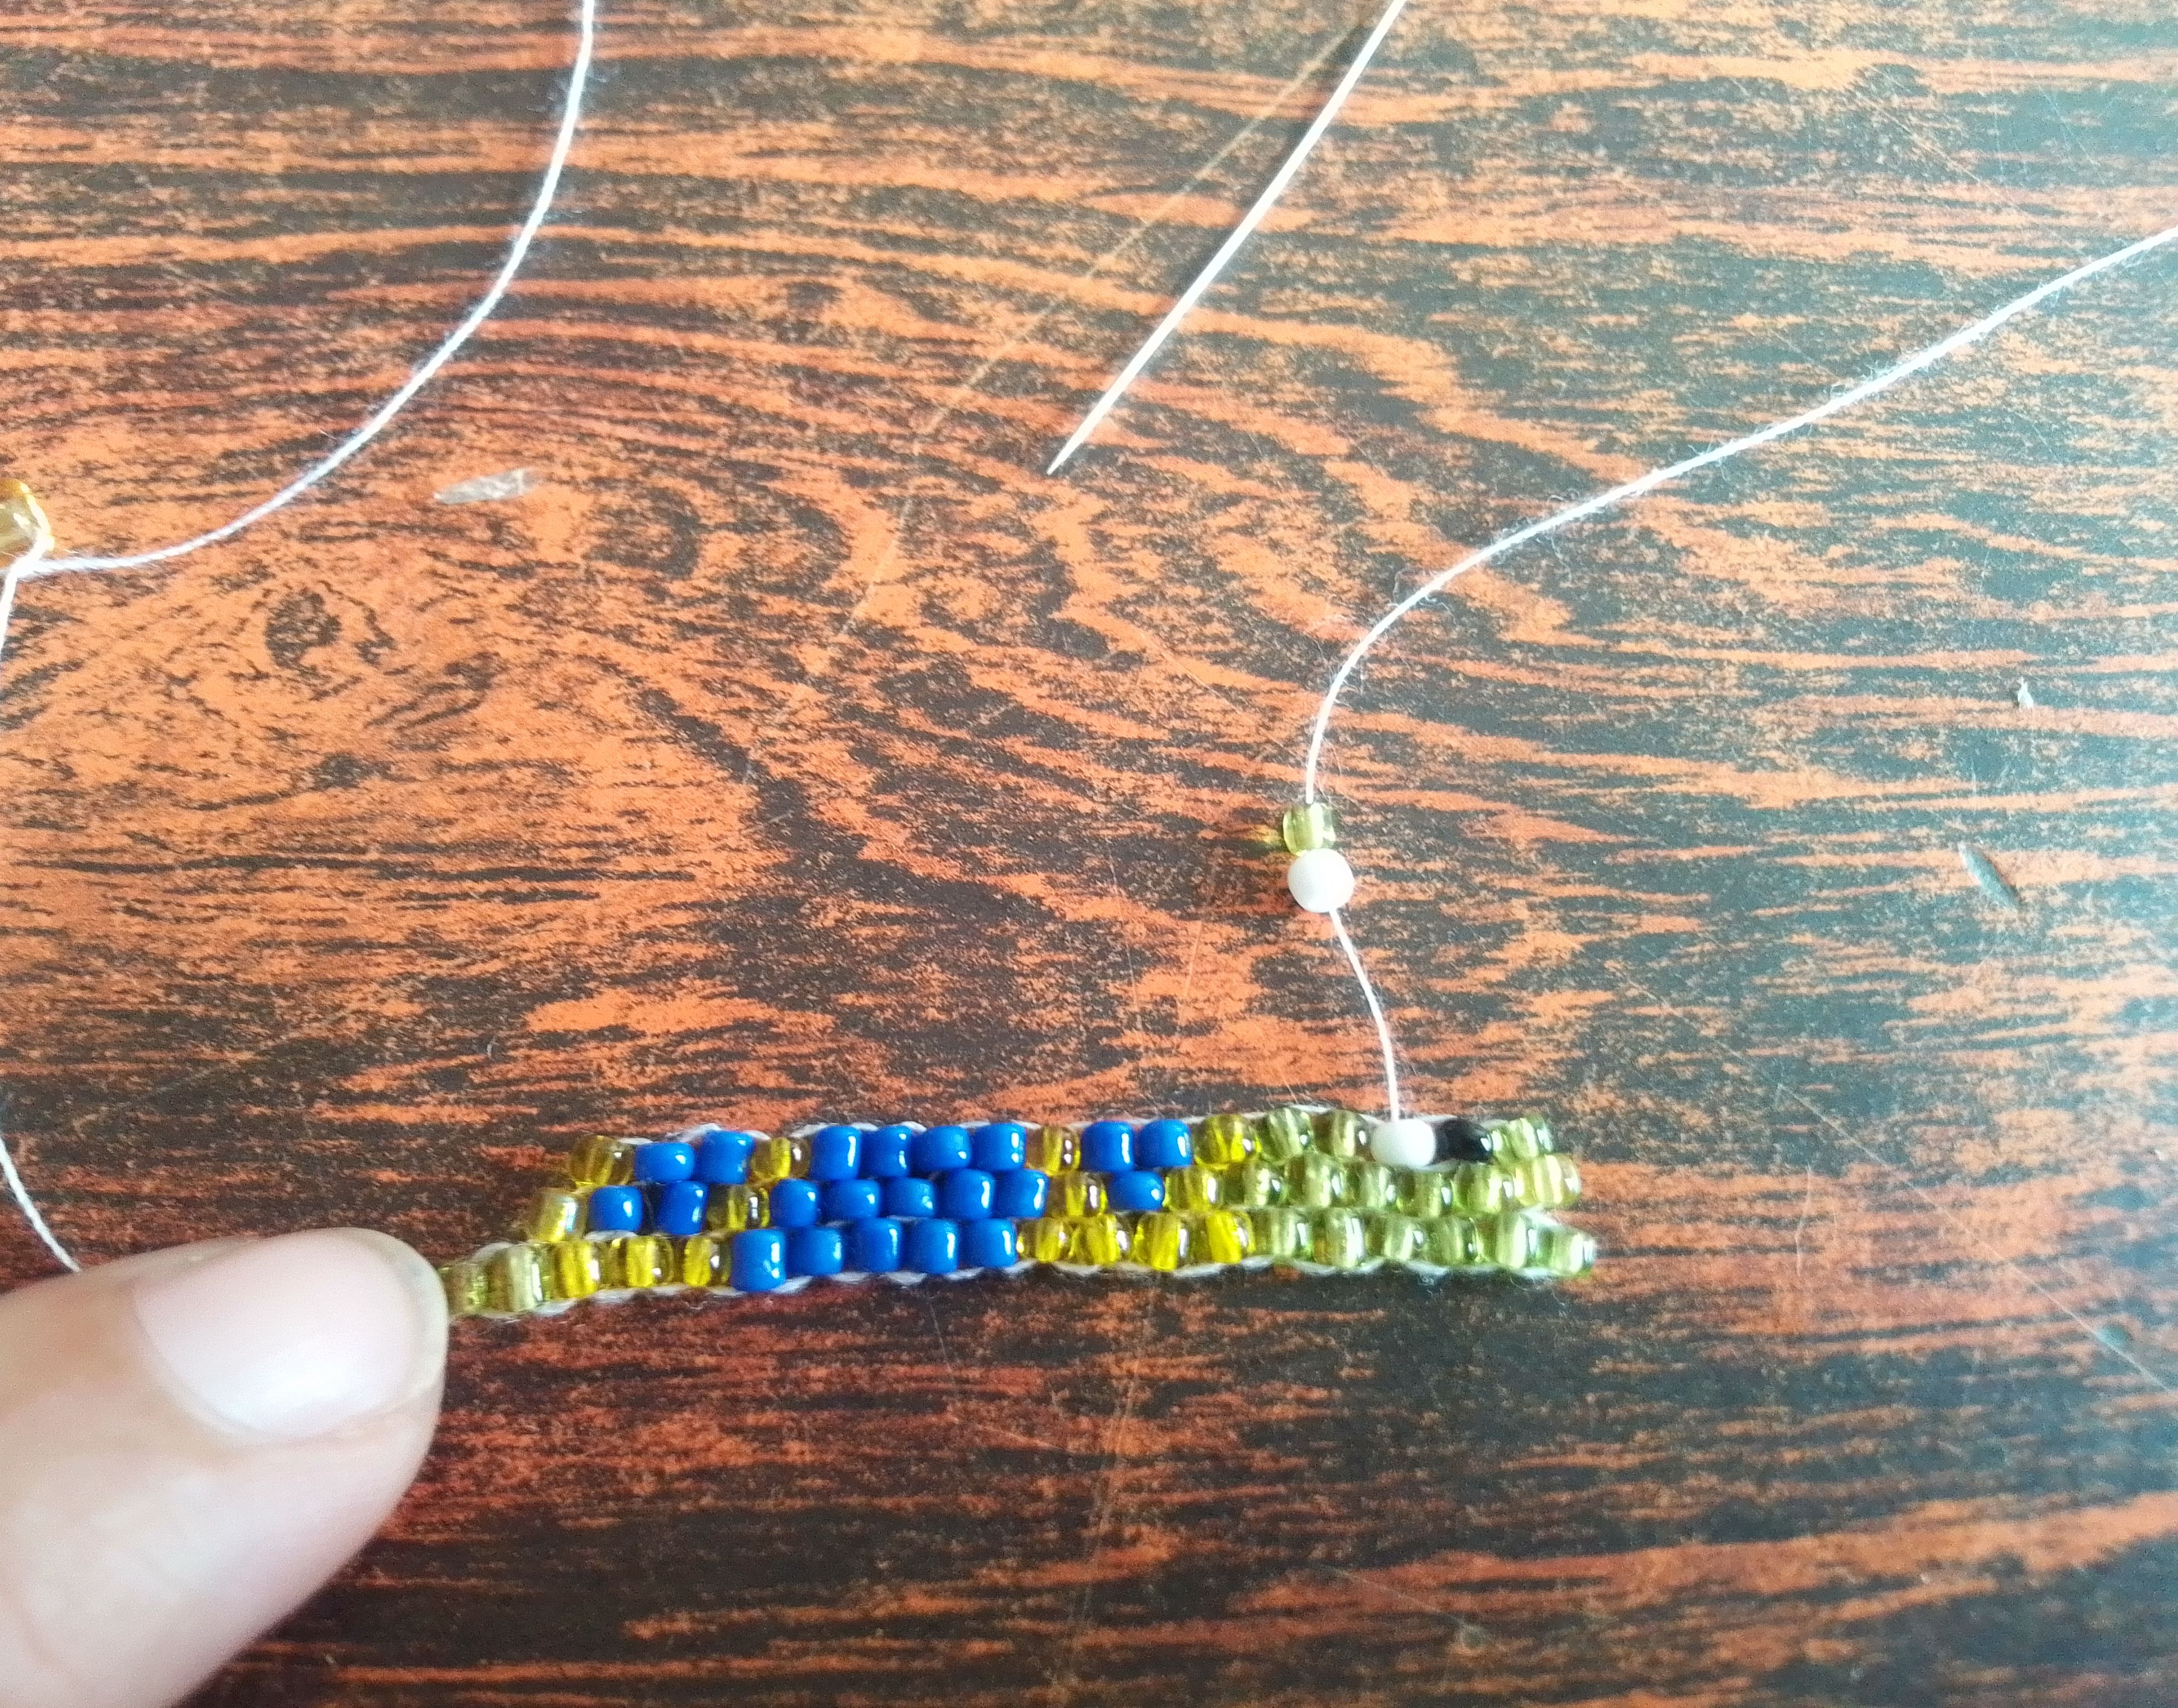
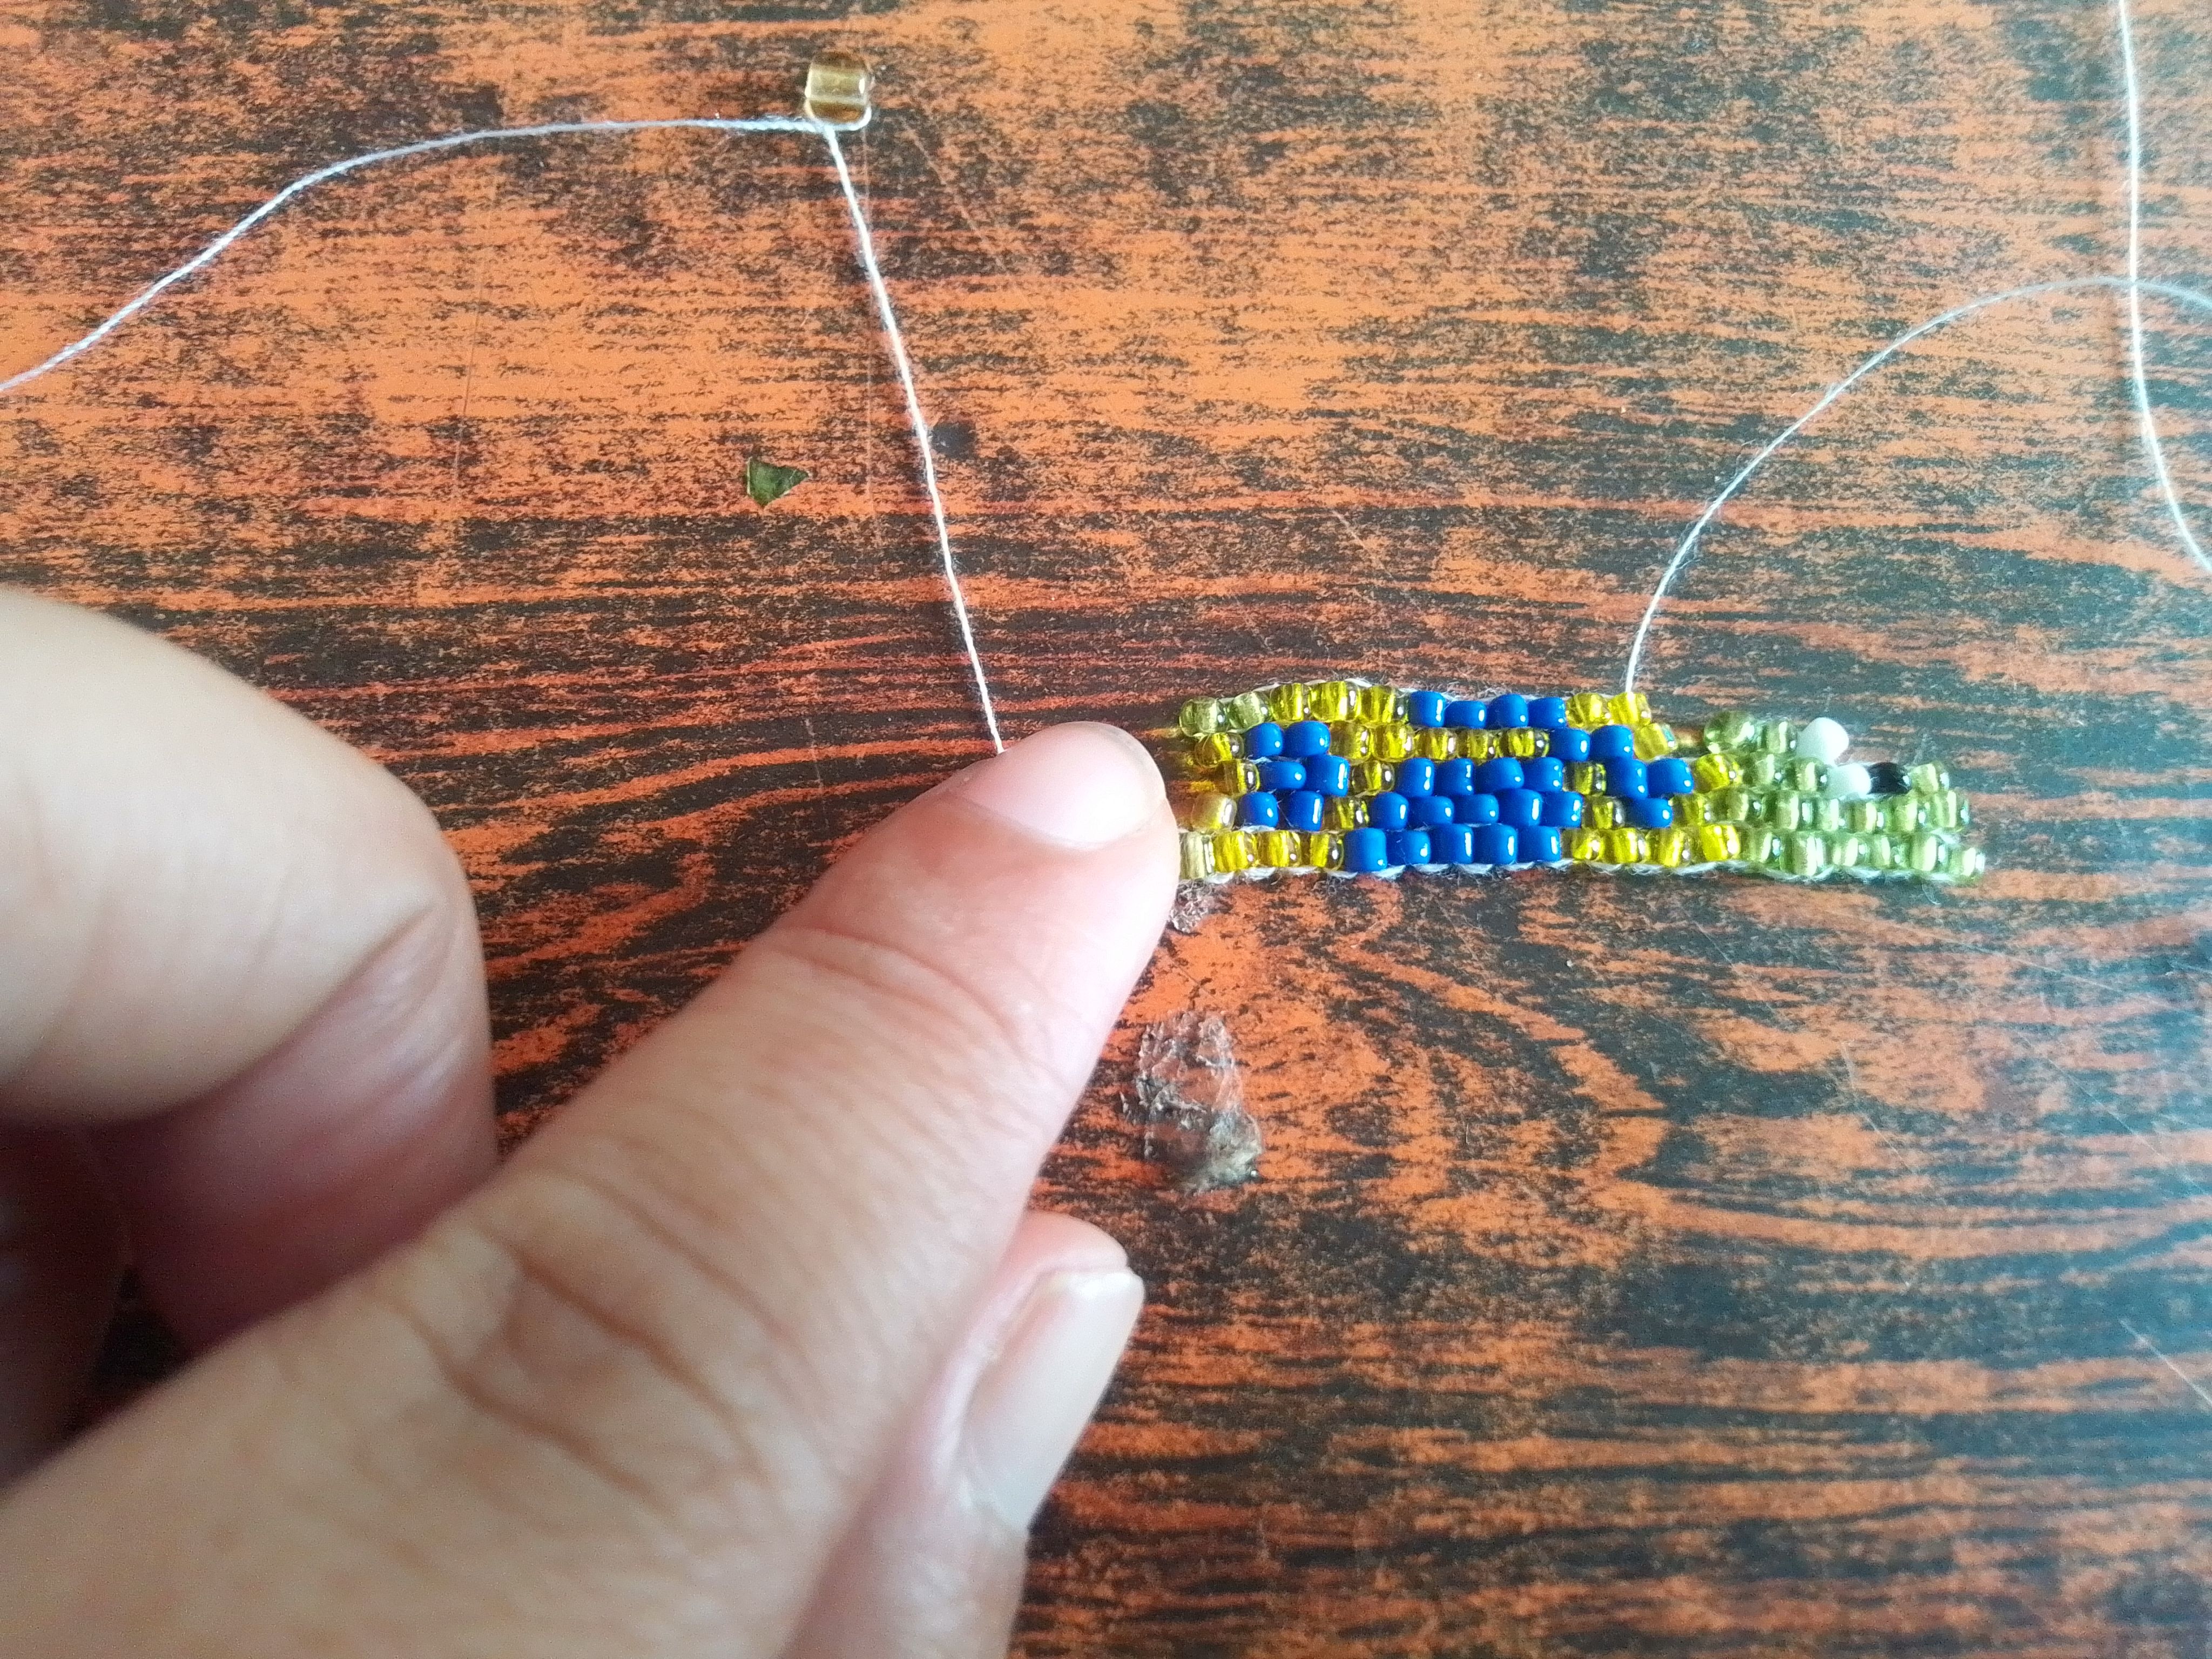
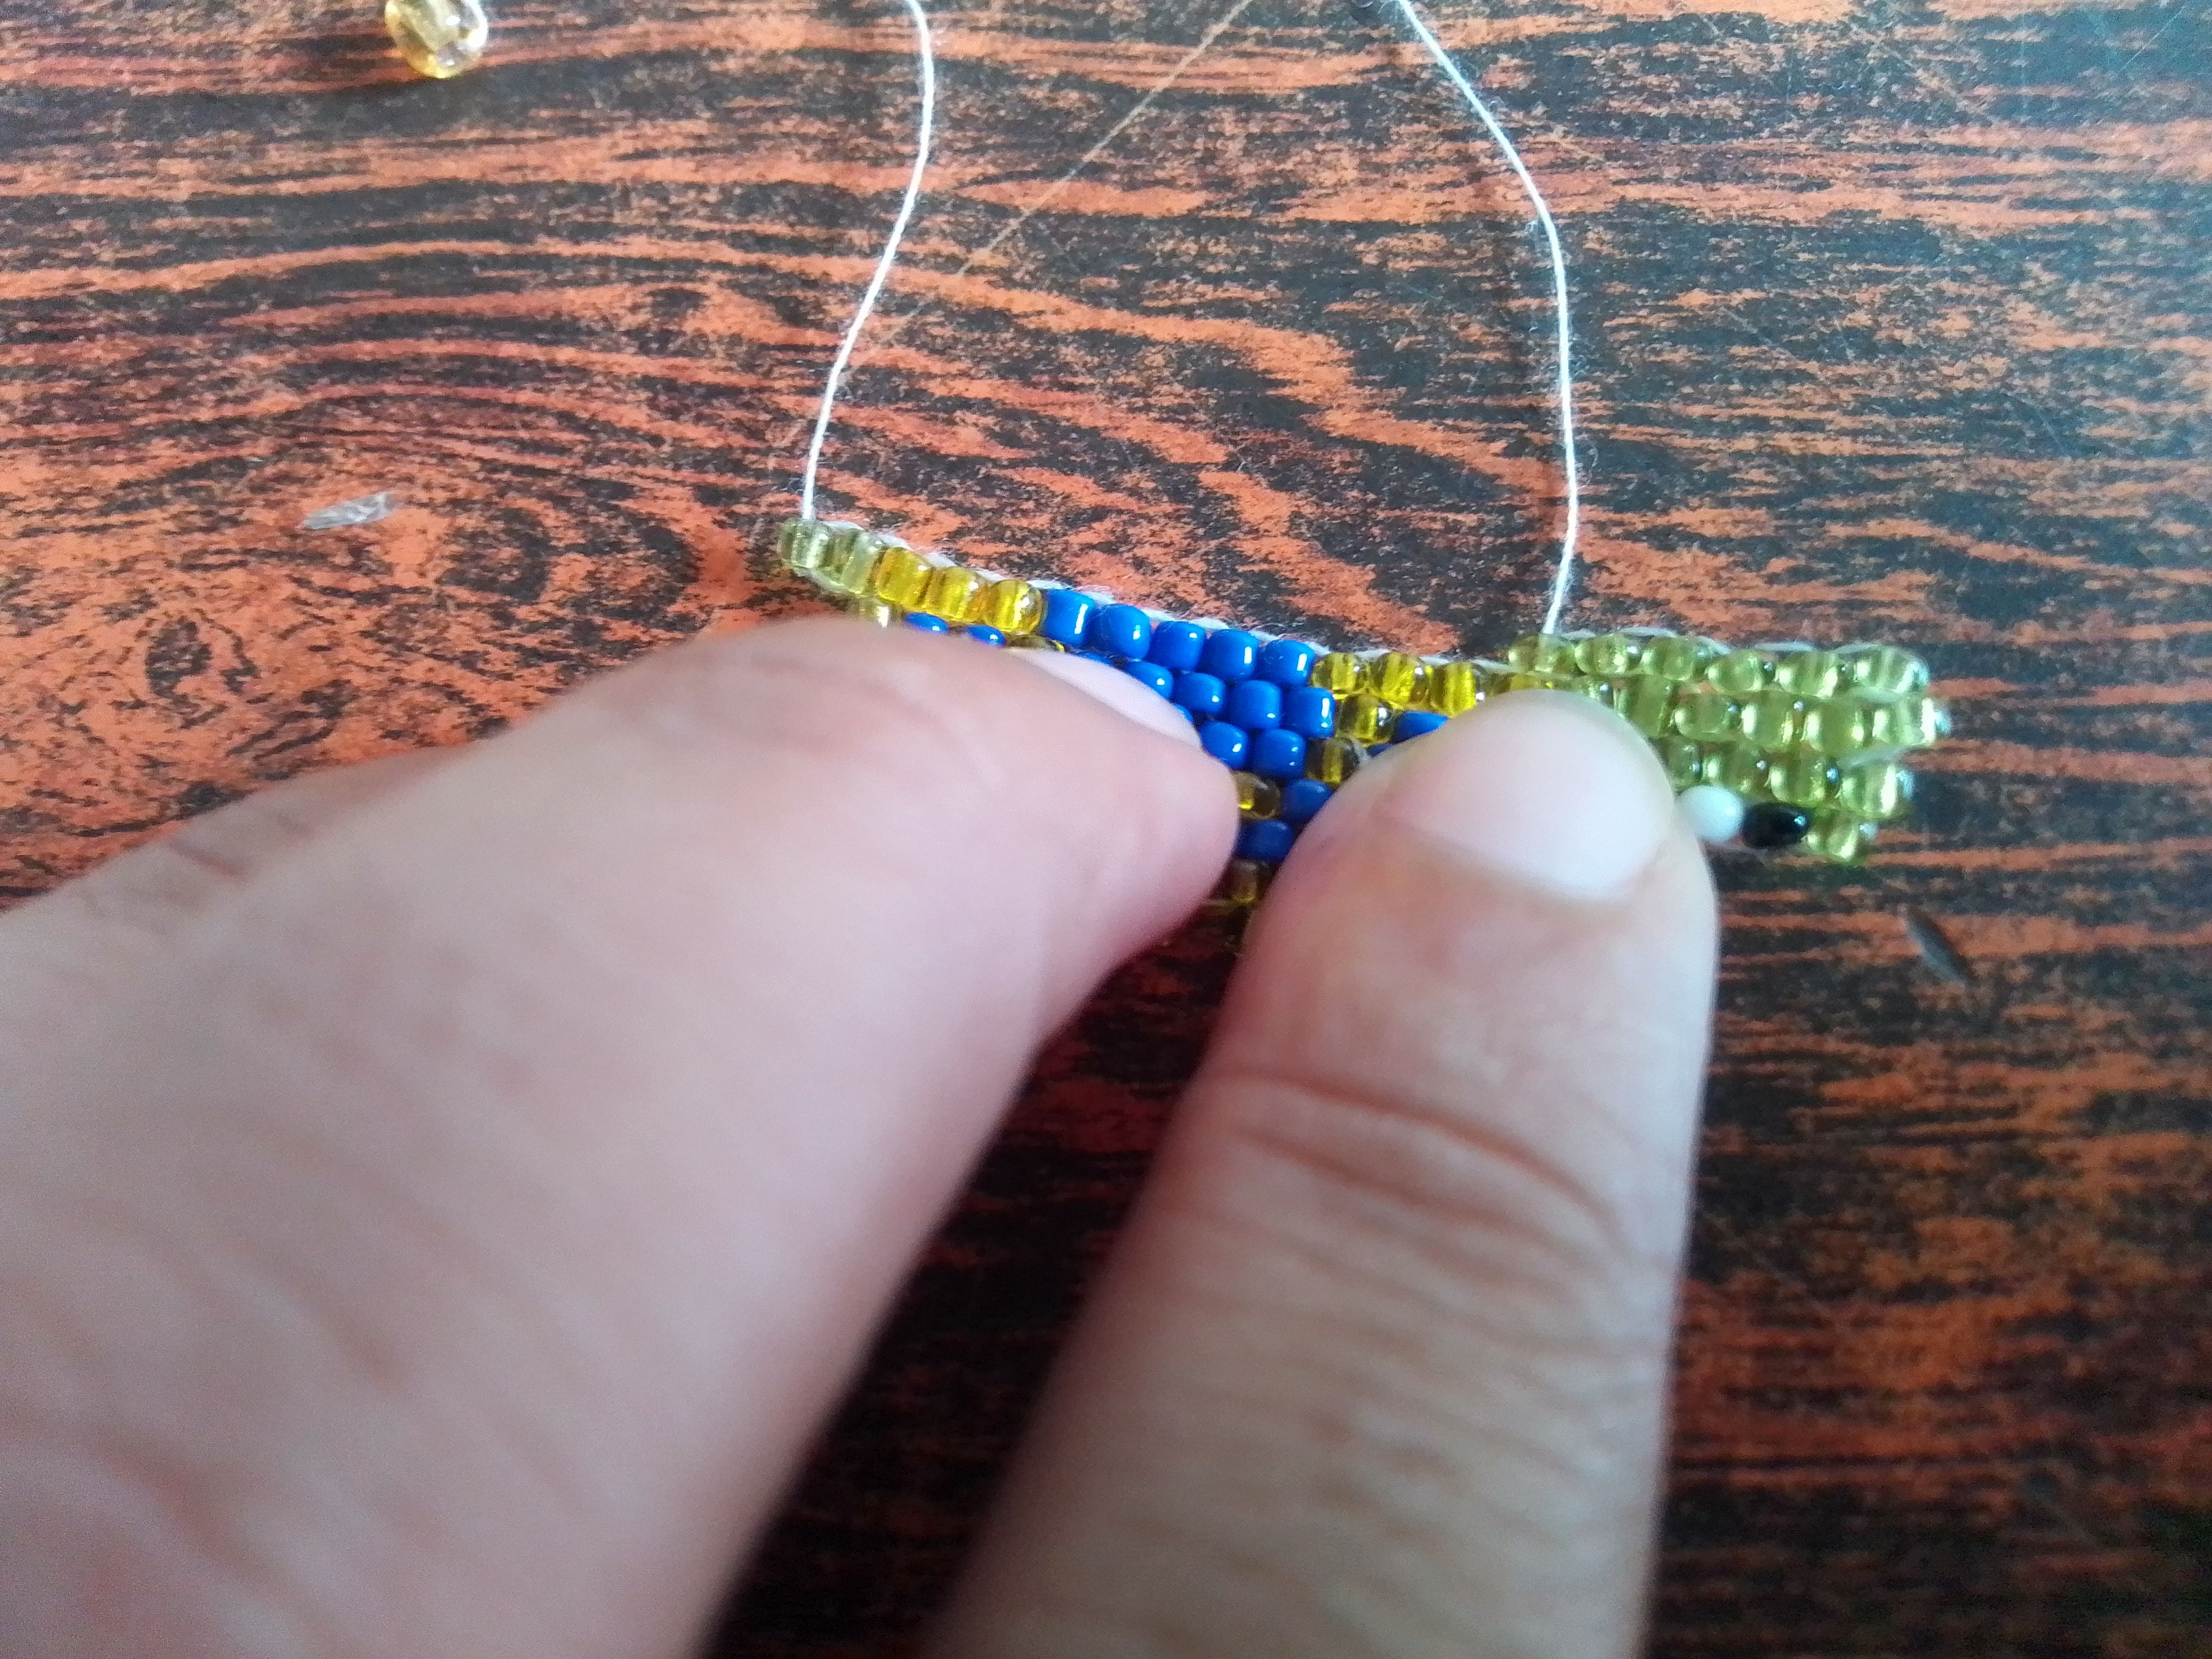
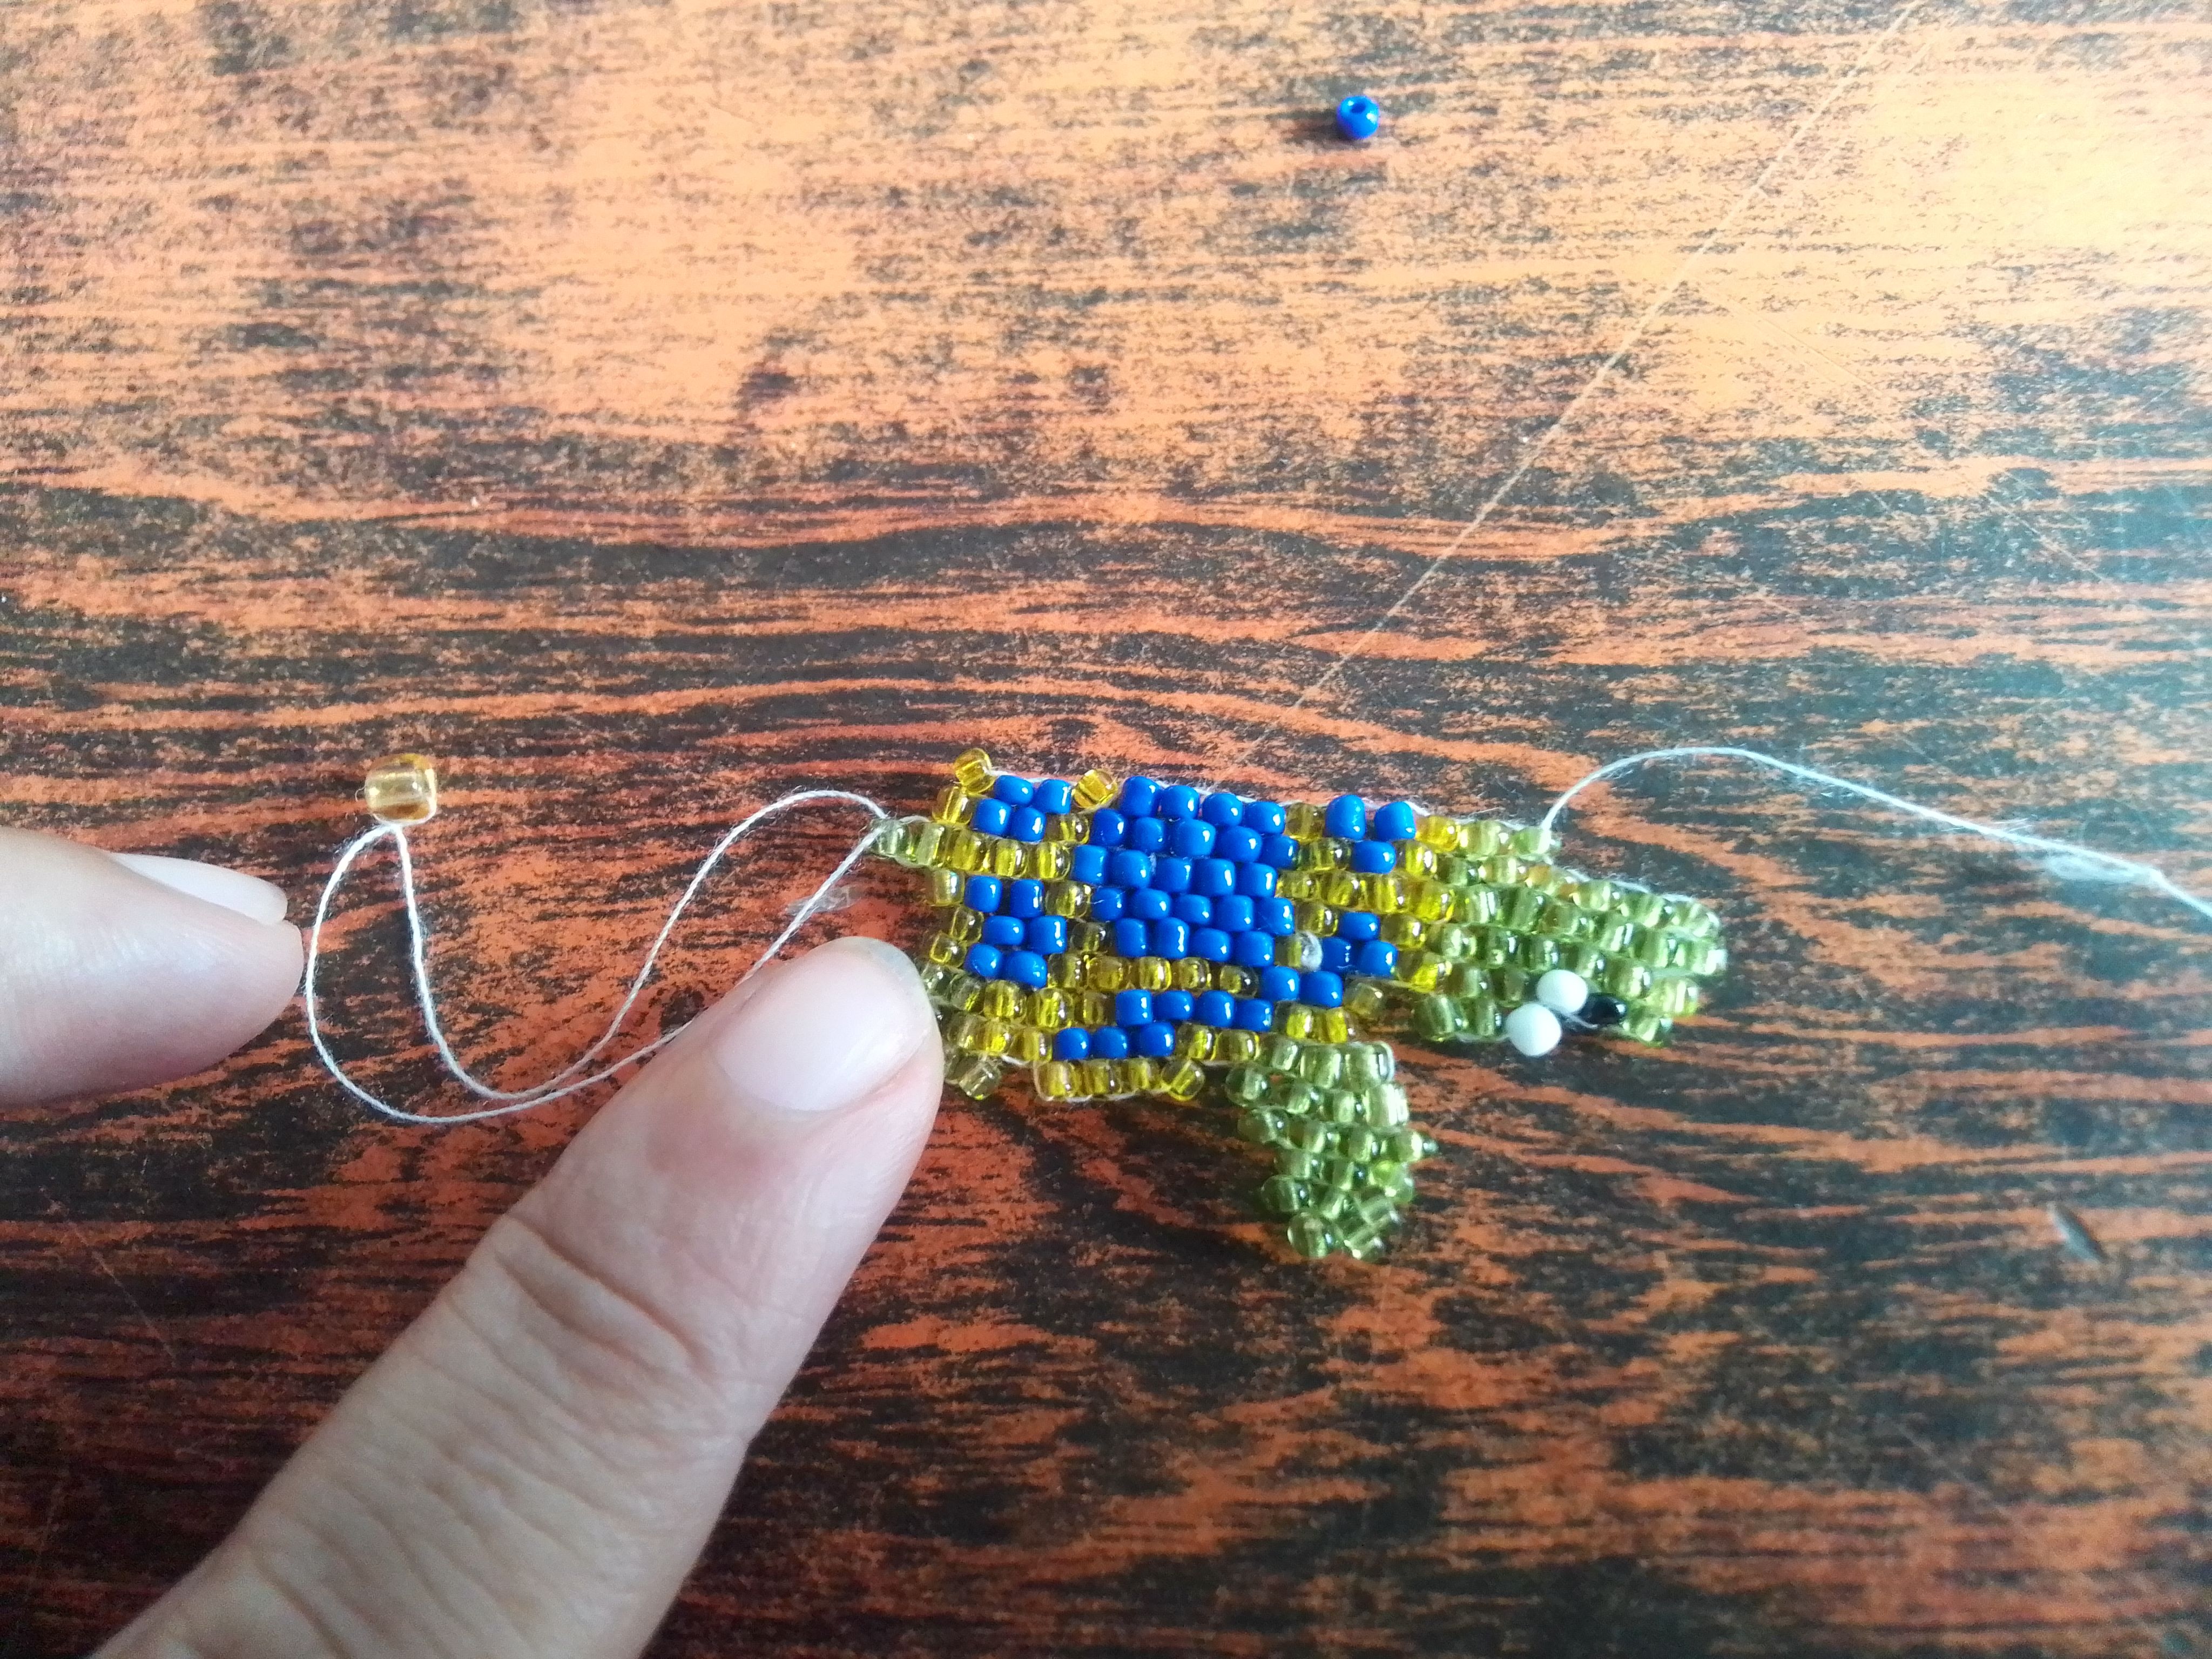
Paso 09
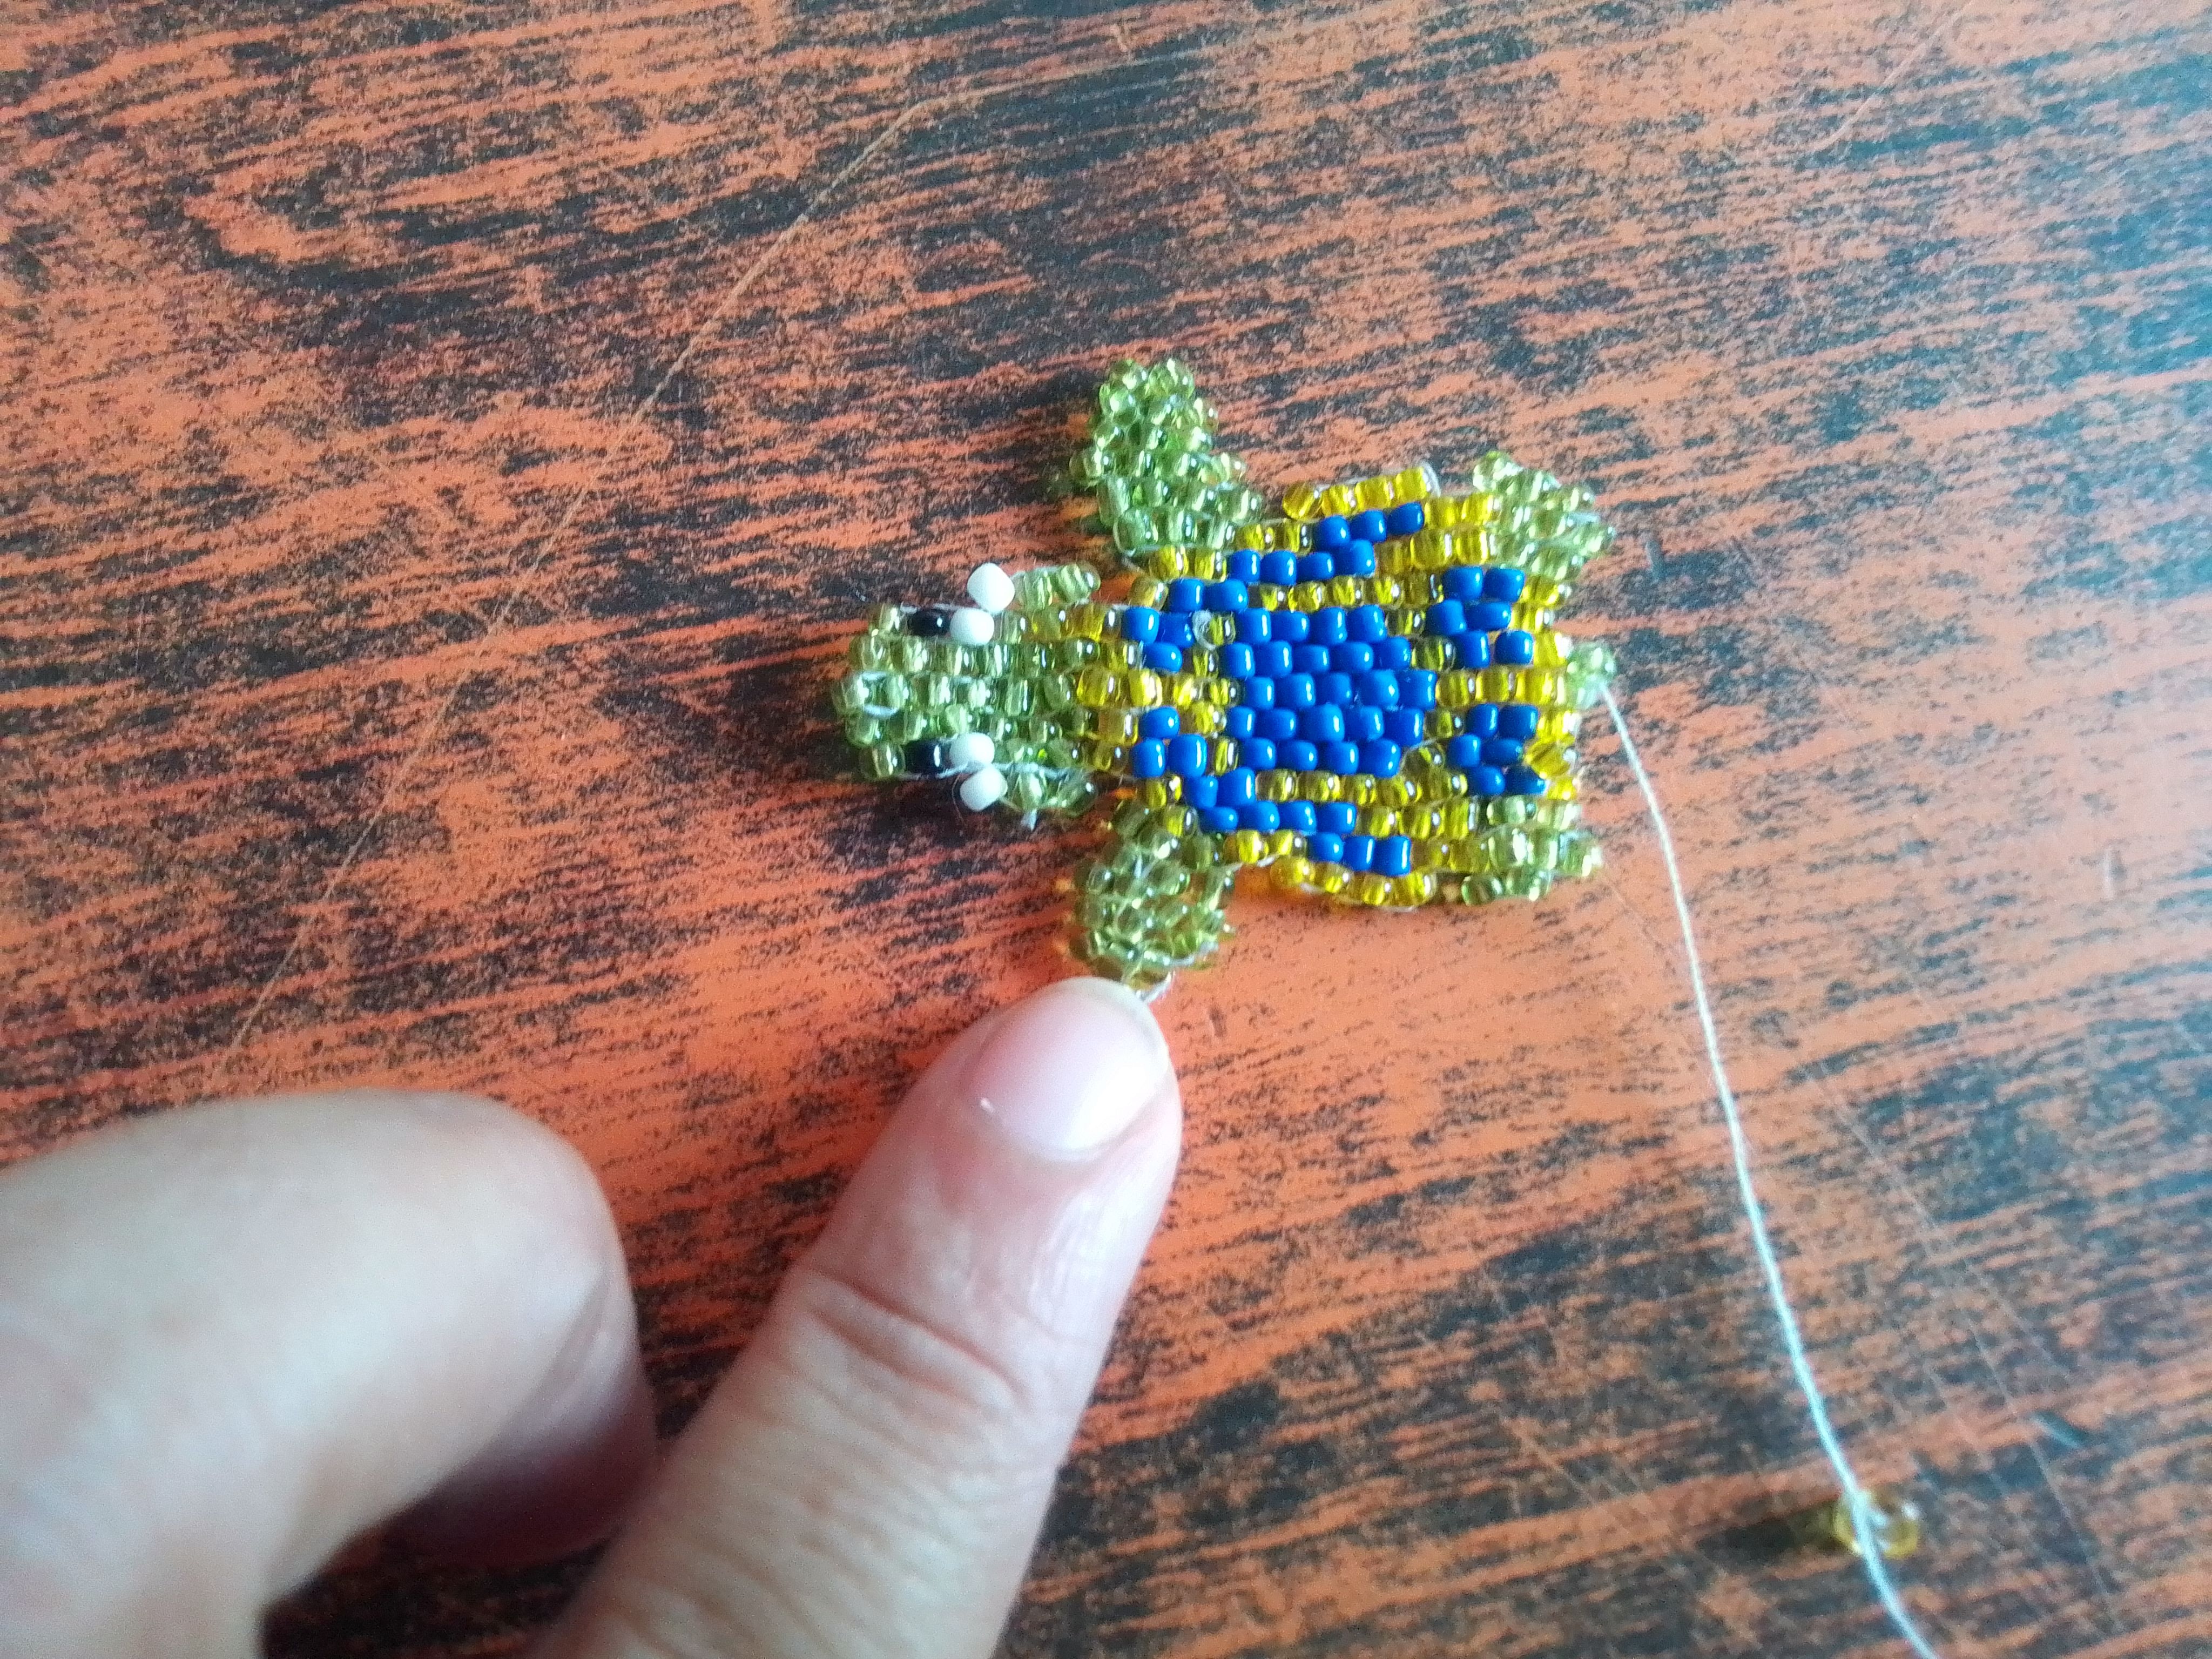
En la séptima línea, inserto dos mostacillas verdes y cruzamos por abajo hasta salir a la mostacilla azul, introduzco tres amarillas y cruzo por abajo hasta salir a la verde. Terminando las 4 últimas de la aleta de la tortuga. Aca ya tenemos la mitad de tortuga hecha y básicamente hacer la otra mitad consiste en seguir los mismos pasos. Podemos pasar el hilo por todas las mostacillas o podemos cruzarlo por la que necesitemos que esté.
Step 09
In the seventh line, I insert two green beads and we cross at the bottom until we get to the blue bead, I insert three yellow ones and cross at the bottom until we get to the green one. Finishing the last 4 of the torture fin.Here we already have half of the turtle made and basically making the other half consists of following the same steps. We can pass the thread through all the beads or we can cross it through the one we need it to be in.
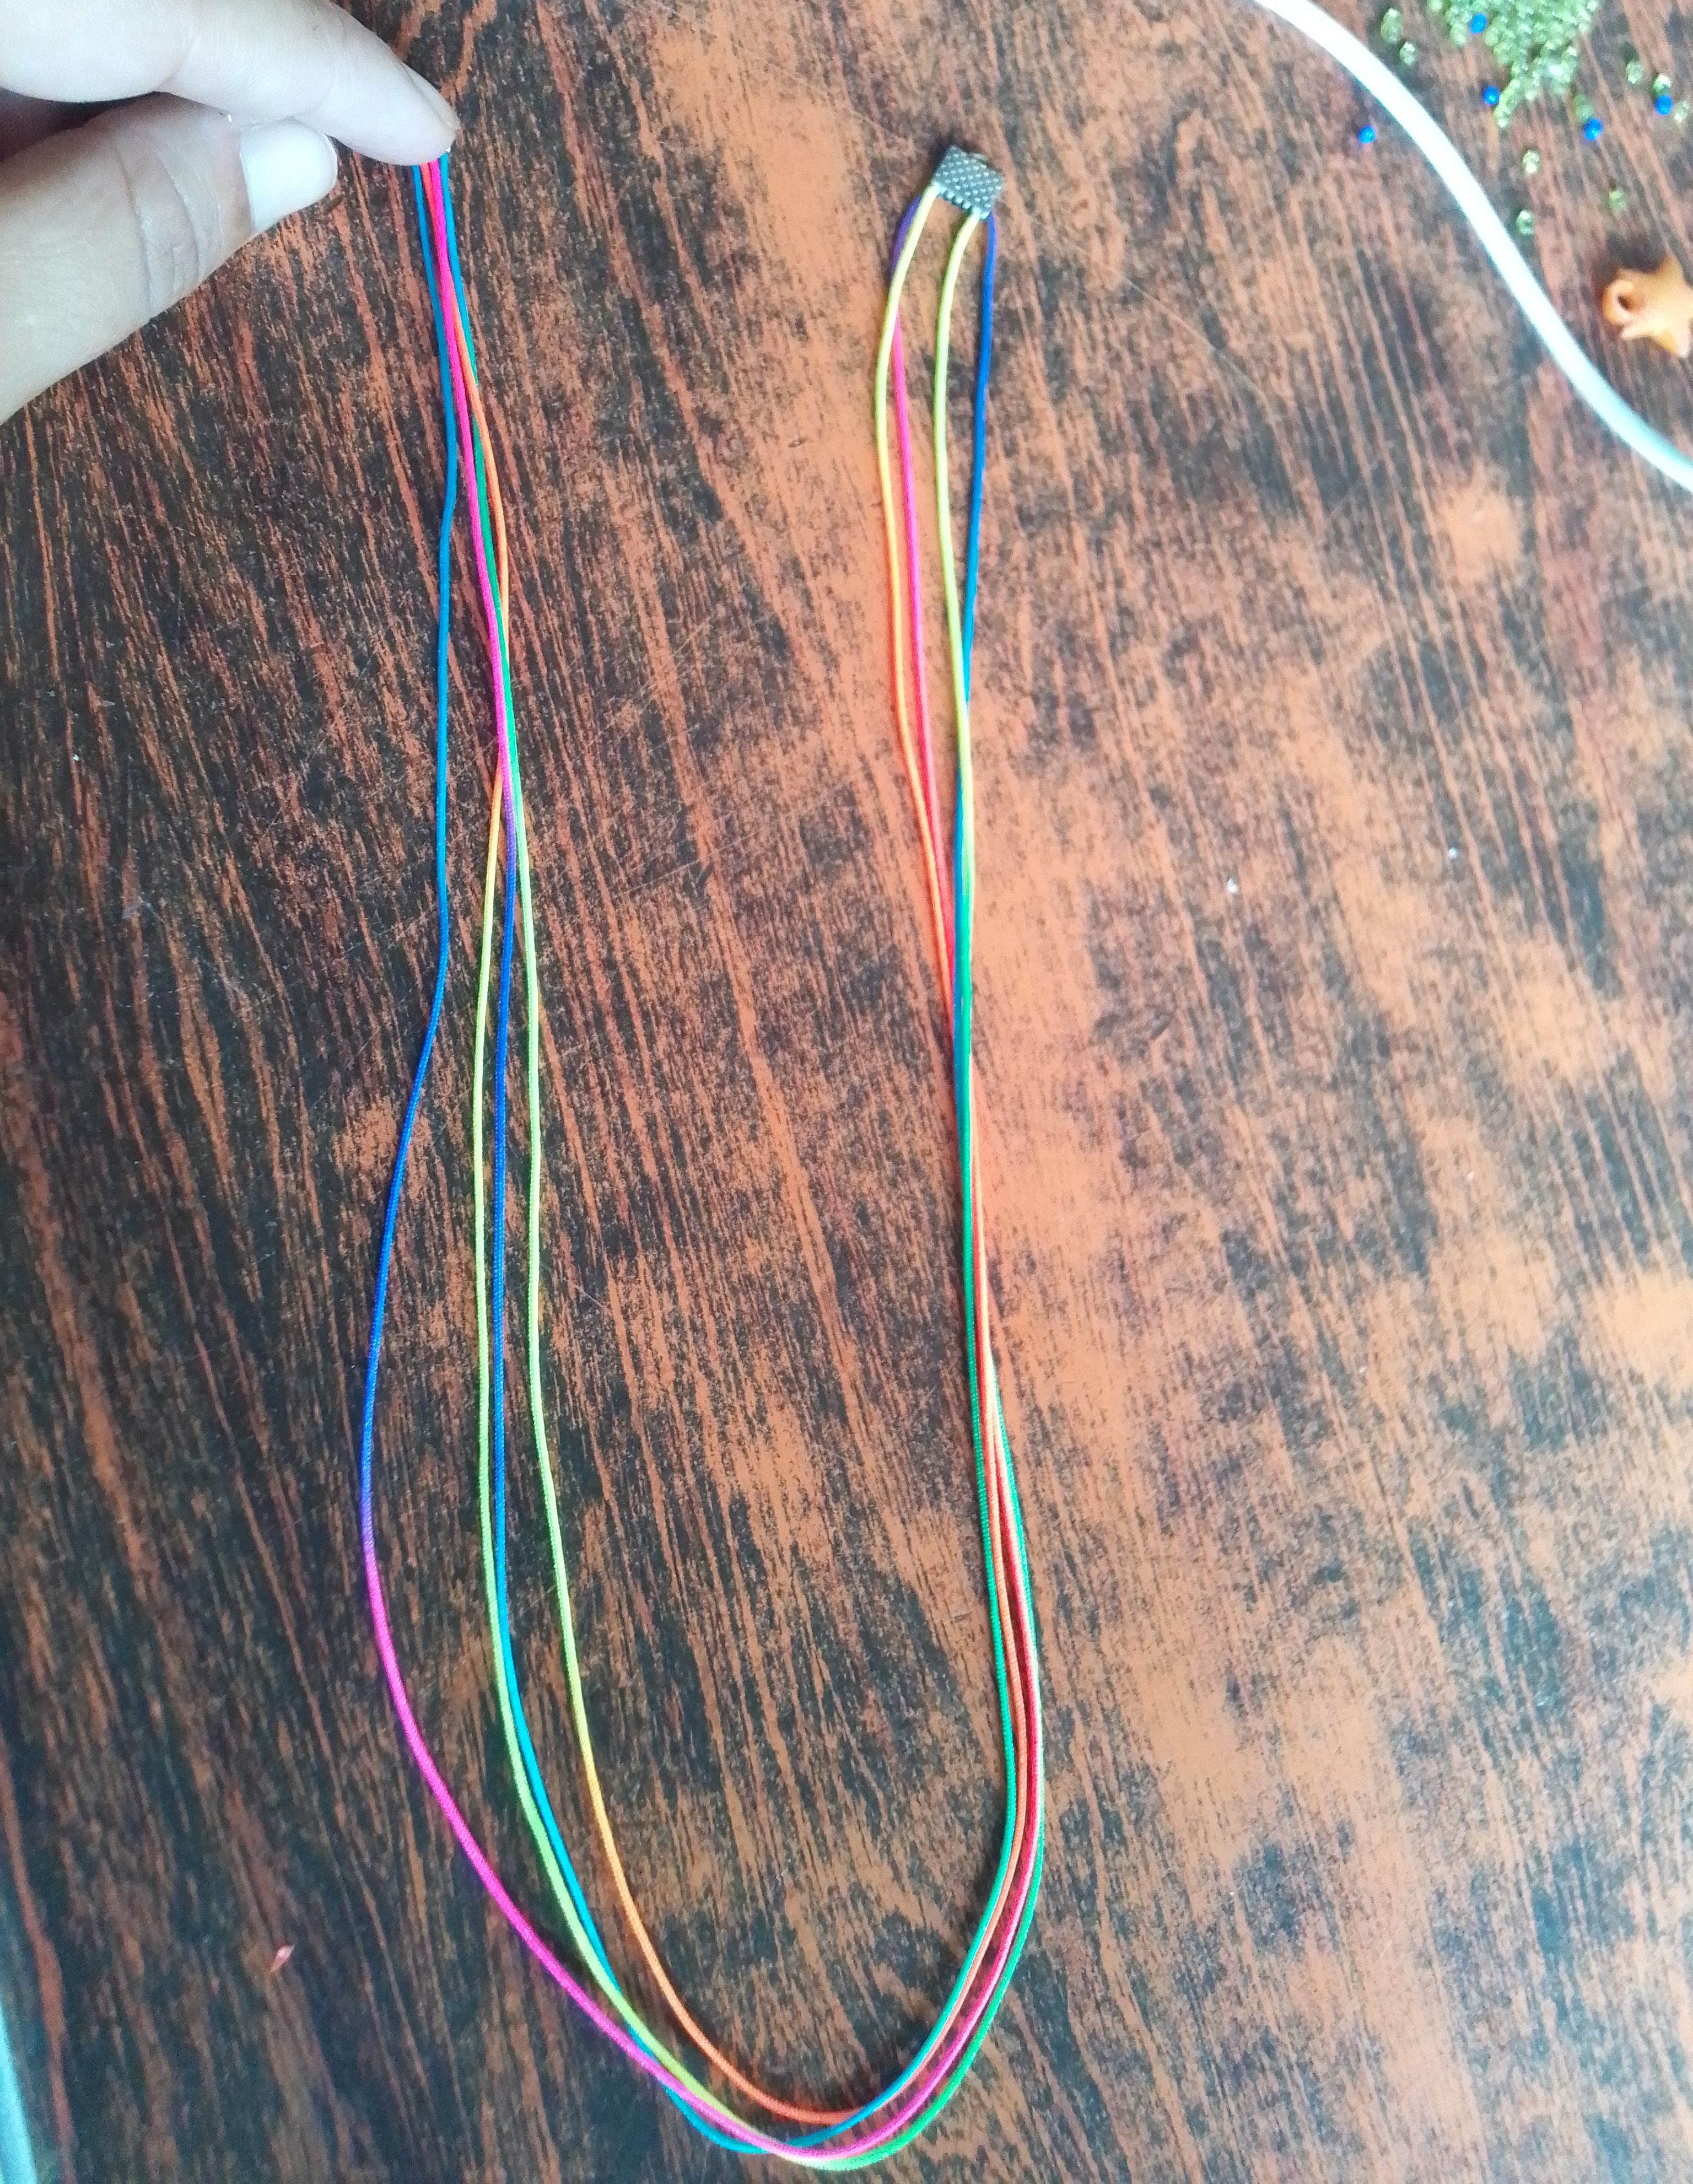
Paso 10
Para el collar doblamos dos metros de hilo chino de colores dos veces. En cada extremo coloco un sujetador de pinza y dos argollas con un broche. Agregamos el dije y listo.
Step 10
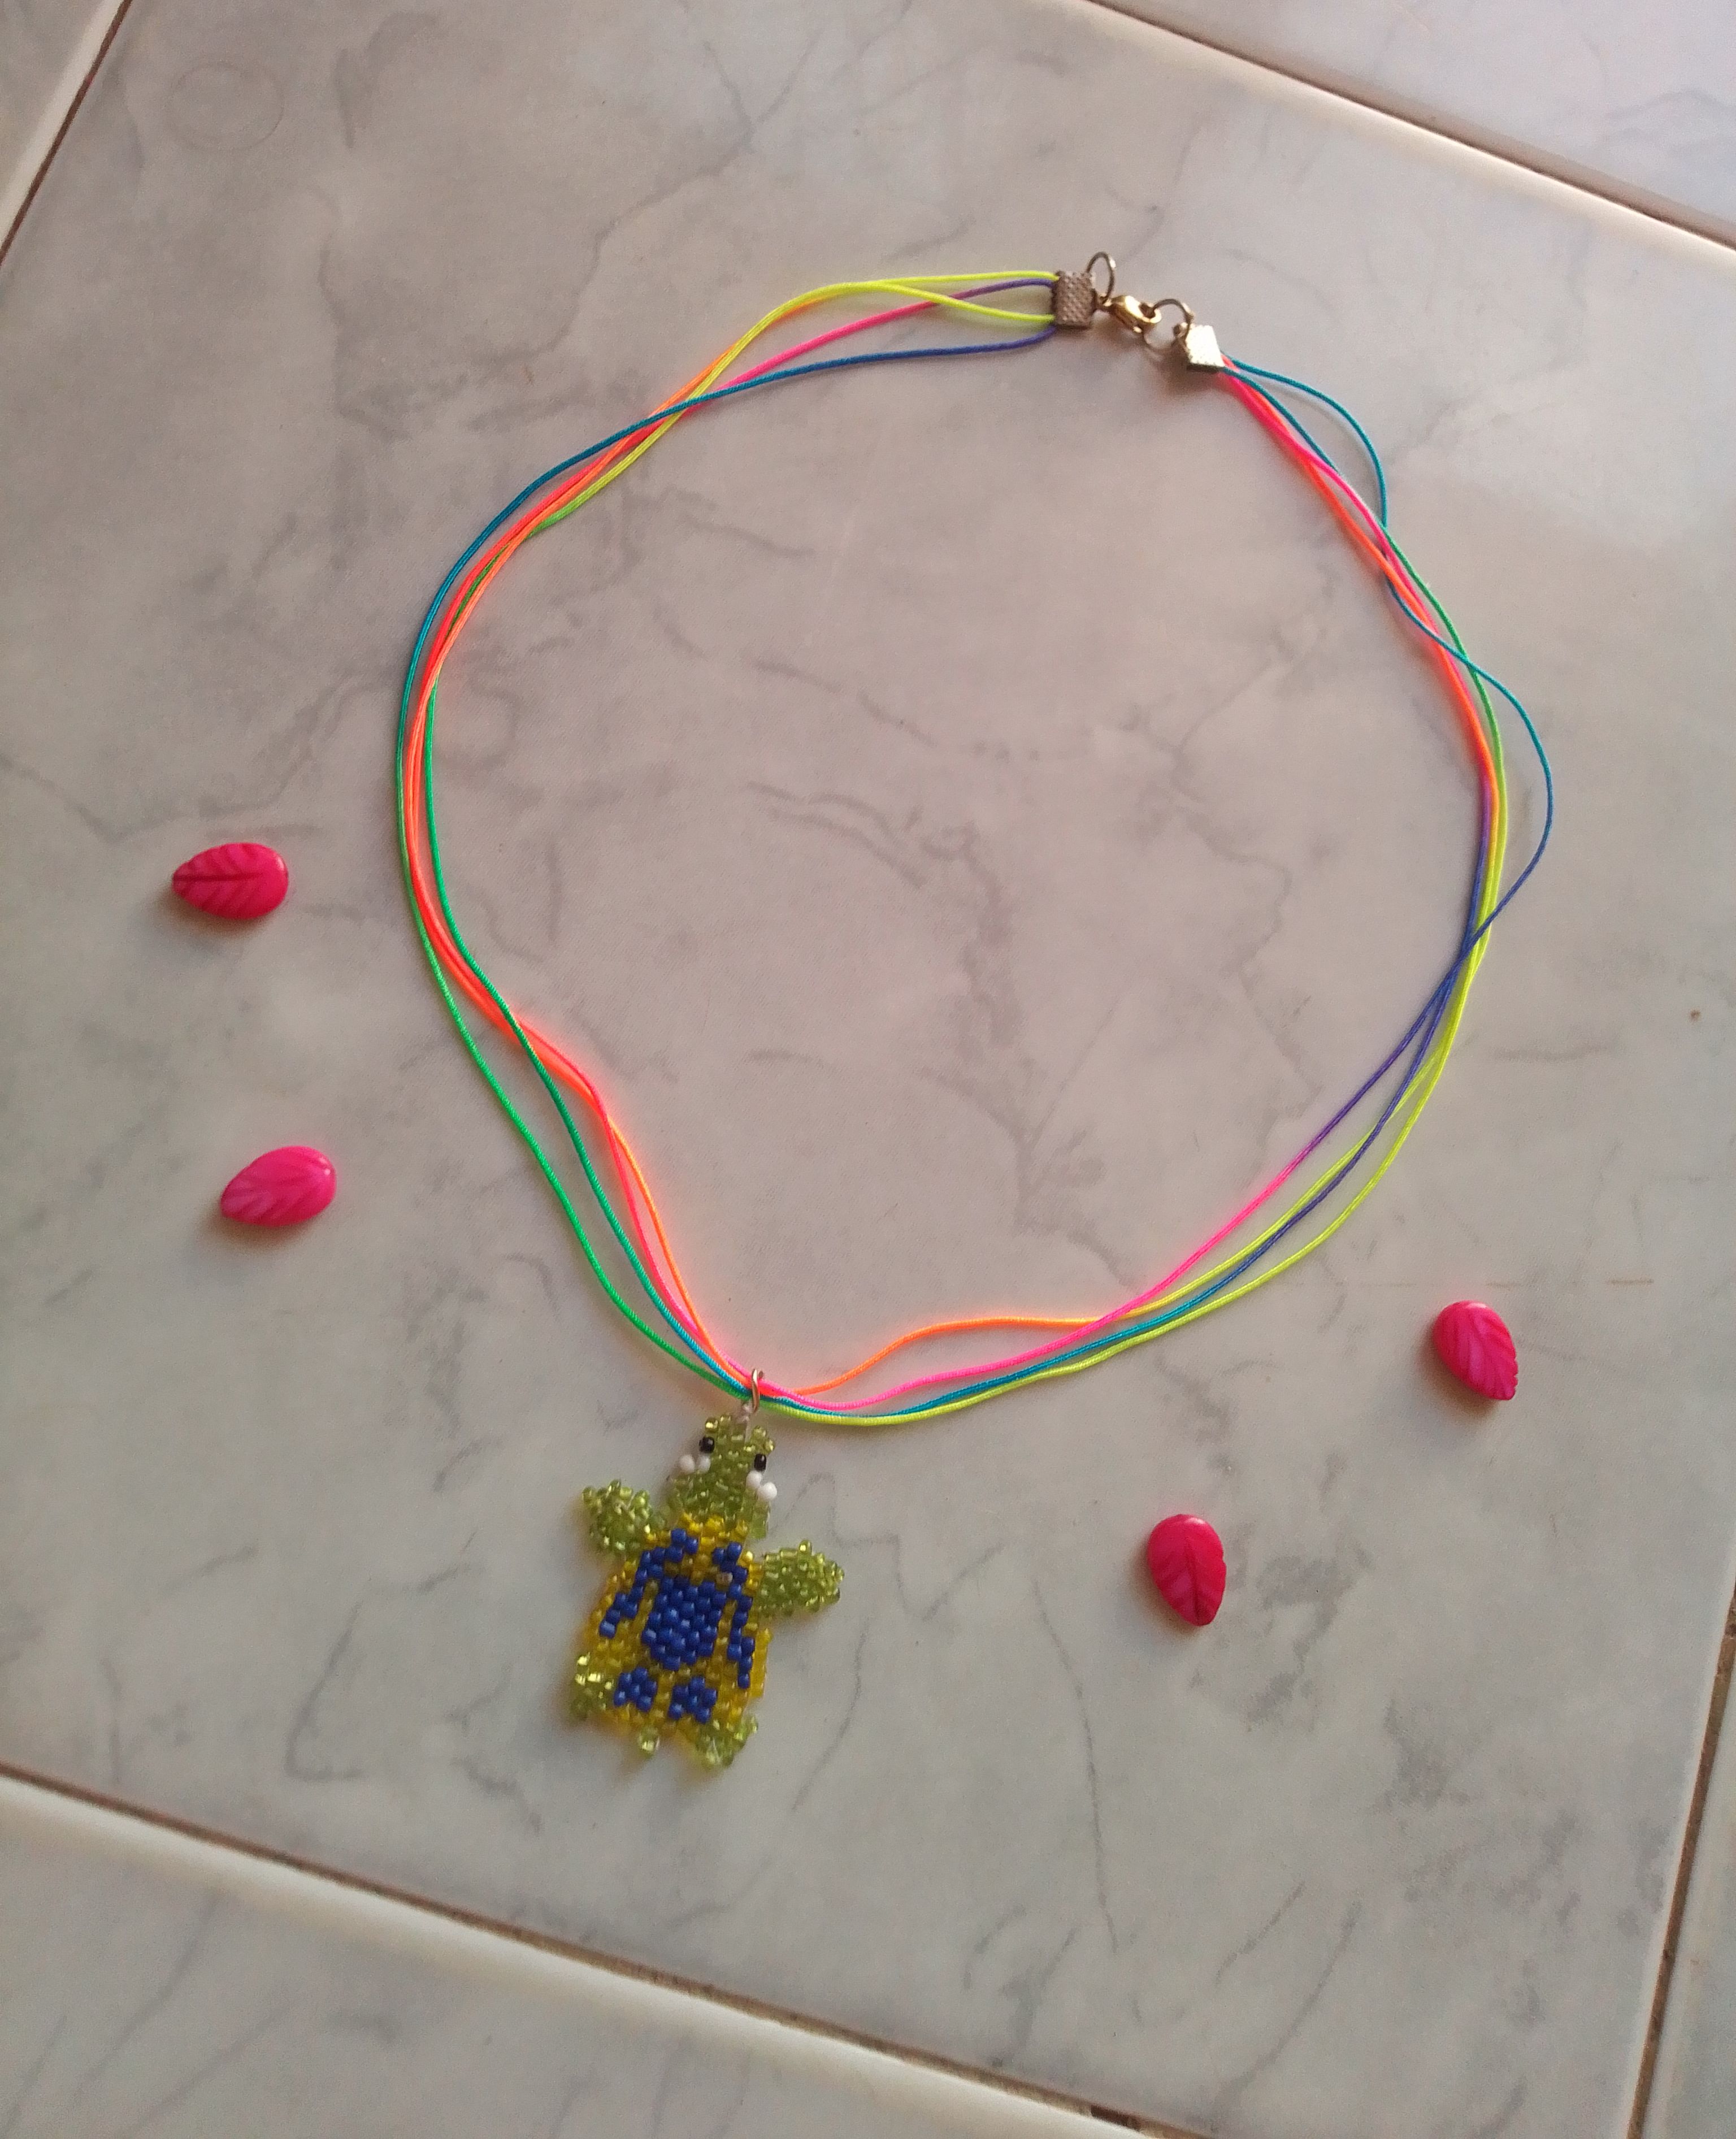
For the necklace we folded two meters of colored Chinese thread twice. At each end I place a clip fastener and two rings with a clasp.We add the pendant and that's it

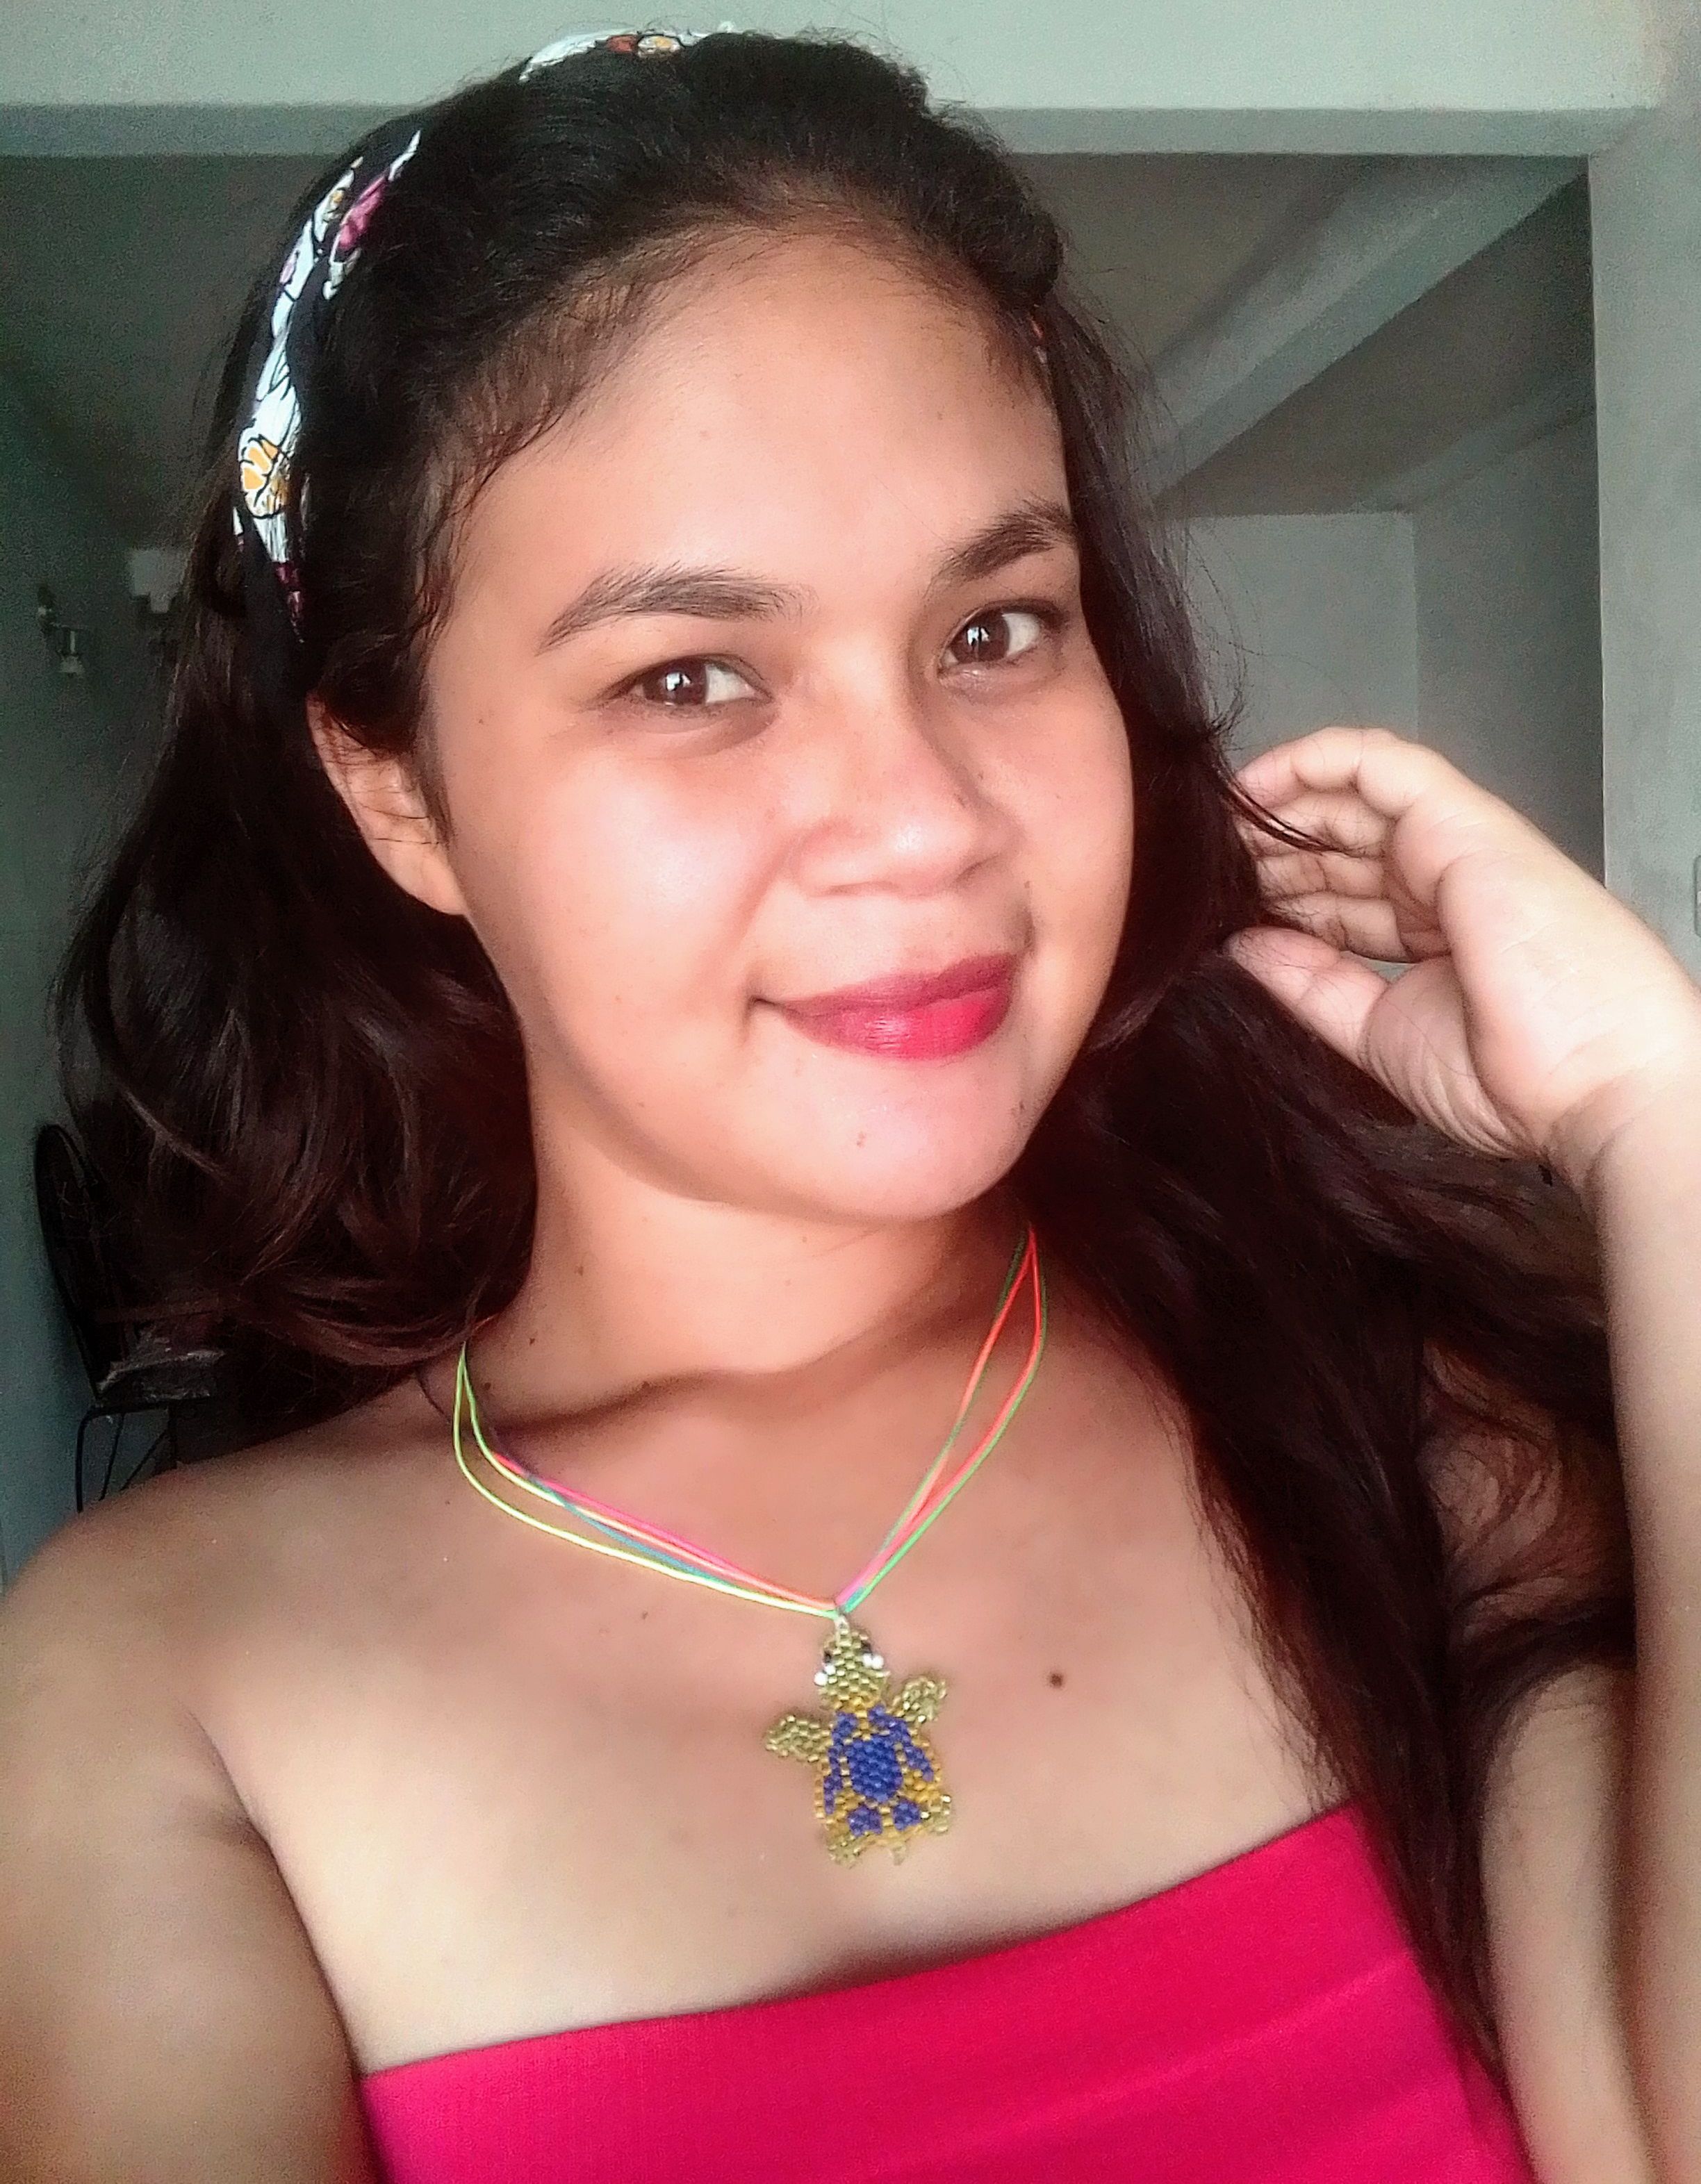
🐢🏖️Resultado! 🏖️🐢
Es un proceso un poco difícil de explicar, pero créanme que no es nada difícil hacerlo. Valió a pena el tiempo que le dediqué a este proyecto porque me gustó muchísimo.
It is a slightly difficult process to explain, but believe me, it is not difficult to do at all. It was worth the time I dedicated to this project because I really liked it.

Con este resultado, me despido invitando a participar a mis creativas amigas @carolycesar15, @yolimarg y @anaarevalo01 ... Espero les guste, cualquier duda pueden hacermela saber a través de sus comentarios. Hasta pronto mis amores! 🙋
With this result, I say goodbye by inviting my creative friends @carolycesar15, @yolimarg and @anaarevalo01 to participate... I hope you like it, if you have any questions you can let me know through your comments. See you soon my loves! 🙋
All images in this publication are mine. Taken from my Smooth 6.5 device, first image edited in PicsArt | Text translated in Google Translate.
0
0
0.000
The contest has prevented you from buying beach accessories but make your own.
Thanks my friend..! 🤗🤭
Que linda tortuga, me encantan las tortugas, saludos!
Hola bella... Muchísimas gracias..que bueno que te guste..
Es muy tierna. Admiro los trabajos y accesorios hechos con mostacillas. Es uno de los materiales que nunca he podido dominar. Me vuelvo un ocho. Jajajaja. Pero tú lo hiciste tan bien y lo presentas de forma tan clara que me dan ganas de intentarlo nuevamente. Buen trabajo.
Saludos
Hola belleza.. Que alegría volver a leer un comentario suyo.. Conociendo su gran talento estoy segura que podrá hacerlo y hasta mejor.. Muchísima suerte y agradezco mucho su apoyo.. Un abrazo y muchas bendiciones para usted..🤗🤗
Que bonita tortugita😄