New christmas contest (reindeer to hang on the door) | Nuevo concurso navideño (reno para colgar en puerta)
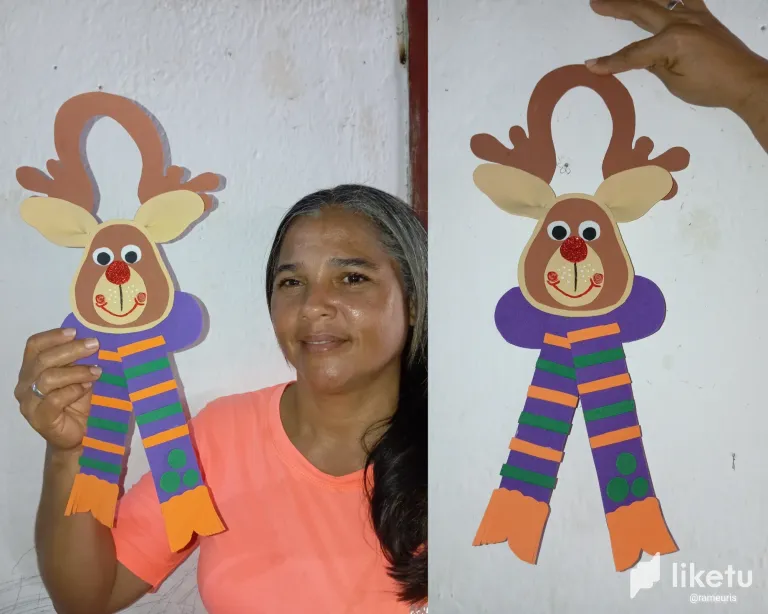
Hola amigos feliz día para todos , espero que estén bien , llenos de salud , hoy me encantaría formar parte del nuevo concurso del mes de nuestra queridísima comunidad diyhub ,con la temática navideña , una hermosa tradición la cuál somos felices , crecimos con ella , mi decoración es de un reno para decorar las puertas de nuestros hogares ideales para esta temporada
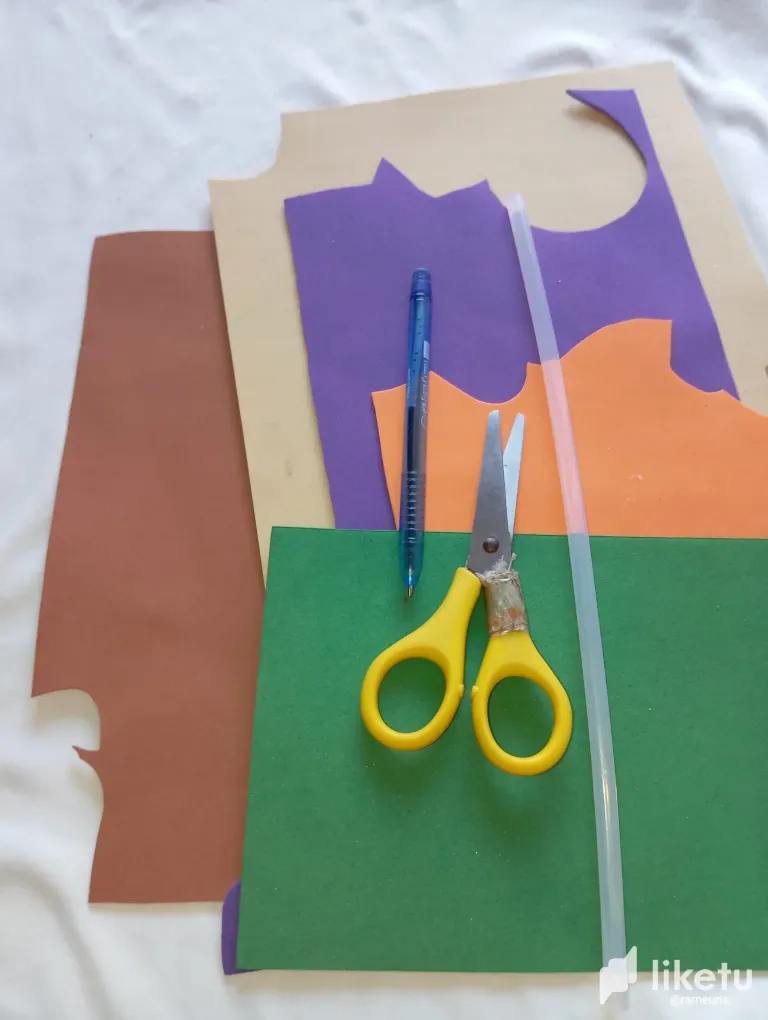
Materiales qué utilicé:
-Foamis
-Tijera
-Silicon
-Lapiz
A continuación los paso a seguir :
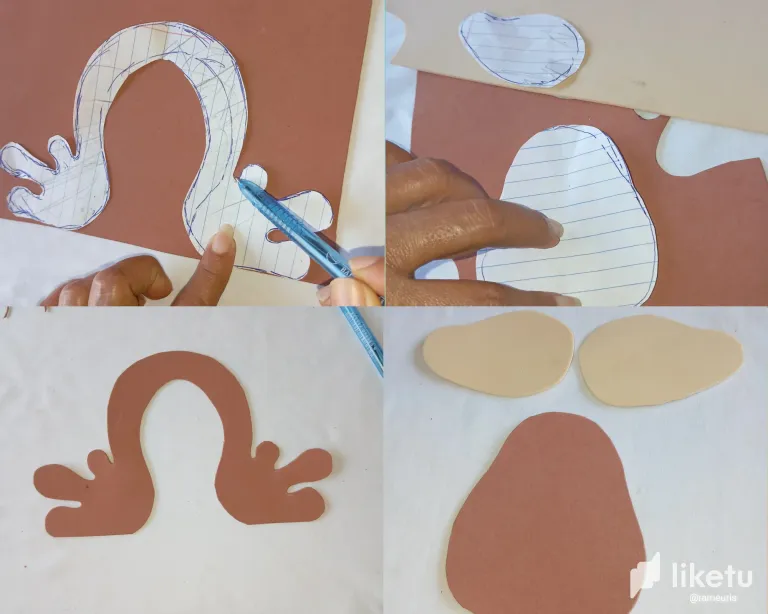
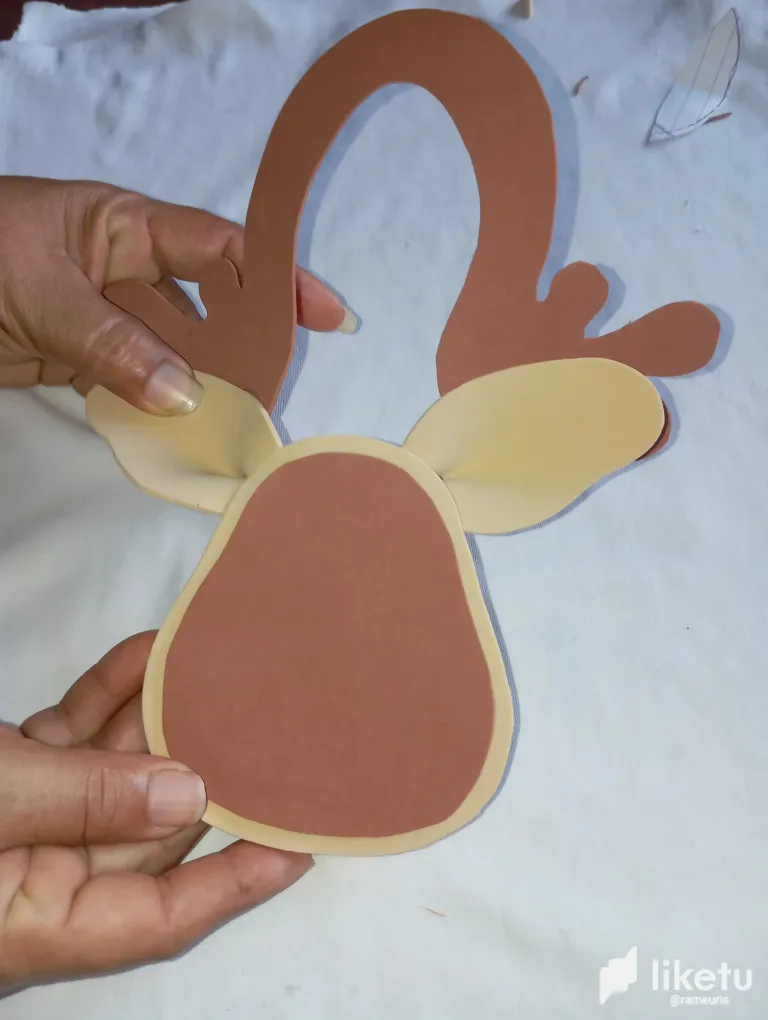
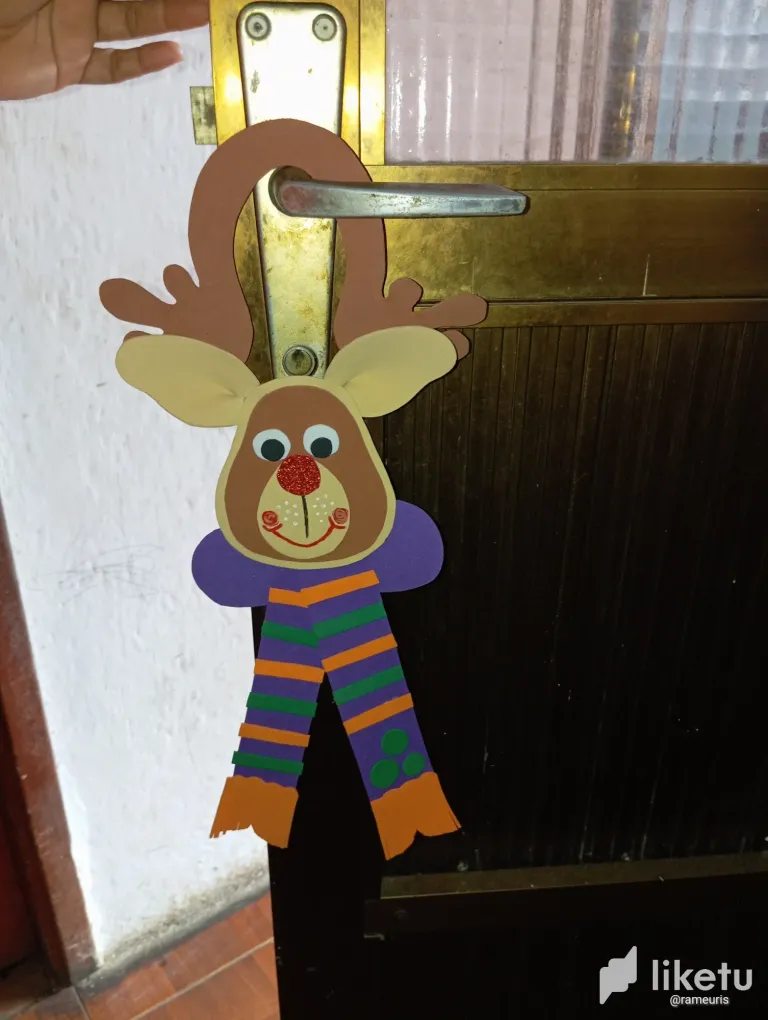
Inicié realizando dos patrones , uno de la cabeza del reno y el otro de los cachos en forma de círculo para que encaje en la Manilla de la puerta , una vez que los tuve listo procedí a marcar cada uno en los foamis de mi preferencia , marrón para los cachos y cabeza , para las orejas y base color piel ,una vez que marcamos recortamos con la ayuda de nuestra tijera
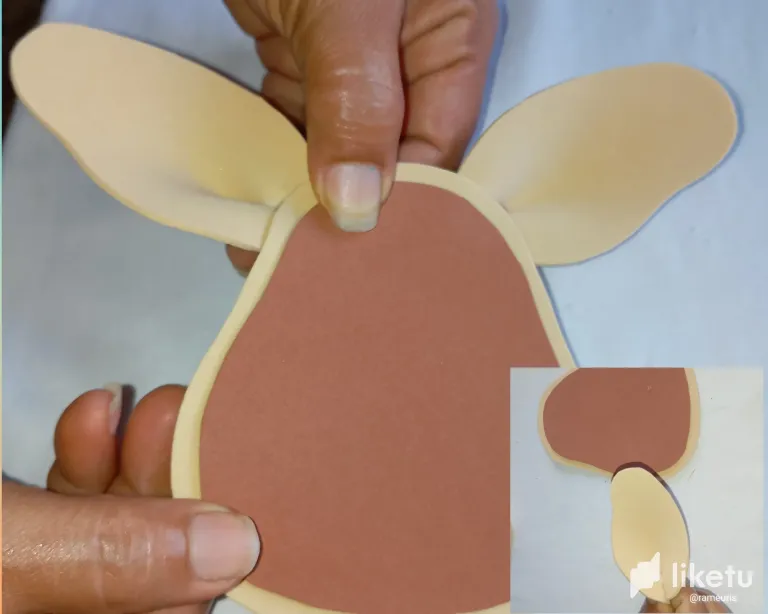
A continuación vamos a tomar las orejas y la doblaremos en la punta y para que quede moldeada , luego pegaremos en la cabeza las orejas a los lados , y en la parte de atrás una base color piel
Luego continuaremos tomando los cachos y lo pegaremos en la parte de arriba de la cabeza de nuestro reno
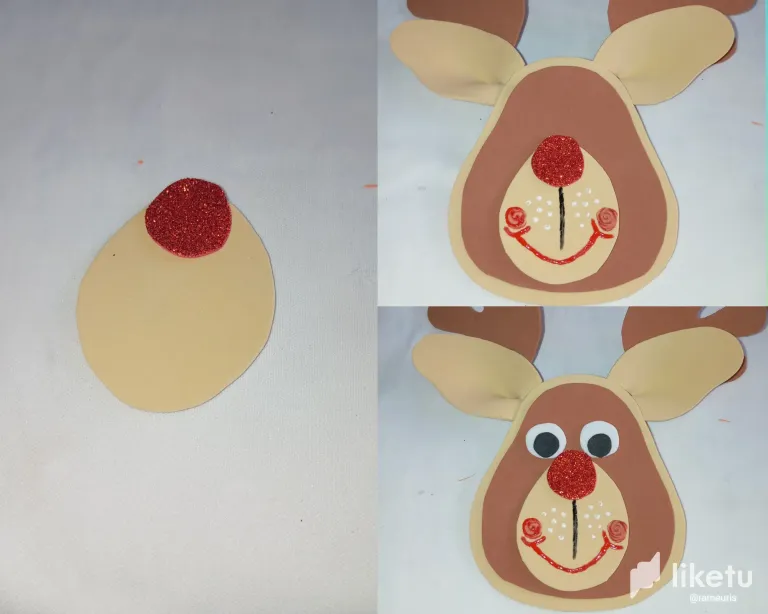
Seguidamente vamos a realizar el rostro de nuestro reno, pegaremos la parte que será la trompa del reno , una nariz redonda roja , está la pegaremos en el centro de la cabeza en la parte de abajo , con una sonrisa sonrojada , en el centro pegaremos sus ojos redondos blanco con negro
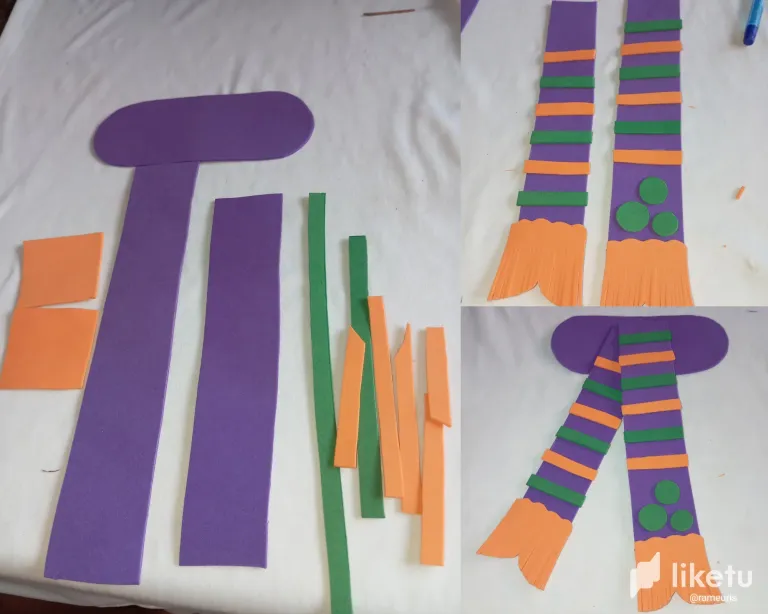
A continuación vamos a realizar una bufanda navideña , para esta ocasión utilicé color morado , tiras verde y naranja para realizar el accesorios y quede , las tiras las pegué en forma horizontal para que parezca las rayas , en la parte de abajo unos flecos y en una esquina unos lunares redondos verdes
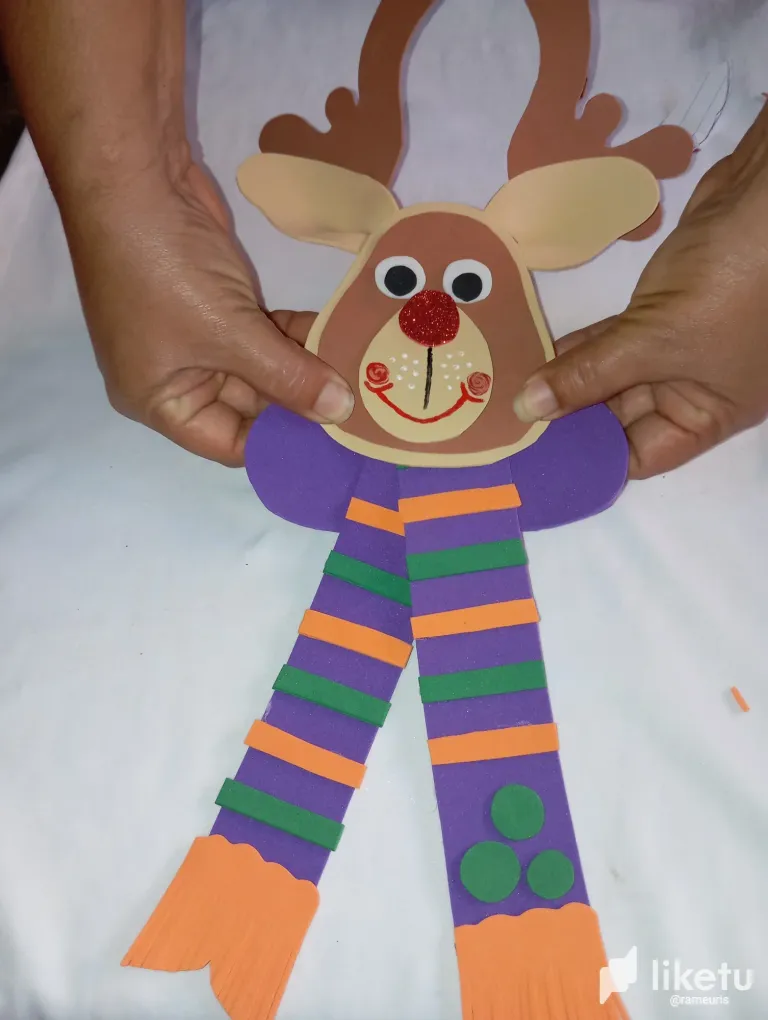
Por último pegaremos la cabeza de nuestro reno en todo el centro de la bufanda , finalizando nuestra hermosa decoración navideña .
Los collages los realicé con la aplicación GridArt, traduje los textos con el traductor deepl,le hago la invitación a la amiga @jorgelissanchez y @lorennys que formen parte de este concurso
Inglés
Hello friends happy day to all, I hope you are well, full of health, today I would love to be part of the new contest of the month of our beloved community diyhub, with the Christmas theme, a beautiful tradition which we are happy, we grew up with it, my decoration is a reindeer to decorate the doors of our homes ideal for this season.
Materials I used:
-Foamis
-Scissors
-Silicon
-Lapiz
Here are the steps to follow:
I started by making two patterns, one of the head of the reindeer and the other of the horns in the shape of a circle to fit the door handle, once I had them ready I proceeded to mark each one in the foamis of my preference, brown for the horns and head, for the ears and skin color base, once we marked cut with the help of our scissors.
Next we are going to take the ears and we will fold it at the tip so that it is molded, then we will glue the ears on the sides of the head, and in the back a skin color base.
Then we will continue taking the horns and we will glue them on the top of the head of our reindeer.
Next we will make the face of our reindeer, we will glue the part that will be the reindeer's trunk, a round red nose, we will glue it in the center of the head at the bottom, with a blushing smile, in the center we will glue its round white eyes with black.
Next we are going to make a Christmas scarf, for this occasion I used purple color, green and orange strips to make the accessories, the strips I glued them horizontally to look like stripes, at the bottom some bangs and in one corner some green round polka dots.
Finally we glue the head of our reindeer around the center of the scarf, finishing our beautiful Christmas decoration.
I made the collages with the GridArt application, I translated the texts with the deepl translator, I invite my friends @jorgelissanchez and @lorennys to be part of this contest.
For the best experience view this post on Liketu
Quedó bien bonito, para las puertas se pueden hacer muchas manualidades lindas como está.
Así es amiga ,gracias
Please upvote this comment to support upvote-suggestor @bhattg
Join Our Community Discord: https://discord.gg/5FZZqrz6wj
Que bonito trabajo realizaste ✌🏽
Gracias bella
que muñequito tan hermoso, es una de mis manualidades favoritas hasta ahora para estas navidades. muchas gracias por compartir. saludos 😘
Gracias amiga linda
Impressive! The way you made this, that's great. Nice work! Thanks!
Thanks Friends ❤️
excelente trabajo! quedo genial!
excellent job! it looked great!