Mi participación en el concurso: Accesorios marinos | My participation in the contest: Marine accessories
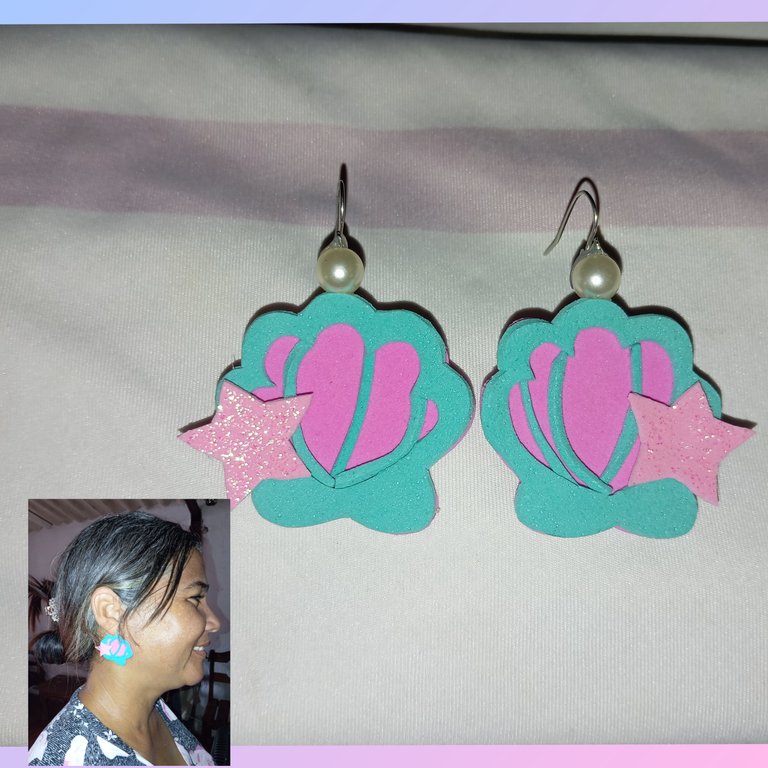
Hola amigos ,Dios les bendiga , buenas tardes tengan todos , un saludo cordial desde la distancia, espero que estén pasando un bello y maravilloso fin de semana , les quiero presentar un tutorial para realizar unos accesorios con temática playera aprovechando el nuevo concurso de nuestra queridísima comunidad jewelry, los zarcillos los realicé sobre unas concha marina,los tonos que usé en esta decoración son mis colores favoritos ,cómo pueden observar combinan perfectamente , si desean utilizar otro color también le quedará perfecto amigos
Hello friends, God bless you, good afternoon everyone, a cordial greeting from afar, I hope you are having a beautiful and wonderful weekend, I want to present a tutorial to make some beach themed accessories taking advantage of the new contest of our beloved jewelry community, I made the earrings on a seashell, the colors I used in this decoration are my favorite colors, as you can see combine perfectly, if you want to use another color will also be perfect friends
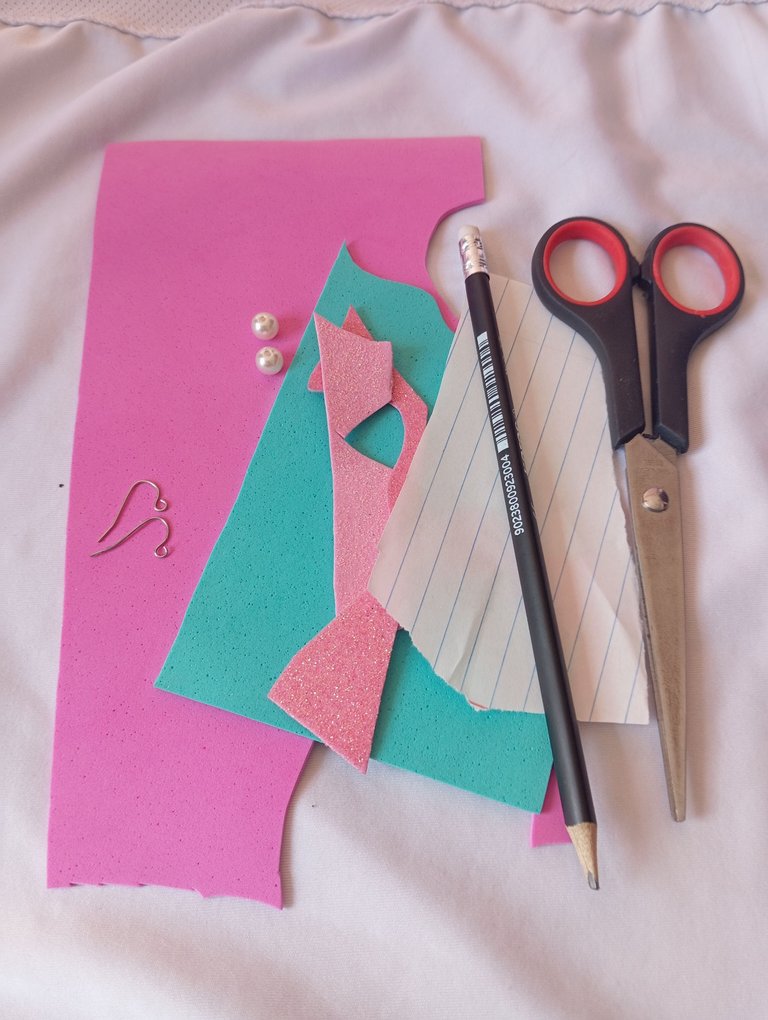
Materiales para realizar unos accesorios de concha marina :
-Foamis (rosa y azul)
-Silicon
-Tijera
-Zarcillos
-Papel y lápiz
Materials to make some seashell accessories:
-Foamis (pink and blue)
-Silicon
-Scissors
-Earrings
-Paper and pencil
Pasos para realizar nuestros accesorios playeros :
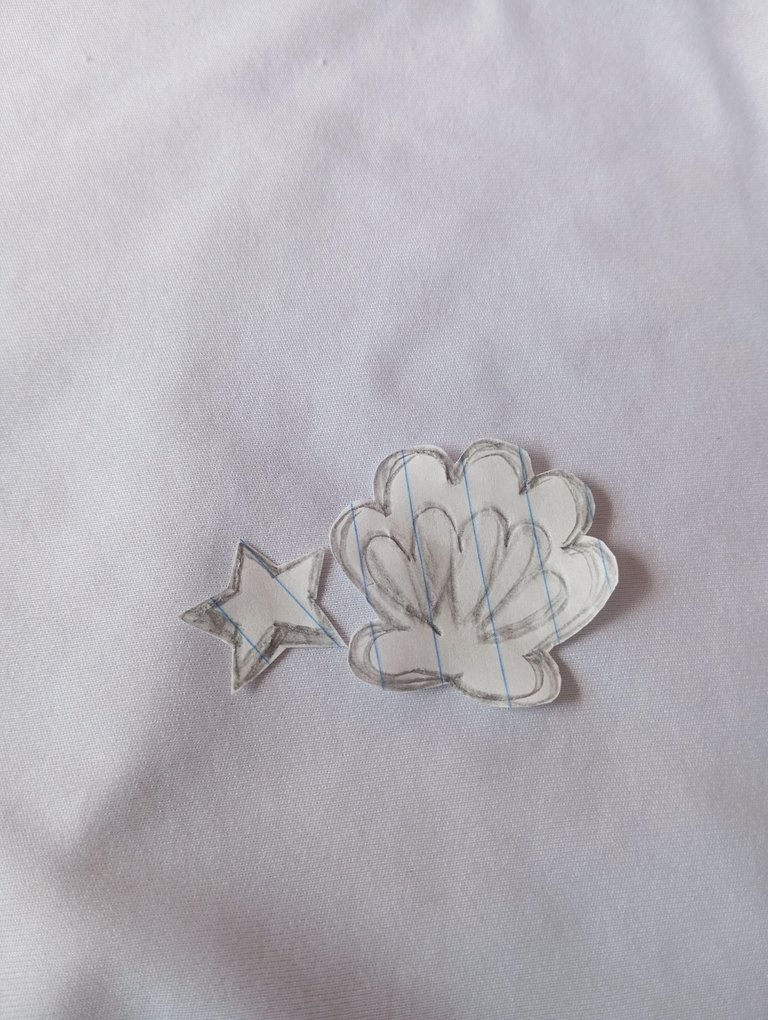
Paso 1 : en nuestro primer paso vamos a comenzar tomando un recorte de papel o cartón , dibujaremos en el nuestro patrón , de esta manera ambas conchas marinas tendrán los mismos tamaños y los accesorios quedarán iguales , dibujé una concha marina y una estrella marina también
Steps to make our beach accessories :
Step 1 : in our first step we are going to start by taking a paper or cardboard cutout , we will draw on it our pattern , this way both seashells will have the same sizes and the accessories will look the same , I drew a seashell and a seastar as well.

Paso 2 : luego que realicemos nuestro patrón continuaremos en nuestro segundo paso recortando lo y dividiéndolo para trabajar cómodamente con nuestros patrones
Step 2: after we make our pattern we will continue in our second step by cutting it out and dividing it to work comfortably with our patterns.
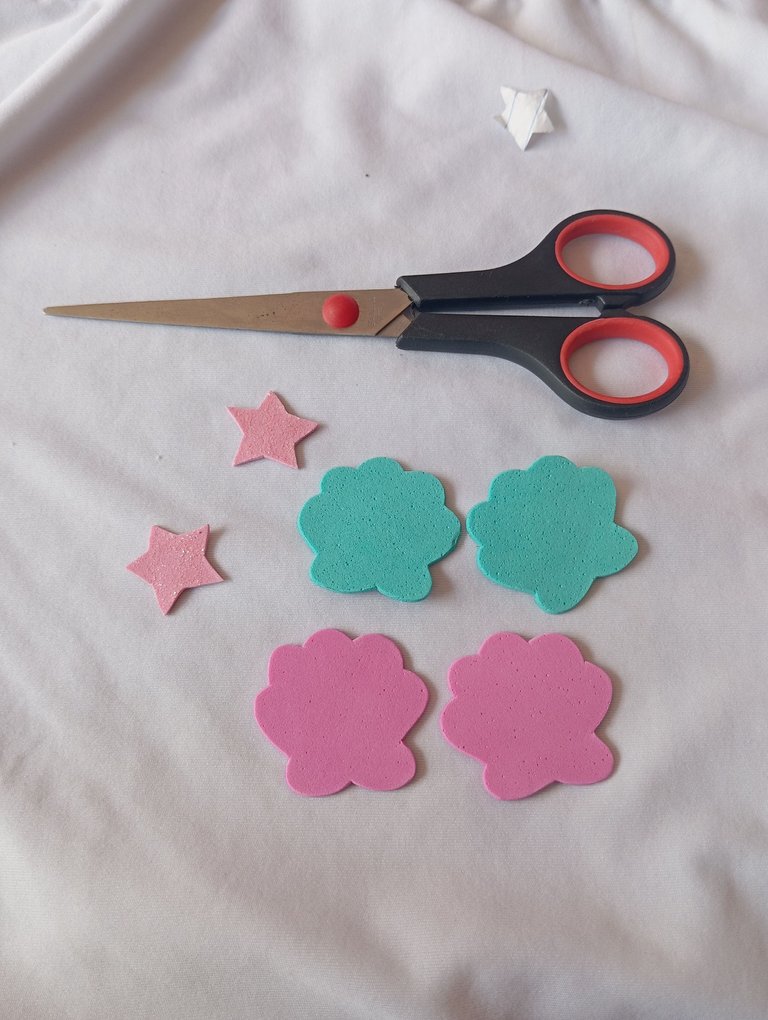
Paso 3 : luego amigos en nuestro tercer paso vamos a comenzar marcando las piezas en nuestros foamis , debemos marcar dos de cada uno , en el azul marcamos la concha que irá arriba , la rosada será la base y la rosa escarchada las estrellas
Step 3 : then friends in our third step we will start marking the pieces in our foamis , we must mark two of each one , in the blue one we mark the shell that will go on top , the pink one will be the base and the frosted pink one the stars.
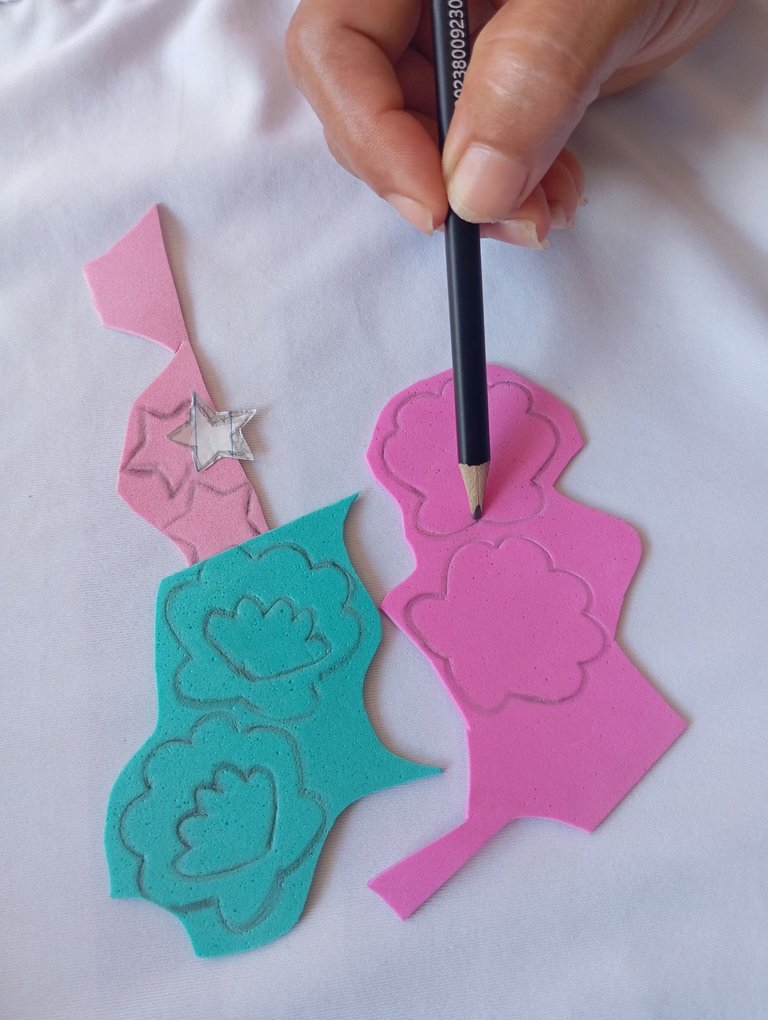
Paso 4 : en el cuarto paso vamos a tomar nuestra tijera y recortaremos cada una de las piezas que marcamos en el tercer paso amigos con mucho cuidado, para que quede el mismo diseño
Step 4: in the fourth step we are going to take our scissors and cut out each of the pieces we marked in the third step friends very carefully, so that the design is the same.
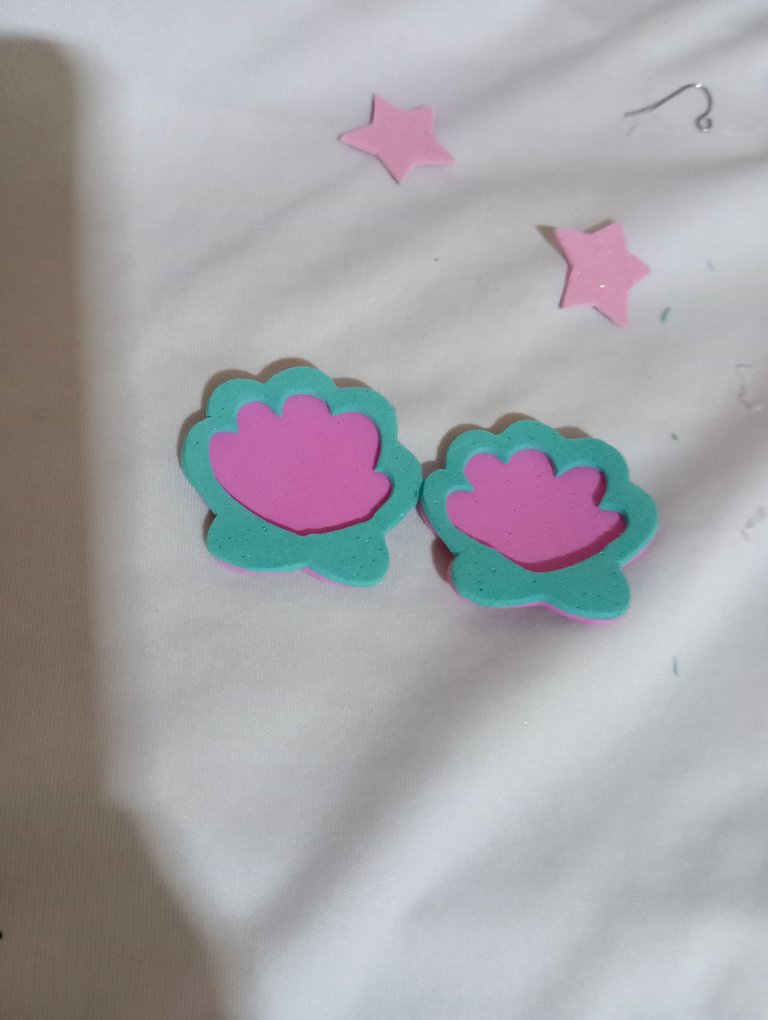
Paso 5: en el quinto paso amigos mío tomaremos la concha marina azul y recortaremos el centro , para que la base rosada de abajo se observé , debe tener el mismo diseño del centro que el de los bordes de afuera , tipo arco cada uno como lo observan
Step 5: in the fifth step my friends we will take the blue seashell and cut out the center, so that the pink base below is observed, it must have the same design of the center as the edges outside, bow type each one as you observe it

Paso 6: en nuestro sexto paso amigos en la parte de arriba de la concha rosada ,vamos a pegar la concha azul como lo pueden presenciar
Step 6: in our sixth step friends on the top of the pink seashell, we will glue the blue seashell as you can see.
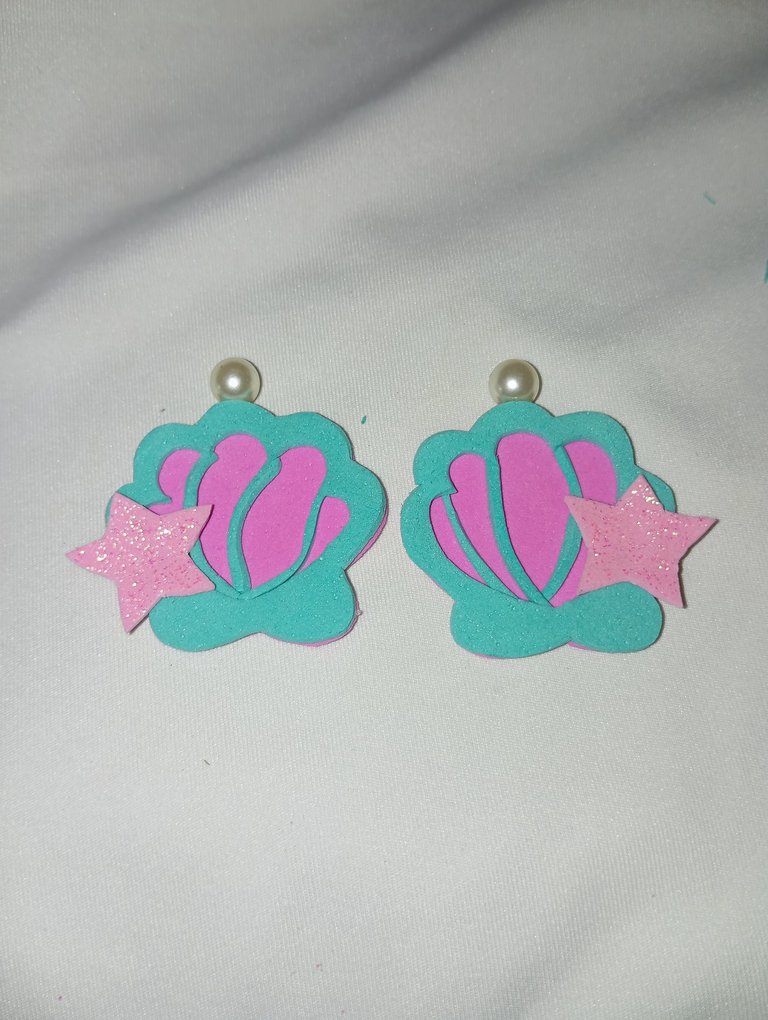
Paso 7: para finalizar con nuestros accesorios playeros vamos a tomar la estrella marina y la pegaremos a la concha en una esquina, luego en la parte de arriba en todo el centro pegaremos una perla plástica para que quede más llamativa y delicado nuestros accesorios
Step 7: to finish with our beach accessories we are going to take the sea star and glue it to the shell in a corner, then in the top part in the center we will glue a plastic pearl to make it more striking and delicate our accessories.
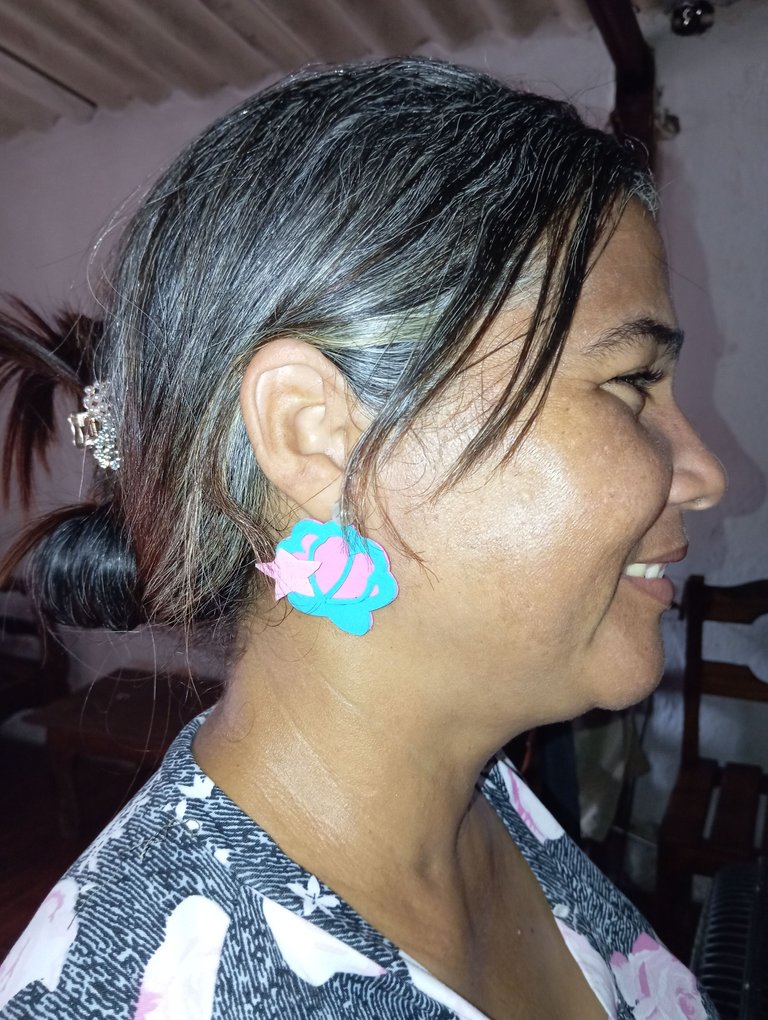
Paso 8 : para culminar con nuestros accesorios tomaremos los zarcillos y los pegaremos en la parte de arriba de nuestras perlas plásticas, de esta manera finalicé mis hermosos accesorios, ideales para lucir en cualquier ocasión especialmente para ir a la playa y lucir en una tarde , es ideal para todo momento amigos , tomando en cuenta que la sencillez es una prenda más para vestir y lucir hermosas , le hago la invitación a mis amigas para que también hagan parte de este concurso @josdelmi @desileal , les agradezco por su atención, espero ver la publicación de mis amigas en esta espectacular temática playera , que Dios les bendiga , nos vemos en el siguiente post , feliz fin de semana para todos
Step 8 : to culminate with our accessories we will take the tendrils and glue them on the top of our plastic pearls, in this way I finished my beautiful accessories, ideal to wear on any occasion especially to go to the beach and look in an afternoon, it is ideal for any time friends , taking into account that simplicity is one more garment to wear and look beautiful, I invite my friends to also be part of this contest @josdelmi @desileal, I thank you for your attention, I hope to see the publication of my friends in this spectacular beach theme, God bless you, see you in the next post, happy weekend for everyone.

It is stylish and beautiful. Love the design of the earrings. Well done!