CULTURE OF MY COUNTRY VENEZUELA 🇻🇪: Idea to make a cute PAPAGAYO 🪁🇻🇪🥰❤️ [eng/esp]
Happy Thursday friends of DIYHUB, I wish that today is a day full of energy and love so that you can achieve your projects successfully 🥰
Today I want to make my first entry for the contest:
“Cultural Diversity DIY Contest - Showcase your unique & beautiful culture with your DIY Crafts”
Among the cultures that exist in my country there is one that, despite the years that have passed, this custom is not lost among children and often among adults. In my childhood I remember many cultures or customs of children's games and that our parents offered us easily since these games were made by their own hands.
Even though my dad only had girls, he wanted to teach us how to make this type of games. In my case, I had a son and two girls, and nowadays we can get these games in stores, so I didn't need to make them for my children. children but I simply bought them already ready, It's about the Papagayos🪁, how they are known in my country Venezuela 🇻🇪
Feliz jueves amigos de DIYHUB, deseo que hoy sea un día lleno de energías y amor para que logren sus proyectos con éxito 🥰
Hoy quiero hacer mi primera participación para el concurso:
“Concurso de bricolaje sobre diversidad cultural: muestra tu cultura única y hermosa con tus manualidades de bricolaje”
Dentro de las culturas que existen en mi país hay una que a pesar de qué han pasado los años no se pierde esta costumbre entre los niños y muchas veces entre los adultos, en mi infancia recuerdo muchas culturas o costumbres de juegos en los niños y que nuestros padres nos ofrecían fácilmente ya que estos juegos estaban hechos por sus propias manos.
A pesar de que mi papá tuvo solo niñas él nos quiso enseñar a hacer este tipo de juegos, en mi caso tuve un hijo varón y dos niñas y en la actualidad estos juegos los podemos conseguir en tiendas, así que no tuve necesidad de hacérselos a mis hijos sino que simplemente los compraba ya listos, Se trata de los Papagayos🪁, cómo se le conoce en mi país Venezuela 🇻🇪
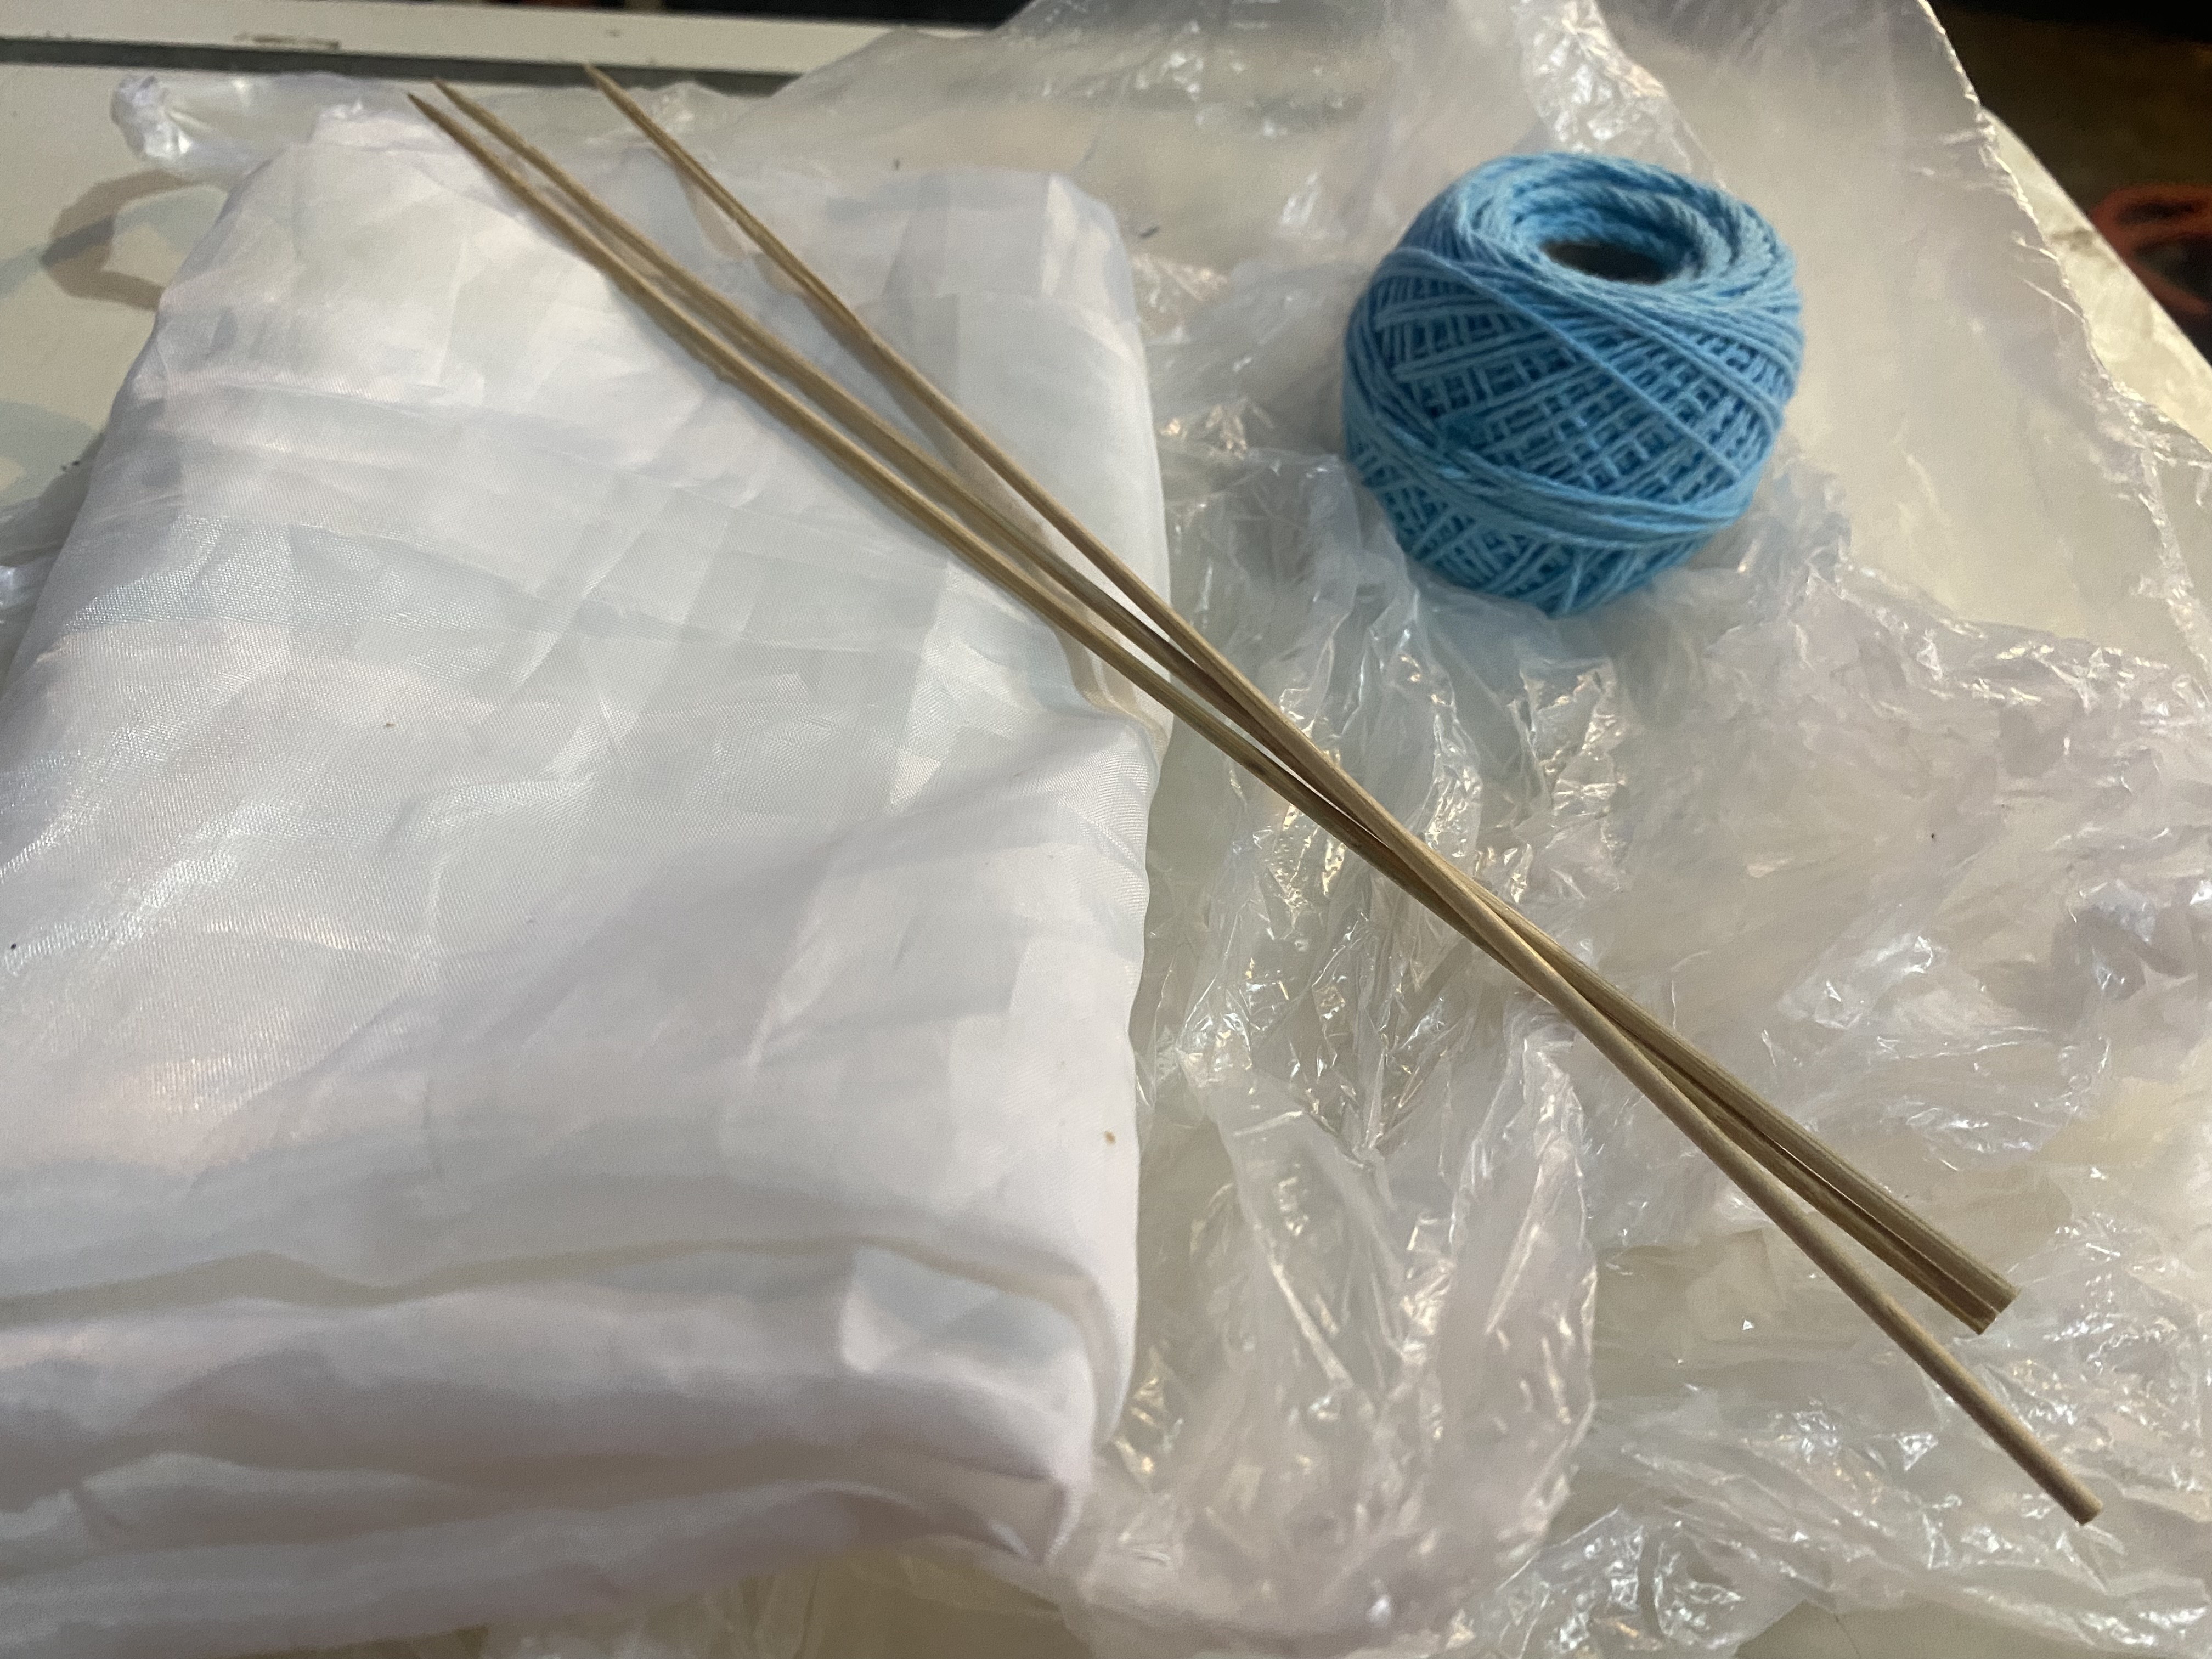
🪁-MATERIALS-🪁
Papagayo, volantin, kite or whatever you know it in your country, this is a very entertaining type of game made in an artisanal way, this type of game was mostly made with a bamboo stick or also with what is known in my country as Maguey, A very fine part was extracted and large and beautiful parrots were made 🪁.
There are countless models of parrots, I am not very expert in making this type of games, but thanks to the things I experienced in my childhood I have a little knowledge and today I want to show you one of the models to make cute parrots, here I leave you The list of materials I used:
- 3 sticks high
- wick thread
- sewing thread
- the thinnest plastic bag you can get
- a piece of fabric that is not very heavy
🪁-MATERIALES-🪁
Papagayo, volantin, cometa o como lo conozcan en su país, este es un tipo de juego muy entretenido hecho de manera artesanal, este tipo de juego mayormente era hecho con palo de bambú o también con el que en mi país es conocido como Maguey, se le extraia una parte muy fina y se armaban grandes y hermosos papagayos 🪁.
Papagayos hay infinidad de modelos, no soy muy experta en la fabricación de este tipo de juegos, pero gracias a las cosas que viví en mi infancia tengo un poco de conocimiento y hoy quiero mostrarles uno de los modelos para hacer lindos papagayos , aquí te dejo la lista de materiales que utilice:
- 3 palitos de altura
- hilo pabilo
- hilo de coser
- bolsa plástica de la más fina que consigas
- un retazo de tela que no sea muy pesada
🪁-PASO A PASO-🪁
🪁-STEP BY STEP-🪁
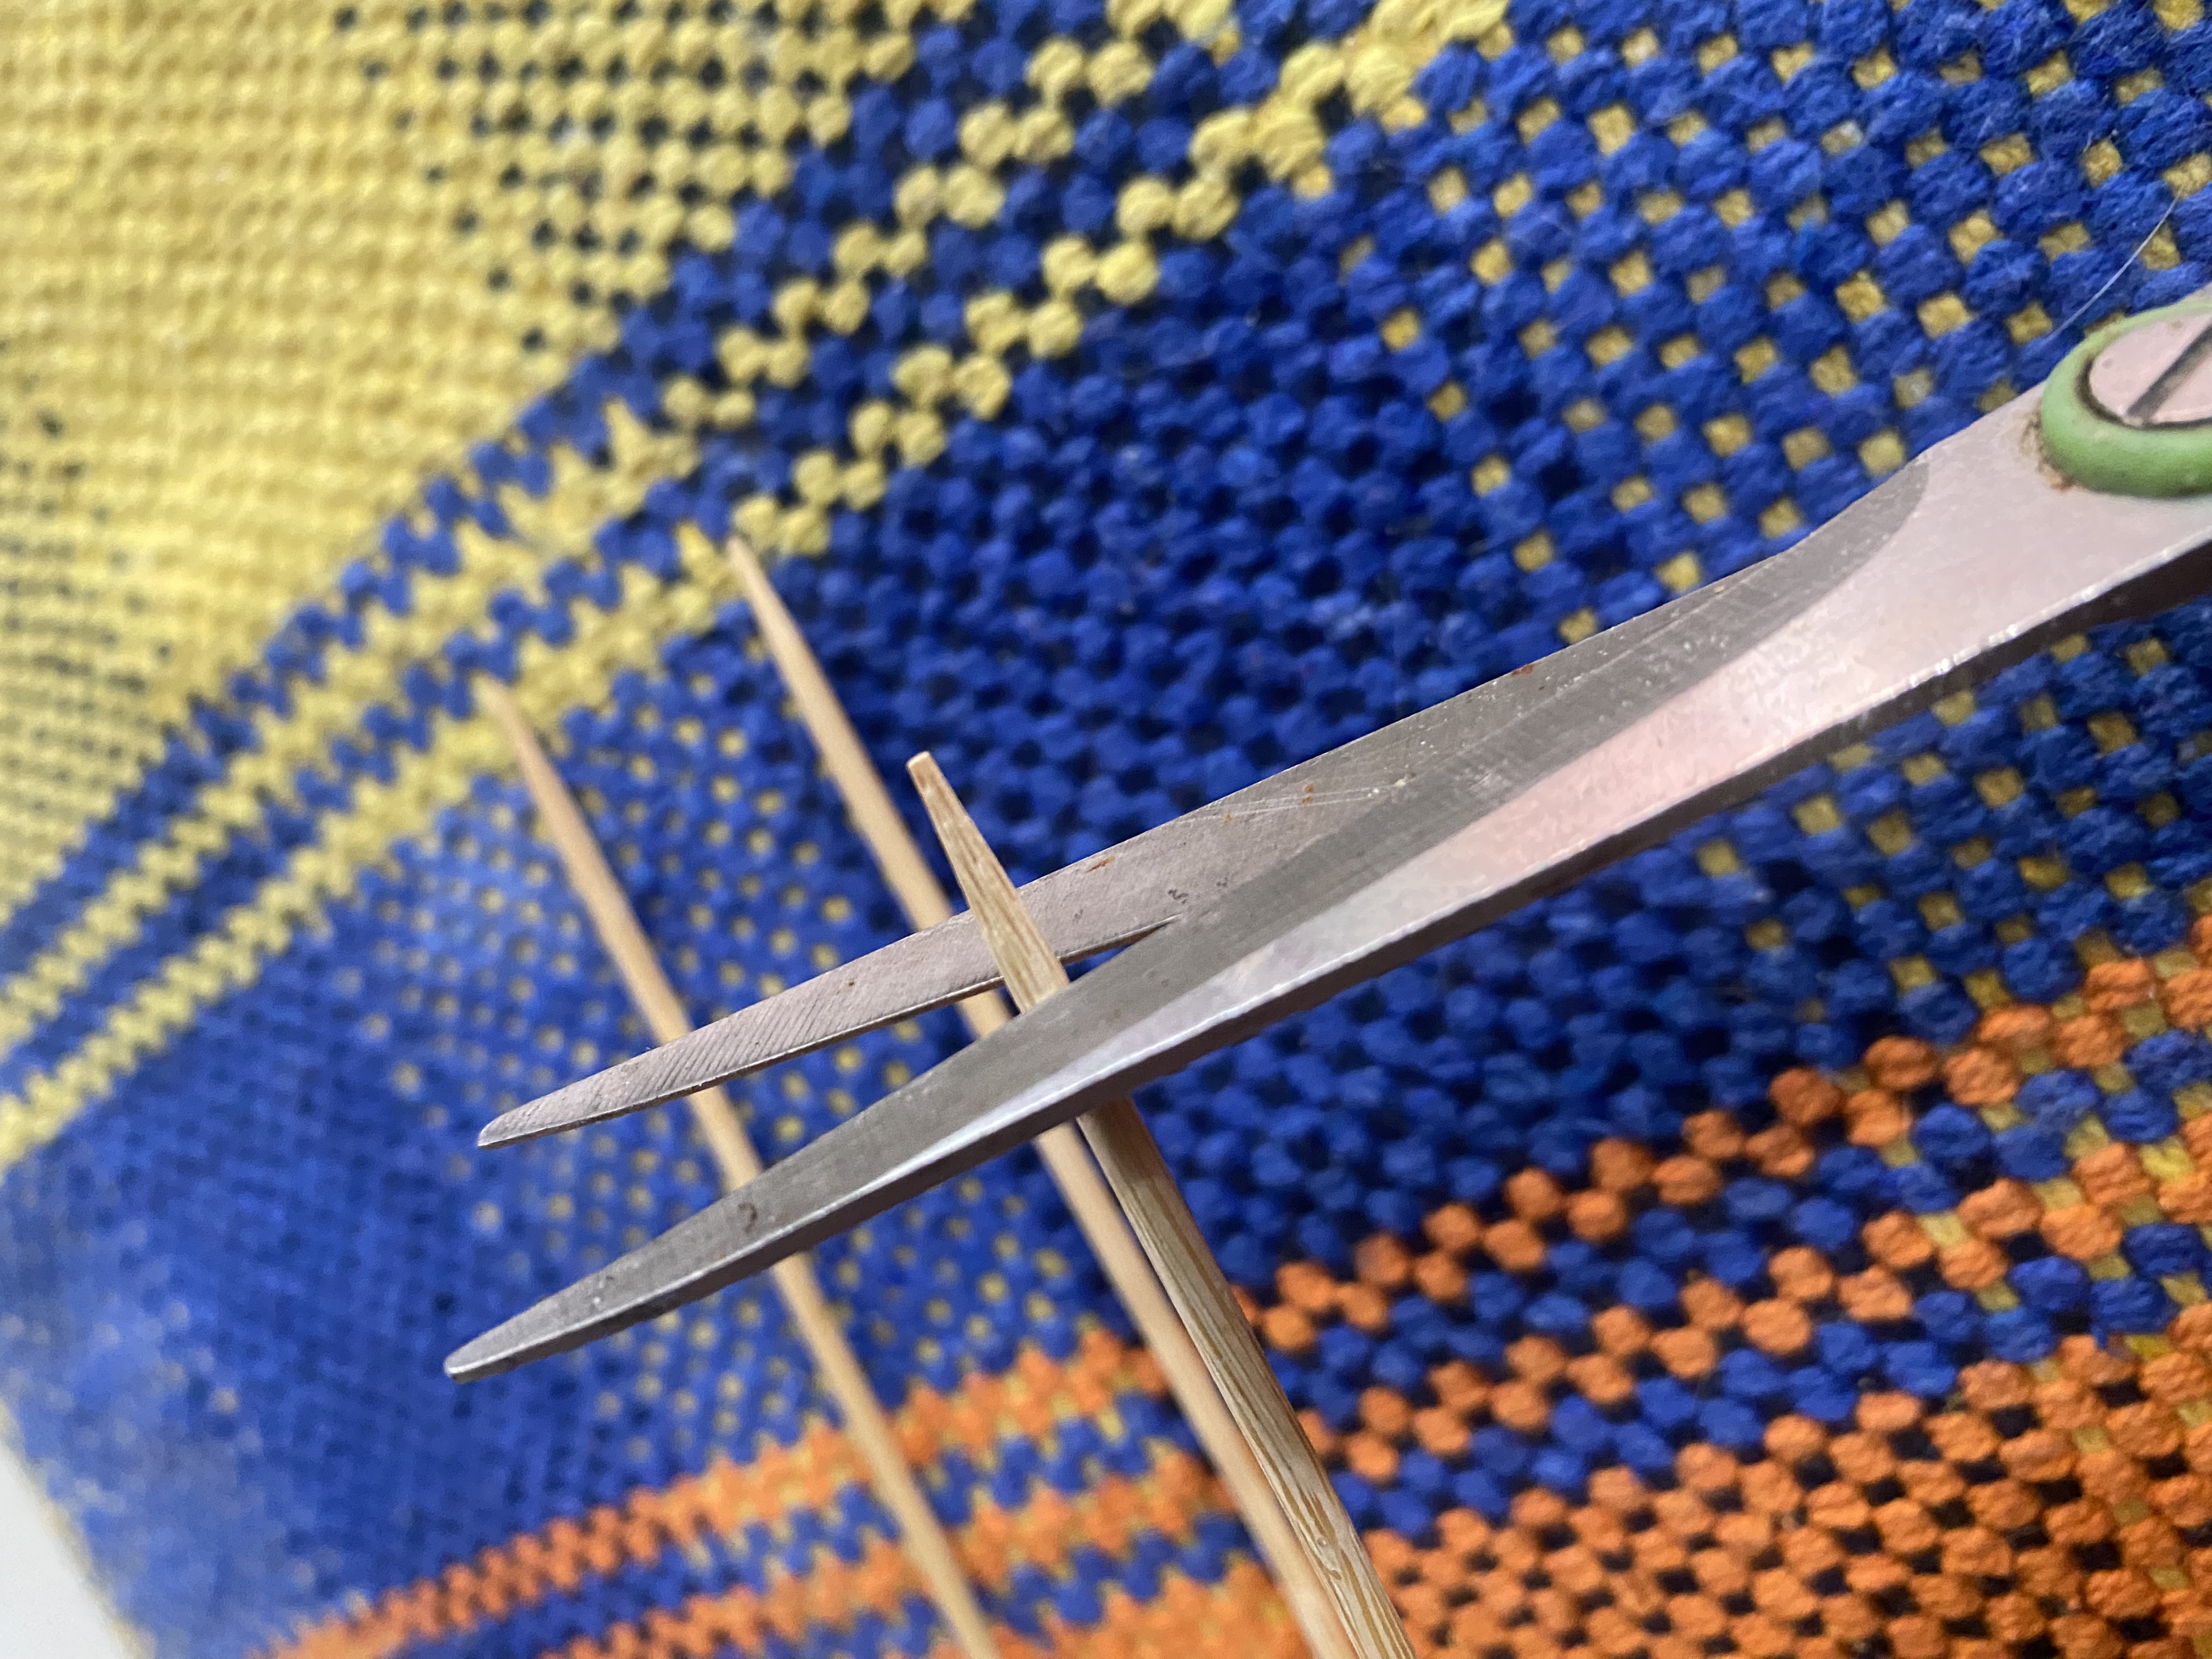
STEP 1 🪁
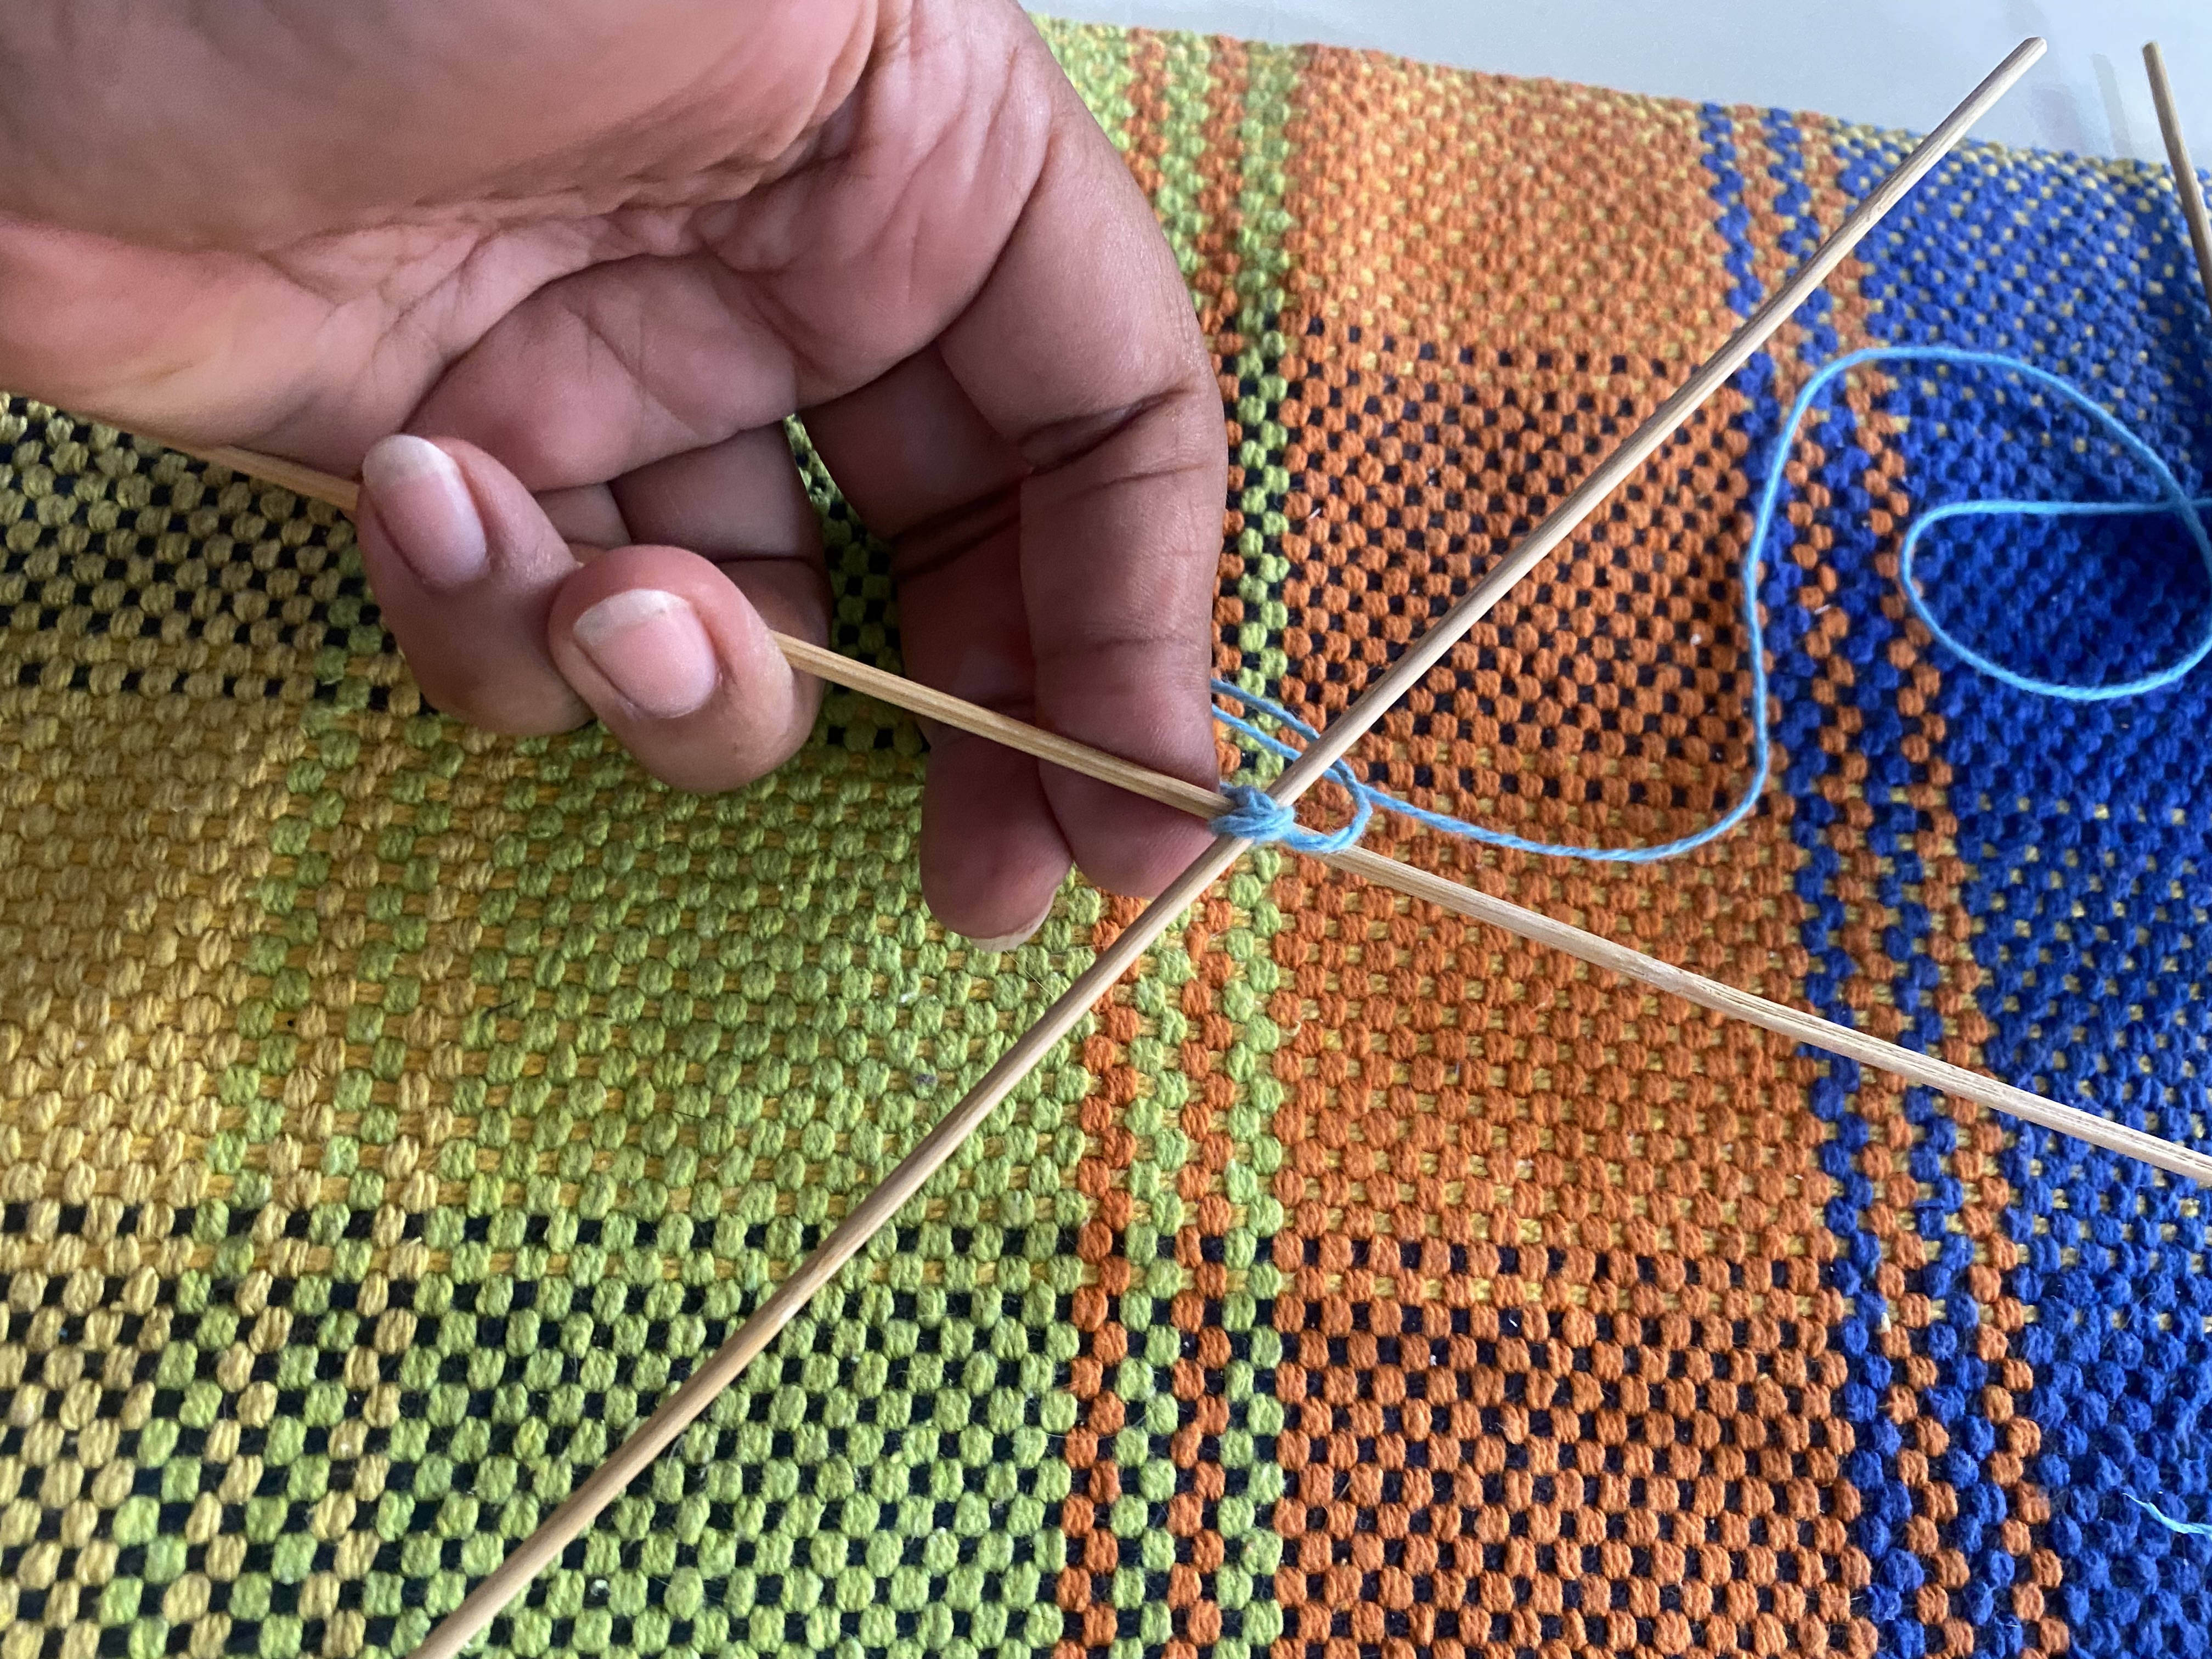
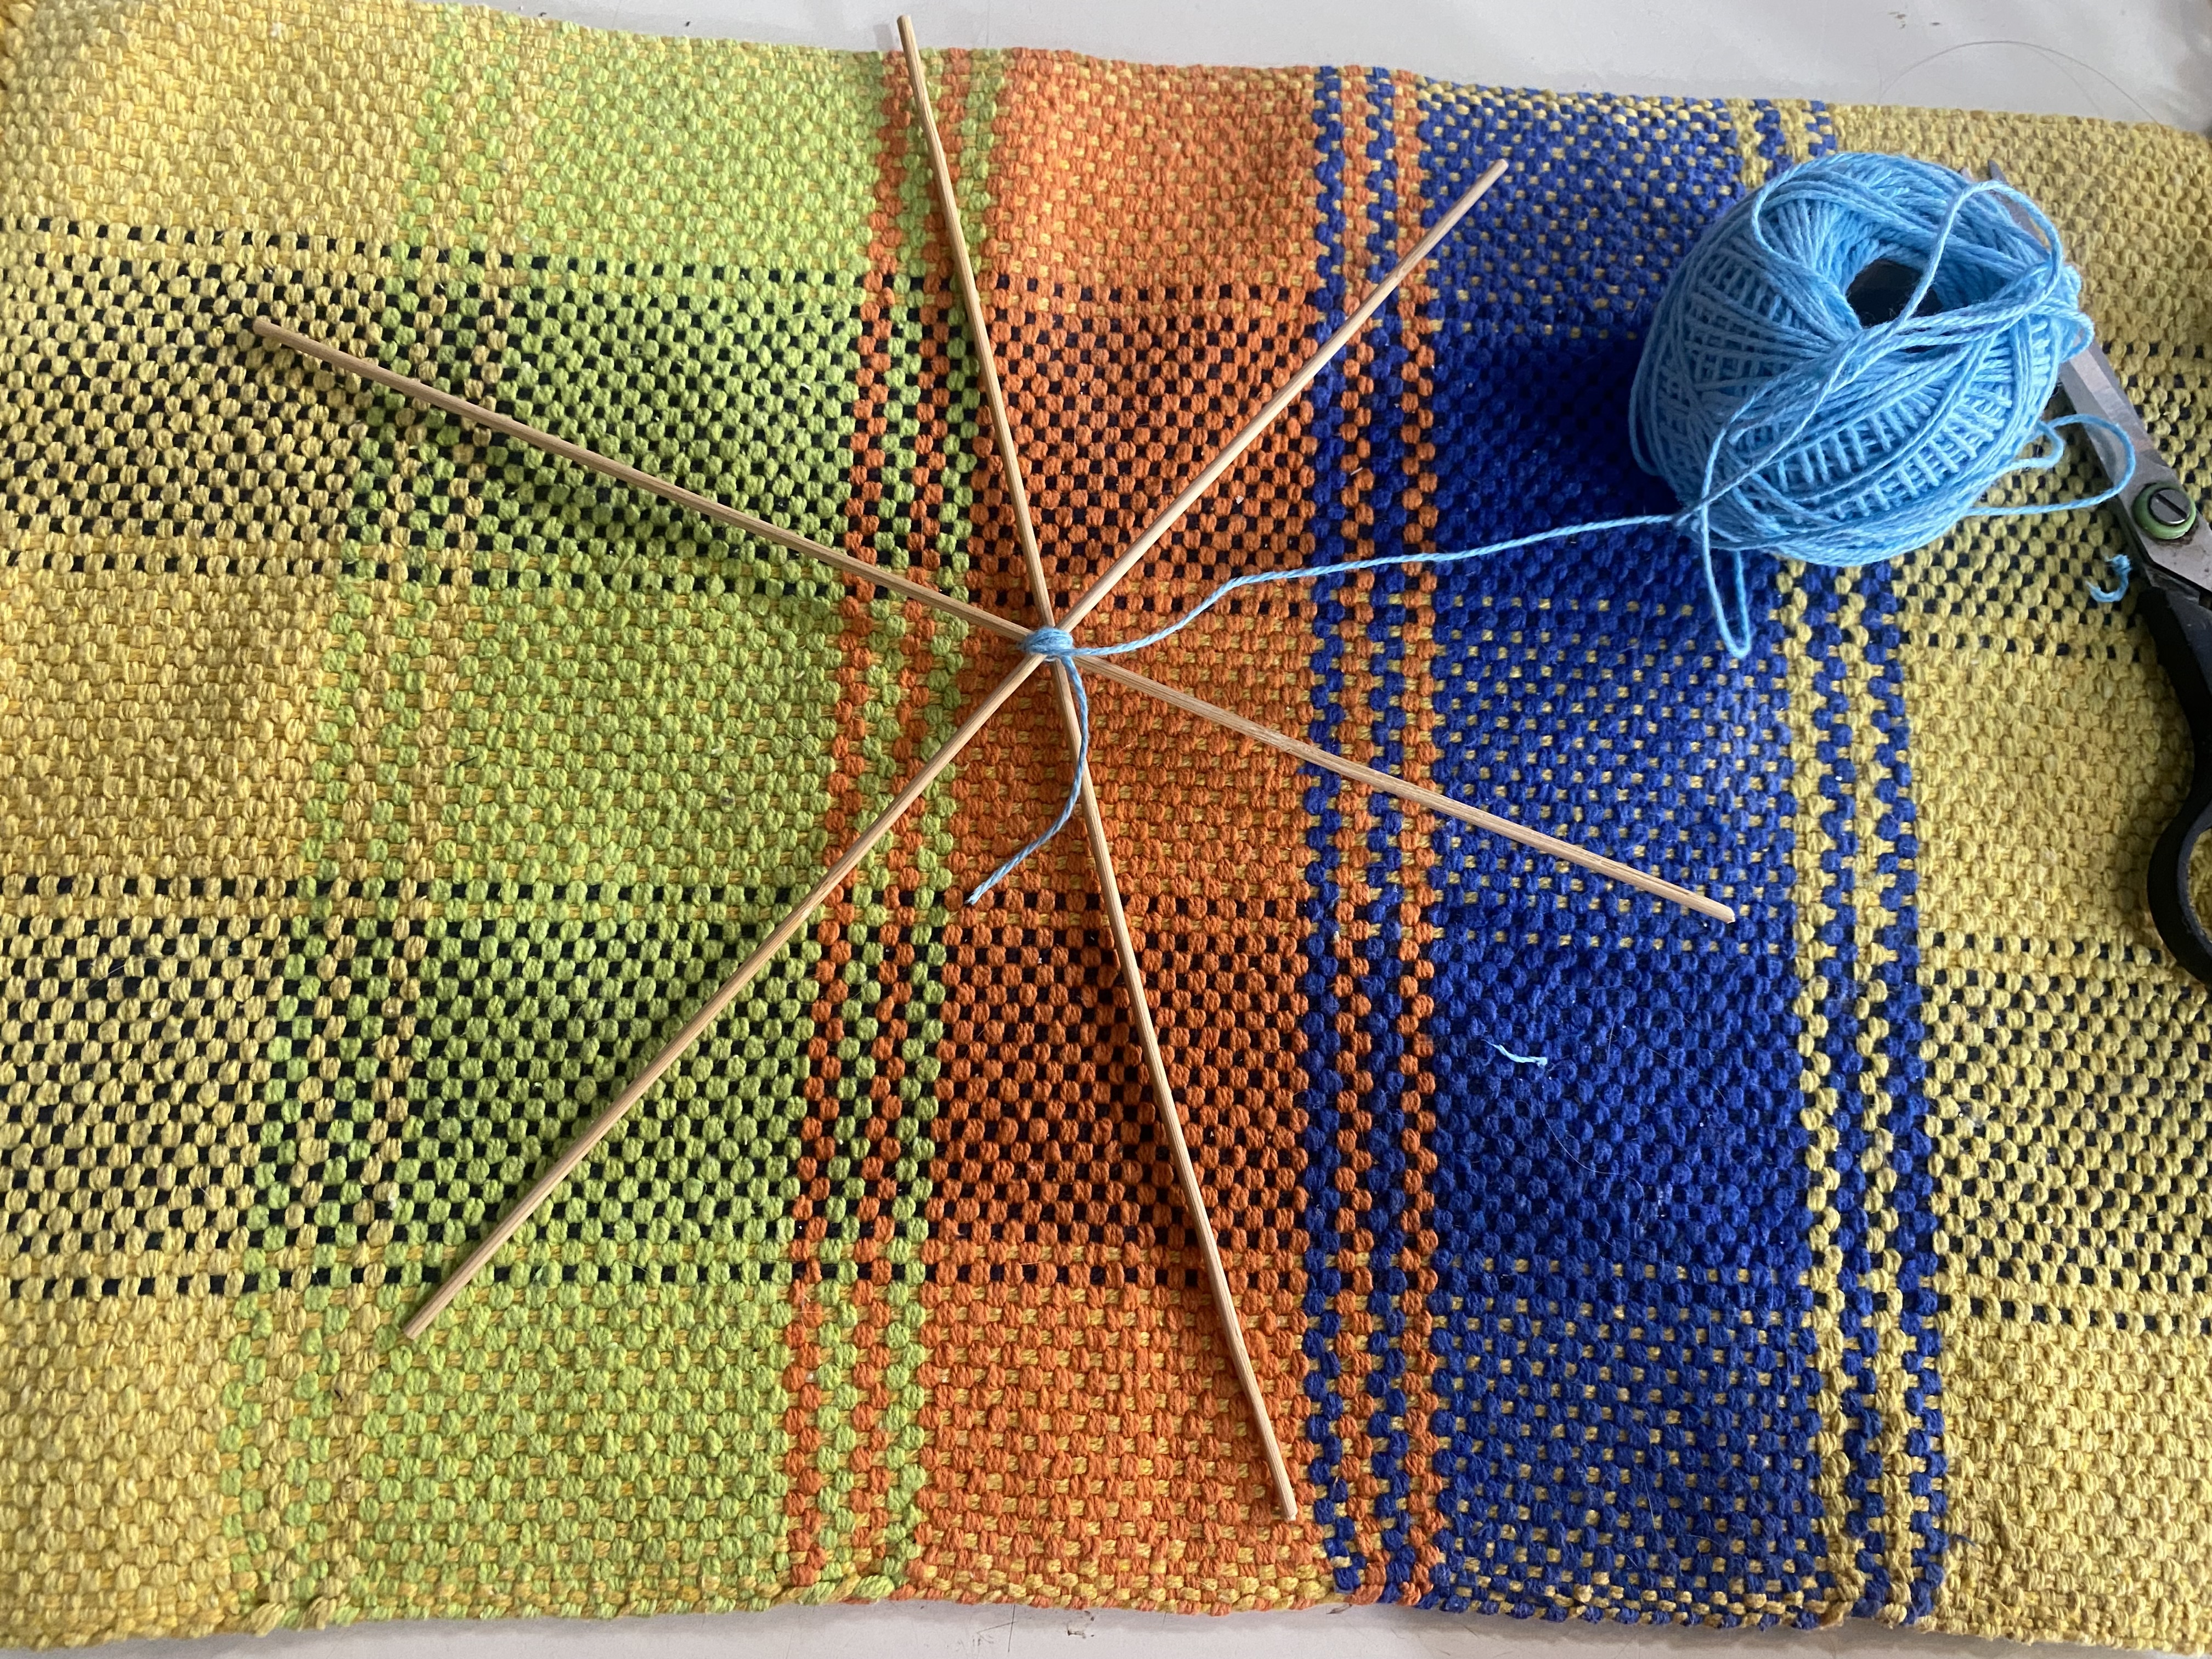
First we are going to cut the sharp ends of the sticks. The model that I am going to show is three sticks, but there are countless models to make different types of Papagayos. We will join 2 sticks in the center. My sticks measure 29 cm long. Half is exactly 14.5 cm. There we are going to turn it with the thread about 3 turns, we open it giving it shape and then we attach the third stick to it, giving it more turns with the thread until it is firm.
PASO 1 🪁
Primero vamos a cortarle las puntas afiladas a los palitos, El modelo que yo voy a mostrar es de tres palitos, pero hay infinidad de modelos para hacer diferentes tipos de papagayos, uniremos 2 palitos en el centro, mis palitos miden 29 cm de largo la mitad es justo en 14.5 cm allí le vamos a dar vuelta con el hilo unas 3 vueltas, abrimos dándole forma y luego le unimos el tercer palito dándole más vueltas con el hilo hasta que quede firme.
 |  |
|---|---|
 |  |
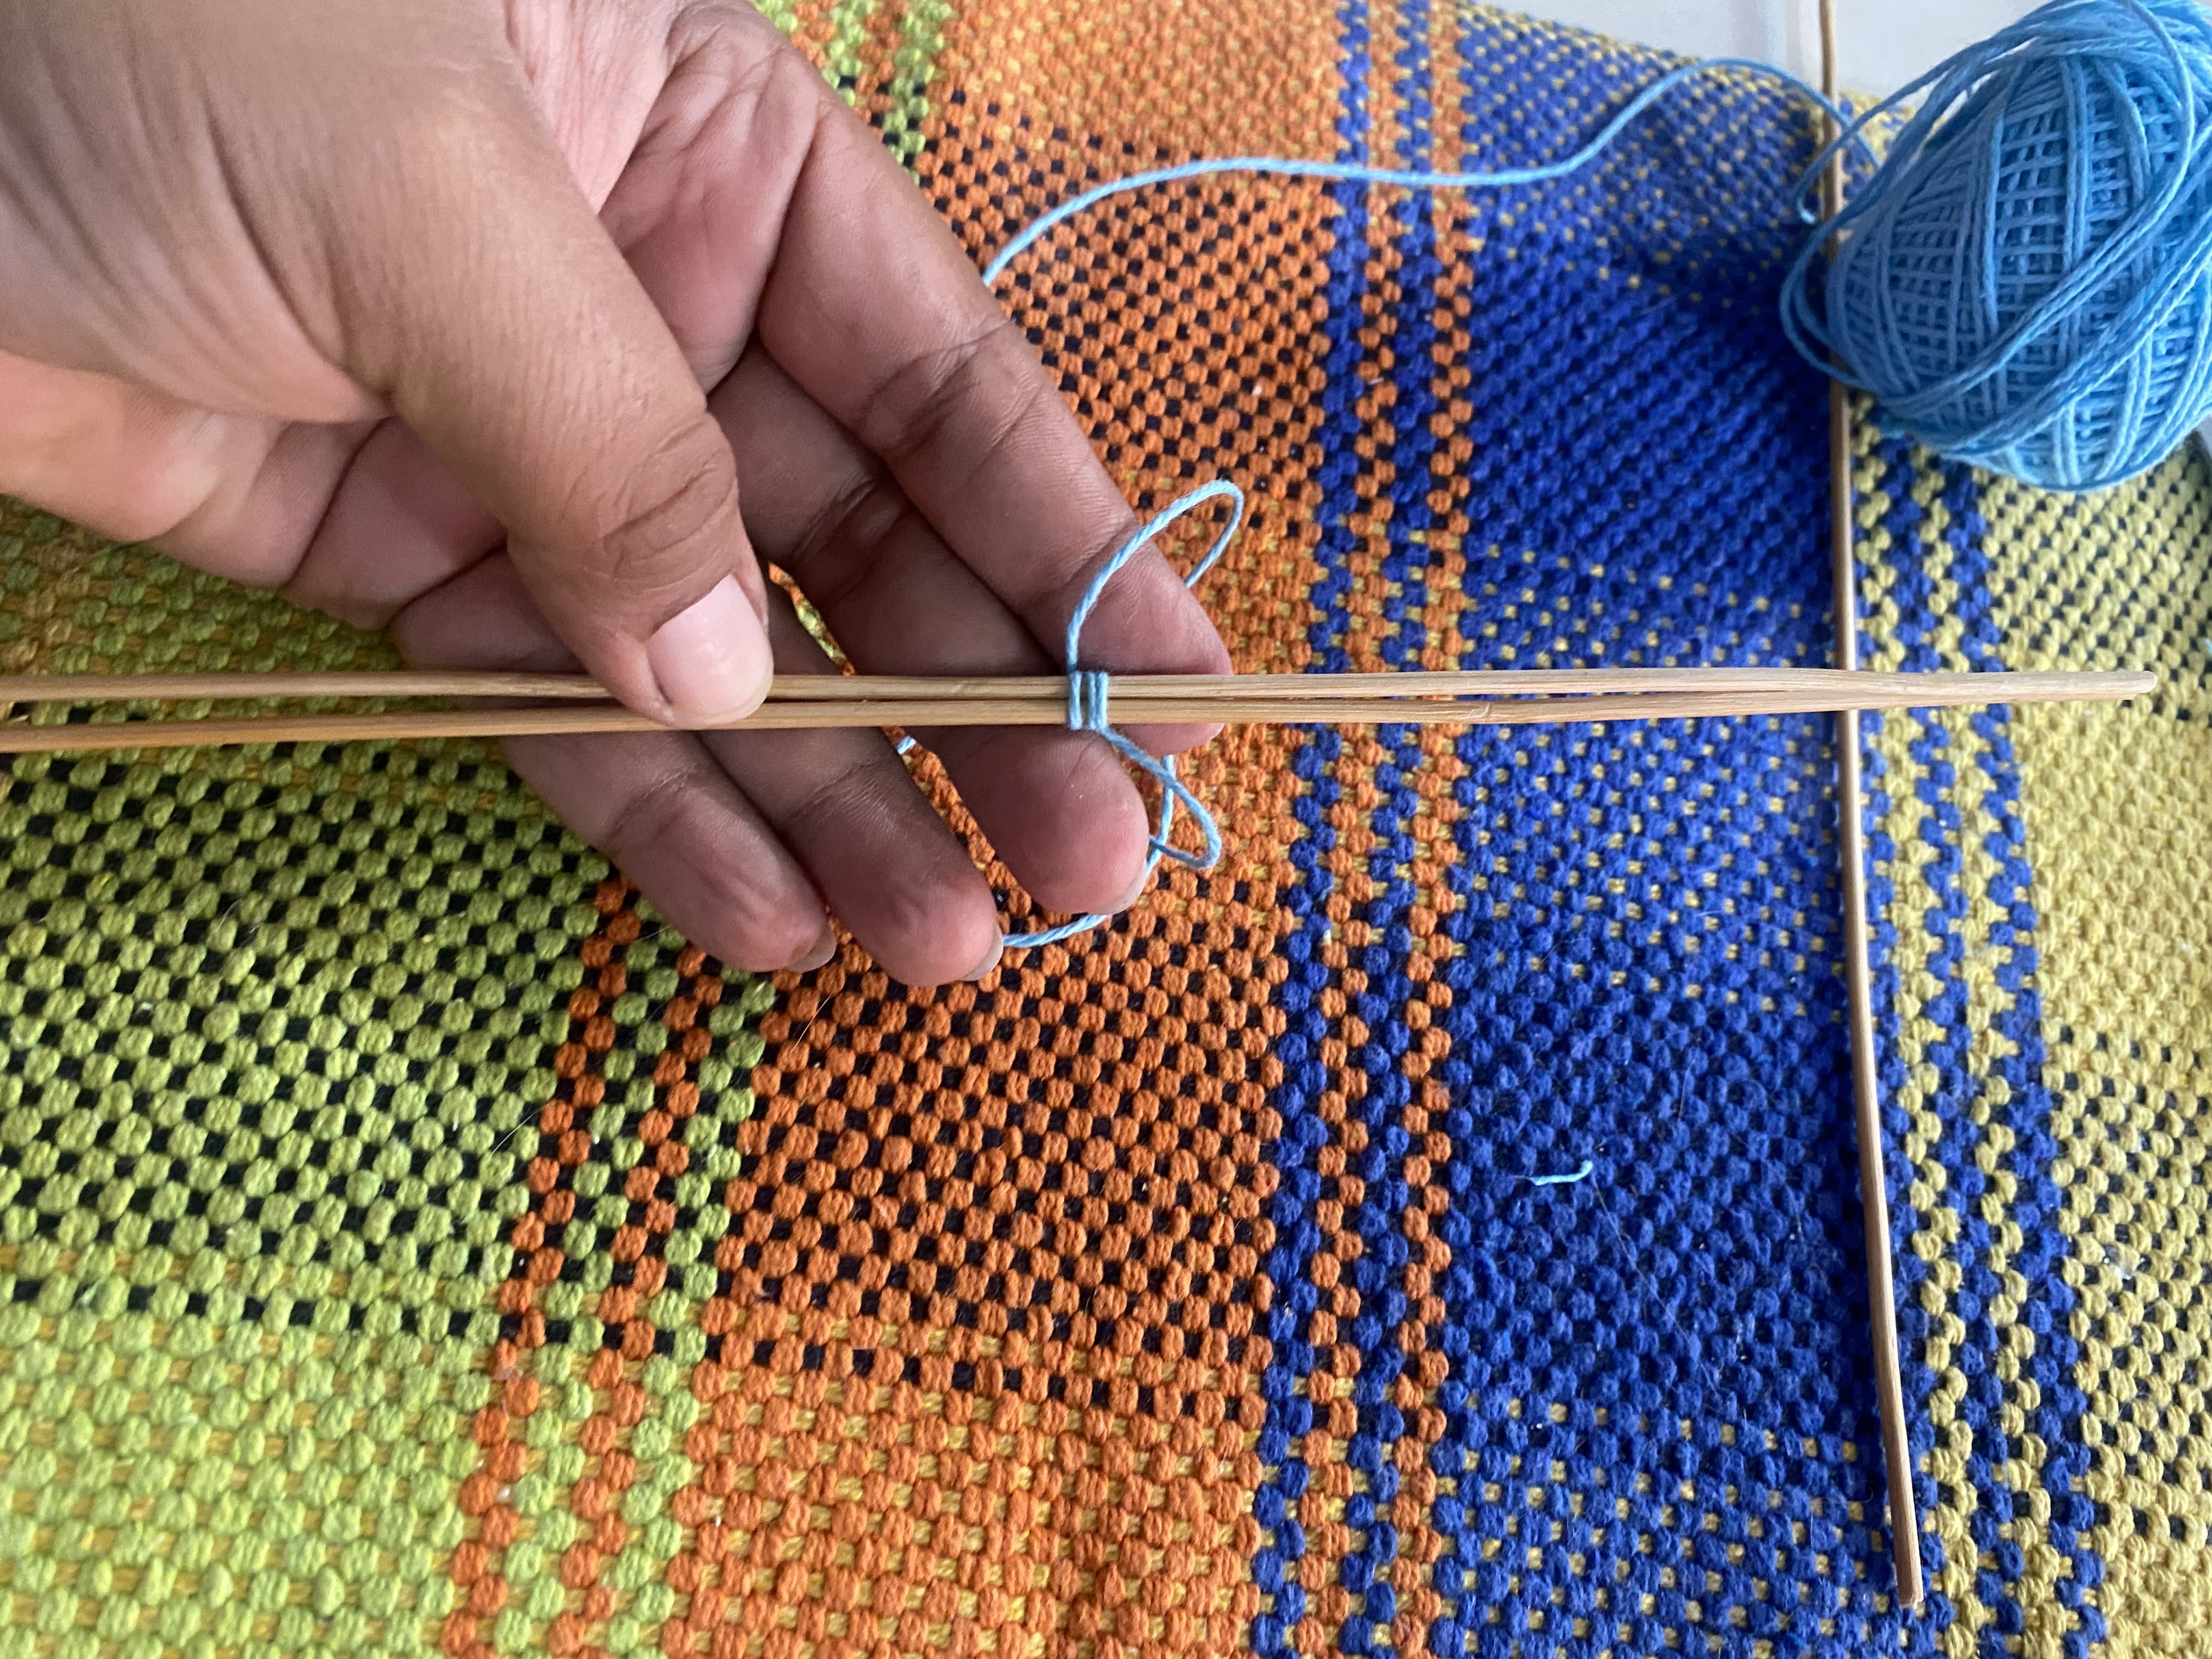
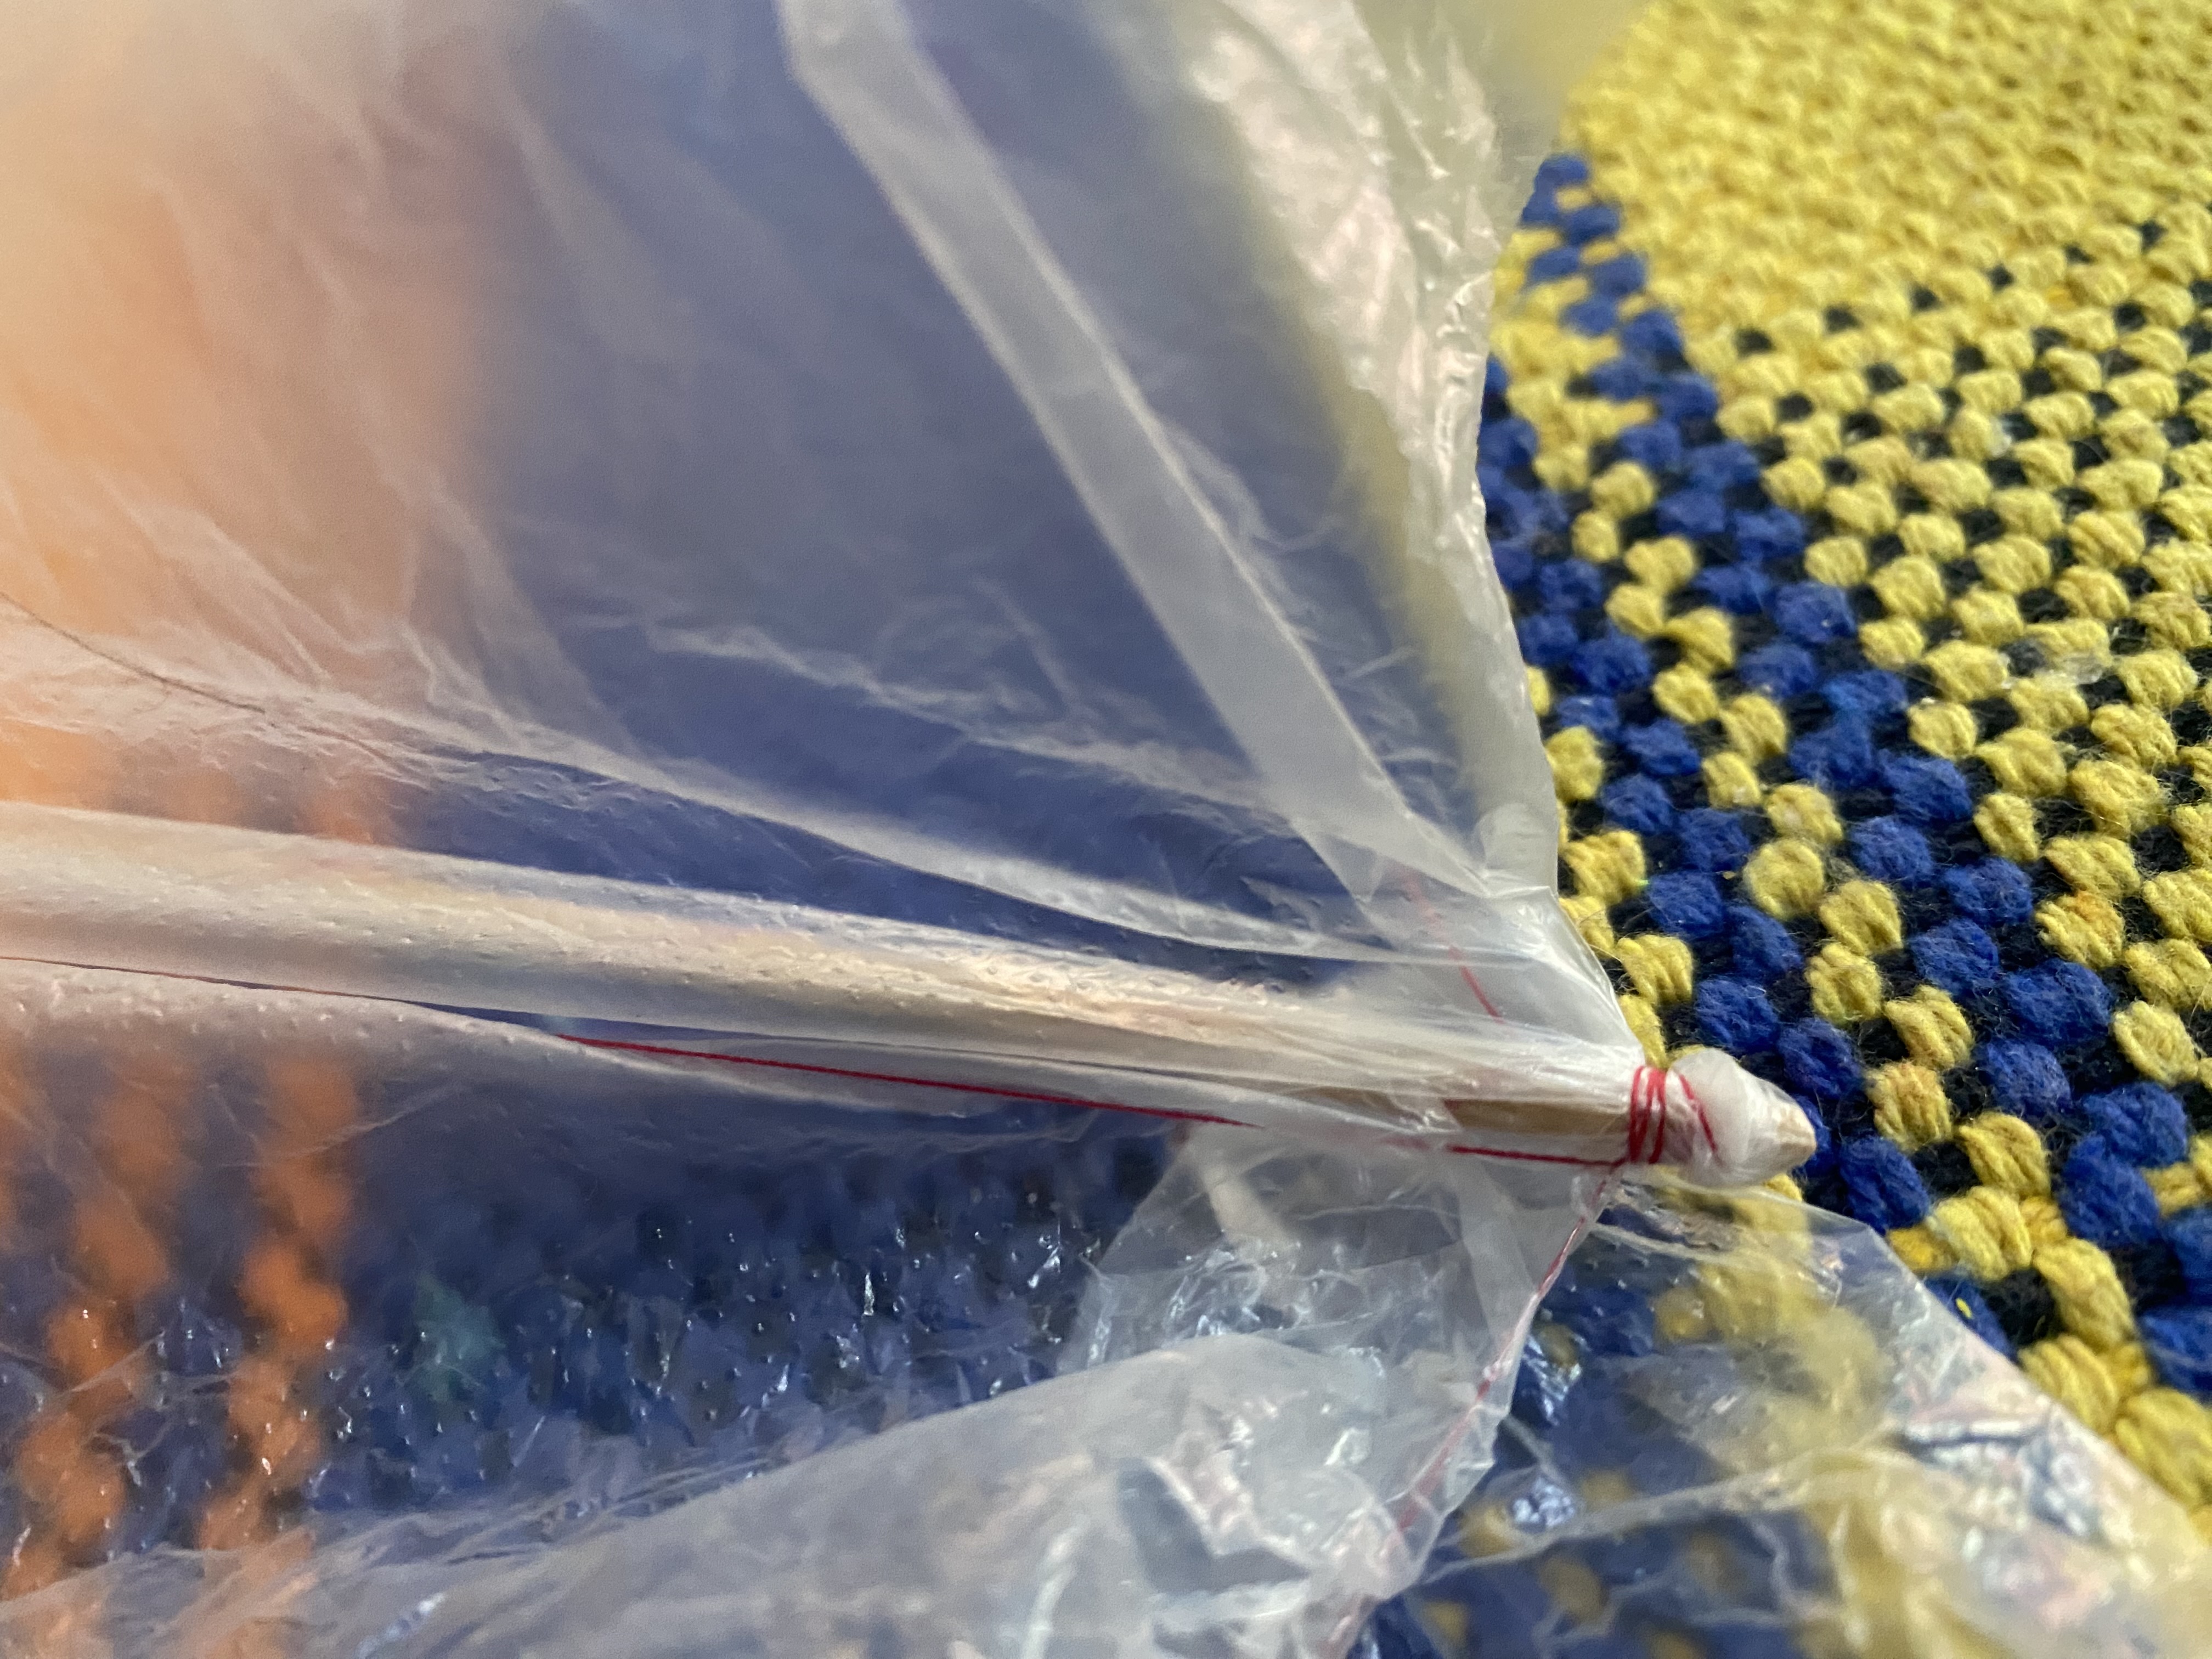
STEP 2 🪁🪁
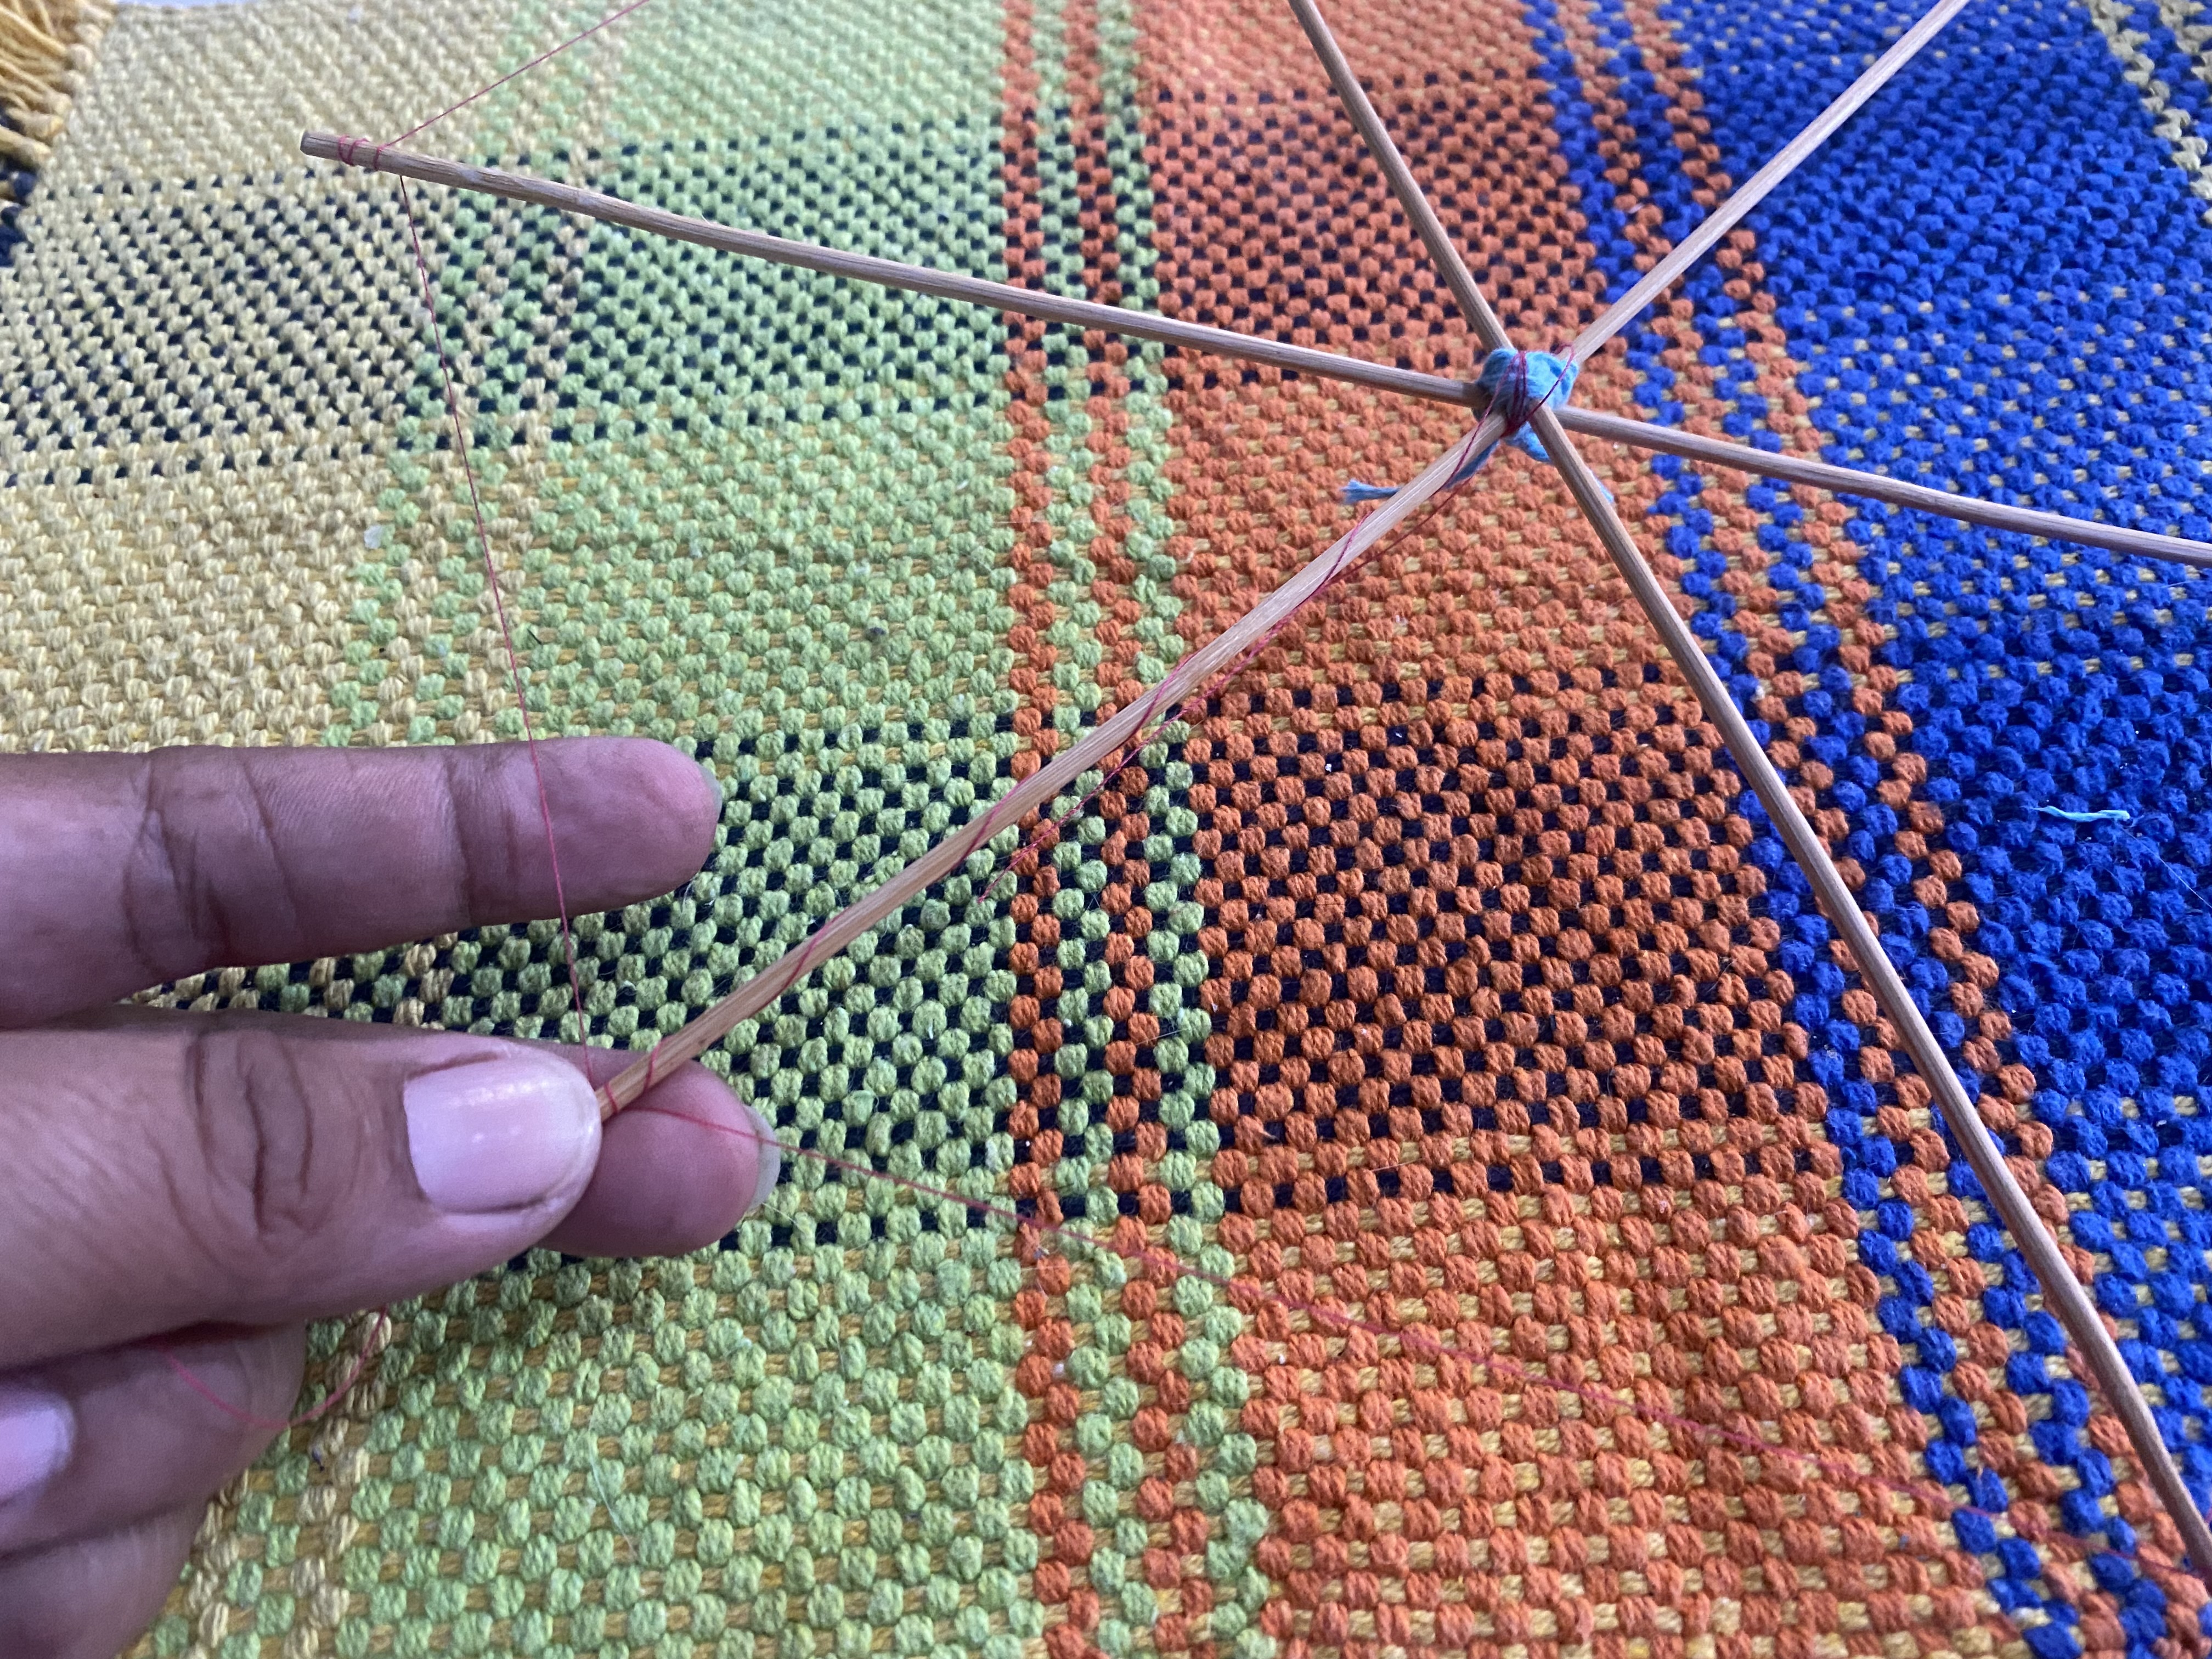
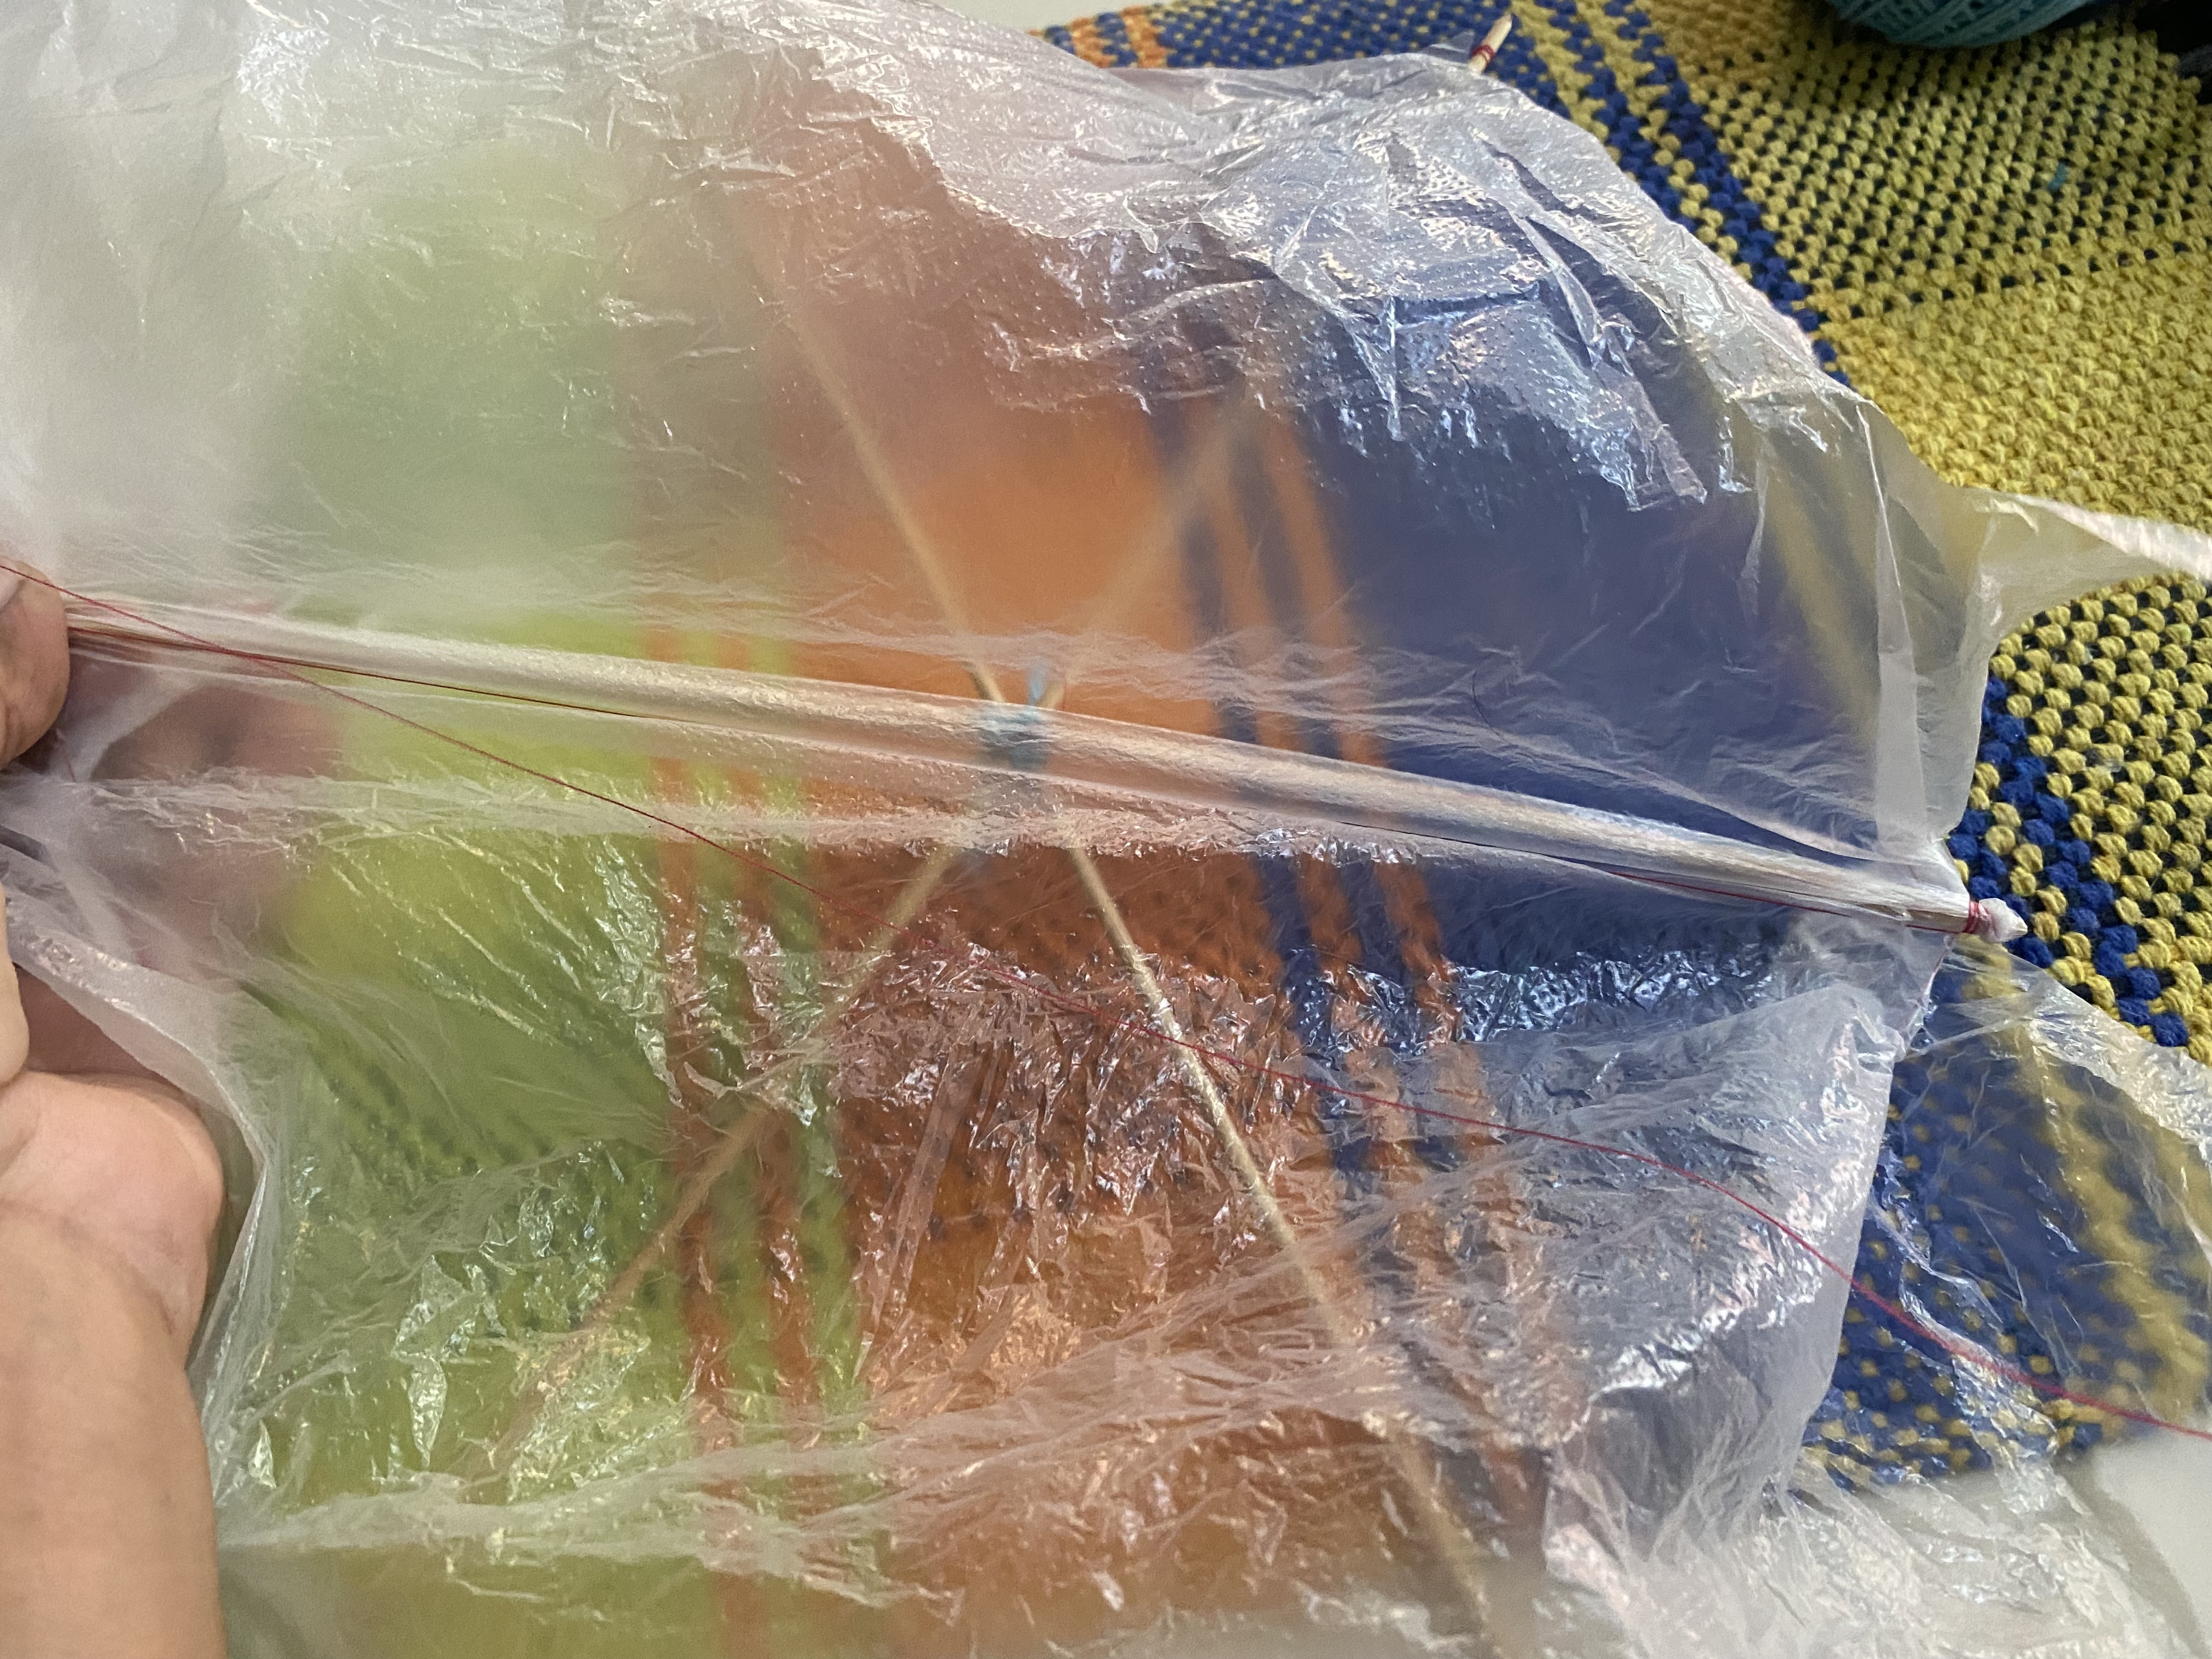
In this step we are going to cut the bag, we will try to find a bag the size of the Papagayos so that it is complete without adding it, the ideal is to get a plastic bag that is quite thin since this reduces the weight of our Papagayos and will make it fly higher.
We will tie the sticks with sewing thread joining them at the ends, then we open the bag and place it on top of the sticks and we will knot each end of each stick, at the end we will cut it trying to leave an edge, this edge can To be decorative, we can make fringes to make it look more beautiful.
PASO 2 🪁🪁
En este paso vamos a cortar la bolsa, trataremos de buscar una bolsa del tamaño del papagayo para que quede completa sin añadirla, lo ideal es conseguir una bolsa plástica de las que son bastante finitas ya que esto le resta peso a nuestro papagayo y hará que vuele más alto.
Anudaremos los palitos con hilo de coser uniéndolos en los extremos, luego abrimos la bolsa y la colocaremos encima de los palitos y vamos a ir anudando en cada extremo de cada palito, al final vamos a recortar tratando de qué quede una orilla, esta orilla puede ser decorativa podemos podemos hacerle flecos para que se vea más bonito.
 |  |
|---|---|
 |
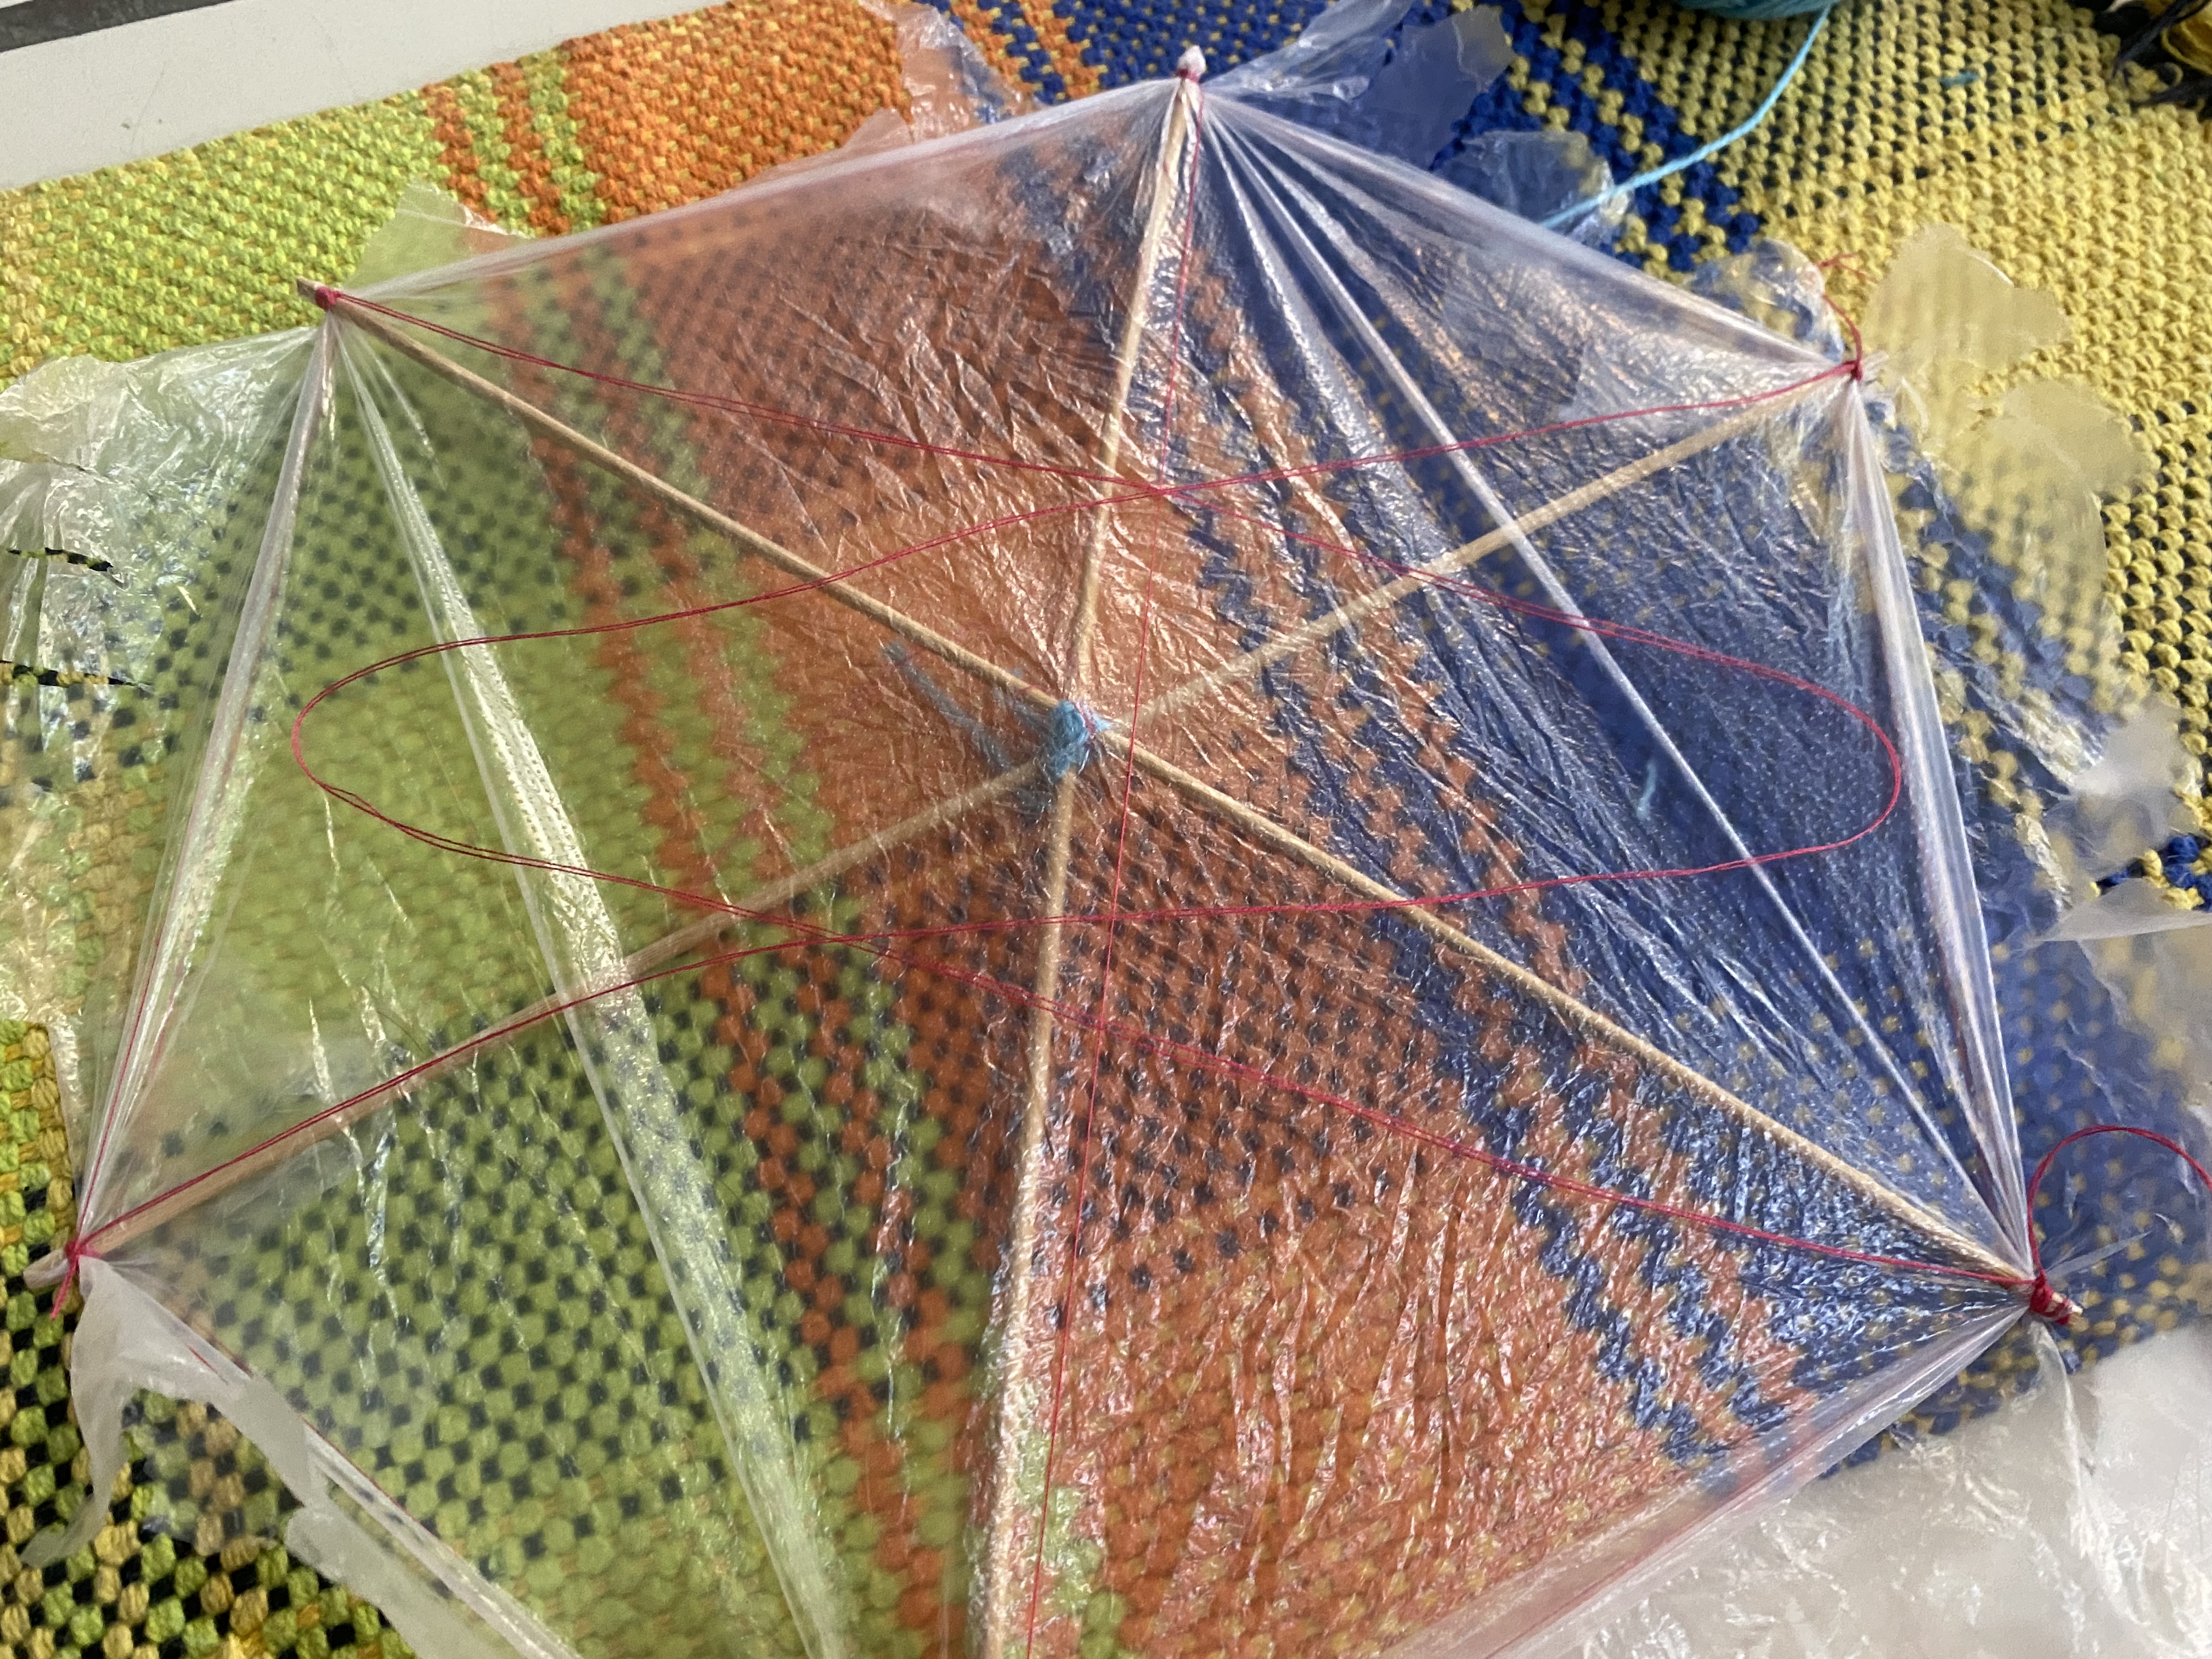
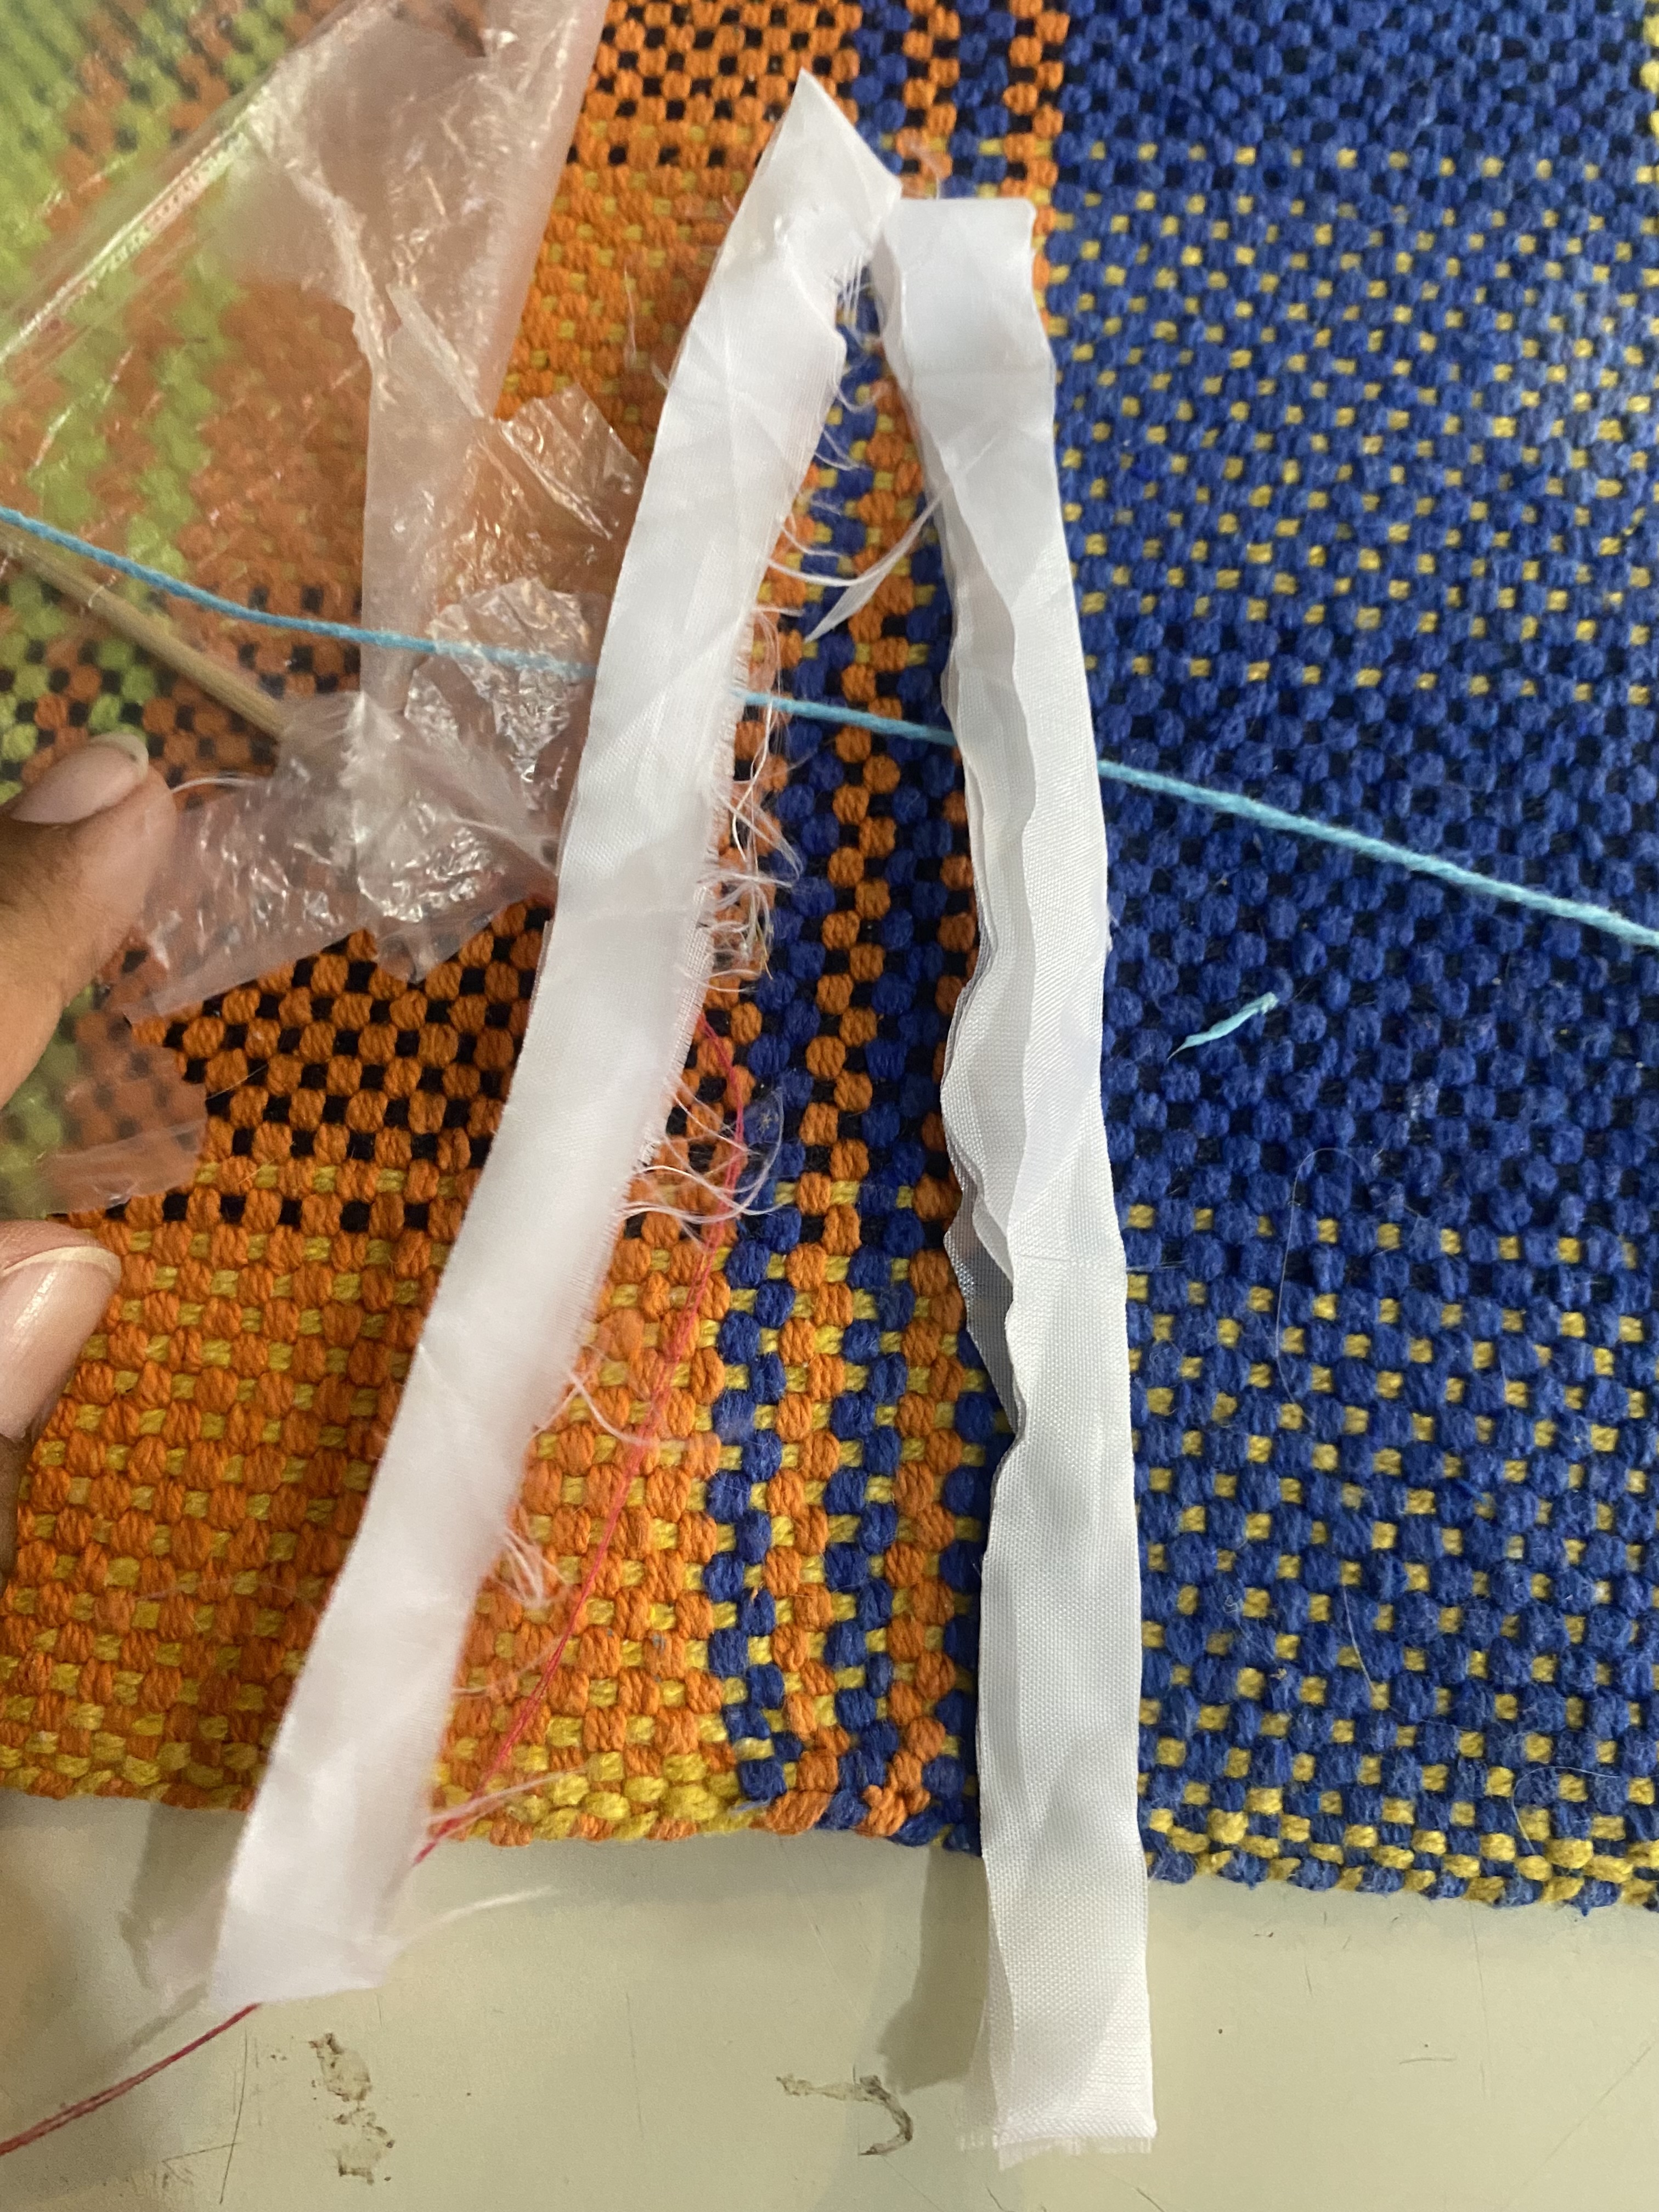
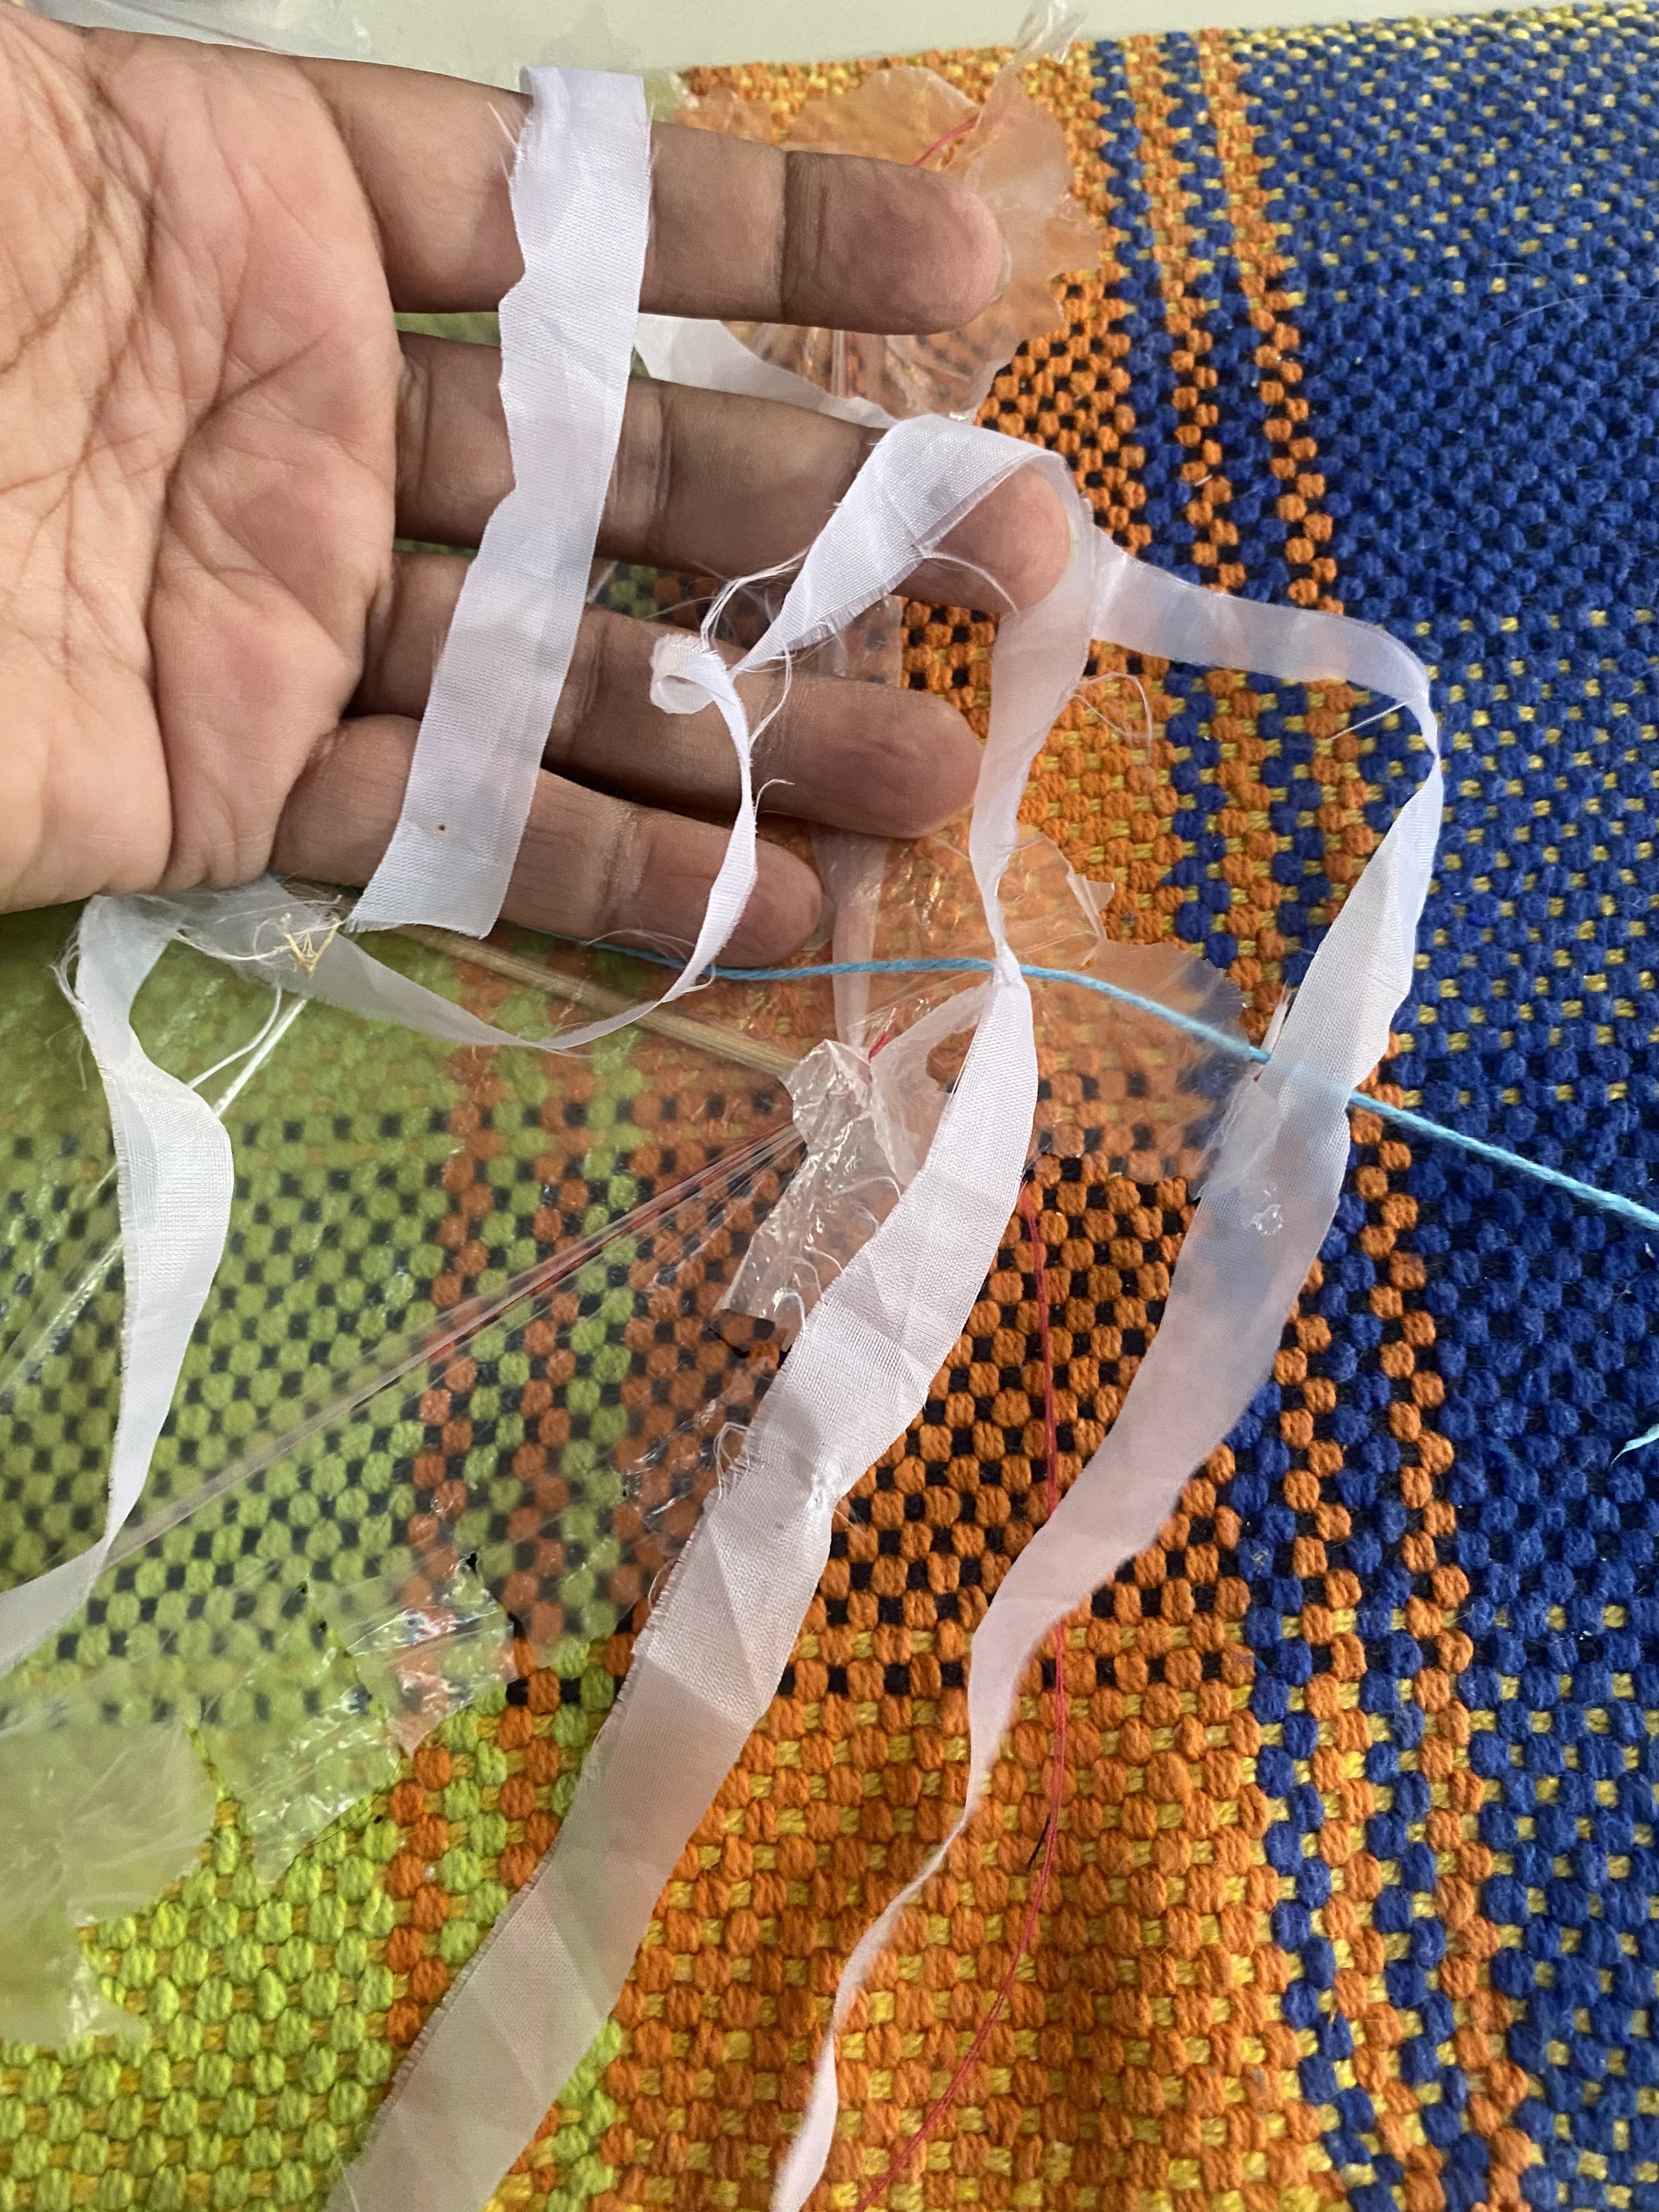
STEP 3 🪁🪁🪁
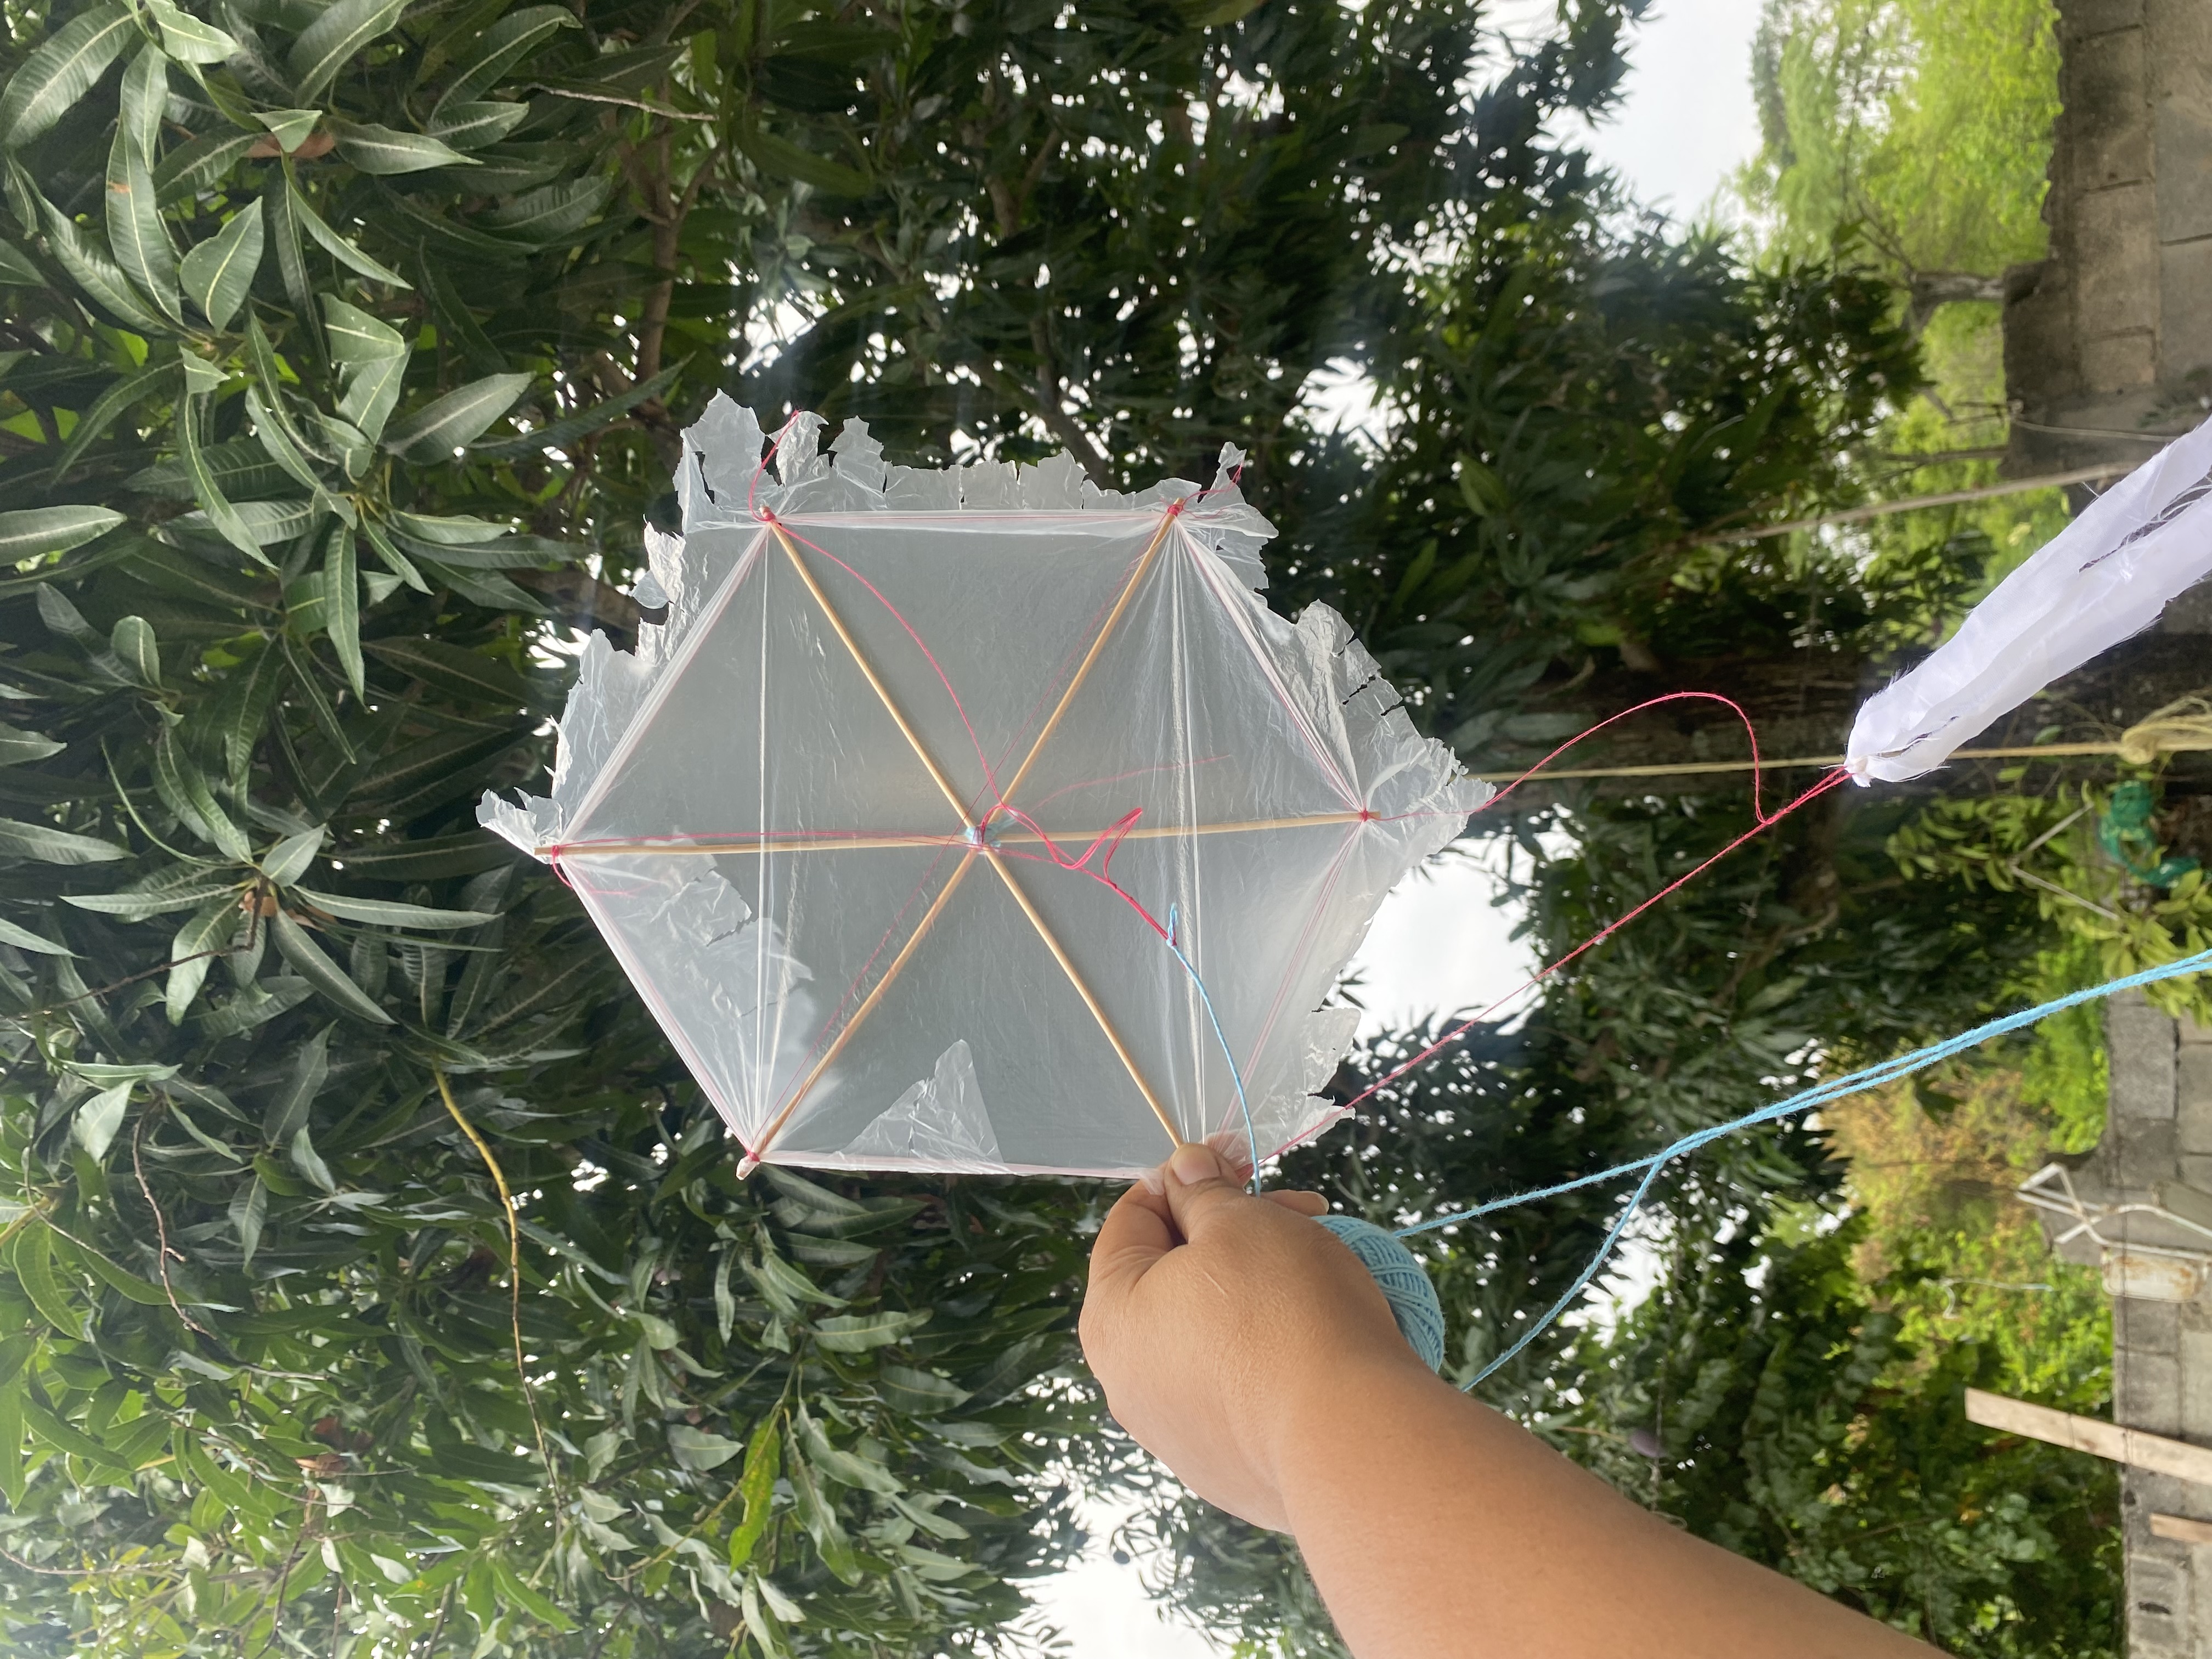
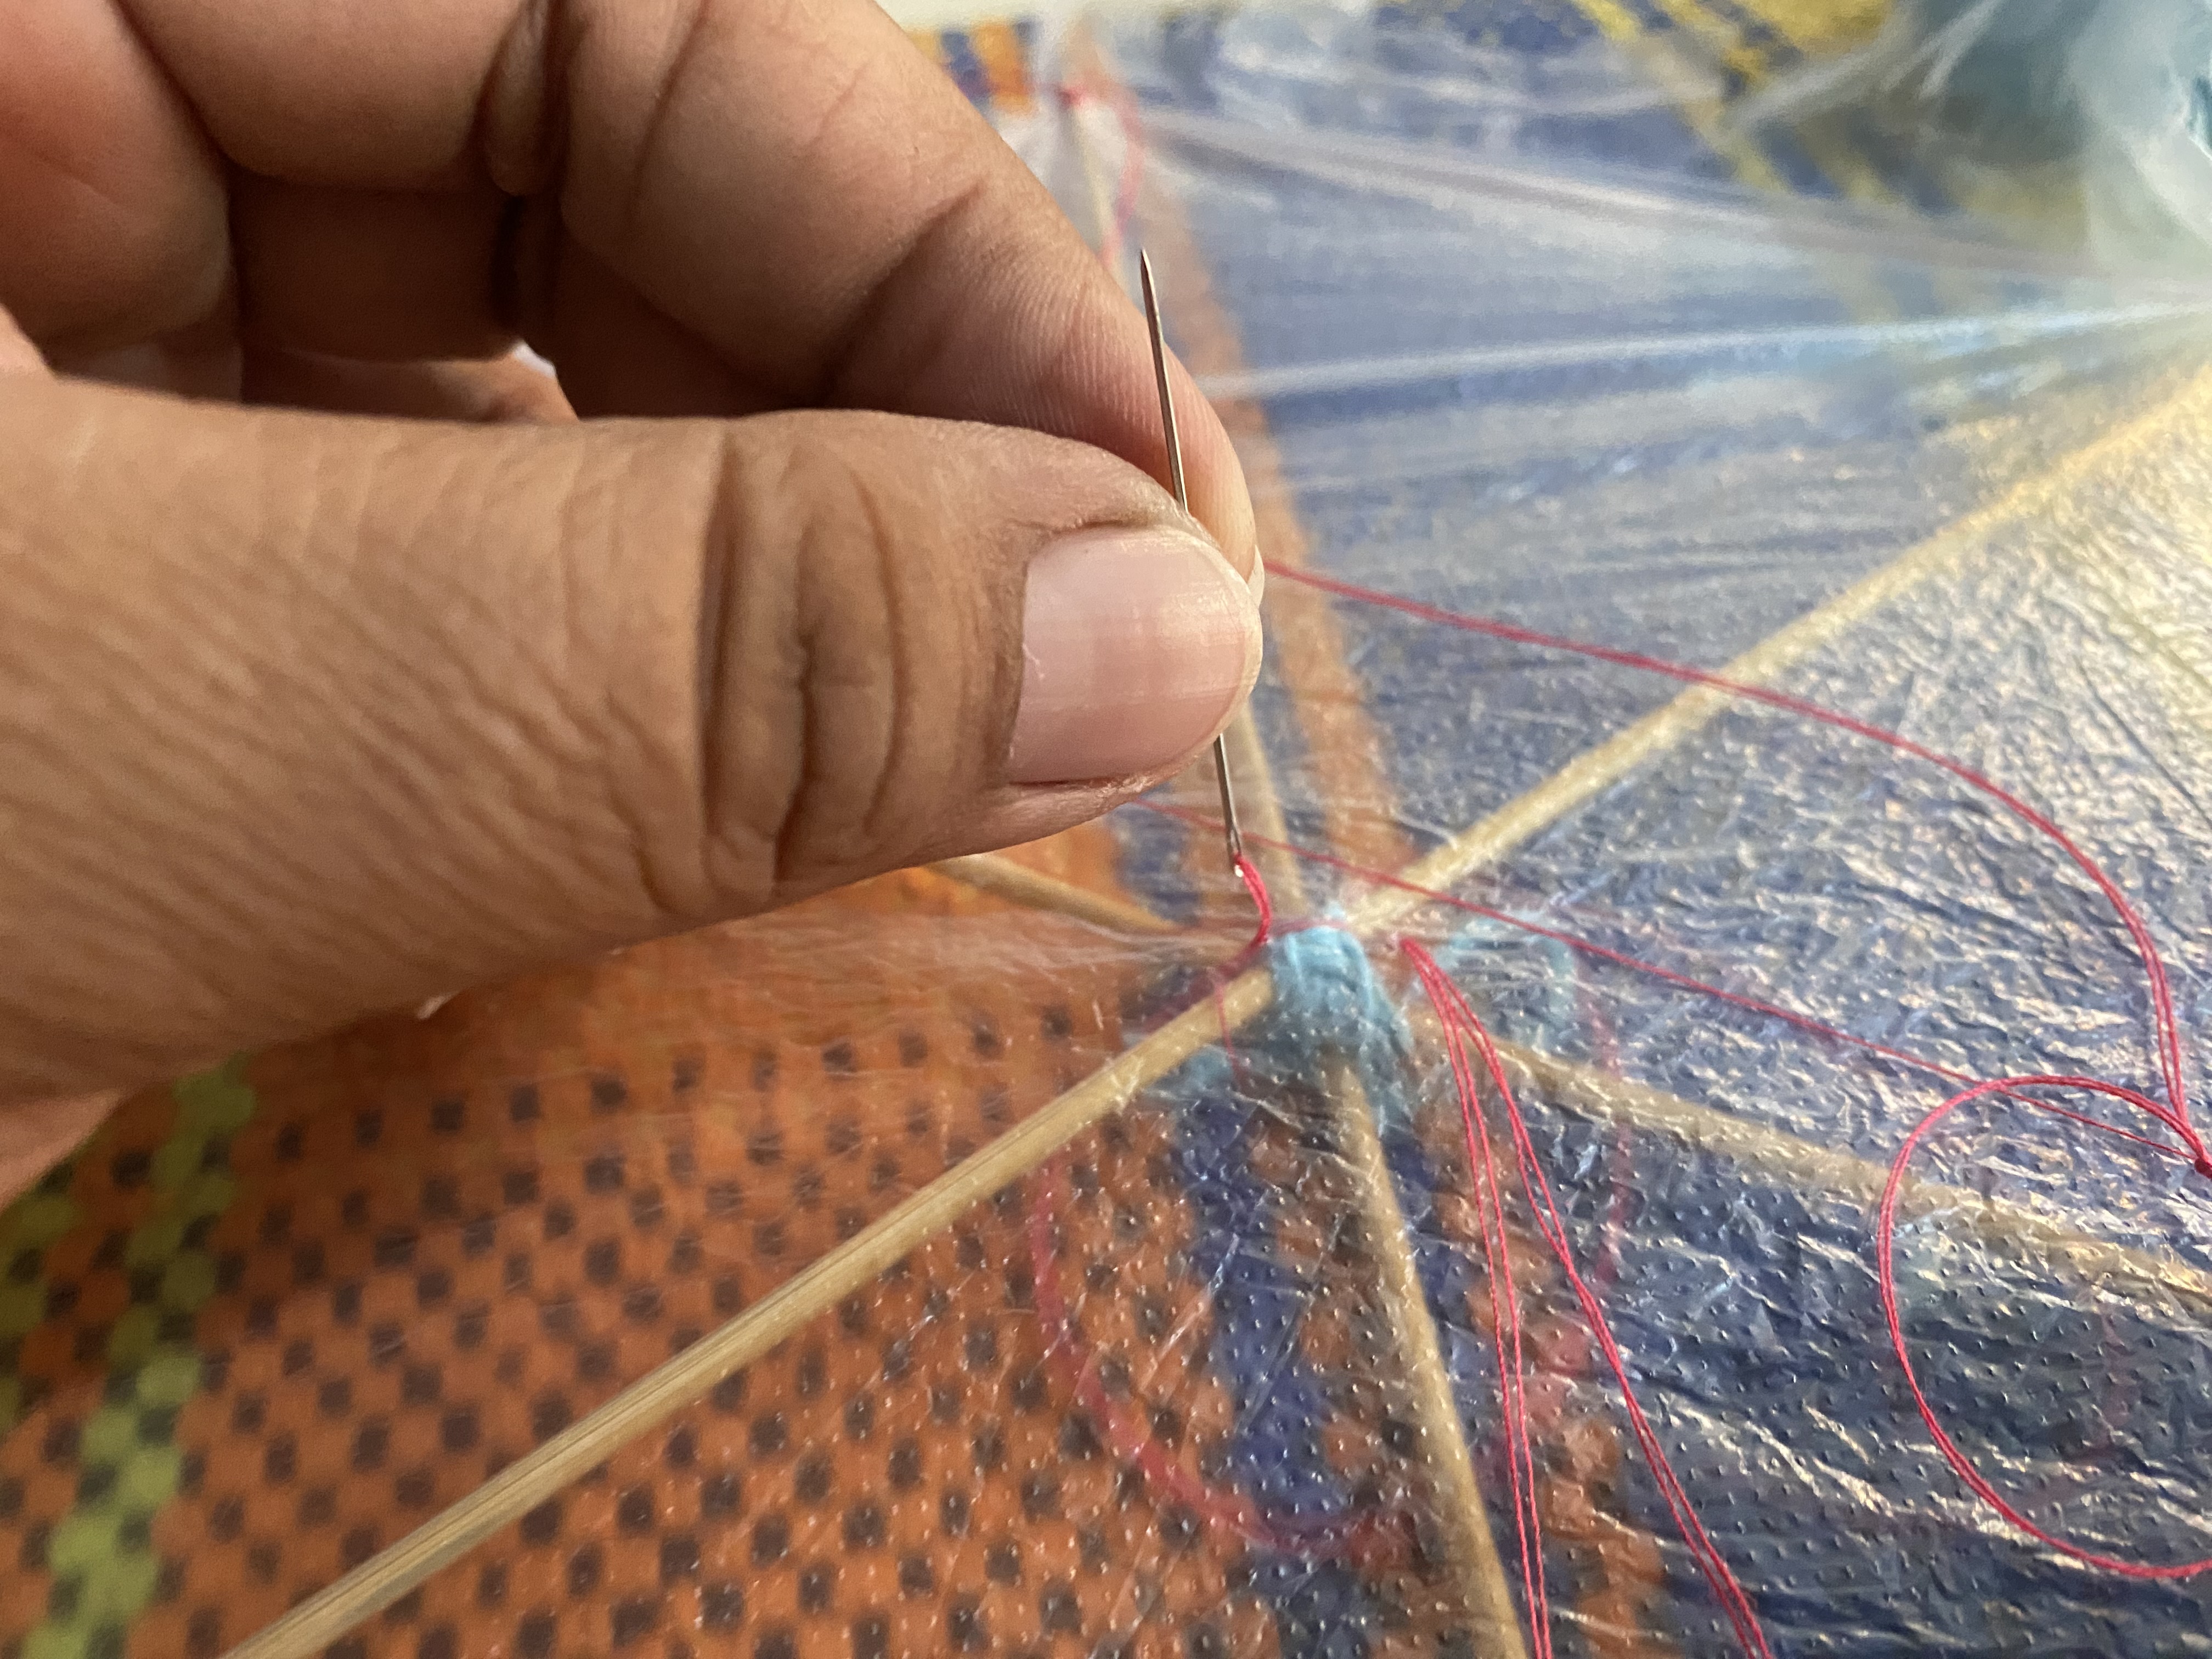
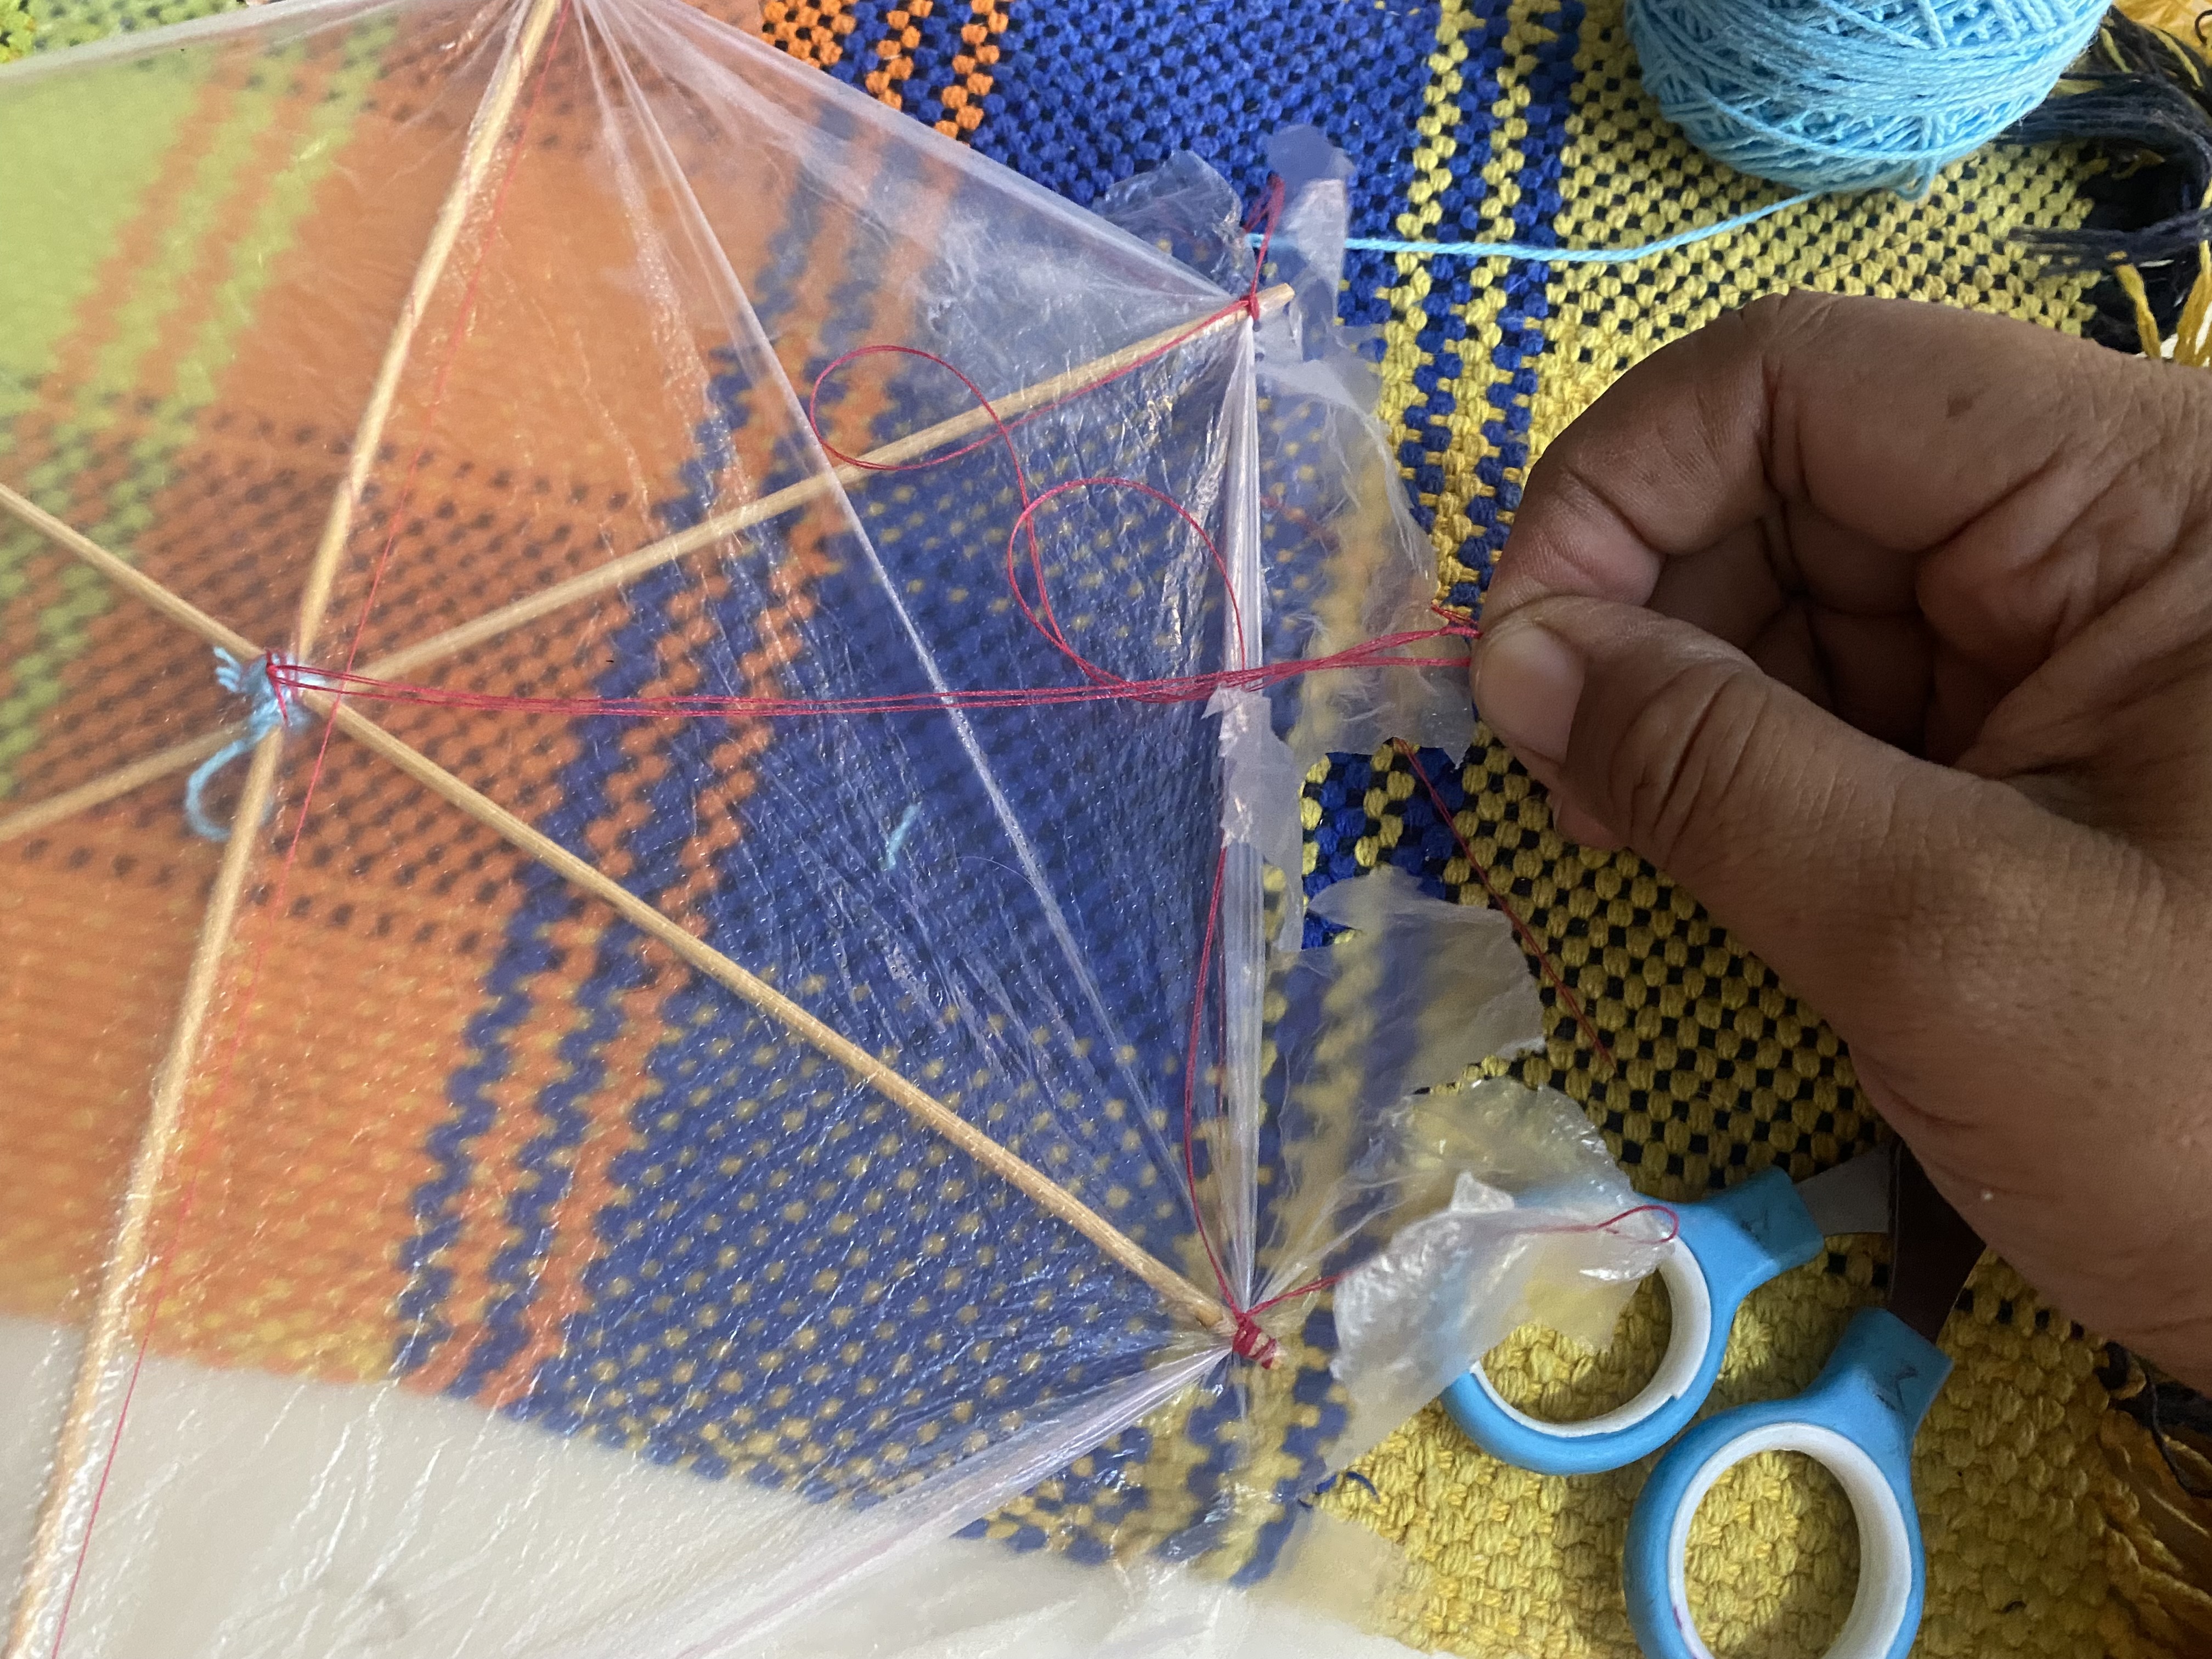
For step 3, placing the threads: we are going to place two strips of thread joining two ends of the sticks and that the length of the thread reaches the base of the Papagayos as I show in my image.
On the opposite side we are going to place another thread in the same way, this will be to place the tail of our Papagayos. Then we will place a thread in the Center, helping ourselves with a needle so as not to pierce the plastic too much, we knot and join with one of the threads that we already placed previously.
This step is quite important since, depending on the size of the thread, our parrot will be able to fly. I really don't have much knowledge about this. What I remember is that the Center thread must be knotted with one of the threads that we put at two ends and this one must get to the base of the parrot, I would like an expert to correct me on this step.
PASO 3 🪁🪁🪁
Para el paso 3 colocación de los hilos: le vamos a colocar dos tiras de hilo uniendo dos extremos de los palitos y que el largo del hilo llegue hasta la base del papagayo así como muestro en mi imagen.
en el lado contrario vamos a colocar otro hilo de la misma forma este va a ser para colocar la cola de nuestro papagayo, Luego colocaremos un hilo en el Centro ayudándonos con una aguja para no perforar mucho el plástico anudamos y unimos con uno de los hilos que ya colocamos anteriormente.
Este paso es bastante importante ya que según la medida del hilo podrá volar nuestro papagayo, en esto de verdad no tengo mucho conocimiento, lo que recuerdo es que el hilo del Centro debe ir anudado con uno de los que pusimos en dos extremos y éste debe llegar hasta la base del papagayo, me gustaría que algún experto me corrija en este paso.
 |  |
|---|---|
 |
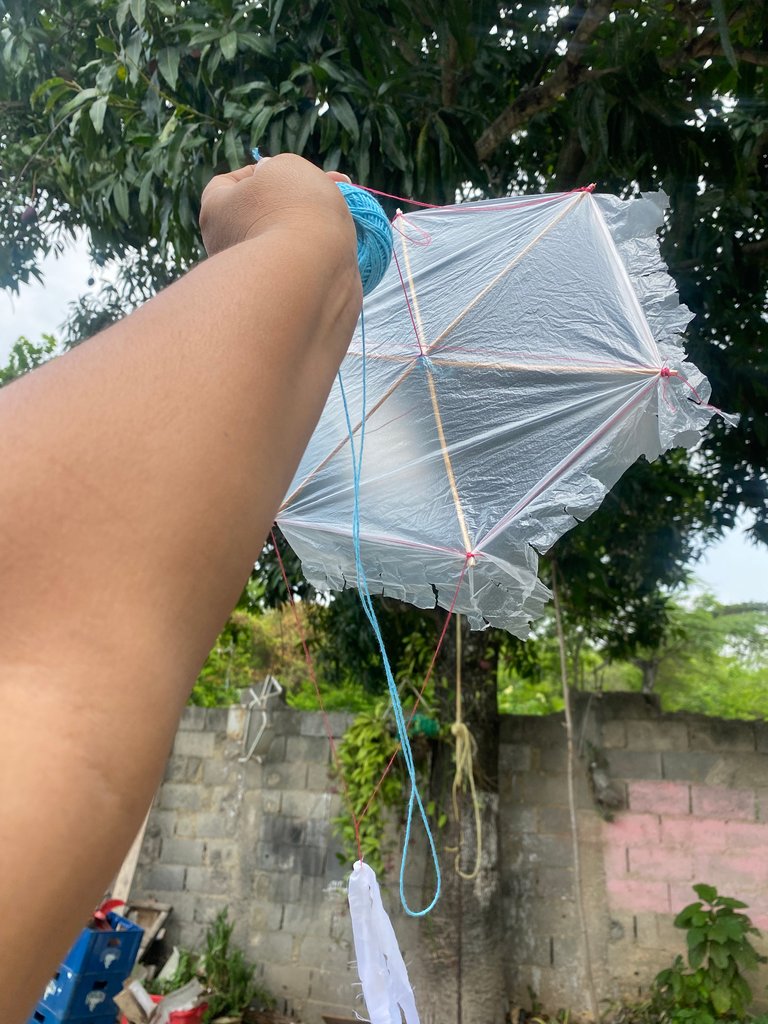
STEP 4 AND FINAL 🪁🪁🪁🪁
In this step we are going to cut strips of fabric, in my case I used a fairly light fabric, I cut 2 strips half a centimeter wide, then we knot them to the thread that was left at the base of our Papagayos, this will be the tail of the parrot and It will do the job of maintaining balance when our Papagayos flies.
And now, let's go out to the patio and fly our cute Papagayos 🪁
PASO 4 Y FINAL🪁🪁🪁🪁
En este paso vamos a cortar tiras de tela, en mi caso utilicé una tela bastante liviana, corte 2 tiras de medio centímetro de ancho, luego las anudamos al hilo que quedó en la base de nuestro papagayo, esta sera la cola de El papagayo y hará la función de mantener el equilibrio a la hora de que nuestro papagayo vuele.
Y ahora sí, a salir al patio y a volar nuestro lindo papagayo 🪁
 |  |
|---|
It is very sad that as the years go by, these beautiful cultures are being lost. Nowadays, children mostly try to play with technological objects and little with artisanal things that are perhaps even much more entertaining. Let's try not to lose these customs and continue teaching them to our children, I hope you liked this idea to make cute parrots, I say goodbye wishing you many successes and blessings 🥰❤️🪁
Es muy triste que al pasar de los años estas hermosas culturas se vayan perdiendo, hoy en día los niños mayormente buscan a jugar con objetos de tecnología y poco con cosas artesanales que quizás son hasta mucho más entretenidas, tratemos de no perder estas costumbres y sigamos enseñándoselas a nuestros hijos, espero Haya gustado esta idea para hacer lindos papagayos, me despido deseándoles muchos éxitos y bendiciones 🥰❤️🪁
Yo nunca pude hacer uno jajaja, ojalá hubiera existido este post en el pasado. Justo ahora lo que me falta es tiempo para se creativo 😅 Excelente post!
😂😂 bueno amigo nunca es tarde, espero pronto tenga el tiempo y lo intente, gracias por comentar 🥰
¡Felicidades! Esta publicación obtuvo upvote y fue compartido por @la-colmena, un proyecto de Curación Manual para la comunidad hispana de Hive que cuenta con el respaldo de @curie.
Si te gusta el trabajo que hacemos, te invitamos a darle tu voto a este comentario y a votar como testigo por La Colmena.
Si quieres saber más sobre nuestro proyecto, te invitamos a acompañarnos en nuestro servidor de Discord.
Gracias 😊
This is nice and good luck in the contest.
Thank you 😊