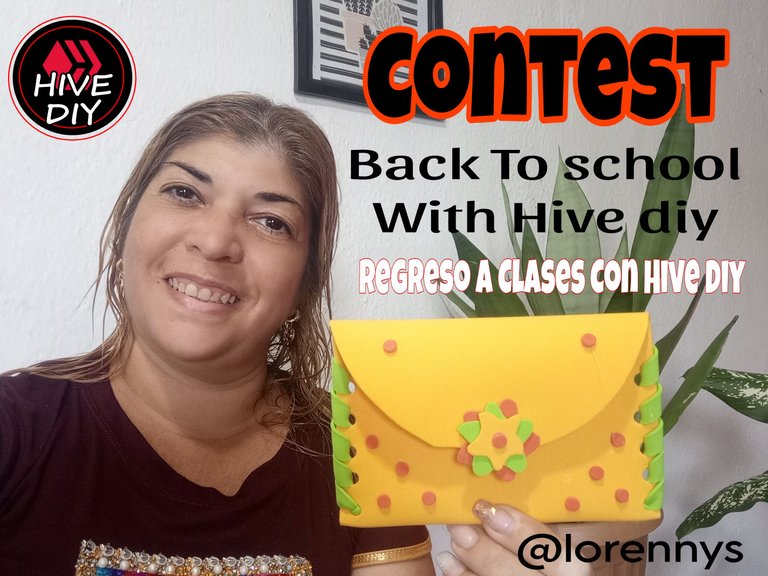
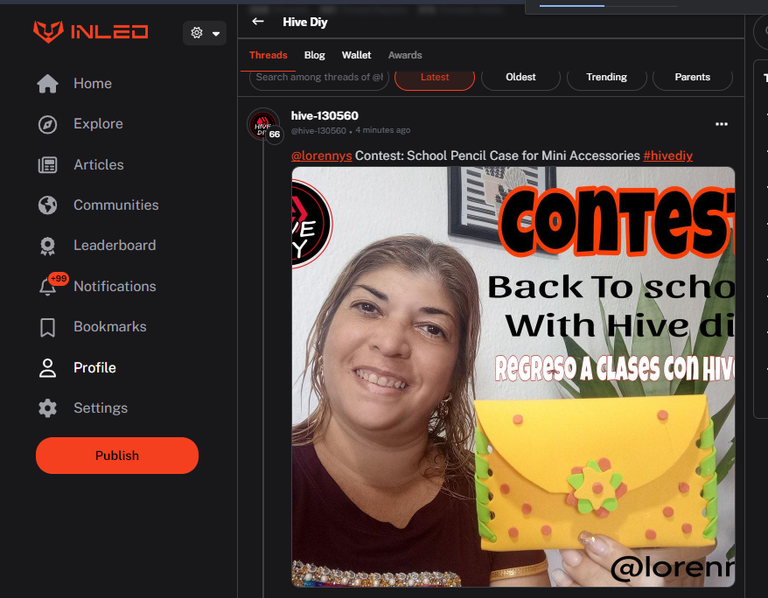
Contest: School Pencil Case for Mini Accessories [Esp/Eng]
Feliz inicio de semana querida colmena, y amigos de esta estupenda comunidad @hivediy, espero que todos estén sanos y felices. Es para mí un verdadero placer estar una vez más con ustedes, en esta ocasión para compartir mi participación en el Concurso: Regreso a clases con Hive DIY, Cartuchera escolar.
Fue una agradable sorpresa la noticia del regreso de los concurso a la comunidad y obviamente no podía dejar de participar a continuación les muestro el paso a paso de la elaboración de mi cartuchera.
Mi cartuchera, fue elaborada para las piezas pequeñas como borradores, sacapuntas, minas, clip, grapas etc, que los chicos, también llevan al cole y que pueden extraviarse sueltas en el bolso si este es muy grande.
Happy start of the week dear hive, and friends of this great community @hivediy, I hope everyone is healthy and happy. It is for me a real pleasure to be once again with you, this time to share my participation in the Contest: Back to school with Hive DIY, School pencil case.
It was a pleasant surprise to hear the news of the return of the contest to the community and obviously I could not fail to participate, below I show you the step by step of the elaboration of my pencil case.
My pencil case was made for small items such as erasers, pencil sharpeners, pencil leads, paper clips, staples, etc., that kids also carry to school and that can get lost loose in the bag if it is too big.
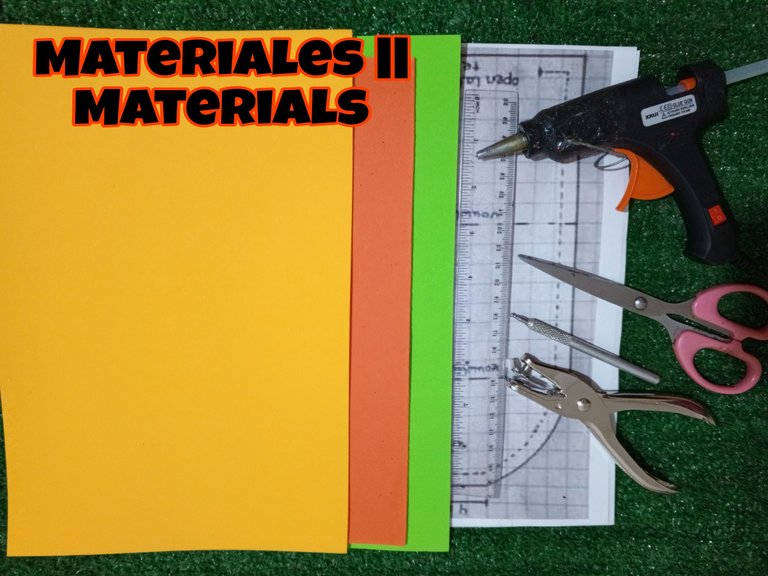
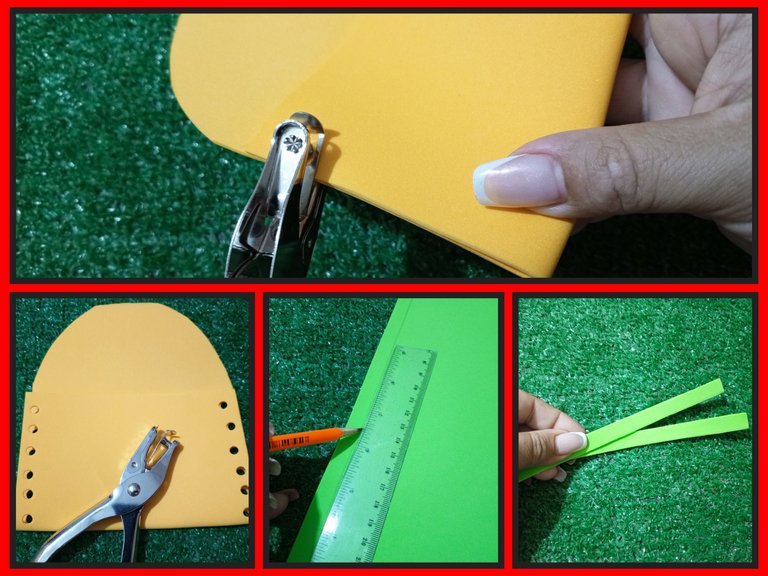
Estos son los materiales que utilicé para la elaboración de la cartuchera
✓Foami diferentes colores.
✓Tijeras
✓Preforador
✓Regla
✓Lapiz
✓Silicon
✓Cierre Mágico
✓Moldes
These are the materials I used to make the pencil case.
✓Foami different colors.
✓Scissors
✓Puncher
✓Ruler
✓Pencil
✓Silicon
✓Magic Zipper
✓Molds
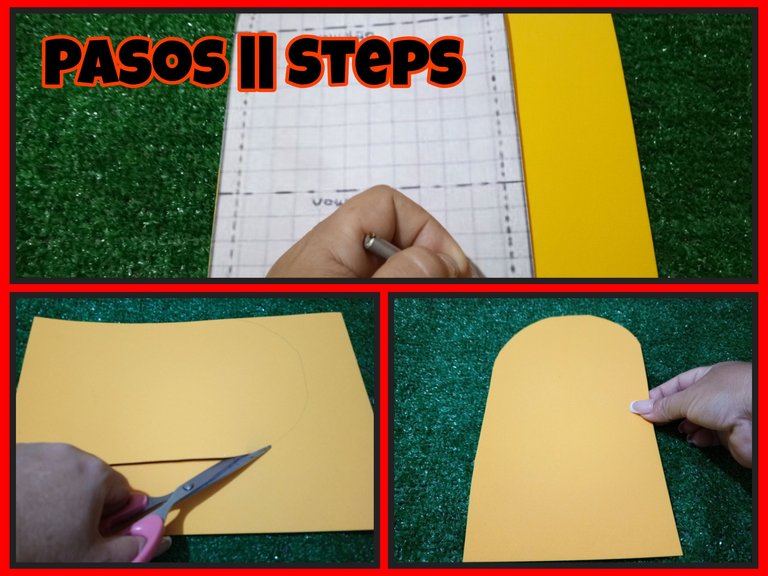
Sencillos Pasos Para Elaborar Cartuchera Escolar
Paso Uno:
Este paso es muy sencillo, solo es transferir el molde al foami y recortar para obtener el modelo deseado.
Simple Steps to Making a School Pencil Case.
Step One:
This step is very simple, just transfer the mold to the foami and cut out to obtain the desired model.
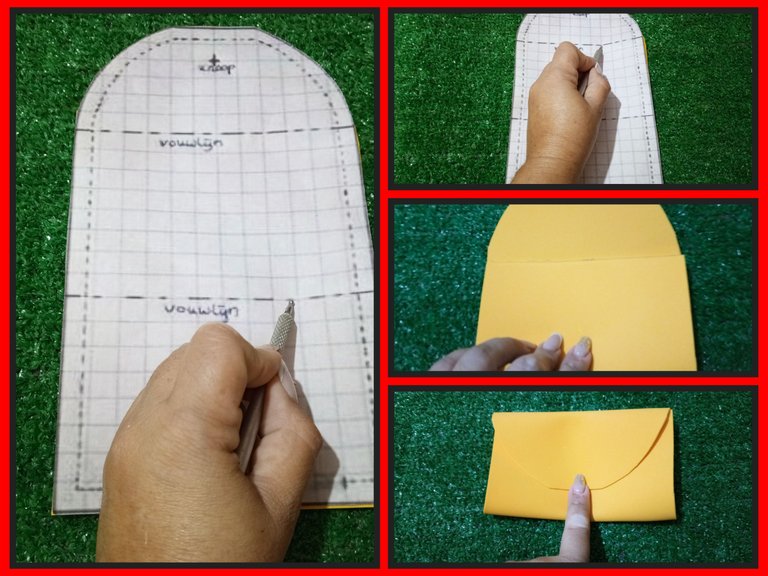
Paso Dos:
Una vez que está lista la pieza que será la cartuchera, la marco en dos partes , la primera será el rectángulo donde irán los accesorios escolares y la segunda la tapa para cerrar . Ver lo que muestra la imagen.
Step Two:
Once the piece that will be the pencil case is ready, I mark it in two parts , the first one will be the rectangle where the school accessories will go and the second one the lid to close . See what the image shows.
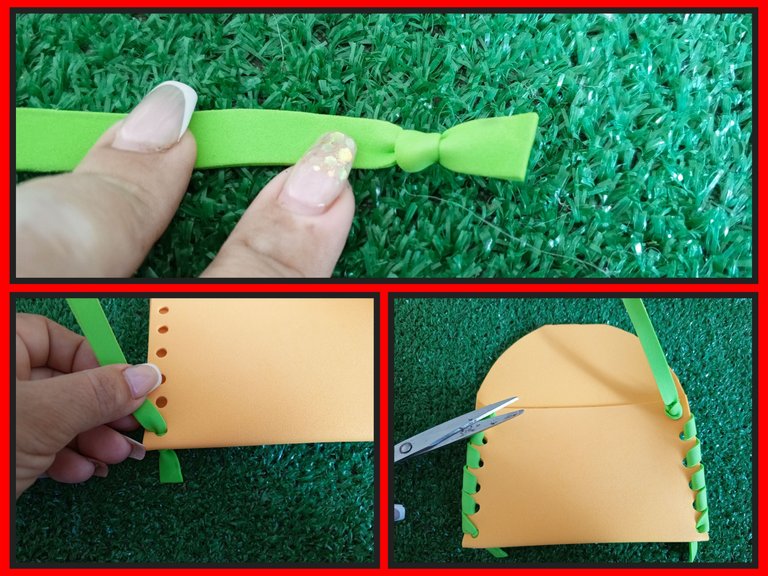
Paso Tres :
Seguimos avanzando en la elaboración de cartuchera escolar y ya en este paso con el perforados hago orificios por los bordes de cada lado. Adicional en este paso corte dos listones de un centímetro con los que voy a unir los lados de cartuchera como especie de costuras.
Step Three :
We continue advancing in the elaboration of the school pencil case and in this step I make holes in the edges of each side with the hole punch. Additional in this step I cut two one centimeter strips with which I am going to join the sides of the pencil case as a kind of seams.
Paso Cuatro:
Comienzo con un nudo en los listones y de la parte inferior hasta arriba comienzo a coser al llegar a la parte superior remato con un nudo para evitar se salga.
Step Four:
I start with a knot in the ribbons and from the bottom to the top I start sewing when I reach the top I finish off with a knot to prevent it from coming out.
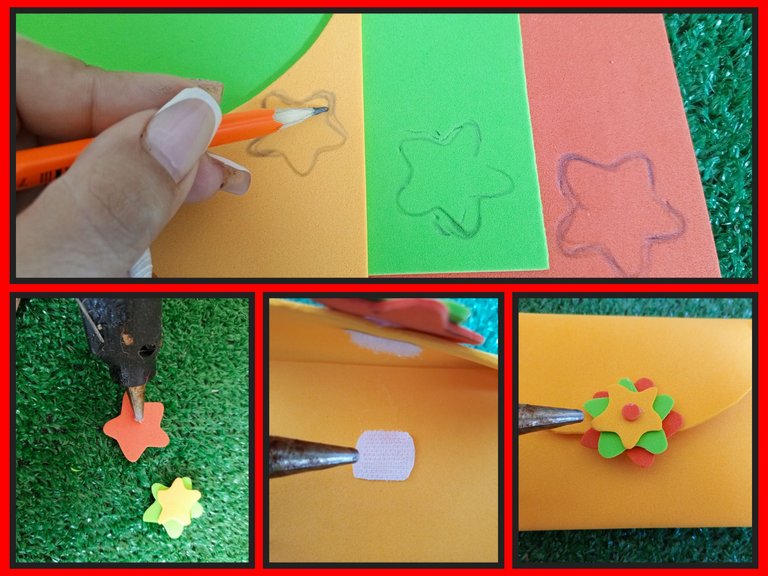
Paso Cinco:
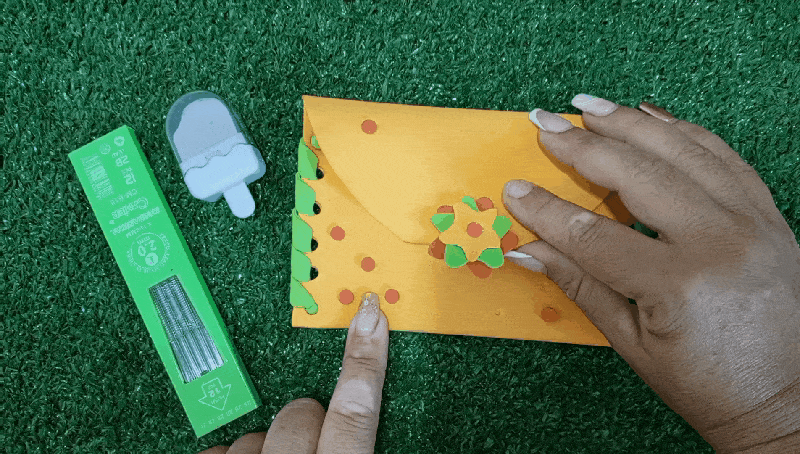
Ya en te paso estamos casi listos para finalizar ya que se trata de la decoración de mi tarea creativa. Elaborado estrellas en tamaño y colores diferentes, puntitos de foami y pego el cierre mágico para que los accesorios no se salgan.
Step Five:
Already in you step we are almost ready to finish as this is the decoration of my creative task. I made stars in different sizes and colors, foami dots and glued the magic clasp so that the accessories do not come off.
n.
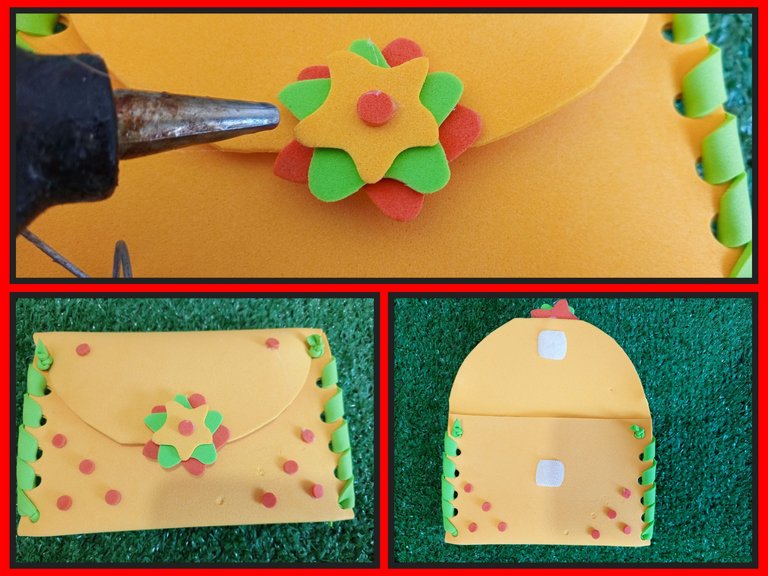
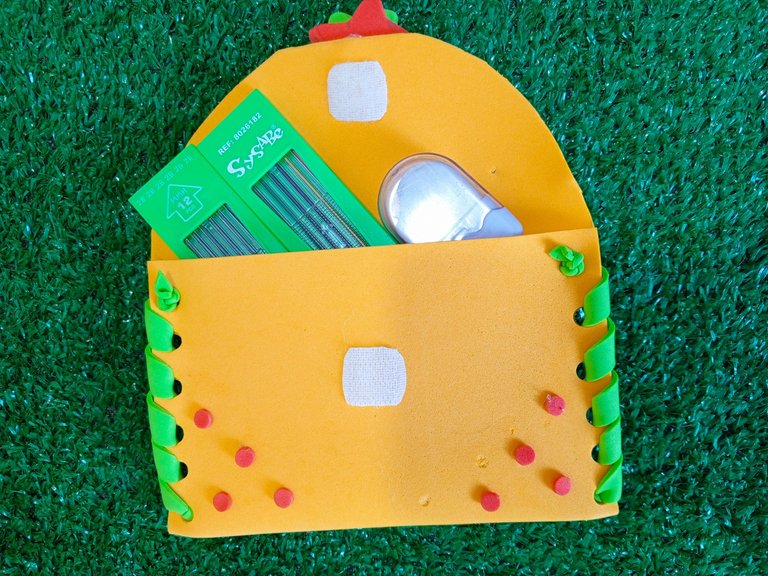
Paso Seis:
Ya tiene todas las piezas terminadas y pegadas podemos observar cómo quedó según lo muestra la imagen.
Step Six:
Already have all the pieces finished and glued we can observe how it looked as shown in the image.
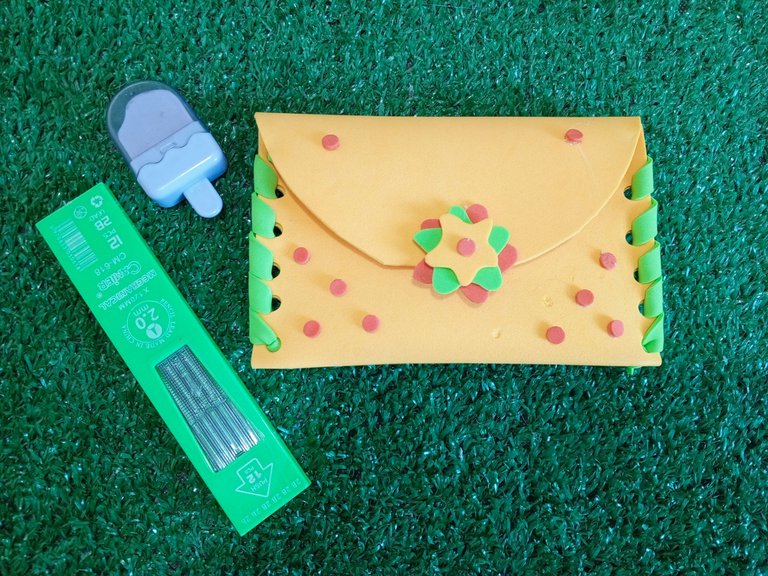
De esta manera llegó al final de mi proyecto, espero que les guste y que sirva de inspiración a otros para que se animen a participar en esta concurso regreso a clases con @hivediy.
This is the end of my project, I hope you like it and that it will inspire others to participate in this back to school contest with @hivediy.
No puedo despedirme sin antes invitar a mi Hiveramigas @egarysv y @nhaydu para que participen en el concurso demostrando su gran talento.
Aquí les dejo el link del concurso para que se unan.
📸Todas las imágenes son de mi propiedad, capturadas con mi Tecno Spark 10 pro.📸 Editadas con Canva, Picsart y GridArt en sus versión gratuita.
🔁Deeptraductor fue utilizado para esta publicación.🔁
Éxitos y bendiciones para todos 🙏🏻 Hasta mi próxima tarea creativa.
¡Tengan una feliz Noche!
¡Gracias por detenerte a leer y dejar tu buen comentario!.
I can't say goodbye without inviting my Hiveramigas @egarysv and @nhaydu to participate in the contest showing their great talent.
Here is the linkof the contest to join.
📸All images are my own, captured with my Tecno Spark 10 pro.📸 Edited with Canva, Picsart and GridArt in their free versions.
🔁Deeptranslator was used for this post.🔁
Success and blessings to all 🙏🏻 Until my next creative assignment.
Have a happy Evening!
Thanks for stopping by to read and leave your nice comment!....
Se ve muy fácil la elaboración de tan bonita y útil cartuchera, me gustó mucho, 🥰
Gracias querida @nhaydu por visitar mi publicación y dejar tu buen comentario. Me alegra que te haya gustado no te olvides de participar.
Excelente trabajo amiga, es ideal para este inicio de año escolar, siempre le pones tu toque mágico y personal.e encanta 🥰
Hola querida @naty16, me alegra que te gustará mi entrada, me gustaría ver la tuya.
Muy bonito y creativo querida amiga, suerte con tu entrada. Saludos.
Gracias bella espero ve la tuya pronto
Qué adorable! Gracias por participar amiga, me encantaron los colores.
Que bueno amiga me hace feliz tu comentario 😊
Creativa, colorida, bonita y super divertida, me gusto tu creacion y te deseo suerte en el concurso ❤️ si estuviera en epoca escolar de seguro llevaria una cartuchera asi jeje
Wao que honor tu comentario 😊 gracias por la visita
Muy linda amiga
Gracias mi querida @jorgelissanchez 😘
@lorennys
https://leofinance.io/threads/view/hive-130560/re-leothreads-2y6kmvdzd