(ESP/ENG) MINI ARBOLITO DE NAVIDAD HECHO CON CARTON Y ESTAMBRE / MINI CHRISTMAS TREE MADE WITH CARDBOARD AND STAMEN
¡Hola, hola! Hivers y linda comunidad de DIYHub, espero todos se encuentren súper bien, animados e inspirados 💟
Hoy me gustaría mostrarles como realice este hermoso mini arbolito de navidad realizado con cartón y estambre, y presentarlo como mi primera entrada al concurso de navidad de esta encantadora comunidad 🎅DIY Christmas is Here! 🎁
Hello, hello! Hivers and cute DIYHub community, I hope you all are super well, cheerful and inspired 💟.
Today I would like to show you how to make this beautiful mini Christmas tree made with cardboard and yarn, and submit it as my first entry to the Christmas contest of this lovely community. 🎅DIY Christmas is Here! 🎁
Decidí hacer este arbolito ya que realmente es mi decoración navideña favorita, siempre me han gustado los arbolitos pero curiosamente nunca hemos comprado uno, siempre que colocamos un arbolito en casa es realizado por nosotros mismos, recuerdo que de niños mi mama se las ingeniaba para hacer algún tipo de arbolito en navidad y nos involucraba a mis hermanos y a mí en la realización y decoración.
Siempre estábamos felices con el resultado y muy ilusionados de pensar que niño Jesús nos dejaría el regalo que le habíamos pedido debajo del arbolito, pero resulta que nuestro niño Jesús nunca esperaba a que nos despertáramos a buscar los regalos debajo del árbol jajaja…. Casi siempre lo conseguíamos junto a la cama, era algo desesperado jajaja…
A continuación los dejo con los materiales que use y también con el paso a paso de cómo lo realice.
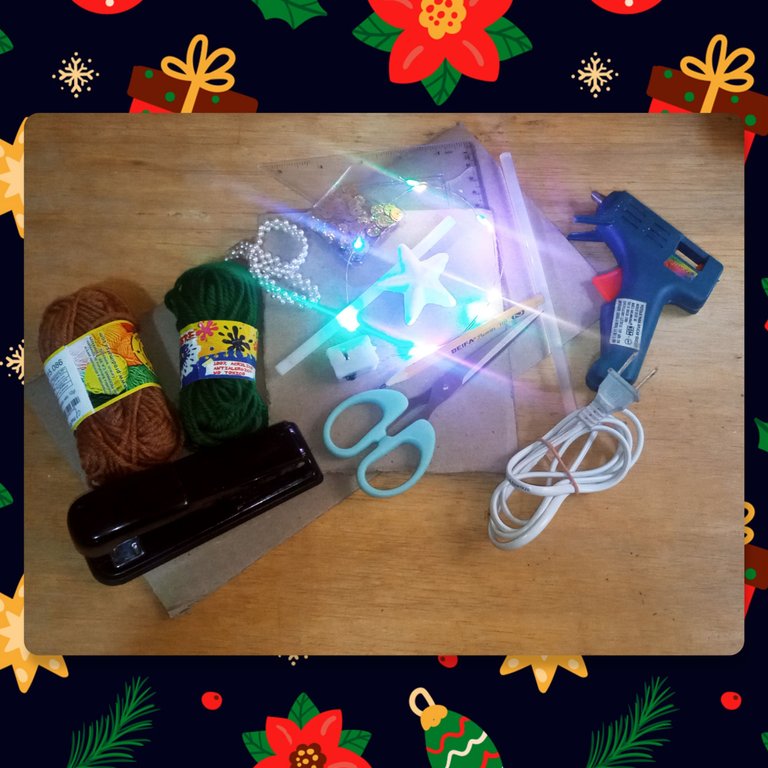
🎁 MATERIALES 🎁
- Cantón.
- Estambre o lana color verde y marrón.
- Escarcha tornasol.
- 1 tubito para globos.
- Silicón en barra y pistola para silicón.
- Luz led pequeña. (Opcional)
- Perlas blancas y confeti dorado.
- 1 estrella de anime o cartón.
- Regla o escuadra.
- Lápiz, una hoja reciclada y tijeras.
I decided to make this tree because it really is my favorite Christmas decoration, I have always liked the trees but curiously we have never bought one, whenever we put a tree at home is done by ourselves, I remember that as children my mom managed to make some kind of tree at Christmas and involved my brothers and me in the realization and decoration.
We were always happy with the result and very excited to think that baby Jesus would leave us the gift we had asked for under the tree, but it turns out that our baby Jesus never waited for us to wake up to look for the gifts under the tree hahaha .... We almost always got it next to the bed, it was something desperate hahaha....
Below I leave you with the materials I used and also the step by step of how I made it.
🎁 MATERIALS 🎁
- Canton.
- Green and brown yarn or wool.
- Iridescent frosting.
- 1 tube for balloons.
- Silicone stick and silicone gun.
- Small led light (optional)
- White beads and gold confetti.
- 1 anime or cardboard star.
- Ruler or square.
- Pencil, recycled paper and scissors.
🎁 PASO A PASO 🎁
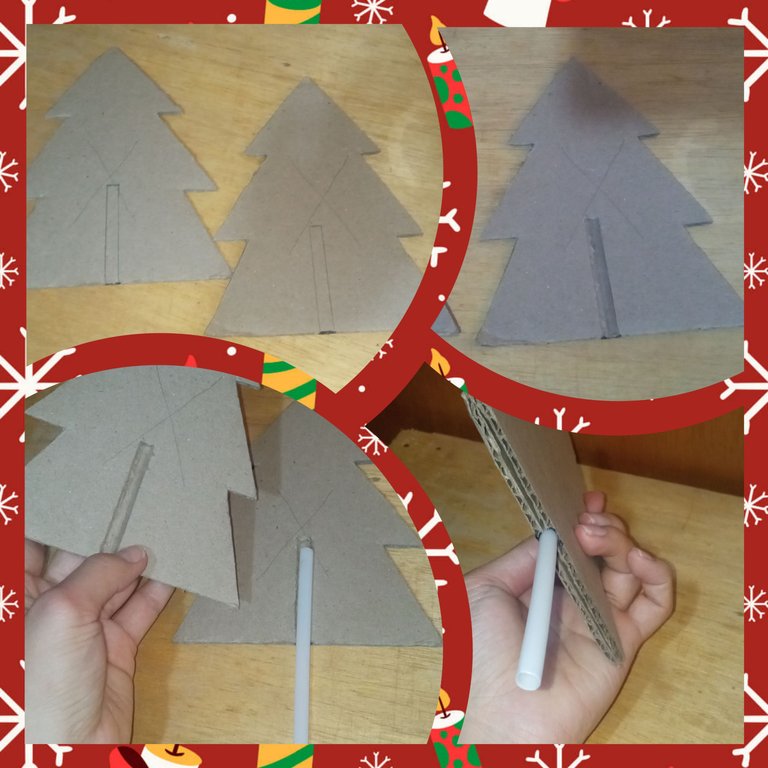
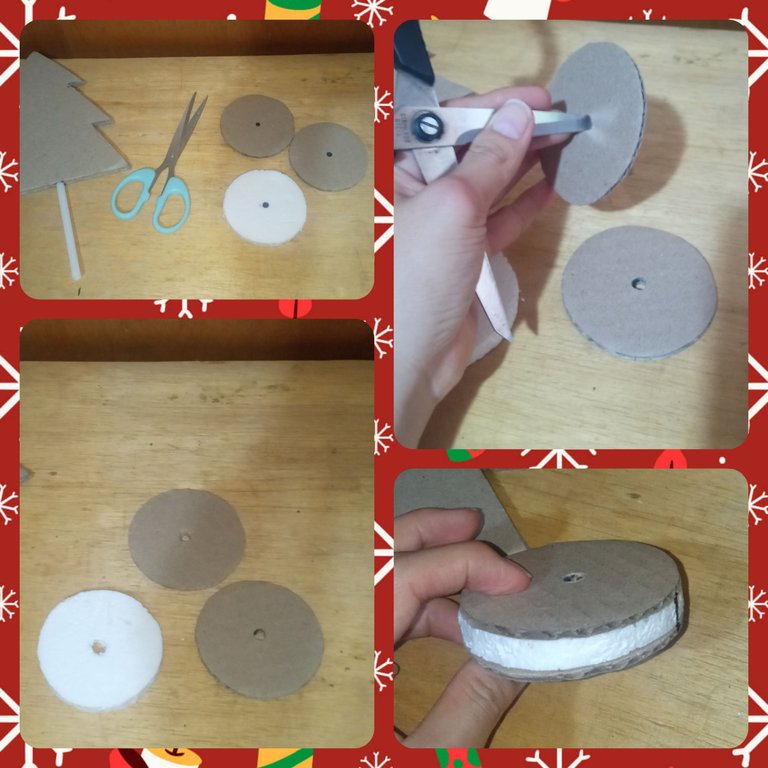
1) Lo primero que hice fue dibujar en una hoja el arbolito con la forma y tamaño que quería y luego lo recorte para marcar la figura en el cartón, marque dos piezas iguales y las recorte.
🎁 STEP BY STEP 🎁
1) The first thing I did was to draw on a sheet the little tree with the shape and size I wanted and then cut it out to mark the figure on the cardboard, mark two equal pieces and cut them out.

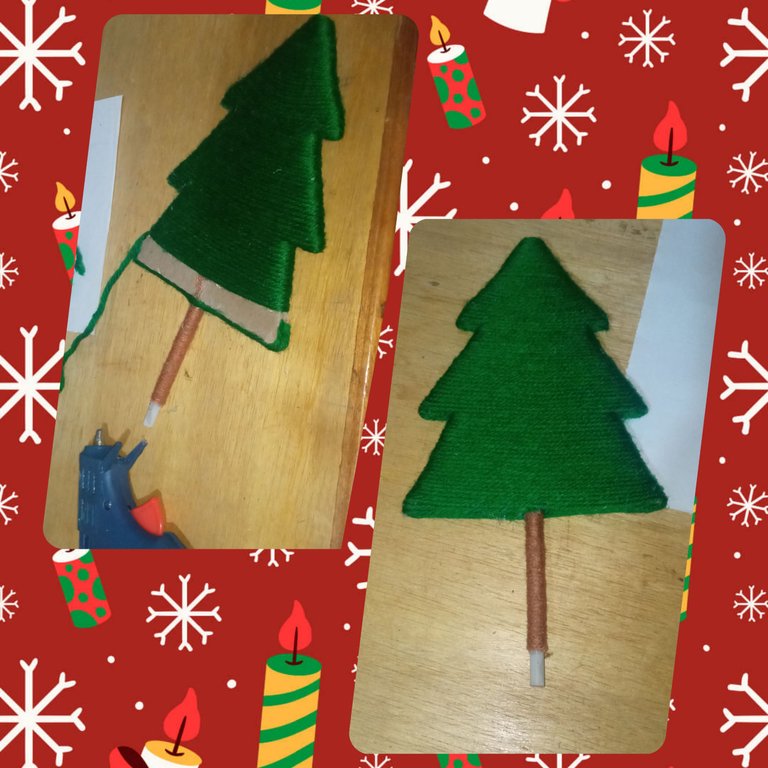
2) Luego hice una especie de canal en las caras del cartón que se pegarían una a la otra, esto lo hic para que el palito quede oculto en el interior de ambos cartones, luego procedí a pegar el palito en uno de los cartones con silicón caliente, y también a pegar las dos piezas en forma de pino.
2) Then I made a kind of channel in the faces of the cardboard that would be glued one to the other, I did this so that the stick would be hidden inside both cardboards, then I proceeded to glue the stick in one of the cardboards with hot silicone, and also to glue the two pieces in the shape of a pine tree.
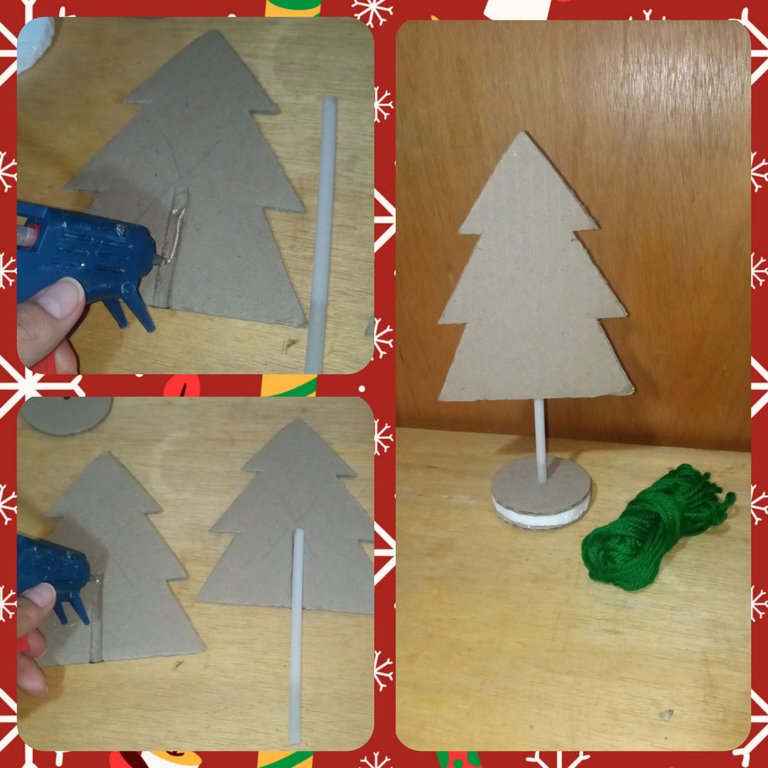
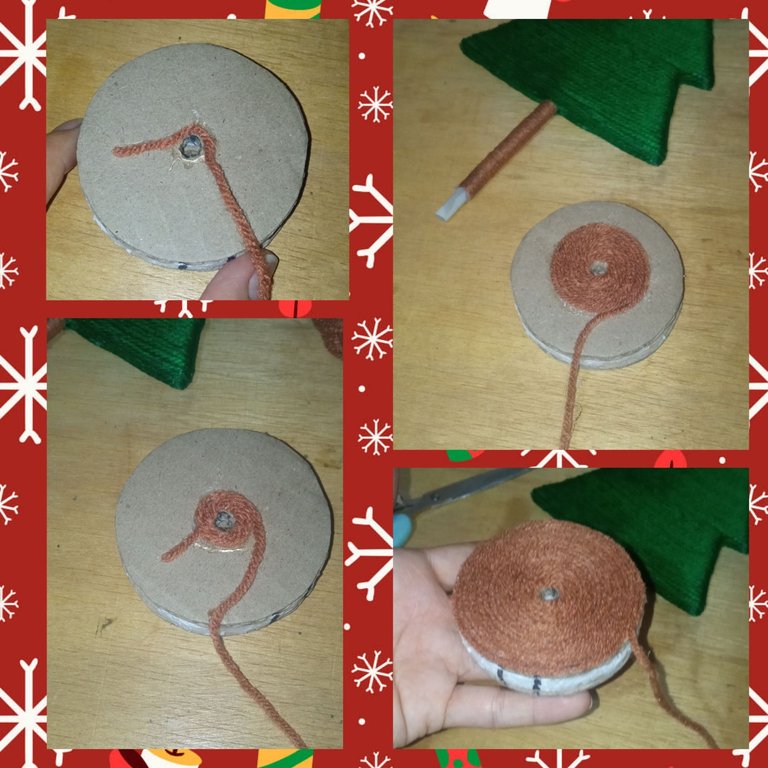
3) Para hacer la base del árbol, corte dos piezas circulares de cartón de 7cm de diámetro y también hice una pieza de anime del mismo tamaño, y luego las perfore con una tijera justo en el centro de tal manera que el palito encajara ajustado en el agujero, luego pegue las tres piezas con silicón caliente y ya está lista la base.
3) To make the base of the tree, I cut two circular pieces of cardboard 7cm in diameter and also made a piece of anime of the same size, and then pierced them with a scissors right in the center so that the stick would fit snugly in the hole, then glue the three pieces with hot silicone and the base is ready.
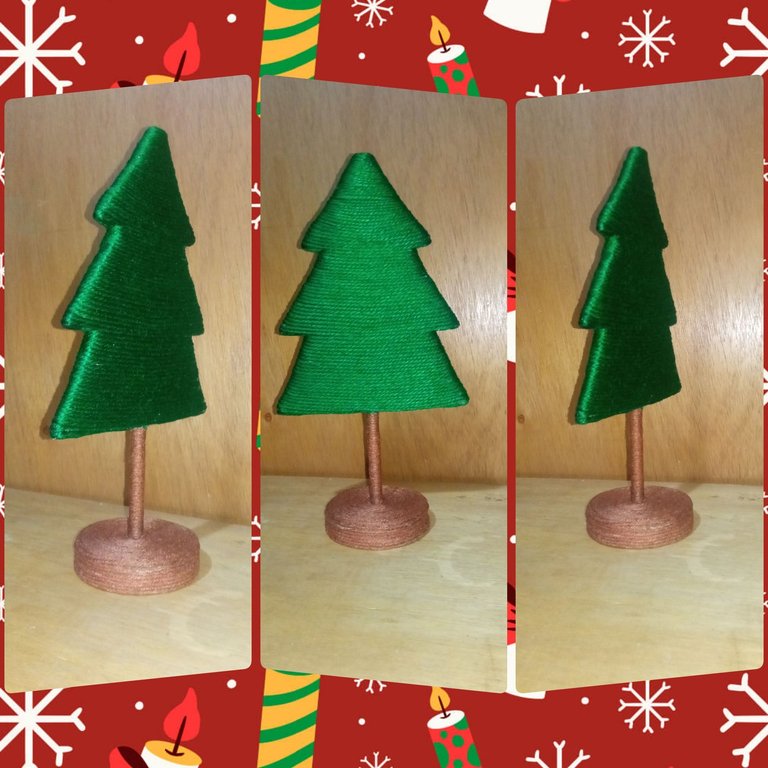
4) Ahora viene la parte más divertida y donde se hace la magia jajaja… lo que continúa es forrar el pino con el estambre o lana verde, y el tronco y la base con estambre marrón, esto lo hice enrollando el estambre en las piezas y a medida que iba avanzando iba colocando gotas de silicón para fijar bien el estambre.
4) Now comes the most fun part and where the magic happens hahaha ... what continues is to line the pine tree with the green yarn or wool, and the trunk and the base with brown yarn, I did this by winding the yarn on the pieces and as I went along I was placing drops of silicone to fix the yarn well.
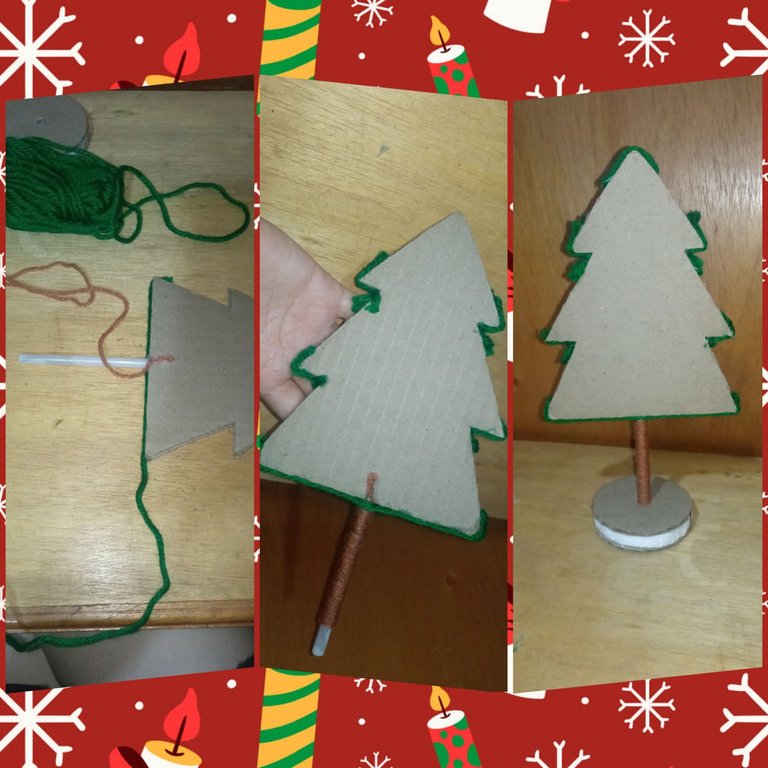
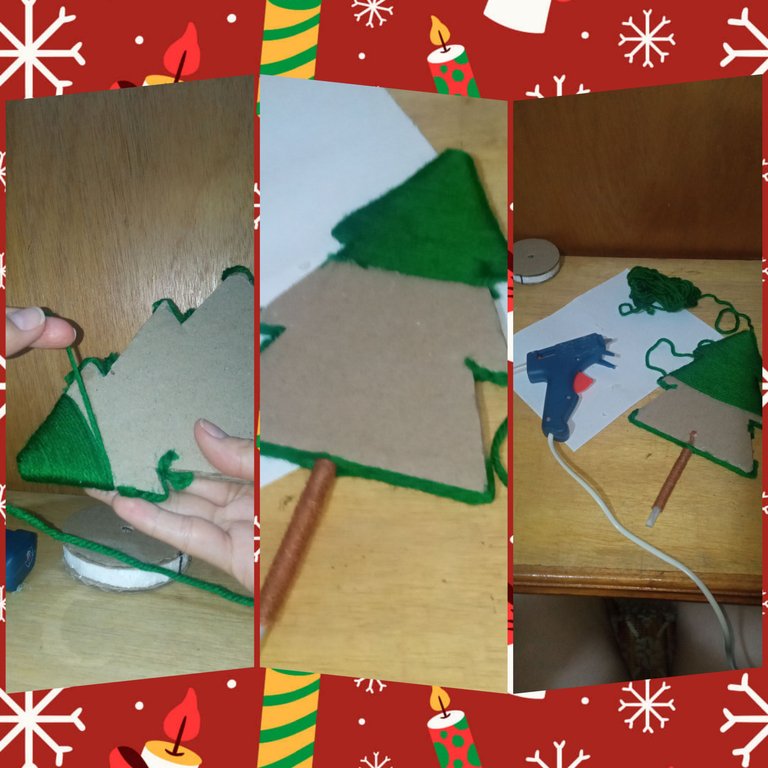
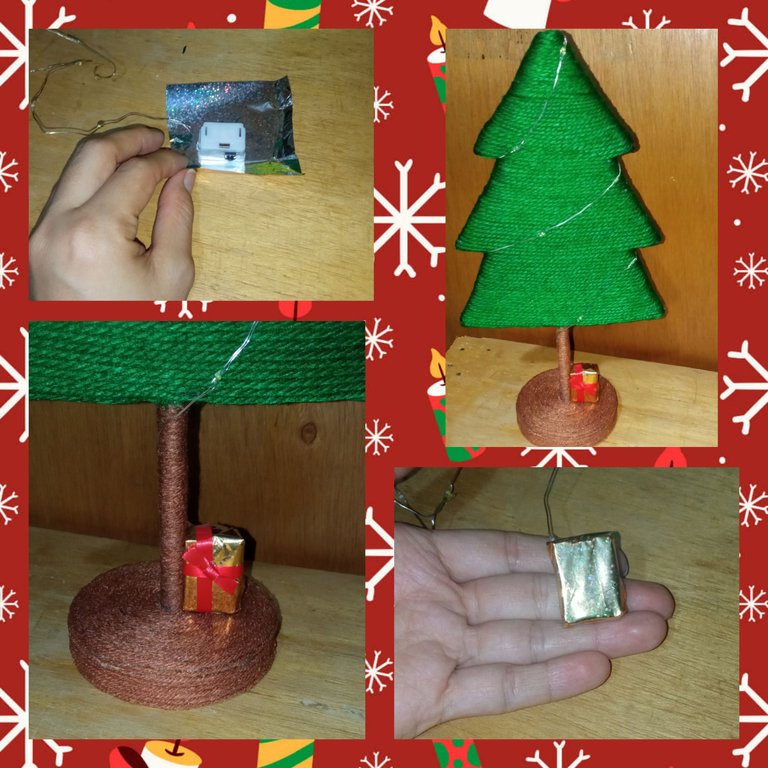
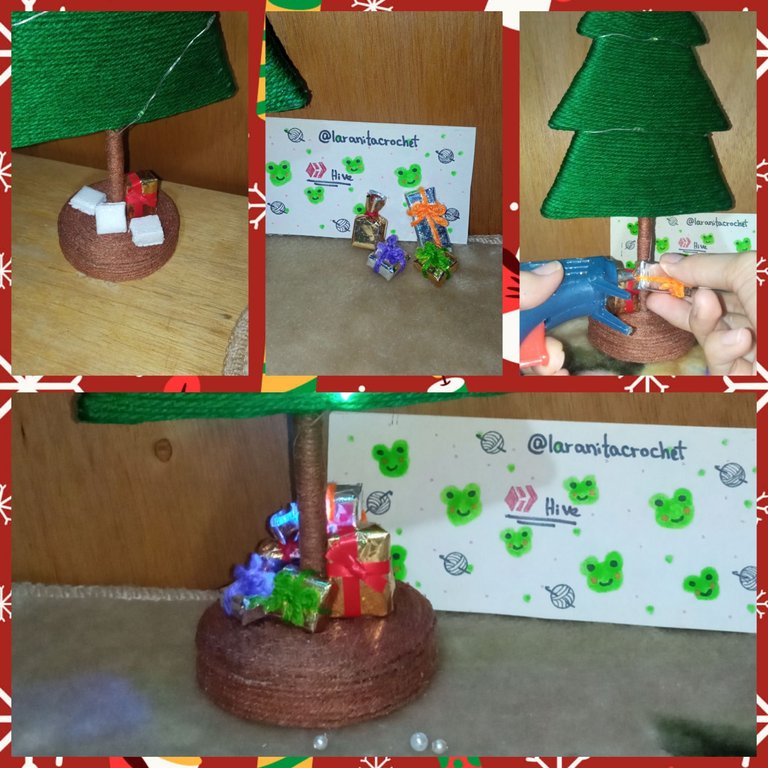
5) Lo que sigue es pegar el pino a la base, y luego comenzar a decorar el arbolito. Para la decoración utilice perlas blancas y color crema, y también confeti dorado y unas pequeñas perlitas color plata, y todo lo pegue con silicón caliente. Para hacer la estrella pues lo que hice fue cubrir con pega blanca la estrella de anime y aplicarle la escarcha tornasol y la deje secar toda la noche.
También realice unas pequeñas cajas de regalo cortando pequeños cubos de anime forados con papel de regalo y les hice lazos con estambre de diferentes colores. El detalle de los regalos fue idea de mi hermana, y su idea fue magnifica porque con ella me dio la solución al problema de como ocultar el interruptor de las luces, así que lo envolví como si fuera un regalo jajaja… y quedo genial. Eso sí, antes de iniciar a colocar la decoración lo que hice fue colocar la luz del arbolito.
5) The next step is to glue the pine tree to the base, and then start decorating the tree. For the decoration I used white and cream-colored pearls, and also gold confetti and some small silver-colored pearls, and I glued everything with hot silicone. To make the star, I covered the anime star with white glue and applied the iridescent frosting and let it dry overnight.
I also made small gift boxes by cutting small anime cubes lined with wrapping paper and made bows with different colored yarn. The detail of the gifts was my sister's idea, and her idea was great because she gave me the solution to the problem of how to hide the light switch, so I wrapped it as if it were a gift hahaha ... and it was great. Of course, before starting to place the decoration what I did was to place the light of the tree.
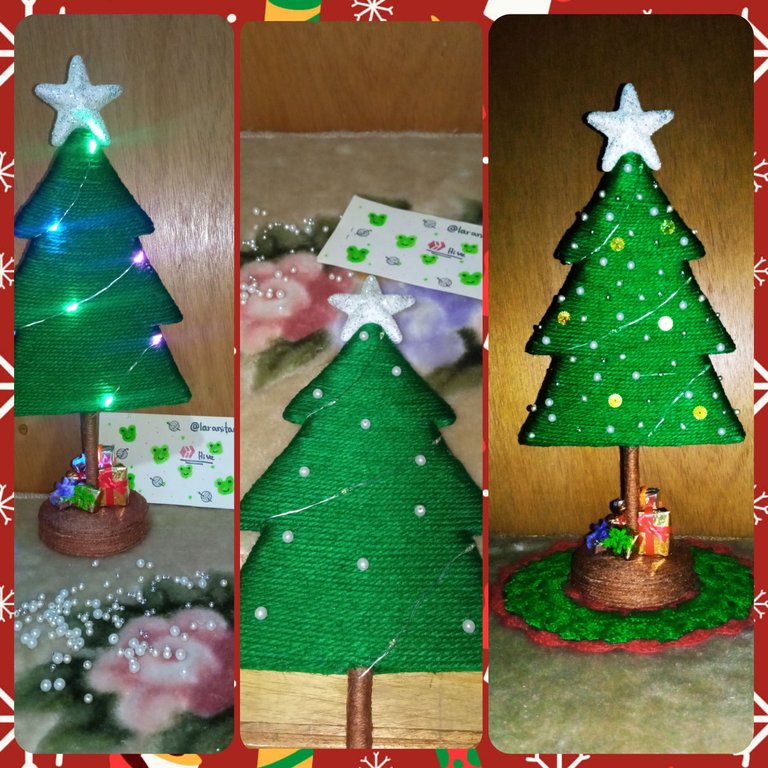
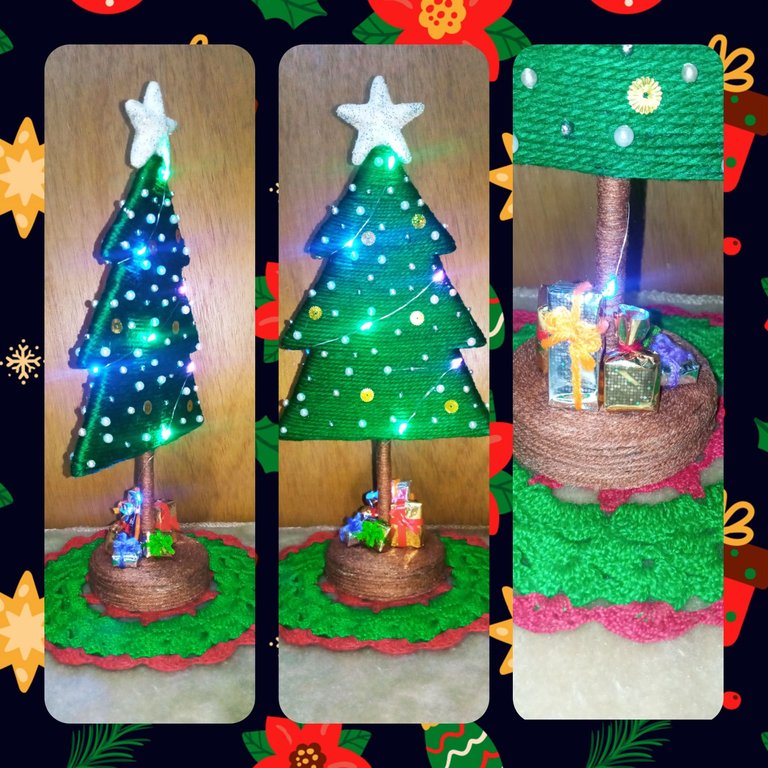
Y así obtuve este hermosísimo resultado, del cual quede completamente encantada, la verdad no pensé que me fuera a quedar tan lindo jajaja… y les cuento que mis hermanos me ayudaron a decidir cómo decorar mi mini arbolito, así que, de cierta manera esta año a pesar de la enorme distancia que nos separa y gracias a la tecnología pudimos hacer un arbolito de navidad juntos otra vez y eso fue muy lindo y me hiso sentir muy feliz.
And so I got this beautiful result, of which I was completely delighted, I really did not think it would be so nice hahaha ... and I tell you that my brothers helped me decide how to decorate my mini tree, so, in a way this year despite the huge distance that separates us and thanks to technology we could make a Christmas tree together again and that was very nice and it made me feel very happy.

BUENO AMIGOS DESEO LES HAYA GUSTADO TANTO COMO A MÍ EL RESULTADO FINAL DE ESTE HERMOSO MINI ARBOLITO DE NAVIDAD, ESPERO SUS BONITOS COMENTARIOS Y/O VOTOS, ASÍ ME MOTIVAN PARA SEGUIR COMPARTIENDO MIS CREACIONES CON USTEDES, YO ESTARÉ FELIZ DE RESPONDER TODOS SUS COMENTARIO, SEAN FELICES Y QUE LA MUSA DE LA CREATIVIDAD NUNCA LOS ABANDONE!
¡GRACIAS POR VISITAR MI BLOG!
Se despide de ustedes con mucho cariño su amiga Nathalie @laranitacrochet
BUENO AMIGOS DESEO LES HAYA GUSTADO TANTO COMO A MÍ EL RESULTADO FINAL DE ESTE HERMOSO MINI ARBOLITO DE NAVIDAD, ESPERO SUS BONITOS COMENTARIOS Y/O VOTOS, ASÍ ME MOTIVAN PARA SEGUIR COMPARTIENDO MIS CREACIONES CON USTEDES, YO ESTARÉ FELIZ DE RESPONDER TODOS SUS COMENTARIOS, SEAN FELICES Y QUE LA MUSA DE LA CREATIVIDAD NUNCA LOS ABANDONE!
GRACIAS POR VISITAR MI BLOG!
Se despide de ustedes con mucho cariño su amiga Nathalie @laranitacrochet
*Todas las fotografías utilizadas en la publicación son propiedad de la autora.
*Las fotografías fueron tomadas y editadas con mi REDMI 9 y con la App FotoRoom.
*La traducción la hice en https://chrome.google.com/webstore/detail/google-translate/aapbdbdomjkkjkaonfhkkikfgjllcleb
*All photographs used in this publication are property of the author.
*The pictures were taken and edited with my REDMI 9 and the FotoRoom App.
*The translation was done at https://chrome.google.com/webstore/detail/google-translate/aapbdbdomjkkjkaonfhkkikfgjllcleb
Déjame decirte que te quedó preciosísimo 😍 me encanta ver el resultado final de tu laborioso proyecto. ¡Buen trabajo! Saludos.
Me alegra que te gustara 😊 Muchas gracias! yo estoy muy feliz con mi nuevo arbolito, aunque aun no hemos colocado la navidad en casa pero ya prontito lo haremos y tendremos nuevos adornitos que estoy realzando 😀💖
gracias por visitar, saludos y un fuerte abrazo @creacioneslelys
Hermoso tu arbolito @laranitacrochet, su elaboración fue genial, te felicito 🎄🌹🌷🪷🌼🌻💮🌸💐🌺☘️
Muchas gracias ☺️🤗
🌹🌷
Quedó muy lindo, buen trabajo 😌
😁🤗 Gracias!
Congratulations, your post has been upvoted by @dsc-r2cornell, which is the curating account for @R2cornell's Discord Community.
Enhorabuena, su "post" ha sido "up-voted" por @dsc-r2cornell, que es la "cuenta curating" de la Comunidad de la Discordia de @R2cornell.
Thank you very much for your support and for visiting my blog! 😊
El estambre ha quedado precioso. Se ve muy bonito la verdad
Muchísimas gracias por la visita @lismarcarolina2 si realmente se ve muy bien y en vivo se ve mucho mas lindo ☺️🥰🎄
QUE BELLEZAAAA!!!! 😍😍😍 en mi casa no tenemos arbolito de navidad y planeaba hacer unos pequeños pero no sabía como, este es tan simple y bello que seguro lo haré para decorar las mesitas de mi casa. Muchas gracias por compartir 🤗❤️
Me alegra mucho que mi post te ayude a decorar tu casa 😊🎄🤗 espero te quede super lindo 🥰
Felicidades un trabajo impecable quedó genial , me encantó.
Muchas gracias ☺️🤗
Congratulations @laranitacrochet! You have completed the following achievement on the Hive blockchain And have been rewarded with New badge(s)
Your next target is to reach 4500 upvotes.
You can view your badges on your board and compare yourself to others in the Ranking
If you no longer want to receive notifications, reply to this comment with the word
STOP¡Hola por aqui Ranita!, es la primera vez que veo una manualidad de arbolito en esta forma, o sea forrado con lanita de colores, me parece super original y sobre todo y lo que mas aprecio, es que el resultado de pies a cabeza se ve homogéneo, soy super quisquillosa con los detalles cuando se trata de decoraciones, y de este me he enamorado 😍 😍 😍
Muchísimas gracias por tu comentario amiga 😌🤗 yo también soy muy quisquillosa con los detalles y hasta que no logro el resultado que deseo dónde todo se vea súper prolijo y homogéneo no lo muestro a nadie. Soy perfeccionista y en ocasiones es algo que juega en mi contra.