Contest : Giveaway to celebrate International Women's Day
Hola buenas tardes tengan todos mis apreciados amigos , espero que hayan amanecido bien, llenos de mucha salud , hoy quiero aprovechar este post para formar parte del nuevo concurso de la comunidad Diyhub, el cuál lleva por tema festejar el día internacional de la "Mujer", que mejor manera de celebrar la vida de una mujer obsequiando le algo , por tal motivo realicé un vestido de foamis para obsequiar y hacer feliz a una amiga o familiar mujer , antes de continuar le hago la invitación a mis talentosas amigas para que se animen y formen parte de este nuevo concurso @lorennys @yagelybr
Hello good afternoon to all my dear friends, I hope you have dawned well, full of good health, today I want to take this post to be part of the new contest of the Diyhub community, which is themed to celebrate the international day of the "Woman", what better way to celebrate the life of a woman giving her something, for this reason I made a foamis dress to give and make happy a friend or family member woman, before continuing I invite my talented friends to be part of this new contest @lorennys @yagelybr
Materiales qué utilicé para mí obsequio:
-Foamis
-Tijera
-Silicon
-Perlas plásticas
-Papel y lápiz
Materials I used for my giveaway:
-Foamis
-Scissors
-Silicon
-Plastic beads
-Paper and pencil

A continuación los pasos a seguir:
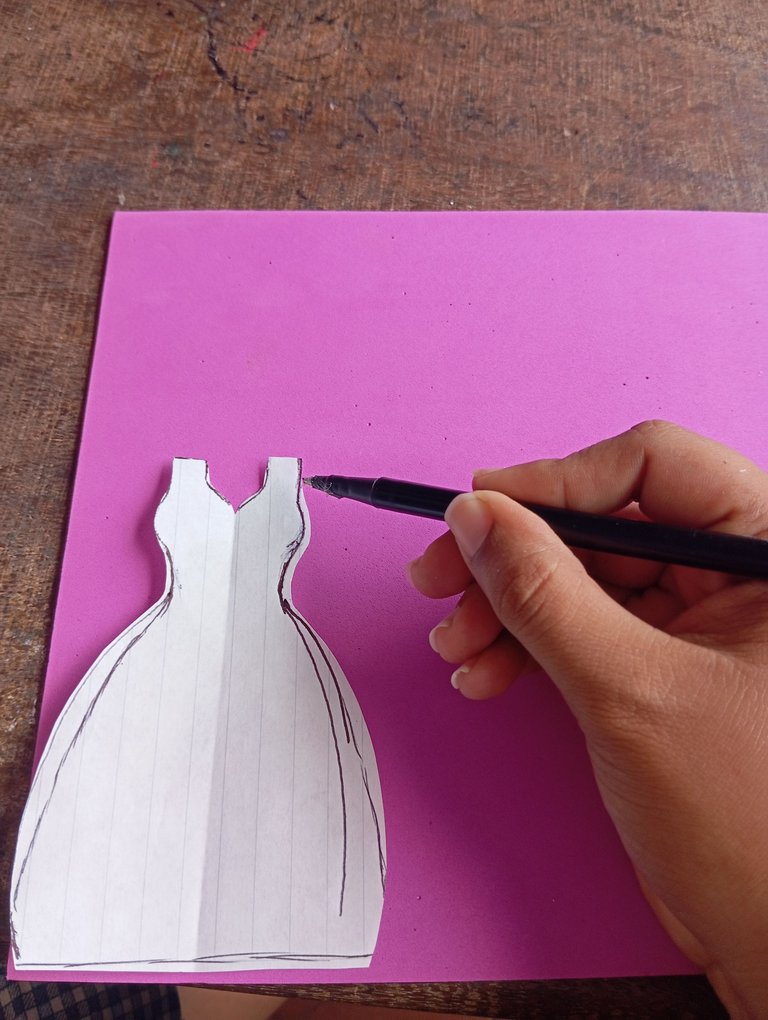
Iniciaremos realizando primeramente un patrón con el que vamos a trabajar,recuerden que siempre que vamos a trabajar doble debemos tener un patrón para que tengamos medidas iguales , dibuje en mi patrón un vestido para poder realizar mi obsequio
Here are the steps to follow:
We will begin by first making a pattern with which we are going to work, remember that whenever we are going to work double we must have a pattern so that we have equal measures, I drew in my pattern a dress to make my gift.

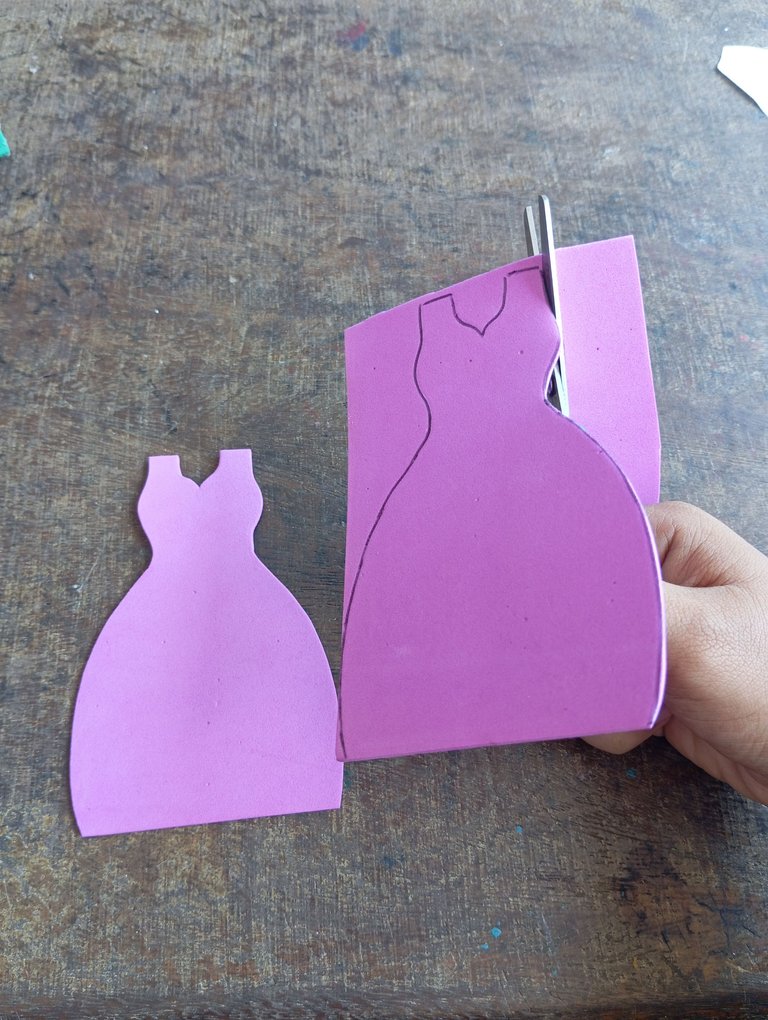
Luego que tengamos listo nuestro patrón ,vamos a continuar tomándolo y marcando en el foamis del color de nuestra preferencia, en este caso utilicé un morado fuerte , debemos marcar dos ya que tiene que tener por ambos lados
After we have our pattern ready, we will continue taking it and marking on the foamis the color of our preference, in this case I used a strong purple, we must mark two as it has to have on both sides.
Luego continuaremos tomando nuestra tijera y recortando los vestidos que marcamos en el paso anterior
Then we will continue taking our scissors and cutting out the dresses that we marked in the previous step.
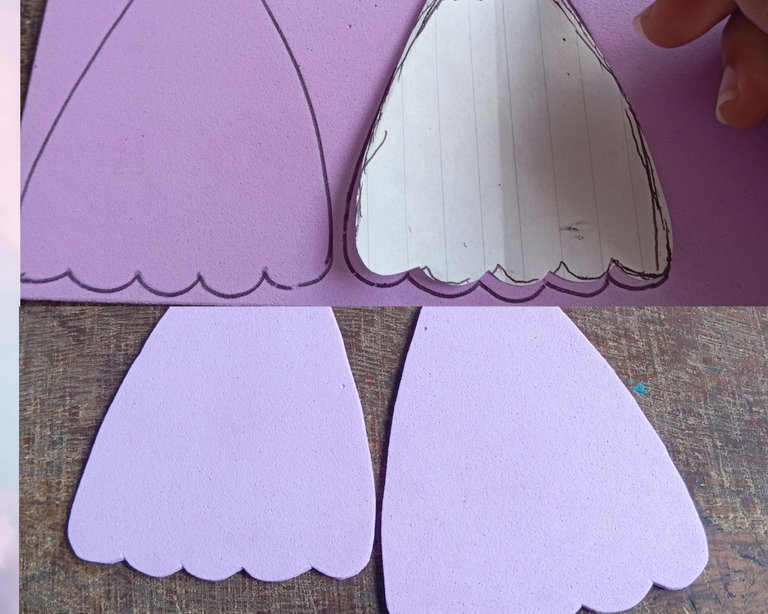
Para decorar el frente del vestido,continúe realizando una parte frontal de diferente color, para ésto utilicé morado claro , tipo lila , marqué dos piezas y las recorté con mi tijera
To decorate the front of the dress, continue making a different color front, for this I used light purple, I marked two pieces and cut them out with my scissors.
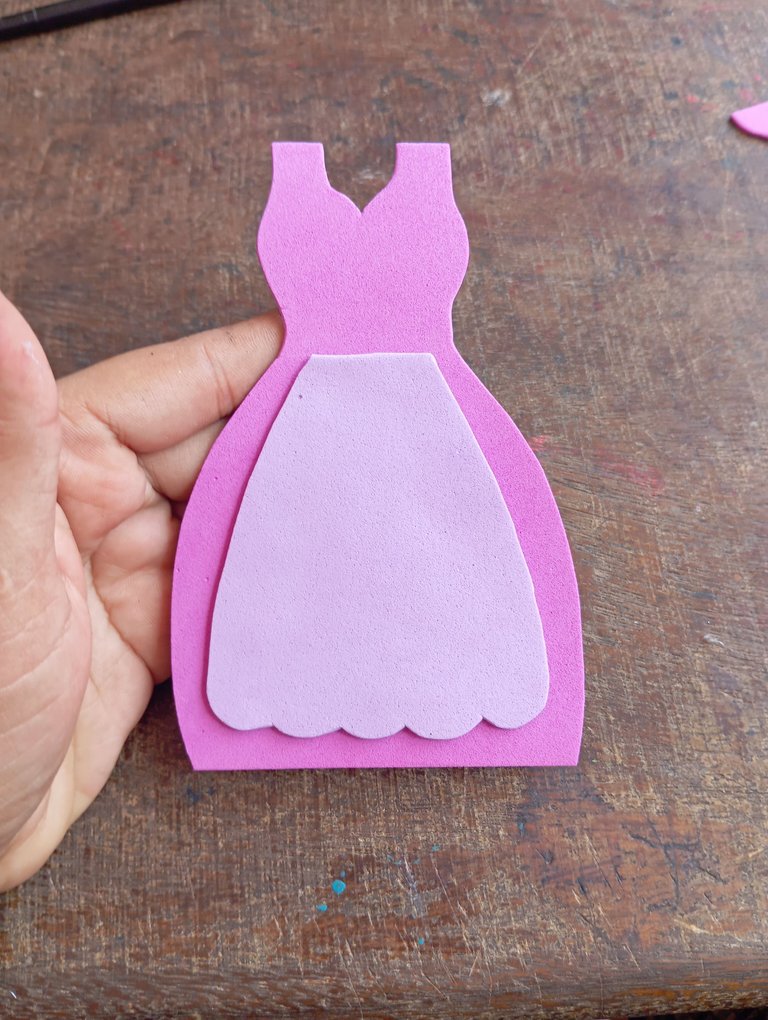
A continuación tomaremos las piezas que recortamos anteriormente y las pegaremos al frente , en todo el centro del vestido como lo pueden apreciar, debemos pegarla en ambos vestidos
Next we will take the pieces that we cut out previously and we will glue them to the front, in the center of the dress as you can see, we must glue them in both dresses.
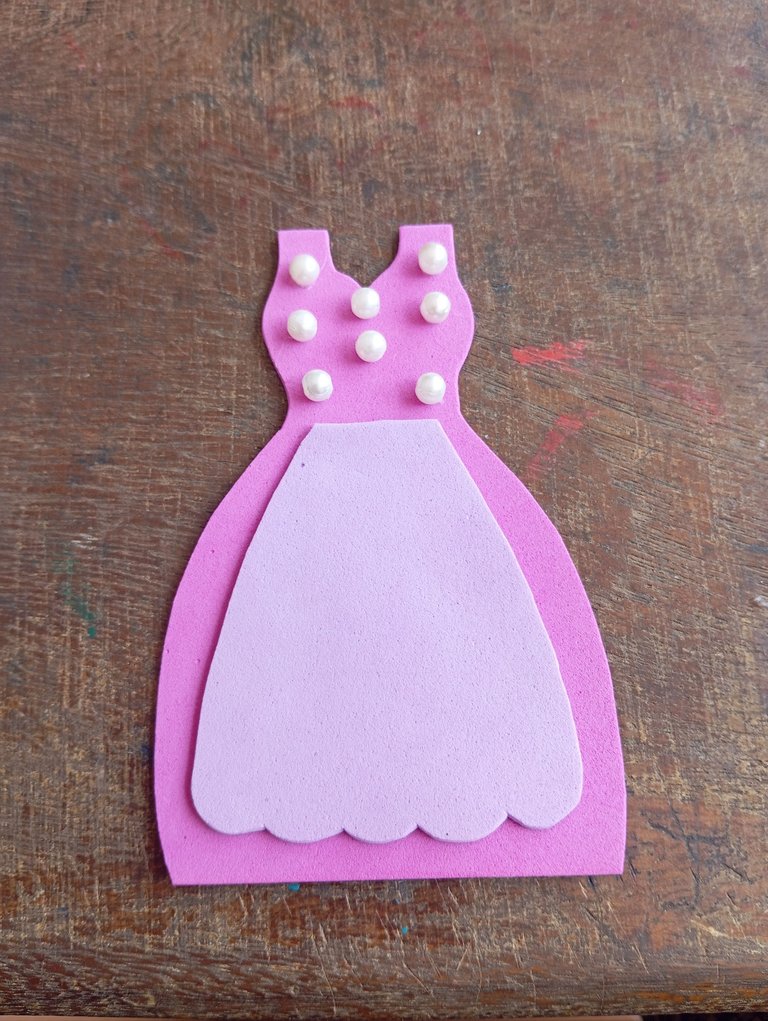
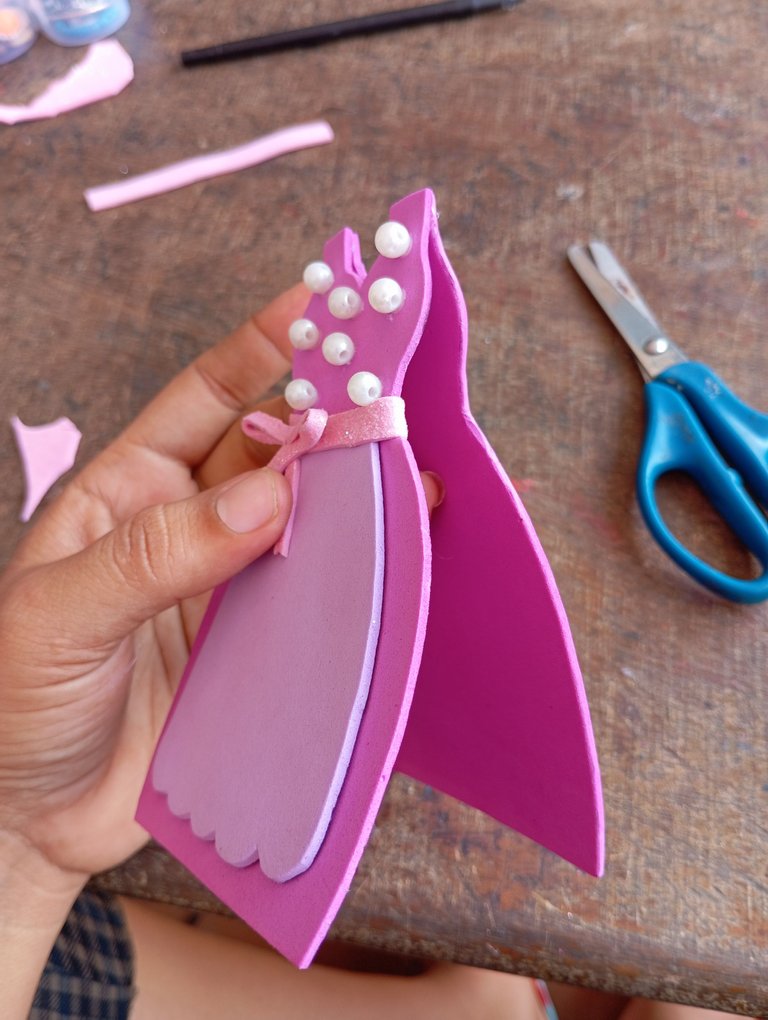
En la parte de arriba del vestido continúe pegando unas perlas plásticas para que decore el alrededor y tenga un lindo diseño arriba
On the top of the dress continue gluing some plastic beads to decorate the top of the dress and have a nice design on the top.
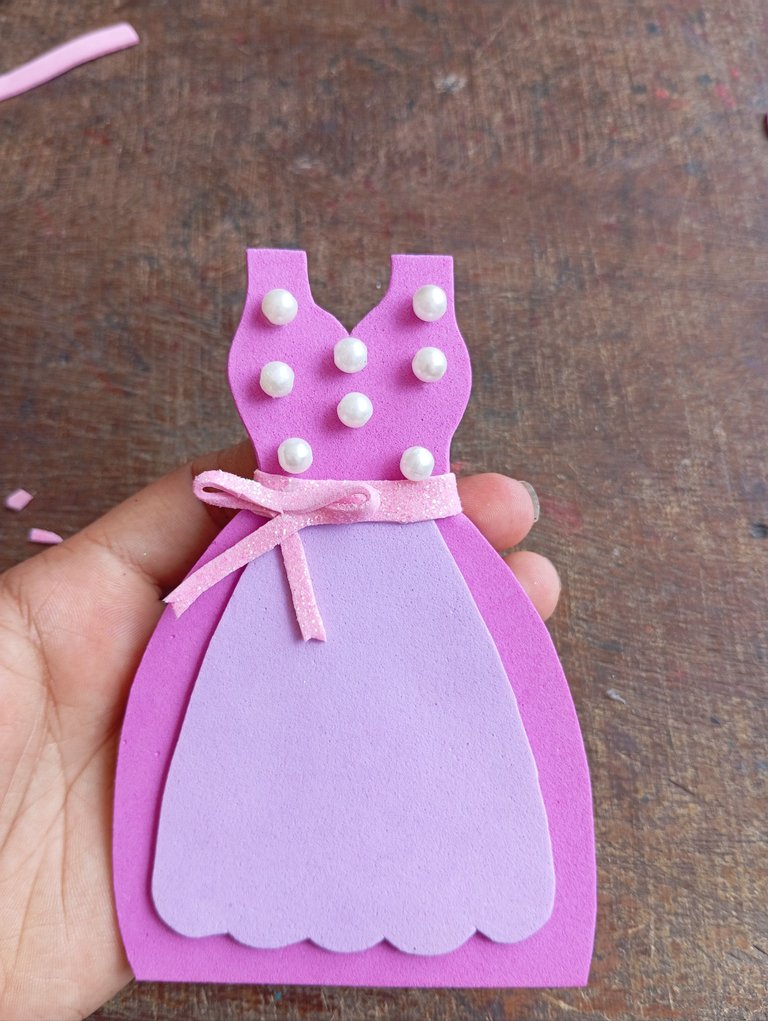
Luego en este siguiente paso continúe tomando una tira de foamis y continúe realizando un lazo el cual lo pegué en todo el centro del vestido
Then in this next step continue taking a strip of foamis and continue making a bow which I glued around the center of the dress.
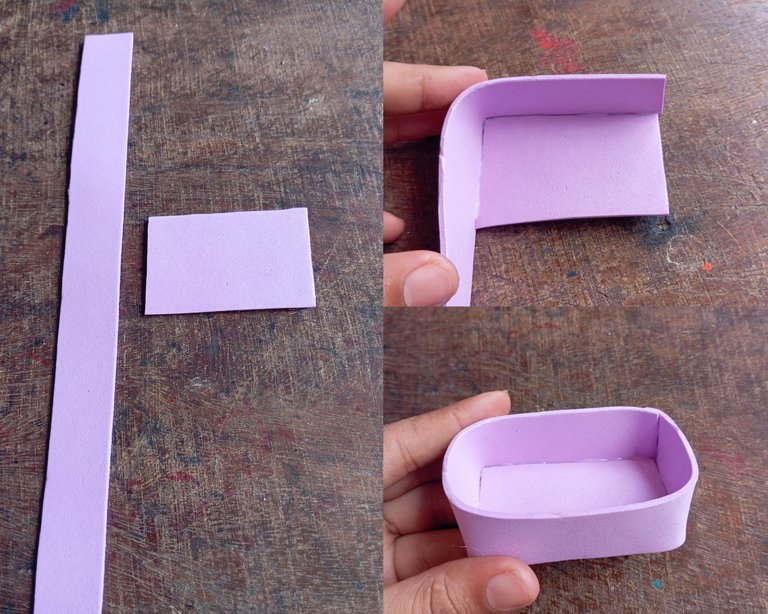
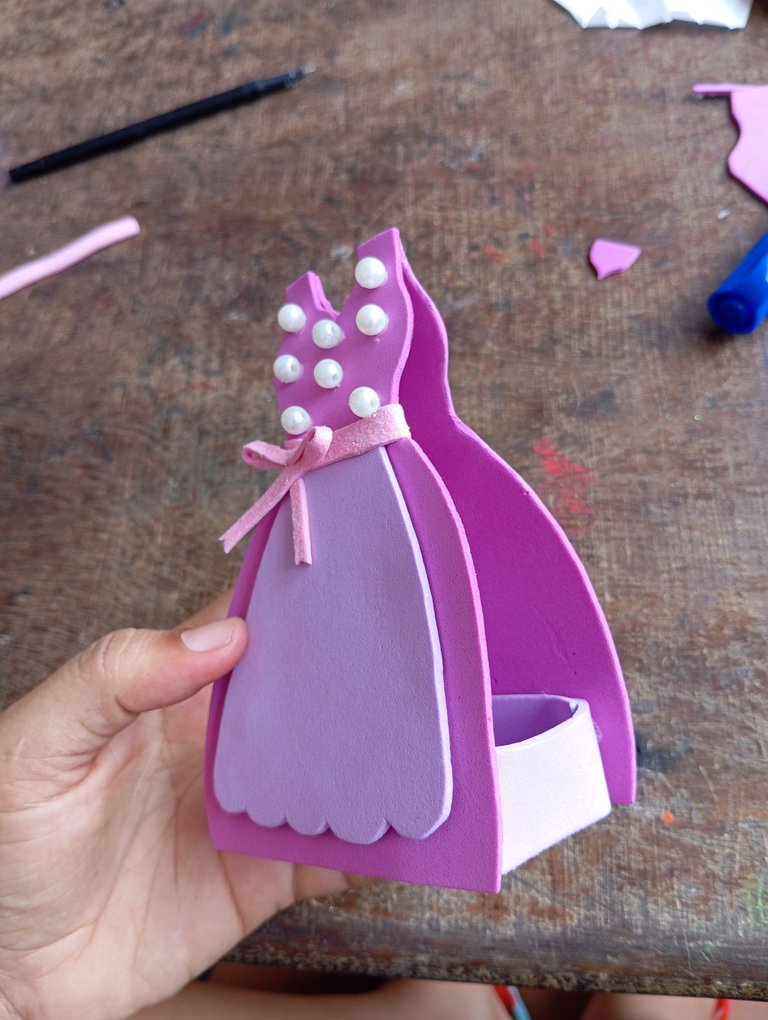
Una vez que tengamos las piezas del vestido lista , continuaremos realizando una pequeña base para colocar dentro el obsequio, por tan motivo retire un cuadro de foamis de 5 centímetros para que sea la base , luego recorté una tira del mismo color de 3 centímetros de ancho ,está tira la procedí pegando por todo el borde del cuadro hasta formar una mini cajita
Once we have the pieces of the dress ready, we will continue making a small base to place inside the gift, for this reason I removed a square of foamis of 5 centimeters to be the base, then I cut a strip of the same color of 3 centimeters wide, this strip I proceeded gluing it around the edge of the box to form a mini box.
Seguidamente tomé ambas partes del vestido y pegué los bordes de la parte de arriba
Then I took both parts of the dress and glued the edges of the top part.
En la parte de abajo del vestido pero del lado adentro continúe pegando la pequeña cajita que realizamos, que quede borde con borde del vestido , finalizando nuestra hermosa cajita de obsequio
At the bottom of the dress but on the inside I continued gluing the little box that we made, so that it is edge to edge of the dress, finishing our beautiful gift box.

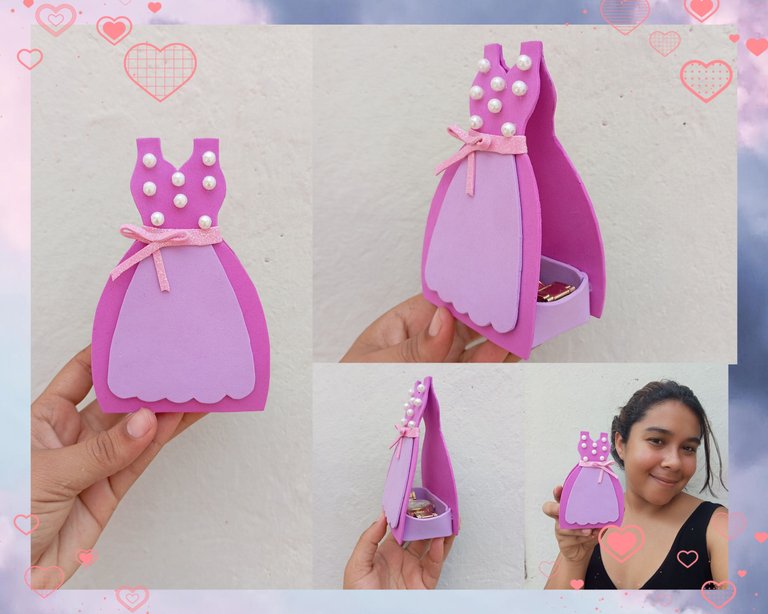
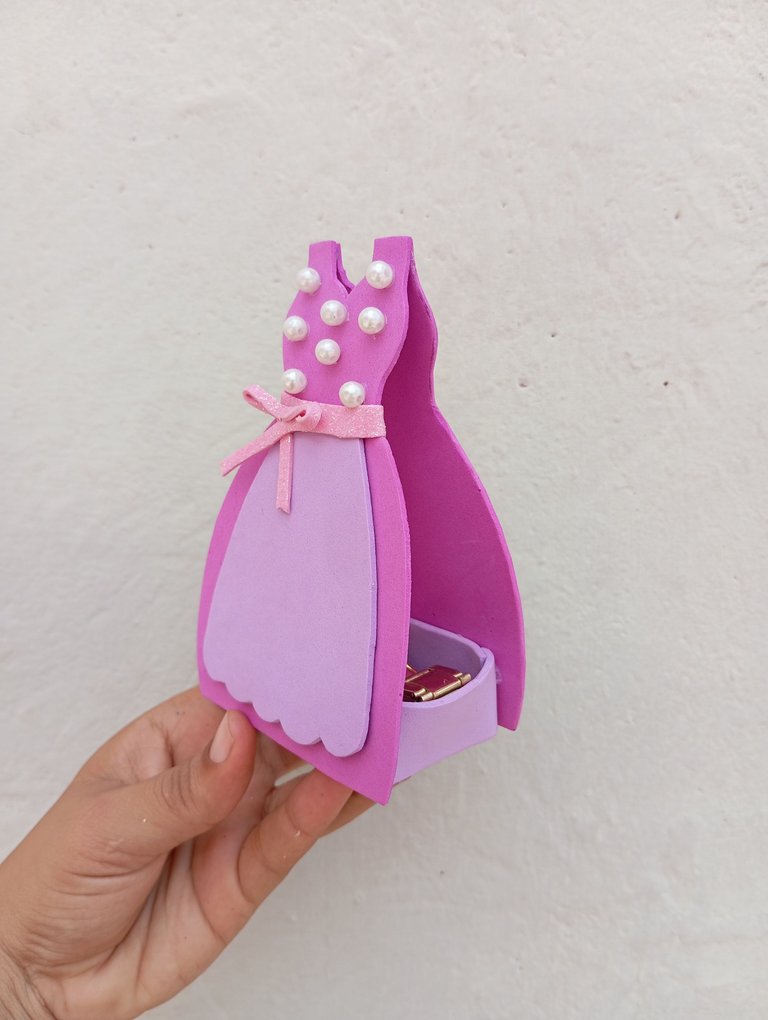
Este es el resultado final de mi hermoso obsequio,inspirado en Un vestido debido ha qué nosotras las mujeres ,la mayoría, amamos los vestidos y nos representa,nos hacen ver lindas .
Créditos : las fotos las tomé con mi redmi 12 y traduje los textos con el traductor deepl, feliz día para todos, hasta la próxima
This is the final result of my beautiful gift, inspired by a dress because we women, most of us, love dresses and they represent us, they make us look beautiful.
Credits: I took the photos with my redmi 12 and translated the texts with the deepl translator, happy day to all, see you next time.
Your DIY craft is really nice. An ideal gift. Thank you for entering the contest. Good luck
Thanks for the support, I'm glad you liked it.
Ohhhhh mine this is so so cute!!!
thanks pretty friend
This is really nice
I like the gift box you attached to it wow
You did a great job
thank you beauty friend
You’re welcome
Muy bello amiga
Gracias linda
Una linda, delicada pieza, la usaría justo para colocar las prendas cuando llegamos a casa!!, gracias ppr compartir el paso a paso
Está muy lindo!!! Bastante funcional; sirve como cotillón pero se me ocurre que si se crea una abertura en el delantal funciona como un bonito portarretrato. Saludos
Gracias amiga linda
Esta muy linda tu idea con el vestido, sirve para meter un regalito dentro y homenajear a las mujeres de nuestra vida. Saludos