Juguete para Don Gato 🐱/ A toy for Don Gato 🐱 Purr-fet Contest
Hola, queridos amigos de esta hermosa plataforma. Había estado un tiempo ausente debido a mi trabajo. Entre mi hermana y yo comenzamos un negocio y afortunadamente nos ha ido bien. Como todo, nos ha tocado fuerte y echarle ganas. Pero bueno acá estoy.
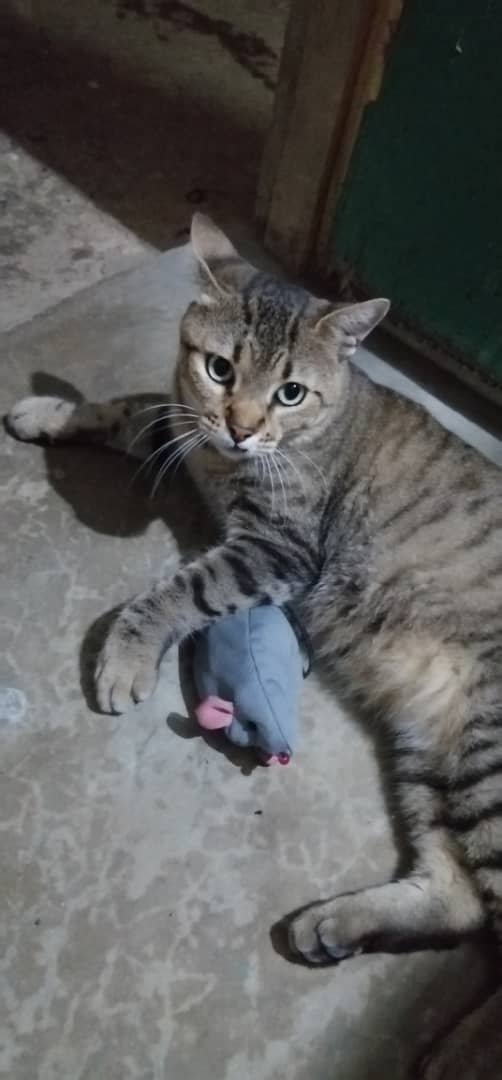
Mi mami adoptó hace unos días a un hermoso felino llamado Don Gato. Tiene 10 meses de vida o al menos eso es lo que cree la señora que lo tenía a su cuidado antes. Esta señora trabaja sin intenciones de lucro para una fundación que rescata gatos y perros de la calle. Así llegó este principe y nos sentimos felices con él. Hoy les contaré como hice un ratón de juguete para el integrante felino de nuestra familia.

Hello, dear friends of this beautiful platform. I had been absent for a while due to my work. My sister and I started a business and fortunately it has been going well. Like everything else, we have had to work hard and put our heart and soul into it. But here I am.
My mom adopted a few days ago a beautiful feline named Don Gato. He is 10 months old or at least that's what the lady who had him in her care before thinks. This lady works for a non-profit foundation that rescues cats and dogs from the street. So this prince arrived and we are happy with him. Today I will tell you how I made a toy mouse for the feline member of our family.
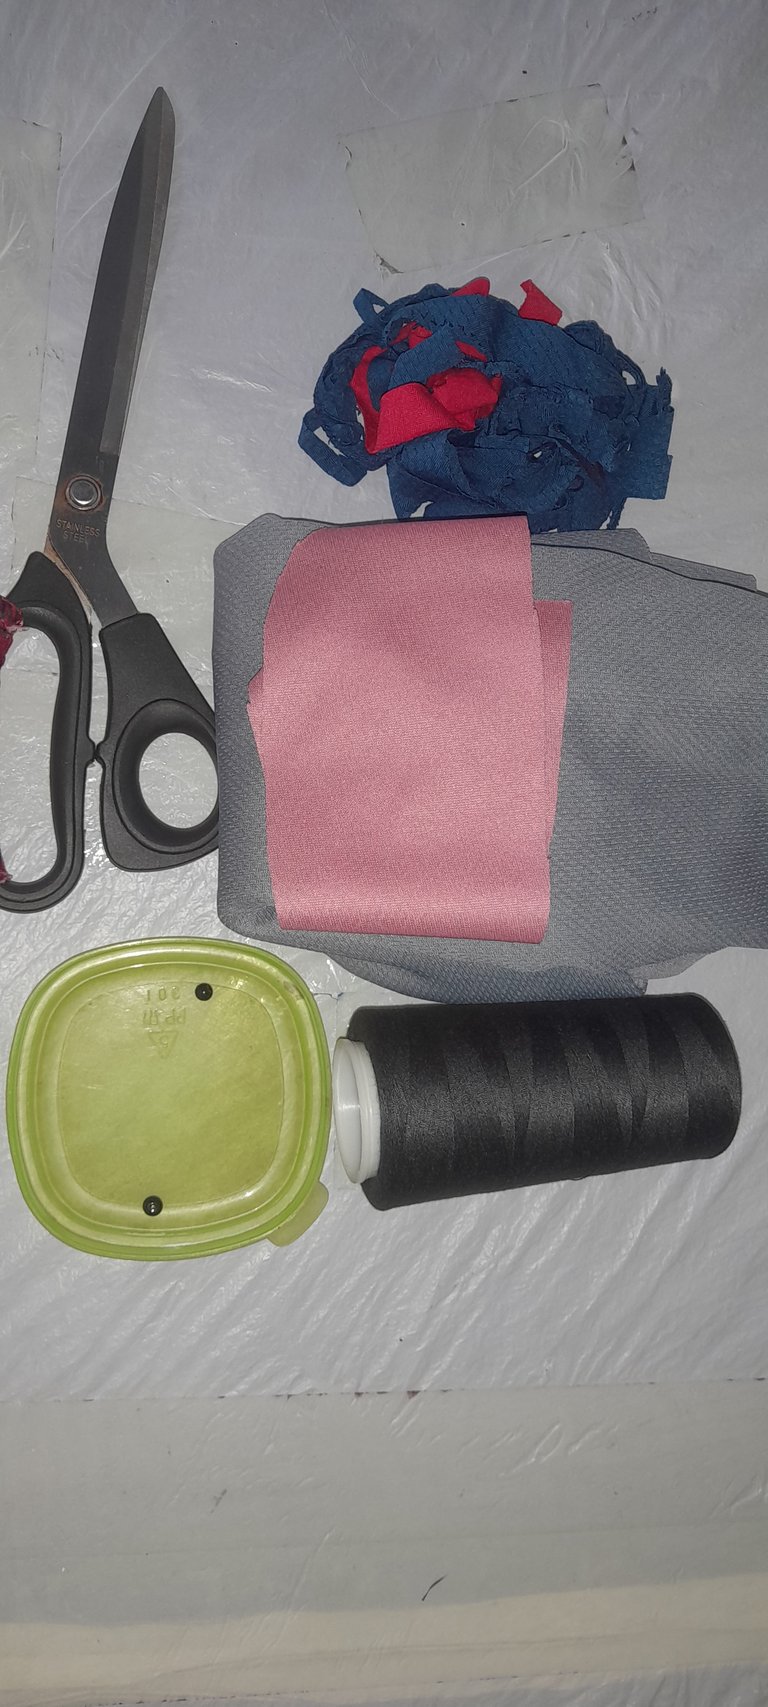
Materiales:
- Aguja.
- Hilo.
- Cuentas negras y rosa.
- Máquina de coser.
- Lápiz.
- Papel.
- Retazos de tela gris y rosa.
- Alfileres.
- Tijeras.
Materials:
- Needle.
- Yarn.
- Black and pink beads.
- Sewing machine.
- Pencil.
- Paper.
- Pieces of gray and pink fabric.
- Pins.
- Scissors.

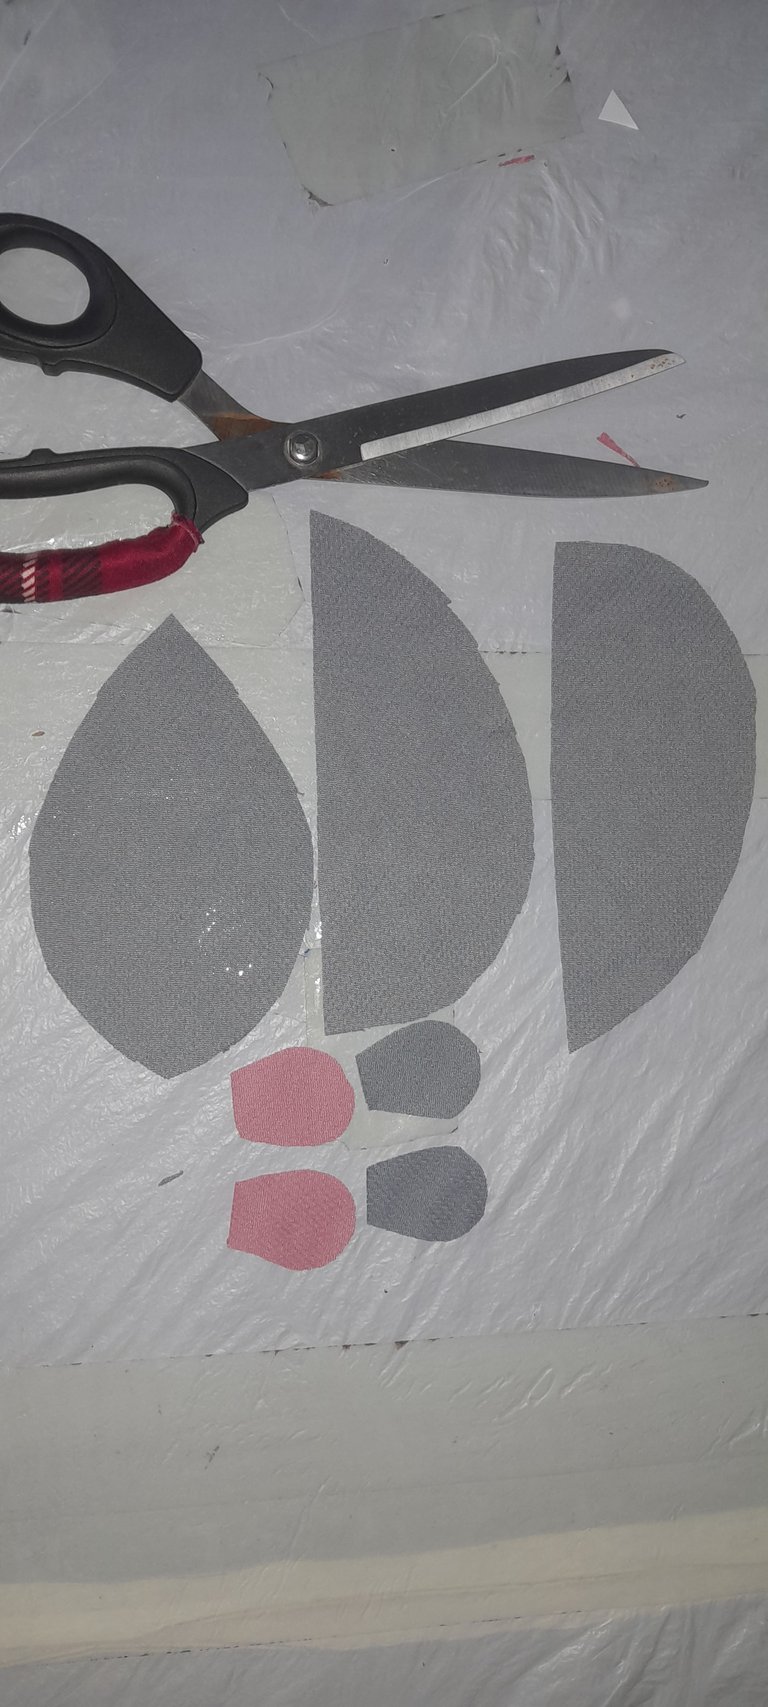
Paso 1:
Dibujaremos una pieza para la espalda del ratón, la barriga y las orejas.
Step 1:
We will draw a piece for the mouse's back, belly and ears.

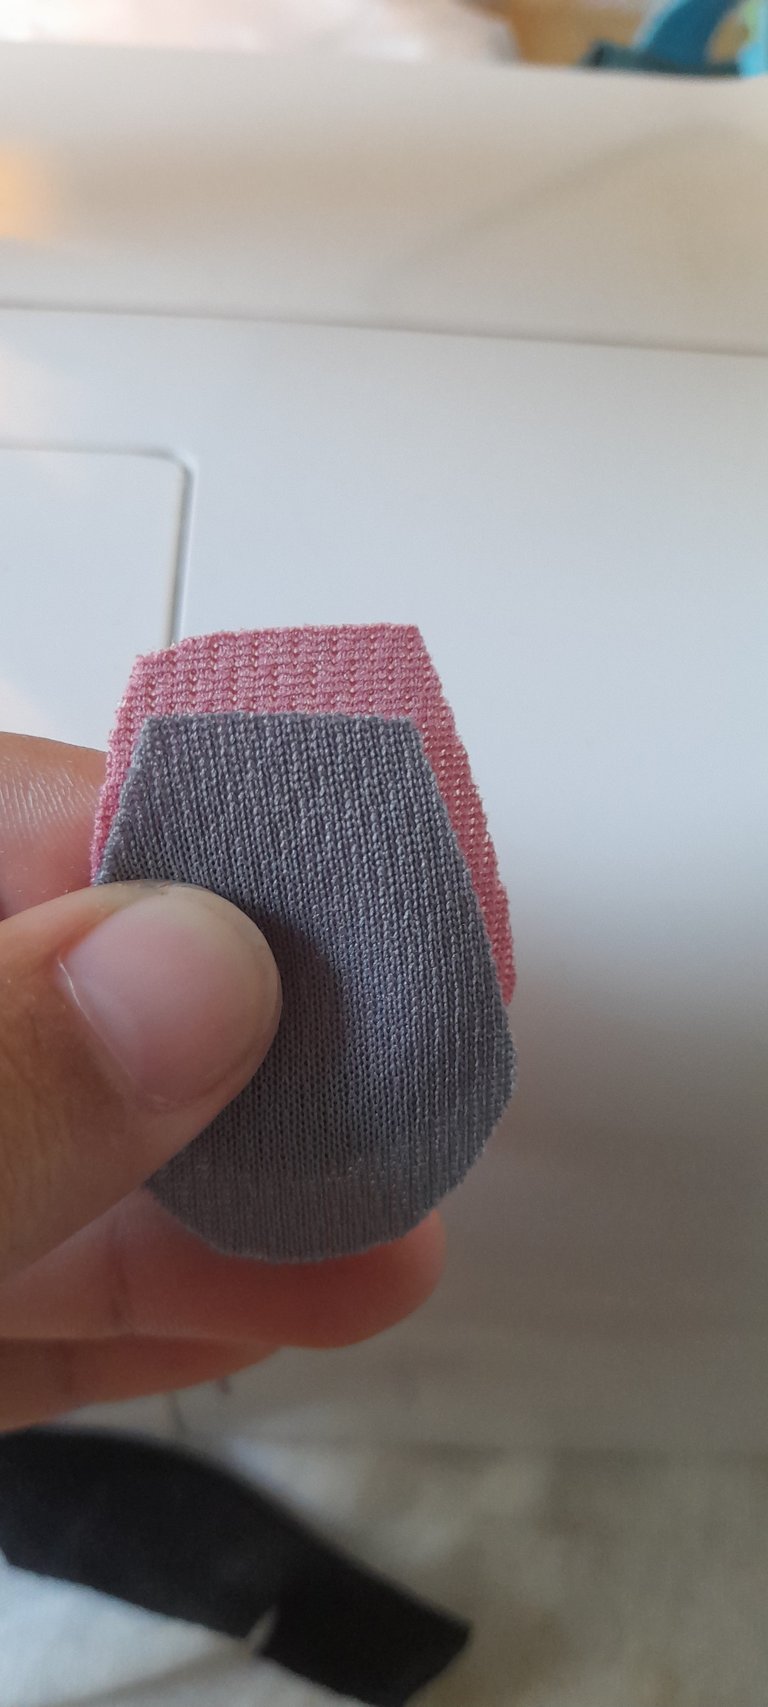
Paso 2:
Colocaremos los patrones encima de la tela y cortaremos 1 pieza para la barriga, 2 piezas para la espalda y 2 piezas para las orejas en gris y rosa.
Step 2:
We will place the patterns on top of the fabric and cut 1 piece for the belly, 2 pieces for the back and 2 pieces for the ears in gray and pink.
Paso 3:
Una vez cortadas las piezas comenzaremos a dar forma. Uniremos las partes para la espalda del lado de la curva.
Step 3:
Once the pieces are cut we will start shaping. We will join the pieces for the back on the side of the curve.


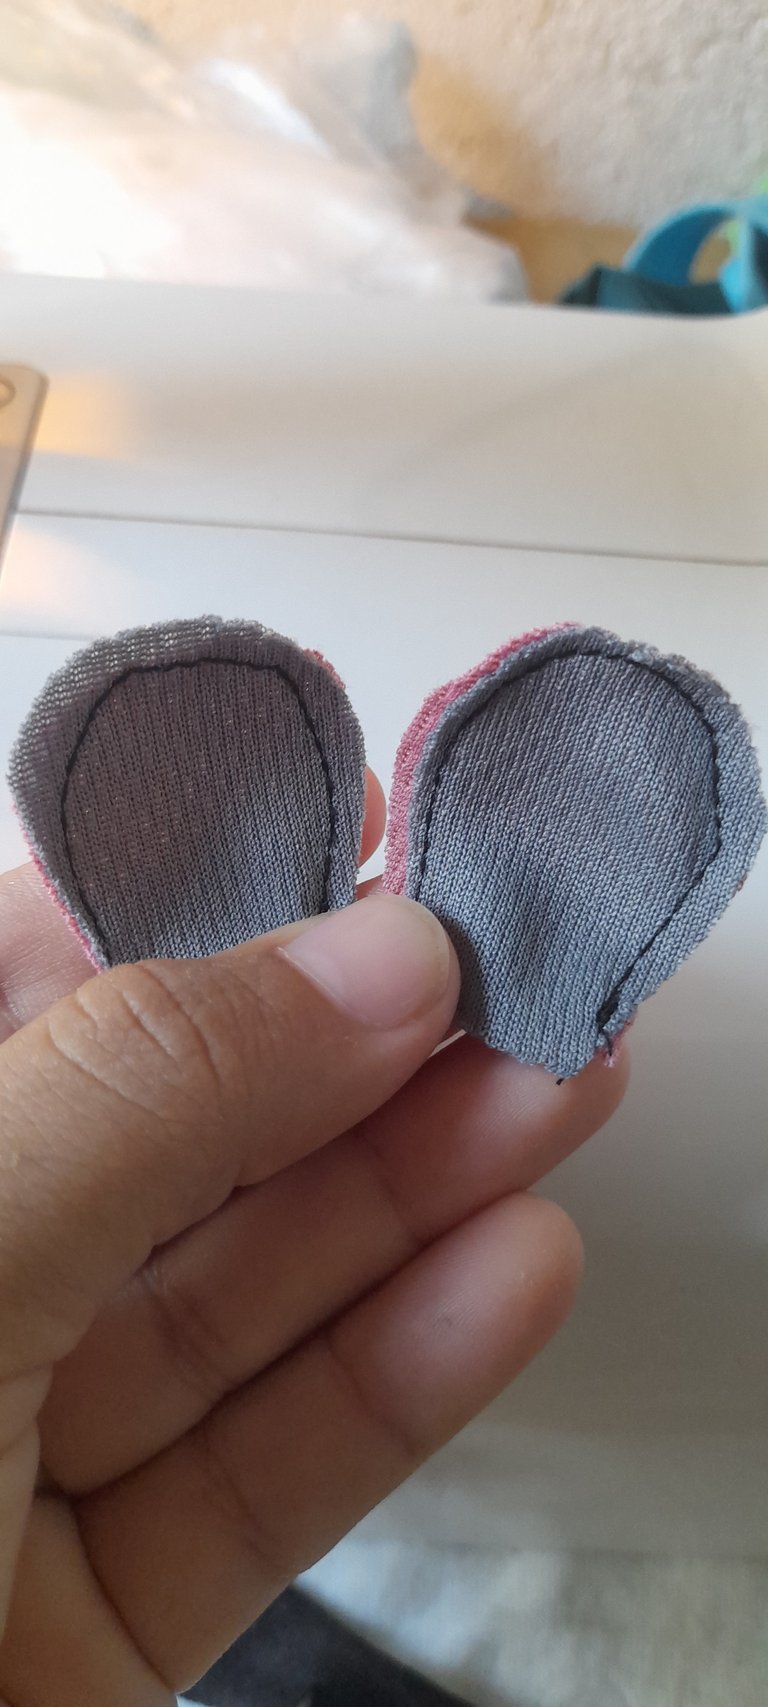
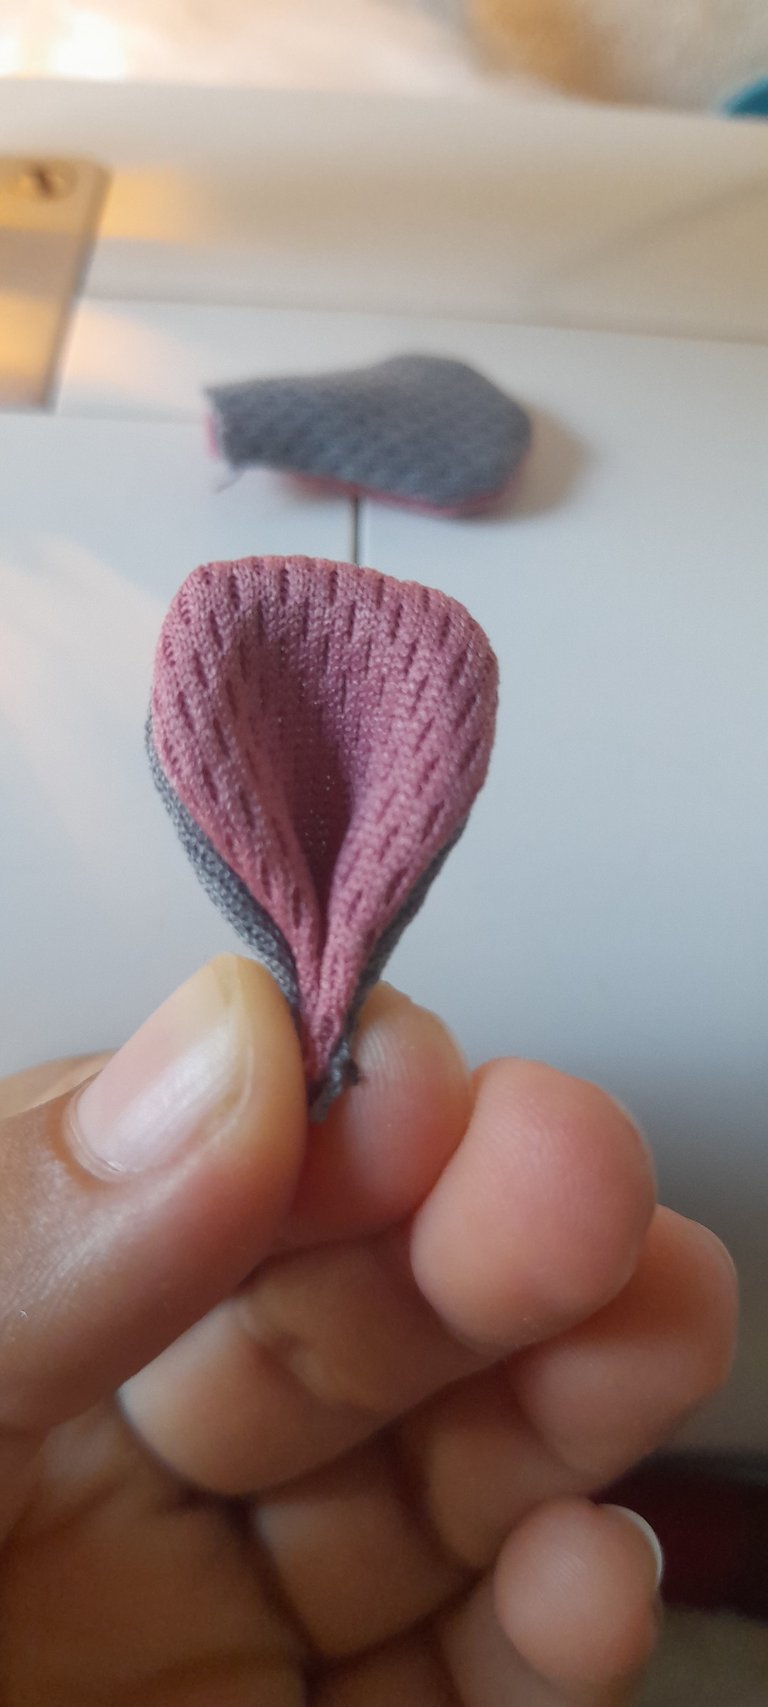
Paso 4:
Cosemos las orejas uniendo una capa gris y una rosa, al estar ya lista damos vuelta.
Step 4:
We sew the ears by joining a gray and a pink layer, when ready we turn over.
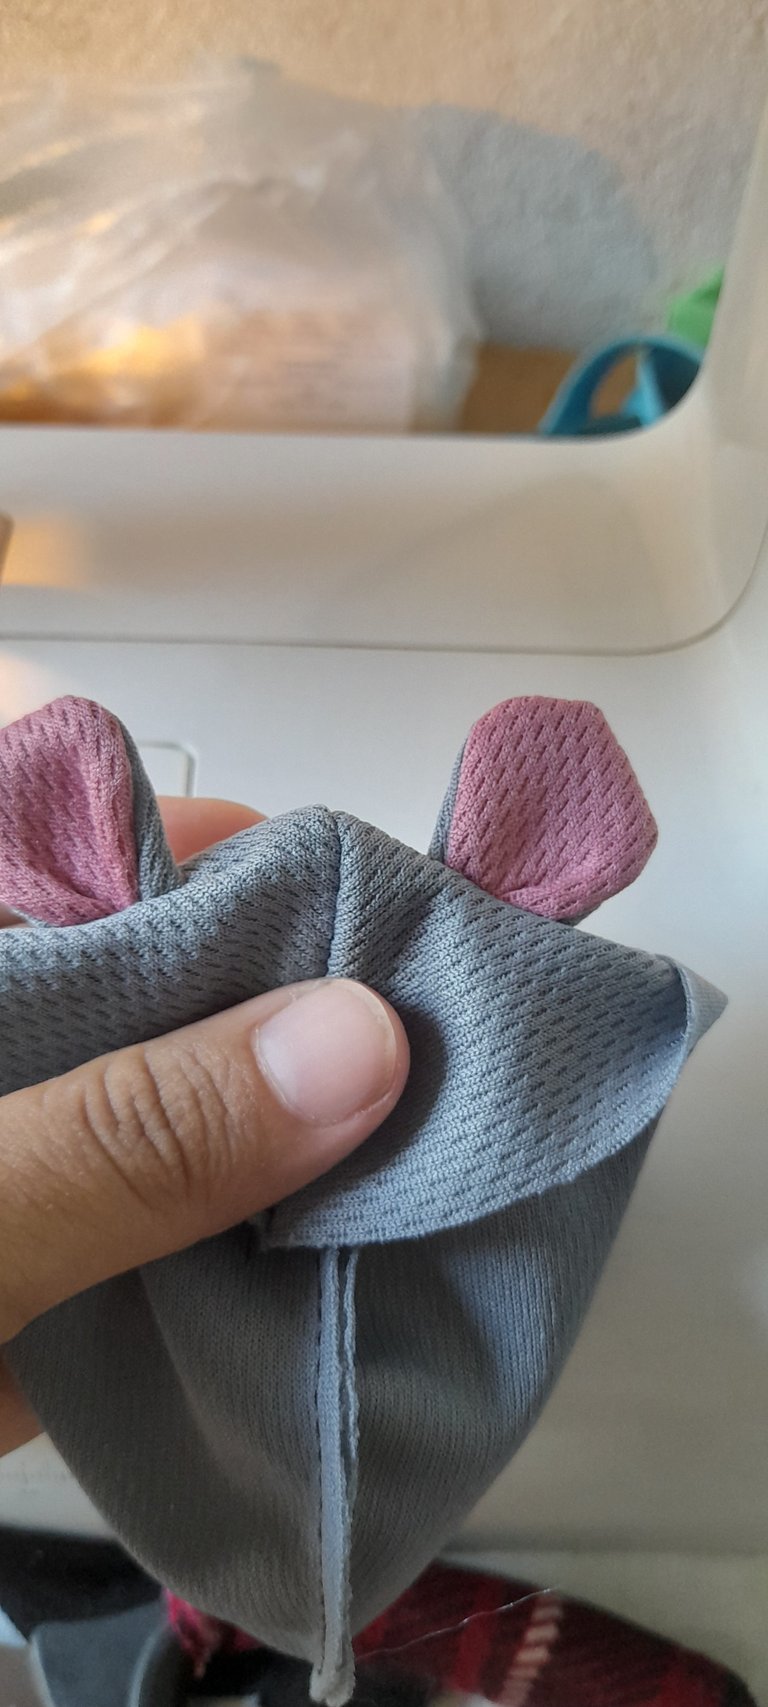
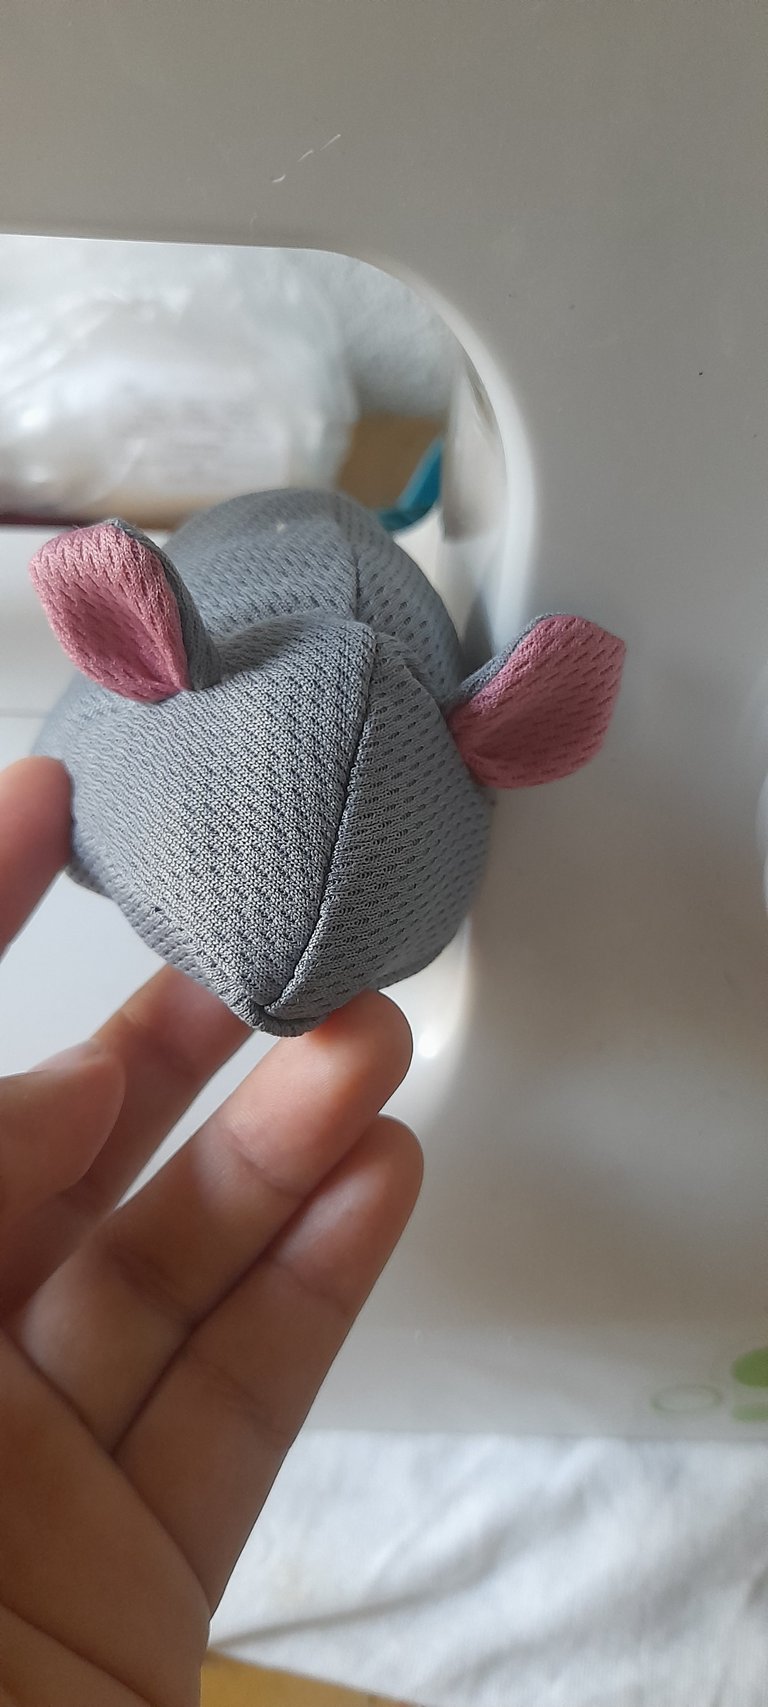
Paso 5:
Doblamos para guiarnos donde irán las orejas y haremos 2 orificios. En los mismos insertamos las orejas y cosemos asegurando muy bien la costura.
Step 5:
We fold to guide us where the ears will go and we will make 2 holes. In these holes we insert the ears and sew, securing the stitching very well.
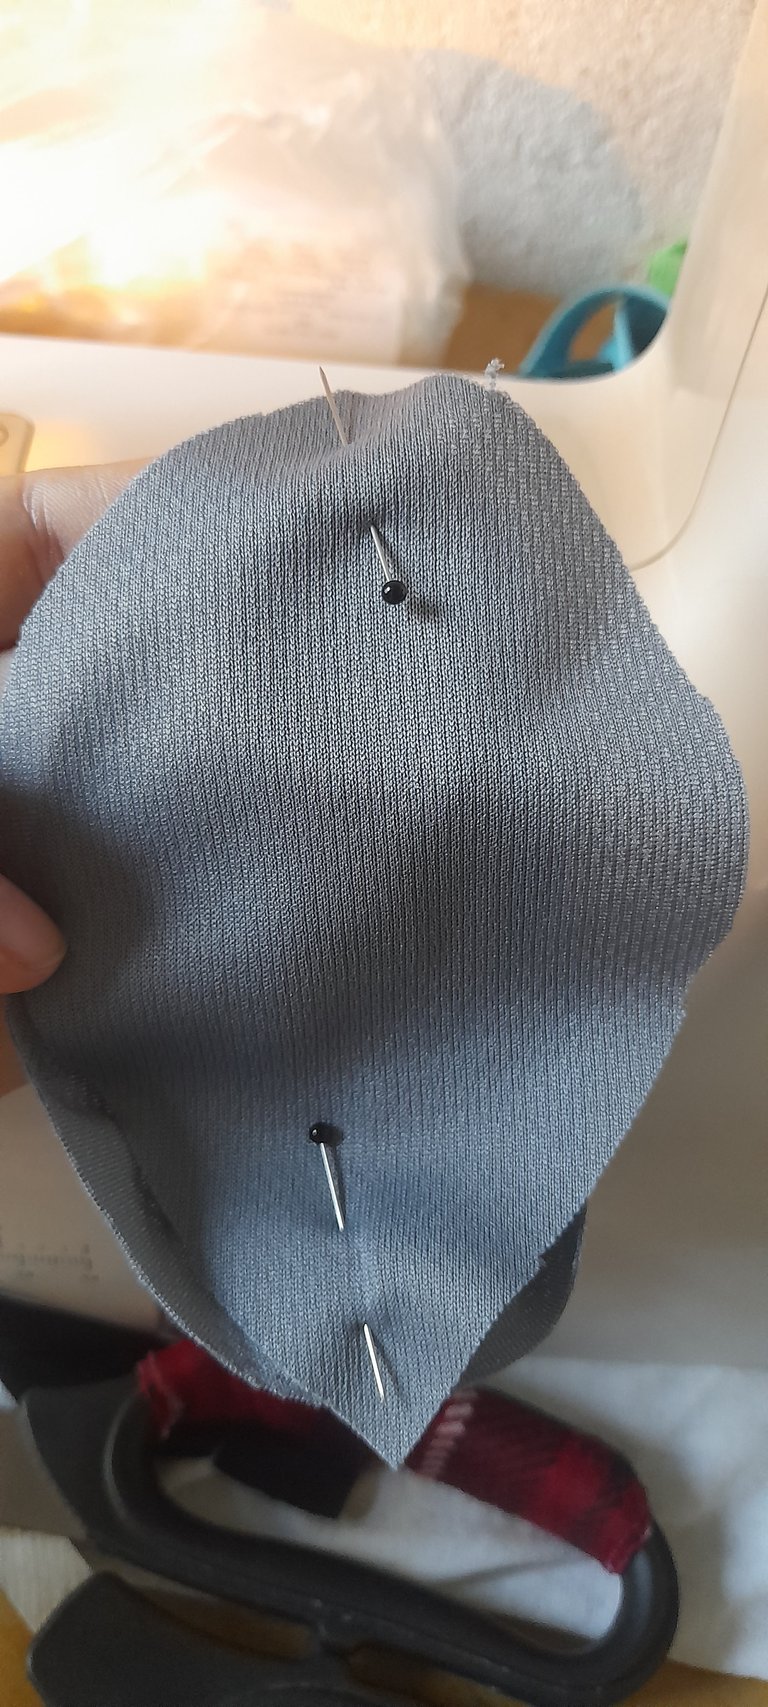
Paso 6:
Colocamos lo que será la barriga del ratón asegurando con alfileres las puntas para que no se nos mueva la tela al momento de coser. Estando lista la costura haremos un corte en el centro de la barriga y damos vuelta.
Step 6:
We place what will be the belly of the mouse, securing the ends with pins so that the fabric does not move when sewing. Once the seam is ready, make a cut in the center of the belly and turn it over.


Paso 7:
Ya la forma del ratón quedó. Ahora procedemos a rellenar, yo usé retazos muy pequeños ustedes pueden usar guata.
Step 7:
Now the shape of the mouse is ready. Now we proceed to stuffing, I used very small scraps, you can use wadding.
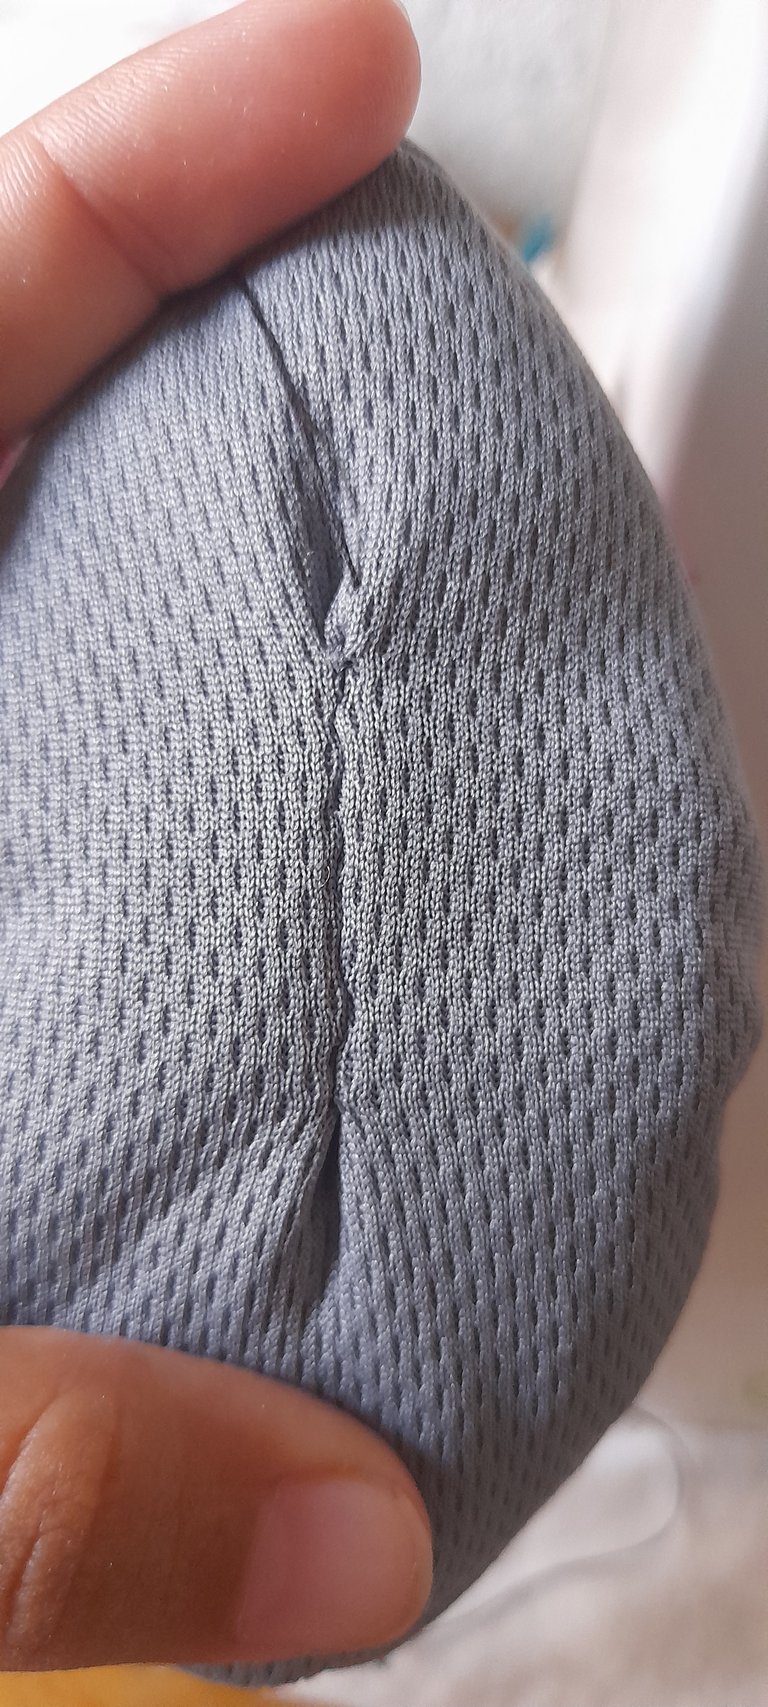
Paso 8:
Haremos una costura invisible en la barriga y con la aguja e hilo colocamos las cuentas que serán los ojos y la nariz.
Step 8:
We will make an invisible seam in the belly and with the needle and thread we place the beads that will be the eyes and nose.

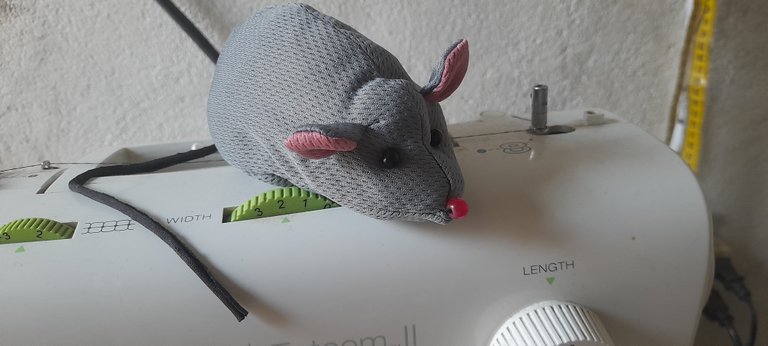
Paso 9:
Con una tira cosemos lo que será la cola del ratón.
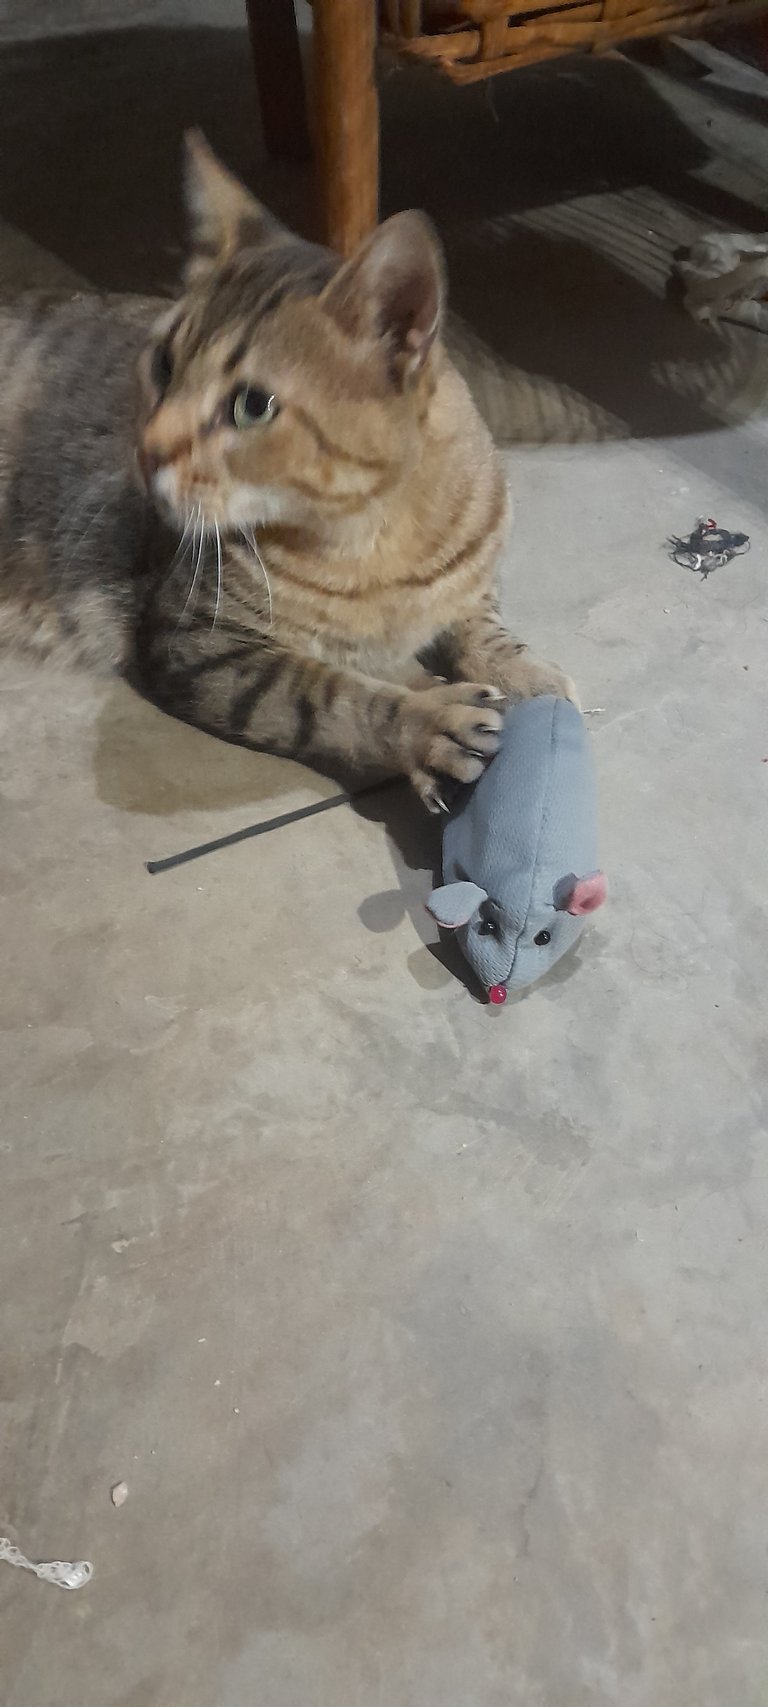
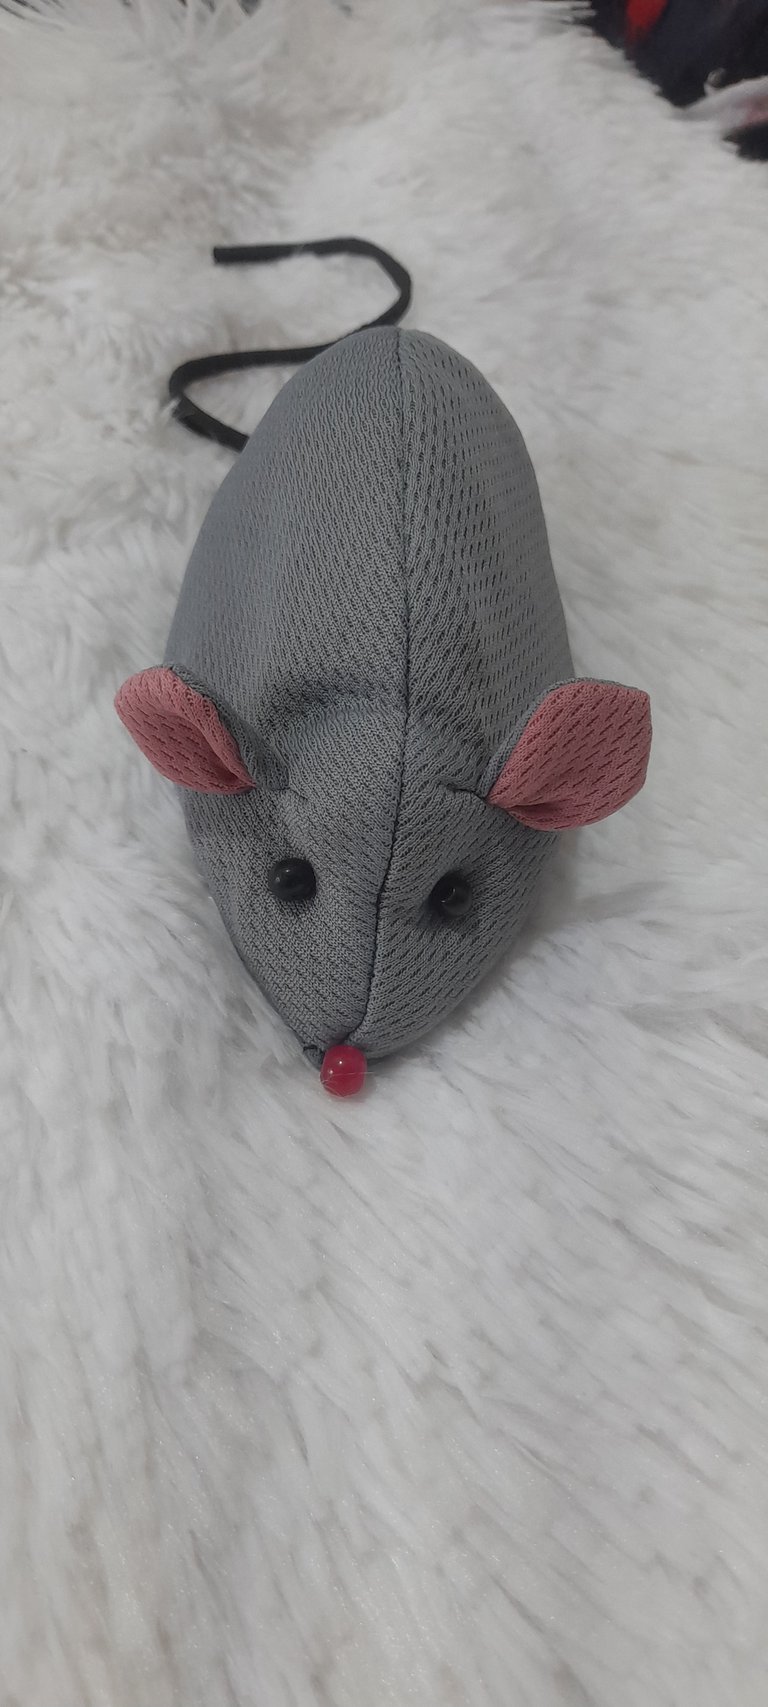
Con esto quedó listo el ratón de juguete.
Step 9:
With a strip we sew what will be the tail of the mouse.
With this, the toy mouse is ready.

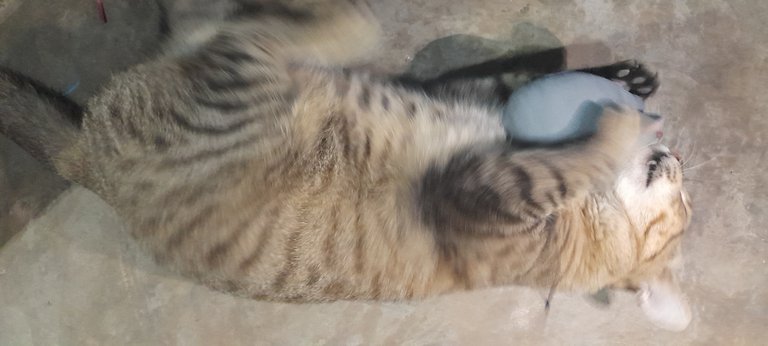
Quedé muy feliz con el resultado y aún más al ver la reacción de Don Gato. Es lindo ver que este pequeño ya tiene un hogar acá.
Espero les haya gustado este contenido y lo puedan realizar,
ya que no toma mucho tiempo. Si tienen esta clase de mascota sería muy bueno para ellos ya que si juegan con ellos. y les gusta.
Un abrazo desde la distancia.
I was very happy with the result and even happier to see Don Gato's reaction. It is nice to see that this little guy already has a home here.
I hope you liked this content and you can make it,
it doesn't take much time. If you have this kind of pet it would be very good for them because if they play with them. and they like it.
A hug from a distance.
Traducido con DeepL.
Todas las fotos fueron tomadas con mi Samsung A12
Excelente idea, se ve muy real, sin duda alguna creo que tu gatito va a estar entretenido por largo rato 😃 👍🏽
Así es , lo hice con la intención de que pueda sentirse en casa. Gracias por comentar . Saludos