Simple Love Masks ❤️ Sencillas Mascarita de Amor [Eng-Esp]
Greetings dear readers, today I give life and love to my blog with another art for children, school children from 8 to 9 years old, to whom within the pedagogical day in the subject of plastic expression I included the two emblematic events of the month of February that we celebrate in Venezuela: carnival, love and friendship, activity that for them was creative and exciting, and that coincidentally lends itself to the invitation of our dear community @diyhub for this month.
This time I had to teach practically two classes in one because some representatives turn a blind eye when it comes to sending the children to school with their complete materials for the day's work.
There really are cases of children who can not get what is required because their families are of limited resources, but there are others who do have the possibilities, because daily they come to school with very expensive supplies, so I infer from this and my experience, the area of plastic expression is not of great importance to some, to the point that I have been told.
But that is part of another story that as a teacher of plastic expression for children in a state school, I could share another time. Now, what I am pleased to present is this creative process of a little mask in the shape of a heart that gladdened hearts and awakened the creativity of many children.

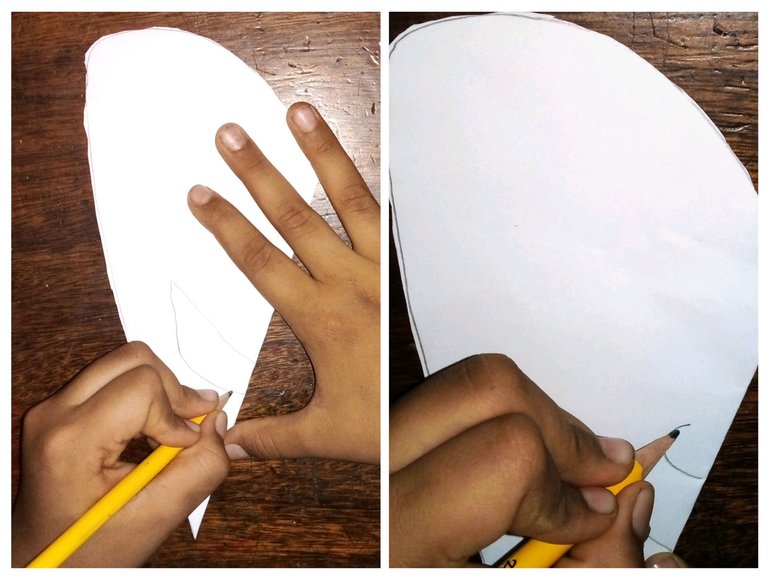
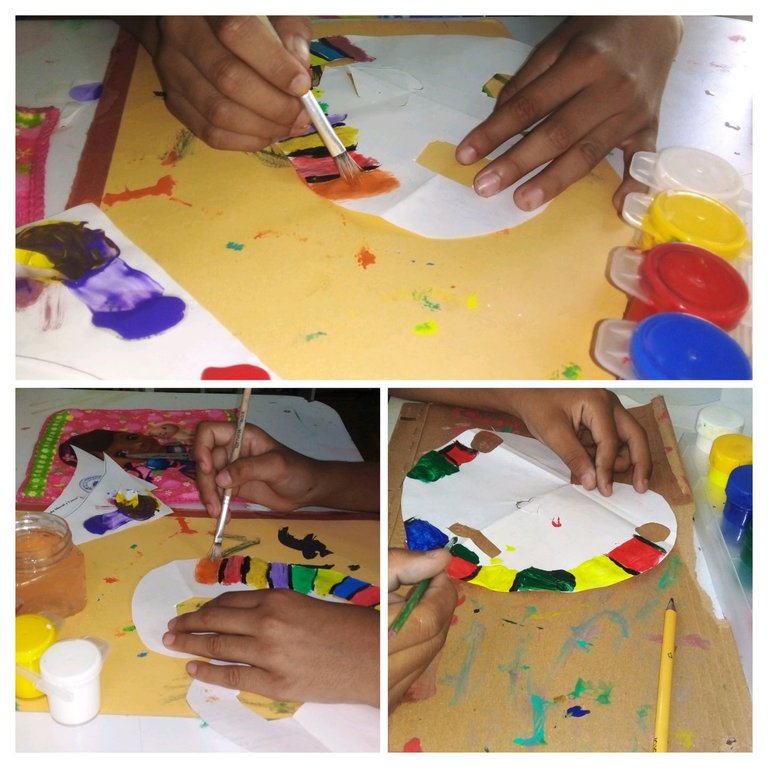
STEP 1
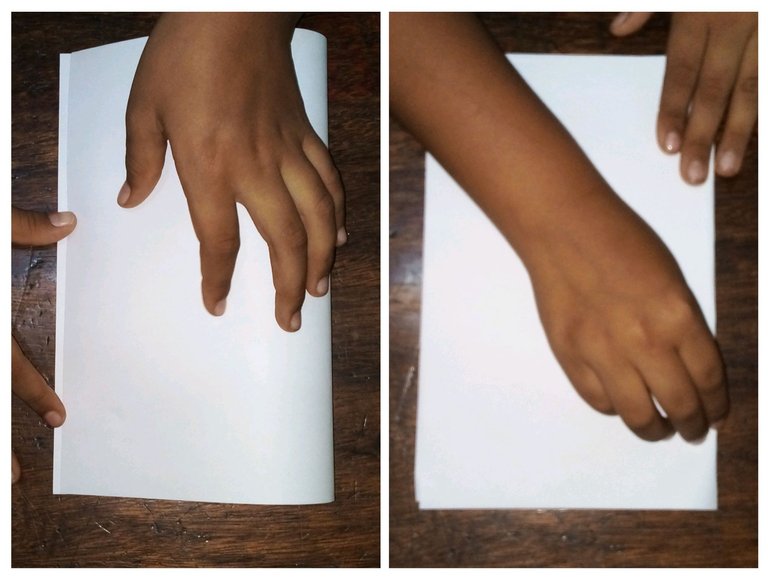
We take a letter size sheet of paper and place it in a horizontal position, joining one end with the other to form a rectangle.
STEP 2
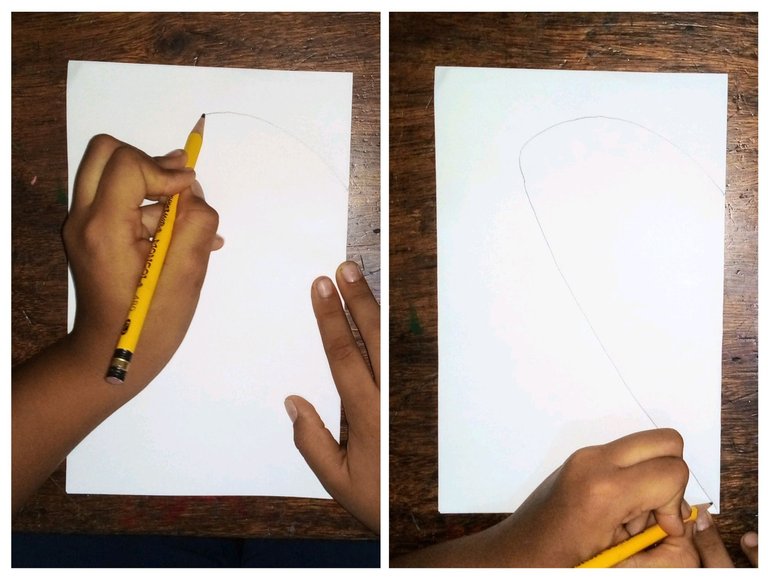
From the folded part with the pencil we draw half of a heart, which would be the motif of our mask.
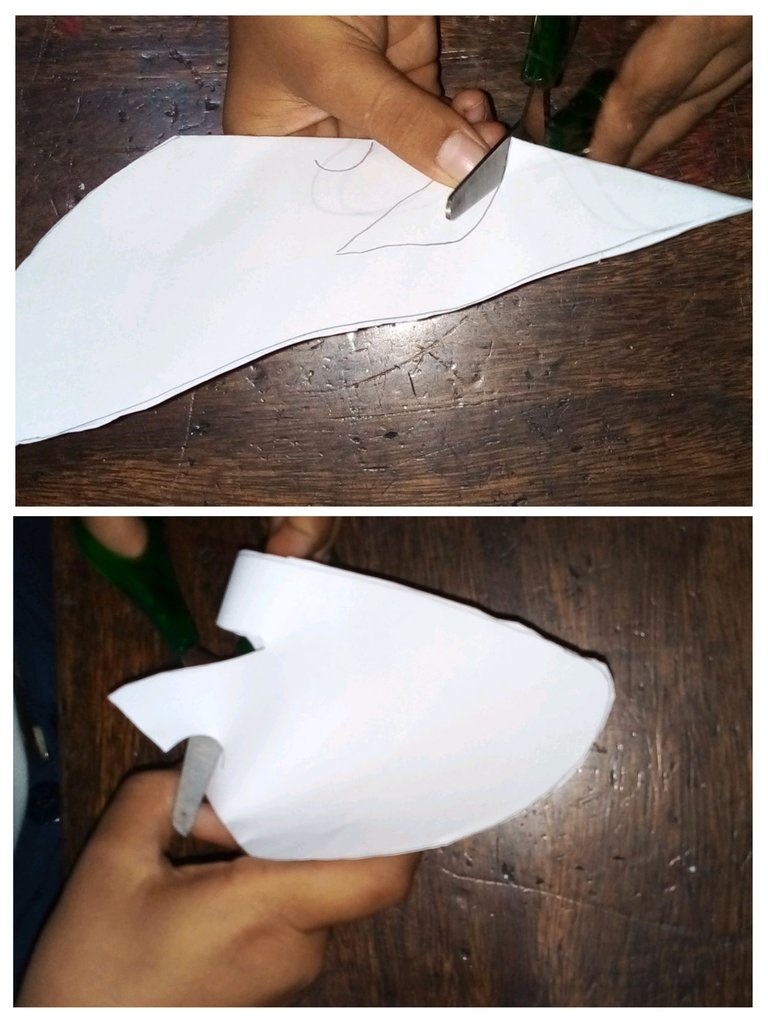
STEP 3
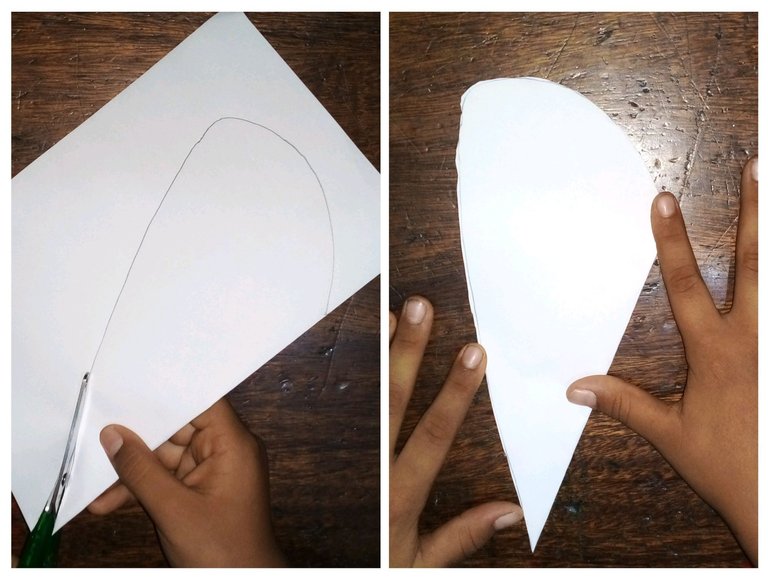
Then we cut the drawn figure, to extract the complete shape of the heart.
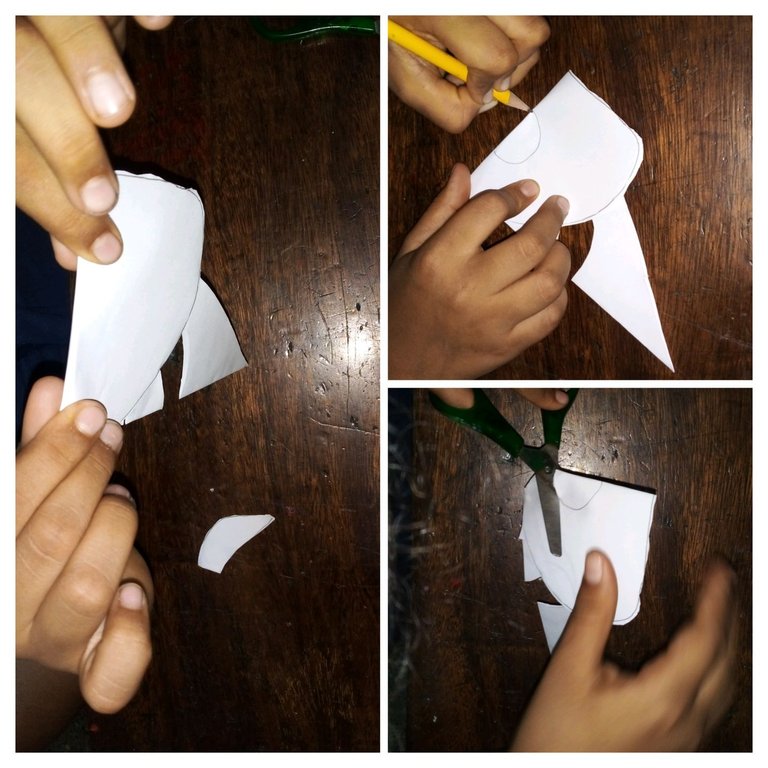
STEP 4
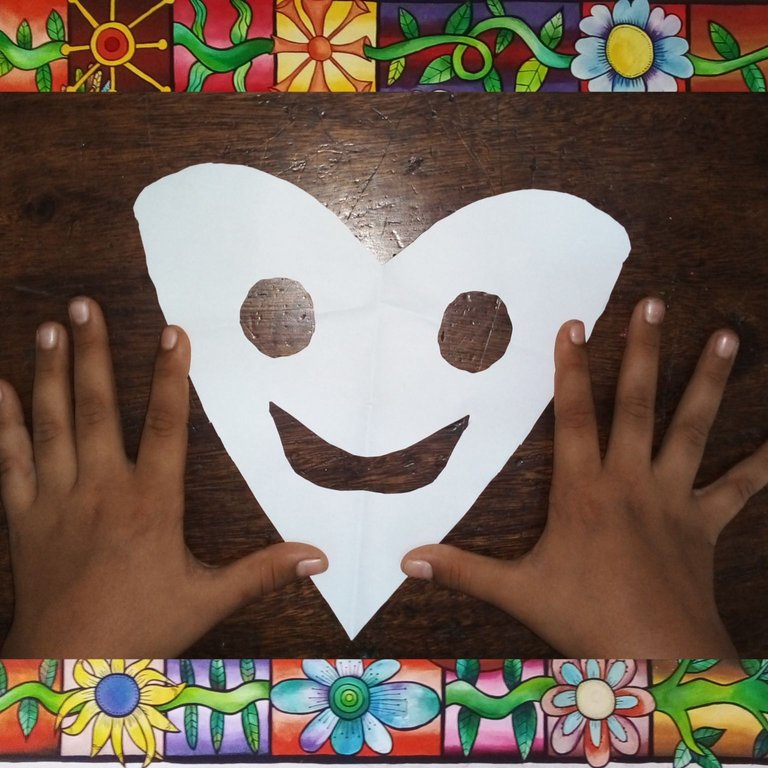
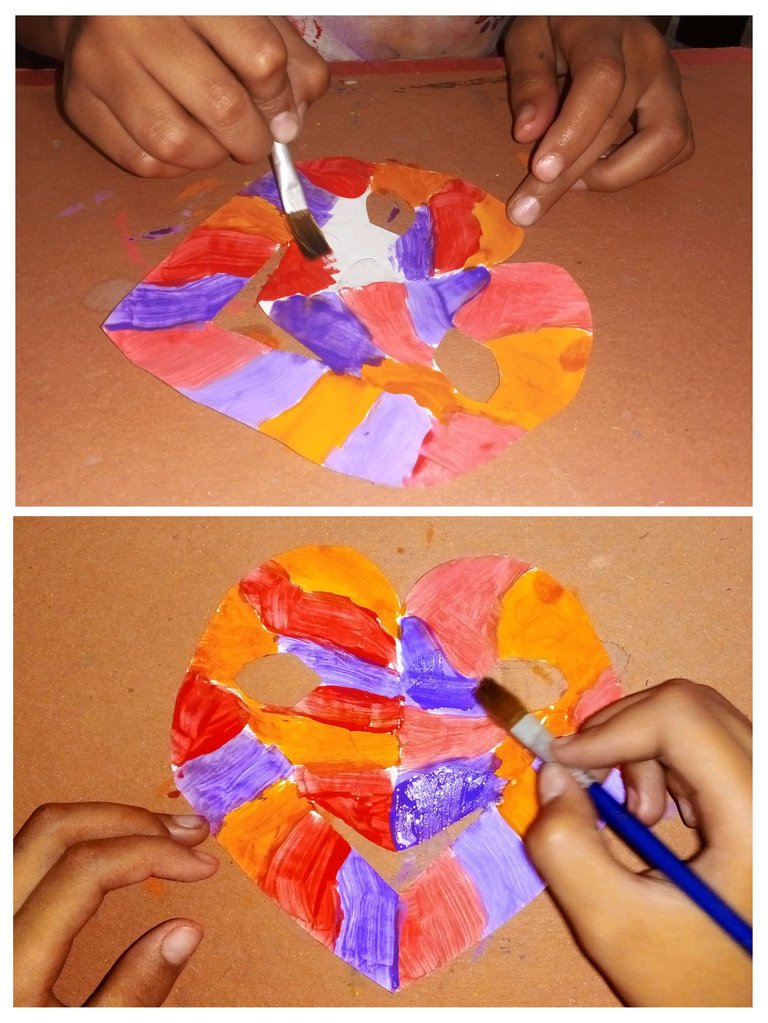
Here we decided what expression our mask would have, to get to this point I made reference to the expression of emotions and how our face looks like when we show it, (this was a moment of great childish humor). In this case the girl reflected in this post, connected with joy by drawing a smiling mouth and a small nose.
STEP 5
With this simple procedure, we use the scissors to cut what would be the mouth, extracting that piece of paper, and from the nose we only cut the small line drawn without passing the scissors beyond the drawn limit.
STEP 6
For the eyes, we fold inward the upper part of the heart, in that small horizontal line that was formed when folding the paper, there we draw a small oval, that when cut in that same position, we can design the two eyes for the mask.
STEP 7
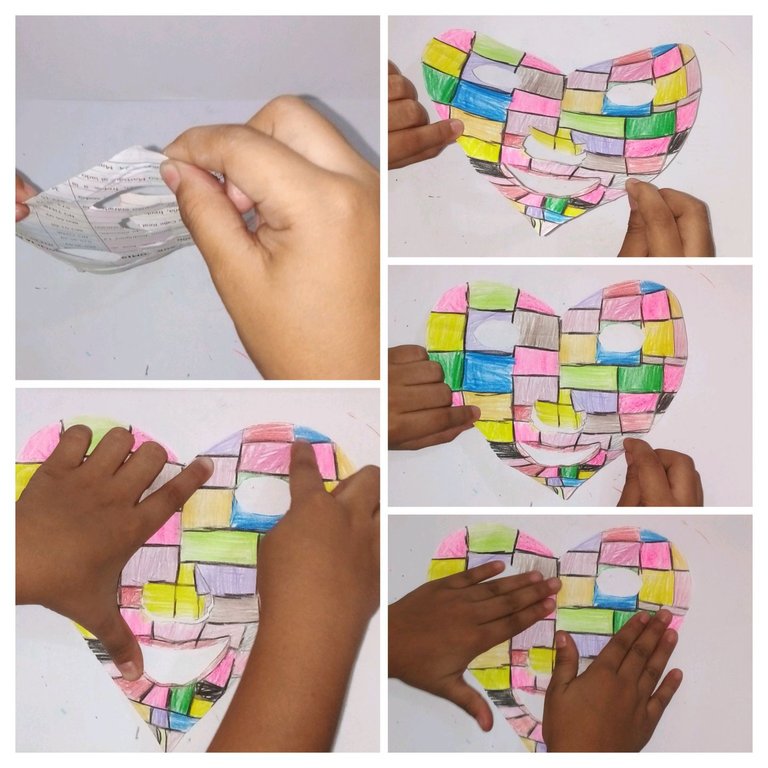
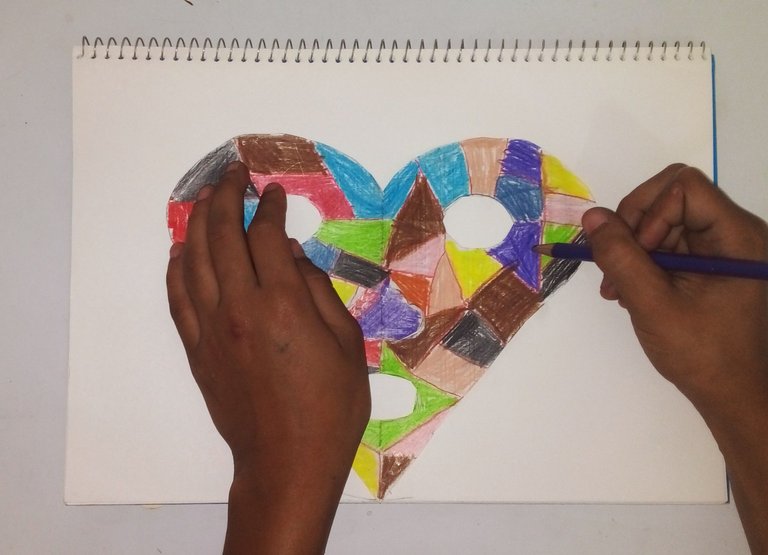
In this way we obtained the pattern of the mask that each child was then able to decorate as he or she wished.
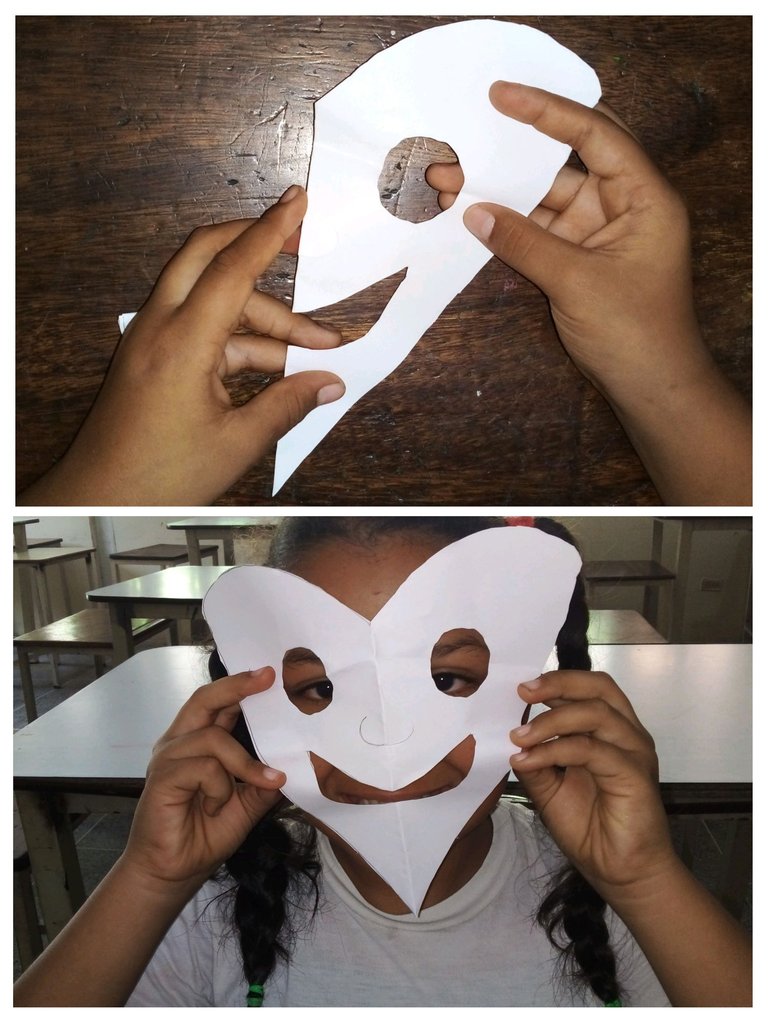
STEP 8
This time we made the masks to record them in our workbook using bond paper, leaving the learning process so that each child could make them at home or on another occasion with cardboard or other easy-to-cut material.
Versión Español
Versión EspañolSaludos apreciados lectores hoy doy vida y amor en mi blog con otro arte para niños, escolares de 8 a 9 años, a los cuales dentro de la jornada pedagógica en la asignatura de expresión plástica incluí las dos emblemáticas efeméride del mes de febrero que en Venezuela celebramos: carnaval, amor y amistad, actividad que para ellos resultó creativo y emocionante, y que casualmente se presta para la invitación de nuestra querida comunidad @diyhub para el mes presente.
En esta oportunidad tuve que dar practicamente dos clases en una debido a que algunos represetantes se hacen la vista gorda cuando se trata de enviar a los niños al colegio con sus materiales completos para el trabajo del día.
Realmente existen caso de niños que no pueden obtener lo requerido pues sus familiares son de escasos recursos, pero hay otros que si tienen las posibilidades, pues a diario llegan al colegio con insumos muy costosos, por lo que infiero según esto y mi experiencia, el área de expresión plástica no es de gran importancia para algunos, al punto que me lo han manifestado.
Pero eso es parte de otra historia que como maestra de expresión plástica para niños en una escuela del estado, podría compartir en otra oportunidad. Ahora lo que me es grato, es presentar este proceso creativo, de una mascarita en forma de corazón que alegró corazones y desperto la creatividad de muchos pequeños.
PASO 1
Tomamos una hoja tamaño carta la colocamos en posición horizontal uniendo un extremo con otro formando así un rectangulo.
PASO 2
Desde la parte doblada con el lápiz dibujamos la mitad de un corazón, el cual sería el motivo de nuestra máscara.
PASO 3
Luego cortamos la figura dibujada, para extraer la forma completa del corazón.
PASO 4
Aquí decidimos que expresión llevaría nuestra máscara, para llegar a este punto les hice referencia a la expresión de emociones y como se ve nuestro rostro al momento de manifestarla, (eso fue un momento de mucha graciosura infantil). En este caso la niña reflejada en este post, conecto con la alegría dibujando una boca sonriente y una pequeña nariz.
PASO 5
Con este sencillo procedimiento, nos dedicamos con la tijera a cortar lo que sería la boca,extrayendo ese pedazo de papel,y de la nariz solo cortamos la pequeña línea dibujada sin pasar la tijera más allá del limite dibujado.
PASO 6
Para los ojos, doblamos hacia adentro la parte superior del corazón, en esa pequeña línea horizontal que se formó al doblar el papel, allí dibujamos un pequeños óvalo, que al cortarlo en esa misma posición, logremos diseñar los dos ojos para la máscarita.
PASO 7
De esta forma obtuvimos el patrón de la máscara que luego cada niño logró decorar a su gusto.
PASO 8
En esta oportunidad las máscaras las hicimos para registrarla en nuestro block de trabajo realizándolas en papel bond, quedando el aprendizaje para que cada niño a su gusto lo pudieran elaborar en el hogar o en otra ocasión con cartulina u otro material de fácil corte.
Que maravilla presentar la expresión artística en los niños, explorado a través del arte y del juego sus sentires, su amor, sus risas... esa mascara de corazón realizada por la niña me arranco una gran sonrisa!
Que viva la expresión artista en nuestros niños, en la escuela y guiados por su maestra ❤️
@sagarkothari88 vote
Excelente post, gracias por compartir.
@tipu curate 8
Upvoted 👌 (Mana: 0/75) Liquid rewards.