Esp/Eng Reconnecting security cameras/Reconectando cámaras de seguridad

Saludos comunidad un gusto seguir compartiendo mi conocimiento con ustedes, acá les vengo a comentar de una reparación que tuvo que hacer a un sistema de cámaras de seguridad el cual había instalado hace tiempo pero entraron los amigos de lo ajeno y dañaron gran parte de esta instalación, yo luego de hacer esta instalación le sugerí al dueño del local sellar el DVR con una caja de metal anclada al suelo, para que esto no sucediera sin embargo nunca atendió a mi solicitud y se llevaron el equipo, es por eso que me tuvieron que llamar para hacer la reconexión de esto nuevamente.
Greetings community, a pleasure to continue sharing my knowledge with you, here I come to comment on a repair that had to be done to a security camera system that I had installed a long time ago. Still, the friends of others entered and damaged a large part of this installation, after doing this installation I suggested to the owner of the premises to seal the DVR with a metal box anchored to the ground, so that this would not happen, however, he never responded to my request and they took the equipment, that is why they had to call to reconnect this again.
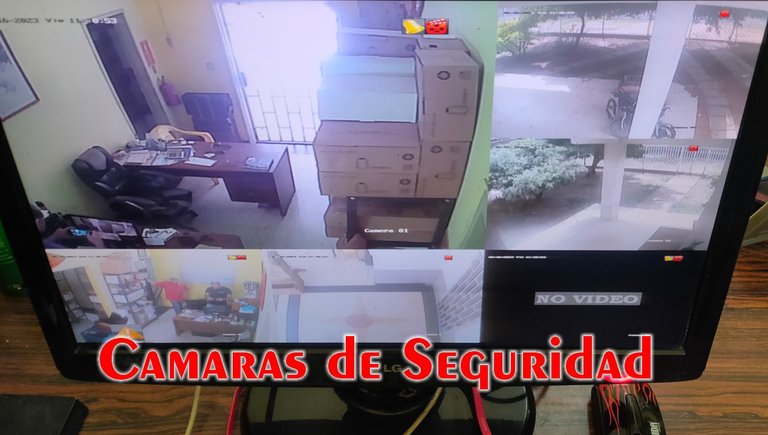
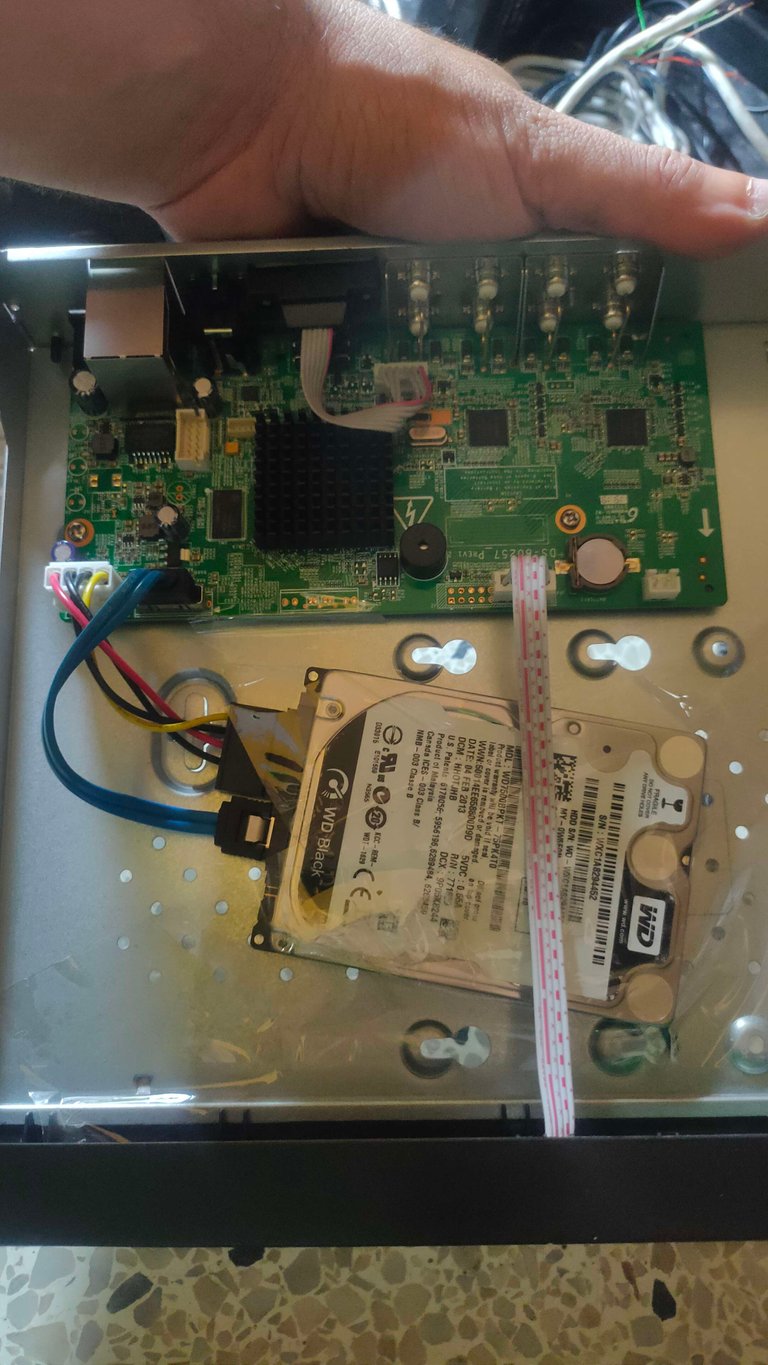
Primero que nada cuando llegué al local noté inmediatamente que reventaron varios de los cables y tuve que hacer de nuevo todas estas conexiones, dañaron los equipos de transmisión y el cableado, estos equipos van conectados al DVR que es la unidad que se encarga de grabar todo el proceso de las cámaras, lo bueno es que ninguna de las cámaras sufrió ningún otro tipo de daños, viendo esto solicité la compra de los equipos necesarios que fueron un DVR, 5 unidades de video Balun, 1 transformador de 12 voltios 5 amperes, 1 divisor de cable 1 a 4 y otro transformador 12 voltios 1 Amper. Cada Cámara se mueve con 12 voltios 1 Amper, sí el transformador de más amperes la Cámara solamente va a tomar 1 ampere, por eso conecto cuatro cámaras en un transformador de 5 amperes lo bueno es que las conexiones de corriente no habían sufrido ningún tipo de daño y solamente me encargué de reconectar estas unidades, para saber si les está llegando corriente a las cámaras solo tenemos que taparlas un poco para ver si encienden sus luces.
First of all, when I arrived at the premises, I immediately noticed that several of the cables burst and I had to make all these connections again, they damaged the transmission equipment and the wiring, this equipment is connected to the DVR, which is the unit that is in charge of recording everything. the process of the cameras, the good thing is that none of the cameras suffered any other type of damage, seeing this I requested the purchase of the necessary equipment which was a DVR, 5 video Balun units, 1 12 volt 5 amp transformer, 1 cable splitter 1 to 4 and another transformer 12 volts 1 Ampere. Each Camera moves with 12 volts of 1 Ampere, if the transformer with more amps the Camera will only take 1 amp, that's why I connect four cameras to a 5 amp transformer. The good thing is that the current connections had not suffered any damage and I only took care of reconnecting these units, to know if power is coming to the cameras we have to cover them a little to see if they turn on their lights.
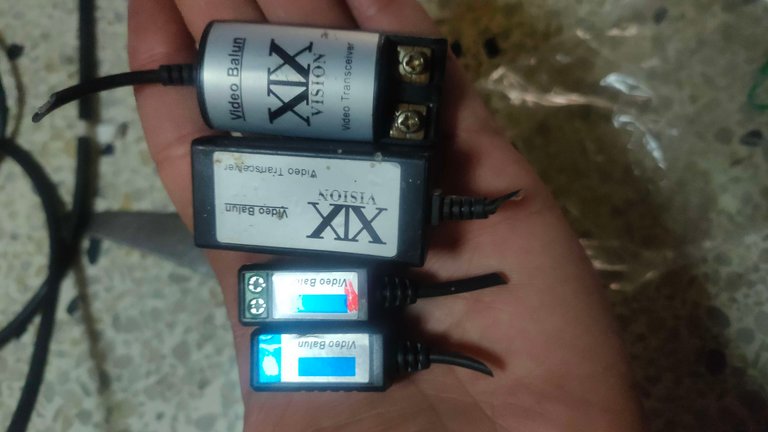
La conexión de video se hacen a través de cable de cobre, en este caso usé cable de red categoría 5E, ya estaba instalado y solamente tenía que cambiar los Vídeos Balun que fueron cortados para llevarse el equipo, los reemplace para conectarlos en el DVR la configuración del cableado que uso normales por colores, como el cable de red tiene hasta cuatro colores diferentes y cada 1 viene con un color blanco es decir está azul y blanco azul uso el color entero como cable positivo y el color que viene con degradado en blanco para el cable negativo.
The video connection is made through copper cable, in this case, I used category 5E network cable, it was already installed and I only had to change the Balun Videos that were cut to take the equipment, I replaced them to connect them to the DVR the wiring configuration that I use normal colors, such as the network cable has up to four different colors and each one comes with a white color, that is, it is blue and white blue, I use the entire color as positive cable and the color that comes with a white gradient for the negative cable.
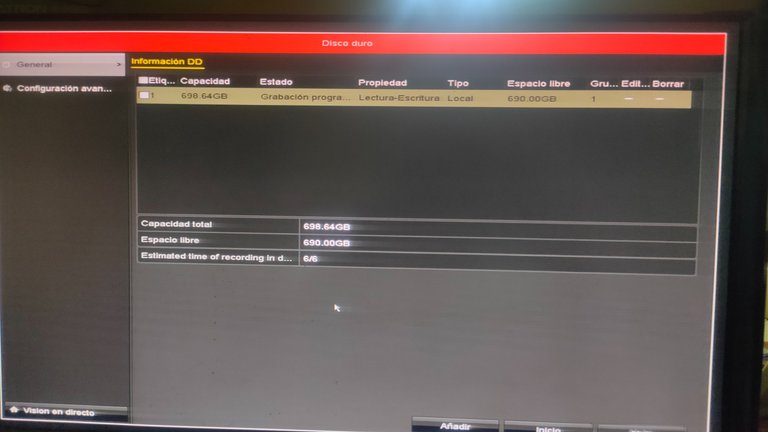
La conexión de El DVR es sumamente sencilla ningún DVR viene con disco duro el disco duro es la unidad de almacenamiento para la grabación de estos vídeos, el DVR solo codifica la señal de las cámaras, pero el disco duro es el responsable de grabar lo que está viendo en este caso utilicé un disco duro de 700 GB que nos da una autonomía aproximadamente de 10 días de grabación con 5 cámaras grabando con una calidad de 1080p.
The connection of the DVR is extremely simple, no DVR comes with a hard drive, the hard drive is the storage unit for recording these videos, the DVR only encodes the signal from the cameras, but the hard drive is responsible for recording what You are seeing, in this case, I used a 700 GB hard disk that gives us approximately 10 days of recording autonomy with 5 cameras recording with 1080p quality.
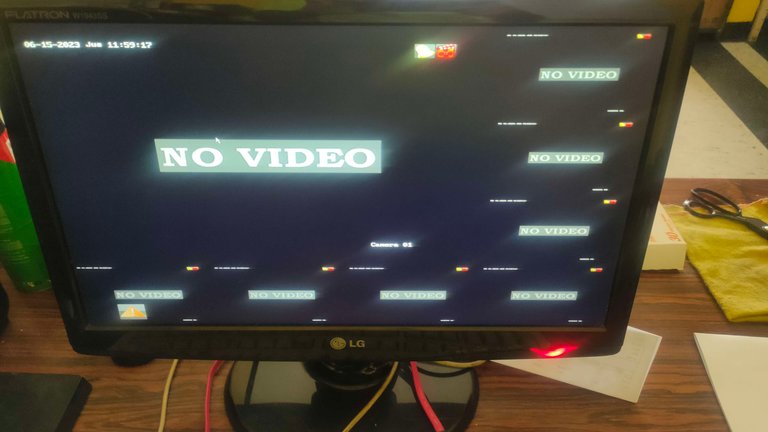
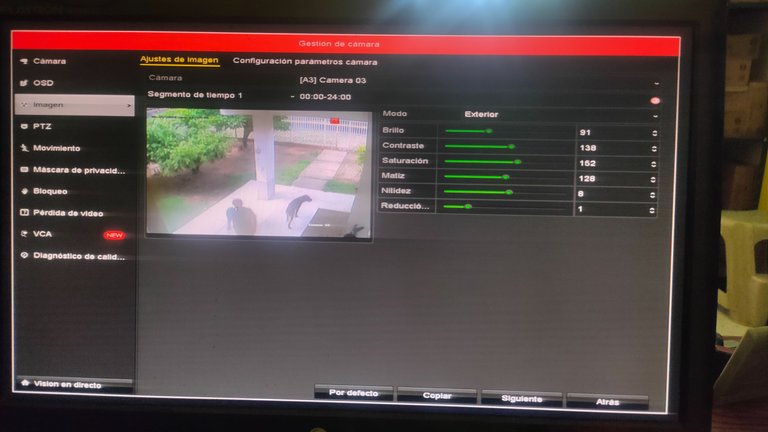
Una vez conectado el disco duro ya conecté todo el cableado en las cámaras para encender el equipo y poder ver las imágenes con claridad luego de esto solamente son configuraciones técnicas del sistema que nos solicita una clave de acceso, cuando el DVR está nuevo la primera clave que uses es la clave que quedará fija en ese DVR, también hay que configurar una clave de red para la seguridad interna del DVR y un patrón para poder acceder al menú principal del sistema.
Once the hard disk is connected, I already connected all the wiring in the cameras to turn on the equipment and be able to see the images. After this, they are only technical configurations of the system that ask us for an access code, when the DVR is new, the first code that you use is the key that will remain fixed in that DVR, you also have to configure a network key for the internal security of the DVR and a pattern to be able to access the main menu of the system.
Una vez dentro de la configuración interna del DVR lo primero que debemos hacer es formatear el disco duro eso se hace simplemente entrando a la parte de la unidad de disco duros y dándole la acción iniciar, esto nos va a pedir darle formato al disco y se inicia la grabación de los vídeos el sistema está diseñado de manera que automáticamente una vez que llegue a la capacidad de grabación se va a reescribir la grabación del último día que tenga es decir en este caso que tenemos 10 días de grabación cuando transcurran los 10 días el sistema automáticamente borrará lo que hay en el día 1 para grabar el día 11 y así sucesivamente.
Once inside the internal configuration of the DVR, the first thing we must do is format the hard disk, this is done simply by entering the hard disk drive part and giving it the start action, this will ask us to format the disk and it will start recording the videos the system is designed in such a way that automatically once it reaches the recording capacity it will rewrite the recording of the last day it has, that is, in this case, we have 10 days of recording when the 10 days elapse the system will automatically delete what is on day 1 to record on day 11 and so on.
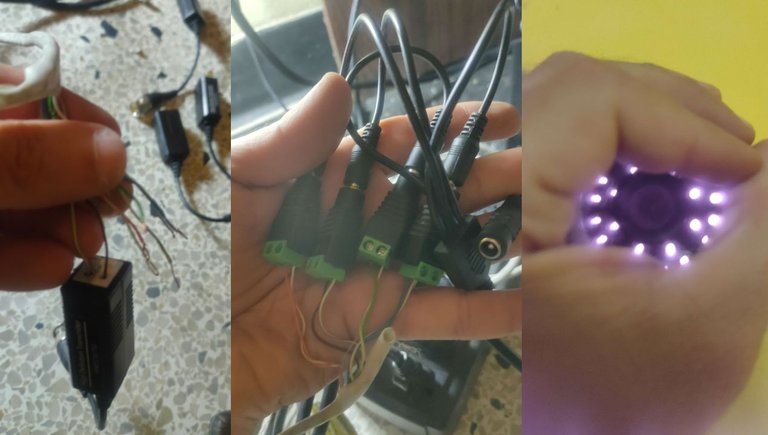
Cómo pueden ver ya esta es toda la instalación no tiene mayor complejidad ya las cámaras estaban instaladas y la configuración como les dije es bastante sencilla, yo me guío por los colores de los cables el que está entero y el que está degradado con blanco para cada Cámara hay que tener cable para el video y cable para la electricidad.
As you can see, this is the entire installation, it does not have much complexity, the cameras were already installed and the configuration, as I told you, is quite simple, I am guided by the colors of the cables, the one that is whole and the one that is degraded with white for each Camera must have cable for video and cable for electricity.

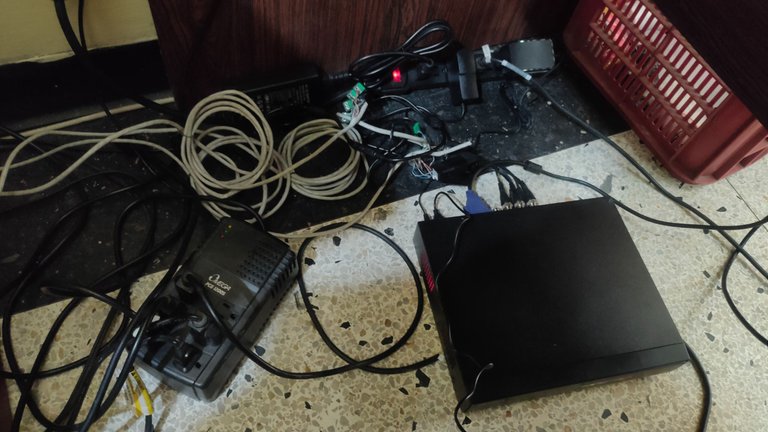
Una vez terminada toda la instalación, esta vez lo dejé de manera totalmente visible porque la última vez lo escondí un poco pero como les dije los dueños me dijeron que iban a mandar hacer una pequeña bóveda para proteger este equipo, pero se confiaron en que estaba escondido y nunca la mandaron a hacer, por este motivo en esta ocasión quise dejarlo de manera muy visible para que ellos mismos recuerden que tienen que mandar hacer esta protección para que no ocurra lo mismo nuevamente.
Once all the installation was finished, this time I left it completely visible because the last time I hid it a bit but as I told you, the owners told me that they were going to have a small vault made to protect this equipment, but they trusted that it was hidden and they never ordered it to be done, for this reason on this occasion I wanted to leave it in a very visible way so that they themselves remember that they have to have this protection done so that the same thing does not happen again.
Gracias por ver mi contenido y espero que te sea de utilidad, las imágenes fueron tomadas directamente desde mi teléfono Realme Q.
Thank you for viewing my content and I hope you find it useful, the images were taken directly from my Realme Q phone.


Registrate en KingOfDuel
Registrate en Splinterlands
Registrate en GodsUnchained
My social networks
Hive: @elfino28
https://twitter.com/ElFinoNFT
https://www.instagram.com/ElFinoNFT
https://www.youtube.com/@ElFino28

0
0
0.000
Thanks for using the #services tag, the go-to tag to grow your LIST token power.
You can also use other tags (other than #services tag) to earn LIST tokens and grow your LIST Power.
Check out those additional tags here. Click on the tags to activate a dropdown that provides a description on how to use these tags properly.
If you are keen to grow your LIST Power to 50K, you may want to join the 50K List Power Club. If you do, please let me know.
Gracias @elfino28 por el tutorial, lastima que surge porque los amigos de lo ajeno destrozaron el local, pero gracias a tu reparación hemos podido aprender como se instalan estos equipos, súper necesarios para proteger nuestros intereses, lastima que los dueños no hicieron la bóveda, pero dejanko así quizás ahora sí la hagan
si lastima uno aprende a la mala y estoy seguro que esta ves si van hacer las cosas bien. gracias por pasar
Muy buen trabajo amigo, le ahorraste dinero aprovechando todo lo que estaba en buen estado y me imagino que aprendieron la lección y mandaran a hacer la bóveda.