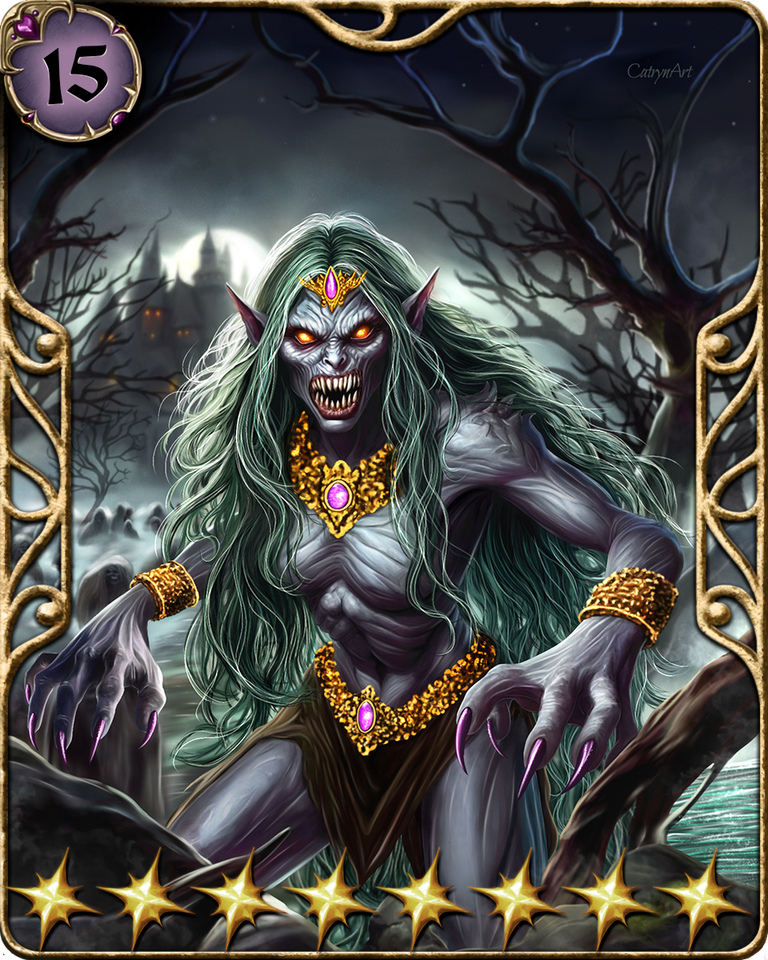
ZIRANA Extended Version(Swamp Horror) 🔮⚔️🎨|#RadaQuest Drawing
Hola comunidad! Mis saludos a todos en esta noche esperando les haya ido muy bien en el día. Bienvenidos! 😉🙂👋😄💕❤️
Hello community! My greetings to everyone tonight, I hope your day has gone very well. Welcome!😉🙂👋😄💕❤️


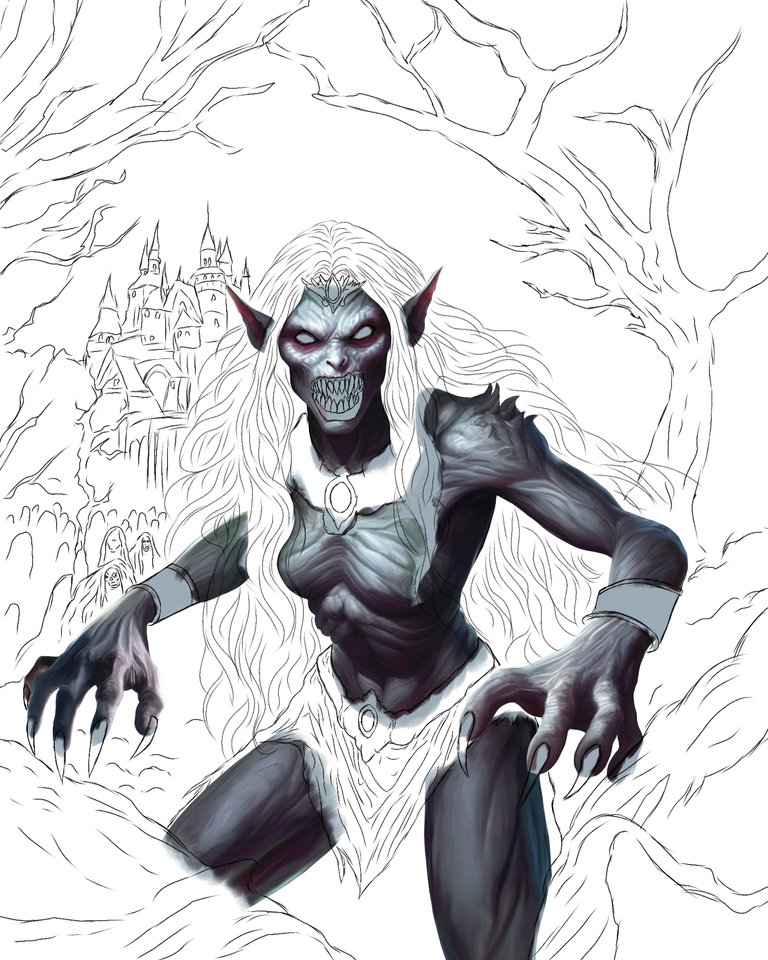
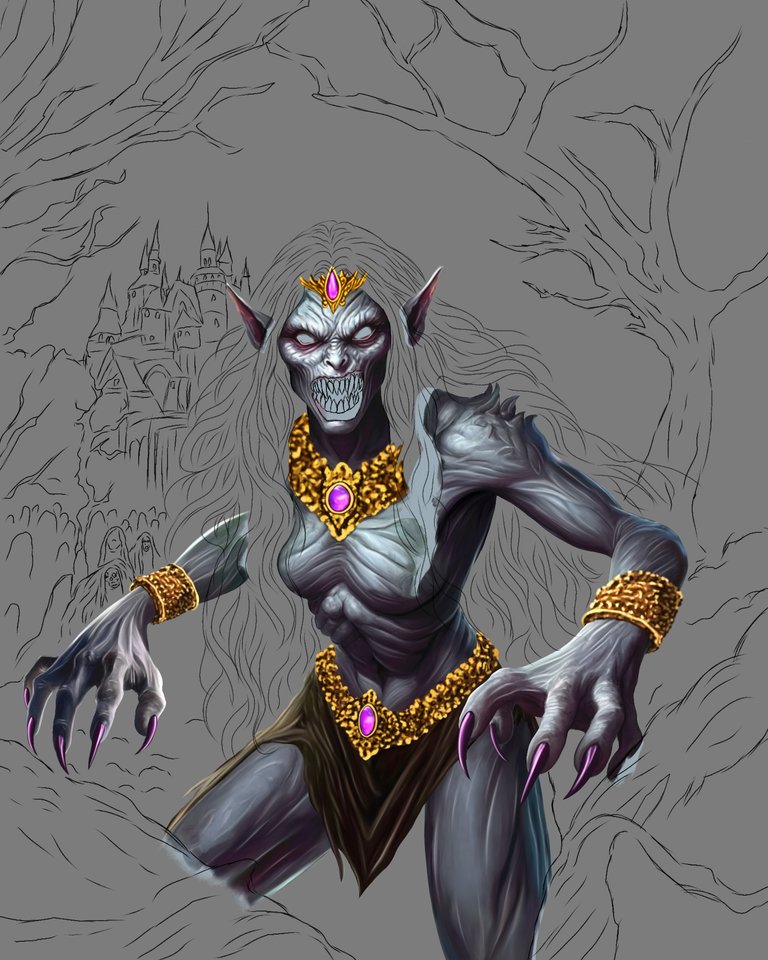
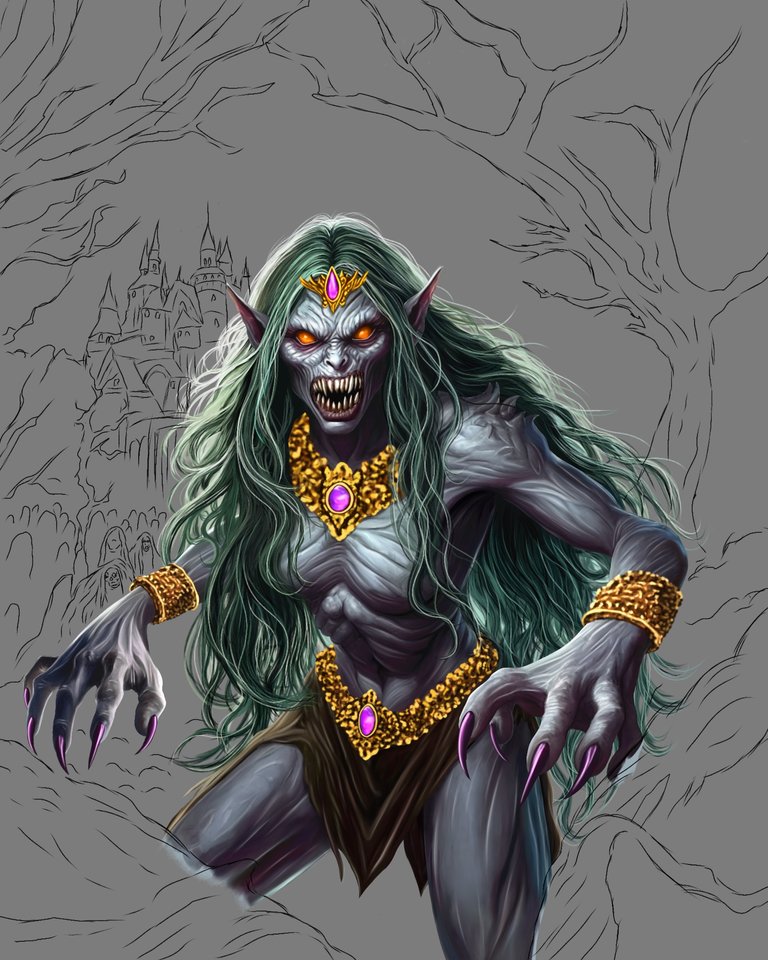
En esta ocasión vine a compartir la versión extendida de ZIRANA(Horror del Pantano) que realice para el juego @RadaQuest. Este personaje de la facción sombra que tiene la habilidad de transformarse en un monstruo del pantano que cuando se siente amenazada o enfurecida, puede liberar su verdadera forma, en una criatura de gran tamaño, con garras, grandes colmillos y de aspecto intimidante. Quería mostrarla en una transformación completa como un monstruo del pantano. Quería que se viera con un aspecto bastante aterrador, acorde con su naturaleza sombría y su poder destructivo. El proceso de realización de este dibujo fue algo inquietante y desafiante para mí, porque quería lograr una piel muy texturizada que ayudara a dar el aspecto aterrador. Me llevó varias horas seguidas crear esta textura de la piel con iluminación y trazos más oscuros. También me esmeré en los detalles de las uñas, la tela que son vestigios que quedan luego de su cambio de forma, los accesorios y el cabello, buscando darle un toque de realismo y personalidad. Para el fondo, elegí un paisaje nocturno con un castillo y un cielo estrellado, que contrasta con los colores de Zirana. Añadí algunos efectos de brillo, sombra y neblina para darle más profundidad y atmósfera al dibujo. Y bueno, me siento muy orgullosa de haber participado en este proyecto y de haber aportado mi granito de arena al universo de #RadaQuest. Creo que este juego tiene mucho potencial y que ofrece una experiencia única a los amantes de las cartas coleccionables y de la fantasía. Les invito ahora me acompañen en este proceso!😊💕🙂
On this occasion I came to share the extended version of ZIRANA(Swamp Horror) that I made for the game @RadaQuest. This character from the shadow faction has the ability to transform into a swamp monster that, when it feels threatened or enraged, can release its true form, a large creature with claws, large fangs, and an intimidating appearance. She wanted to show her in a complete transformation as a swamp monster. She wanted her to look quite scary, befitting her shadowy nature and the destructive power of her. The process of making this drawing was somewhat disturbing and challenging for me, because I wanted to achieve a very textured skin that would help give the scary look. It took me several hours straight to create this skin texture with lighting and darker strokes. I also took great care in the details of the nails, the fabric that are vestiges that remain after its change of shape, the accessories and the hair, seeking to give it a touch of realism and personality. For the background, I chose a night landscape with a castle and a starry sky, which contrasts with the colors of Zirana. I added some glow, shadow and haze effects to give more depth and atmosphere to the drawing. And well, I feel very proud to have participated in this project and to have contributed my grain of sand to the #RadaQuest universe. I think this game has a lot of potential and offers a unique experience to fans of collectible cards and fantasy. I now invite you to join me in this process!😊💕🙂
Puedes adquirir esta tarjeta de @RadaQuest haciendo Click en el siguiente enlace NeftyBlocks :
You can purchase this card from @RadaQuest by clicking on the following link NeftyBlocks :
Link Comprar Tarjeta - Zirana (Horror Del Pantano)
Link Buy Card - Zirana (Swamp Horror)

Etapas del Dibujo/Drawing Stages
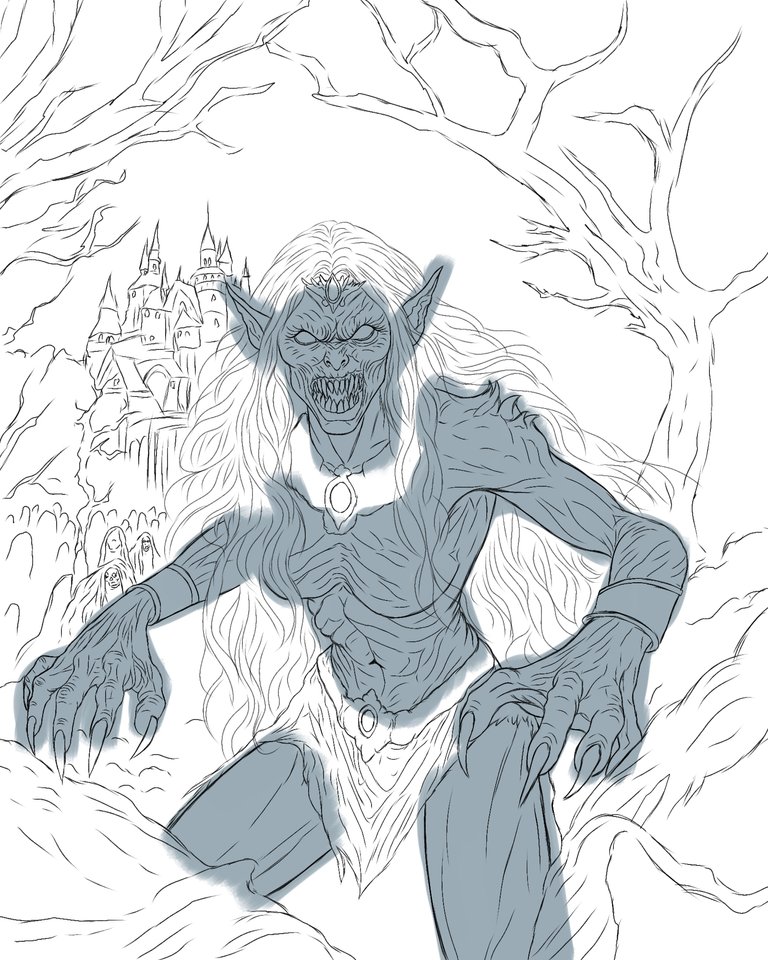
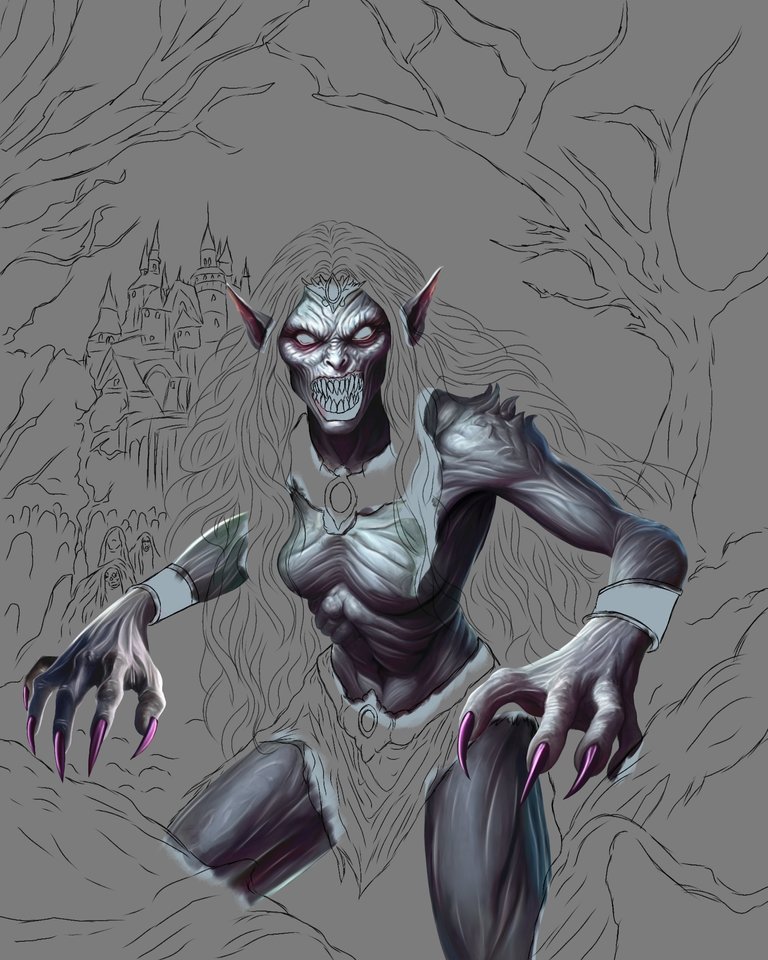
Lo primero que hice fue realizar el boceto en limpio con la brocha tipo pelo, usando varias capas para ir definiendo la forma y la pose de esta versión extendida de Zirana. Luego pasé a pincelar con plano real un color base para la piel. También seguí pincelando tonalidades más oscuras para las sombras y también la iluminación, usando diferentes opacidades. Fui difuminando para mezclar y suavizar los colores, creando un efecto de volumen y profundidad. En otra capa, fui pincelando las grietas con líneas más delgadas, usando un tono más oscuro. Estas grietas representaban las pequeñas cubrían la piel de Zirana en la versión base resultado de las incontables transformaciones que ha sufrido a lo largo del tiempo. Segui difuminando las líneas para que se integraran mejor con los colores base. Así seguí con varias capas hasta lograr la textura deseada. Así mismo, pincelé con líneas más iluminadas para hacer el contraste y resaltar más la textura.
The first thing I did was make a clean sketch with the hair brush, using several layers to define the shape and pose of this extended version of Zirana. Then I started brushing a base color for the skin with a real plane. I also continued brushing darker tones for the shadows and also the lighting, using different opacities. I blended to mix and soften the colors, creating an effect of volume and depth. In another layer, I brushed the cracks with thinner lines, using a darker tone. These cracks represented the small ones covering Zirana's skin in the base version resulting from the countless transformations she has undergone over time. I continued blurring the lines so that they would integrate better with the base colors. So I continued with several layers until I achieved the desired texture. Likewise, I brushed with more illuminated lines to create contrast and highlight the texture more.

 |  |
 |  |
 |  |

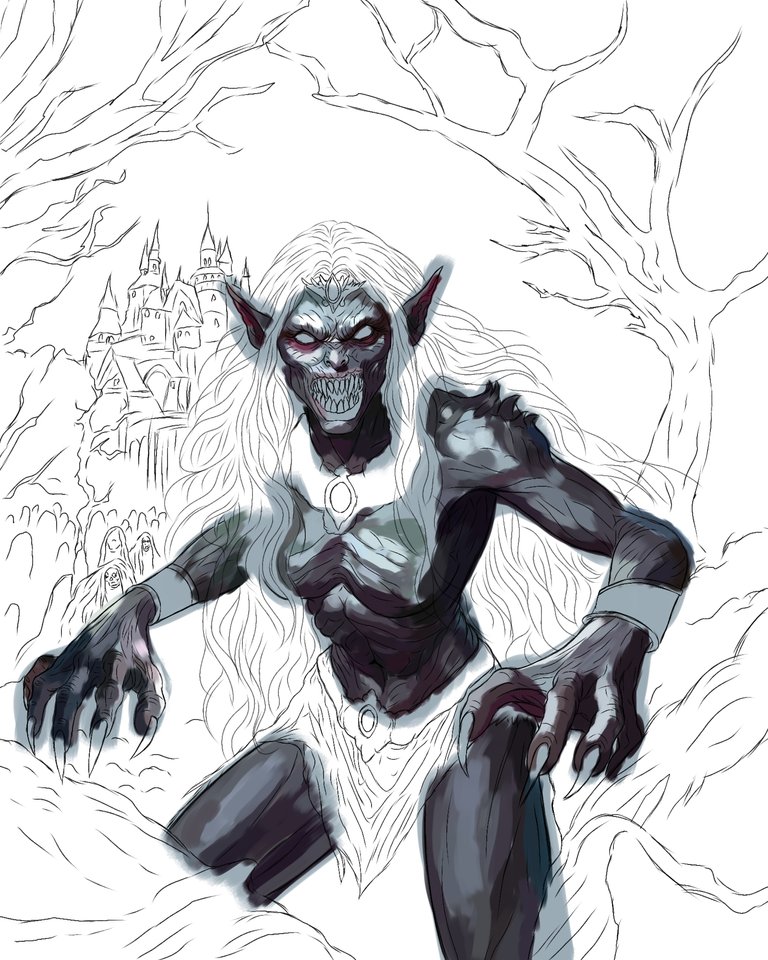
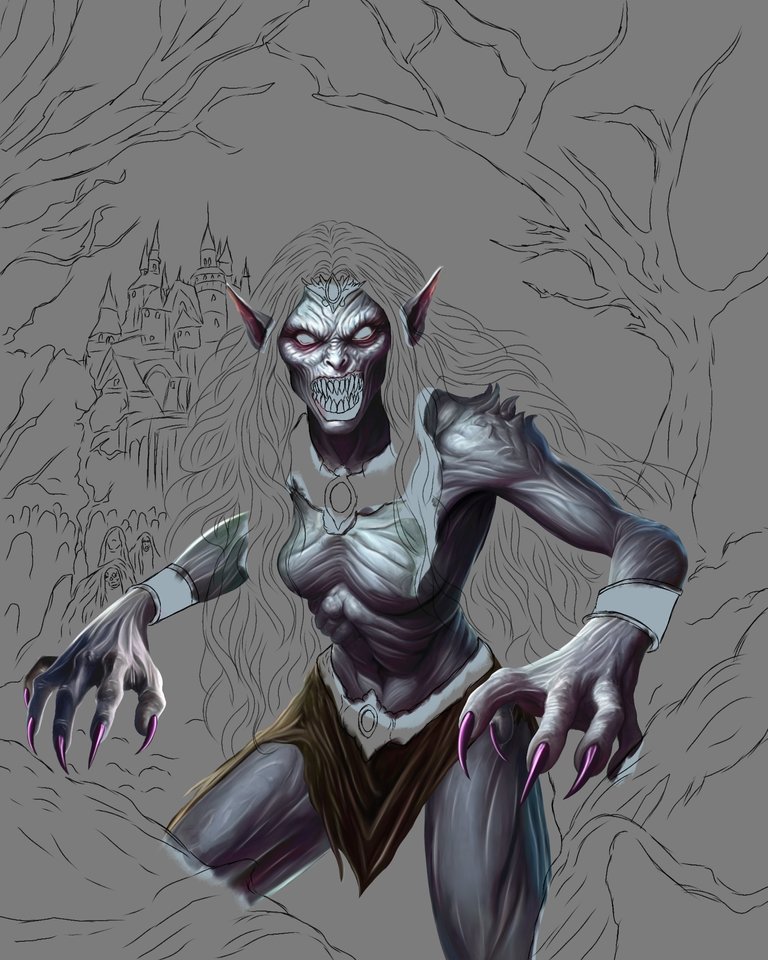
Fui limpiando con borrador los bordes que sobresalían del boceto, para darle una forma más definida al cuerpo de Zirana. Luego, en otra capa por encima, trabajé las uñas con lilas oscuros y claros, usando la brocha tipo plano real. Me gustó el resultado, ya que le daba un toque de color y contraste a las garras. Procedí con la prenda de ropa, que era una túnica que cubría parte de la cintura y las piernas de ella. Pincelé pliegues en una capa aparte, usando un tono más oscuro y también más claros, para crear los relieves en ella. También le di algunos toques de iluminación y sombra, para darle más realismo. Seguí con los accesorios, como el collar, la tiara, los brazaletes y un cinturón con una hebilla de diadema. Usé un color amarillo intenso para el metal, dándole esa textura algo rústica, pincelando trazos cortos y otros largos y después difuminando un poco, usando el método normal de mezcla. Después me quedé dedicándome a su cabello, con varios tonos usando método normal de mezcla. Usé la brocha abanico para crear el efecto de las hebras, y también la tipo pelo para definir aún más los mechones. Le di algunos toques de iluminación y sombra, para que se viera más natural y con movimiento.
I was cleaning the edges that stood out from the sketch with an eraser, to give a more defined shape to Zirana's body. Then, in another layer on top, I worked the nails with dark and light lilacs, using the royal flat brush. I liked the result, since it gave a touch of color and contrast to the claws. I proceeded with the article of clothing, which was a tunic that covered part of her waist and legs. I brushed creases on a separate layer, using a darker tone and also lighter ones, to create the reliefs on it. I also gave it some touches of lighting and shadows, to give it more realism. I continued with the accessories, such as the necklace, tiara, bracelets, and a belt with a headband buckle. I used a deep yellow color for the metal, giving it that somewhat rustic texture, brushing short and long strokes and then blending a little, using the normal mixing method. Then I dedicated myself to her hair, with various shades using the normal mixing method. I used the fan brush to create the effect of the strands, and also the hair brush to further define the strands. I gave it some touches of lighting and shadows, so that it looked more natural and with movement.
 |  |
 |  |
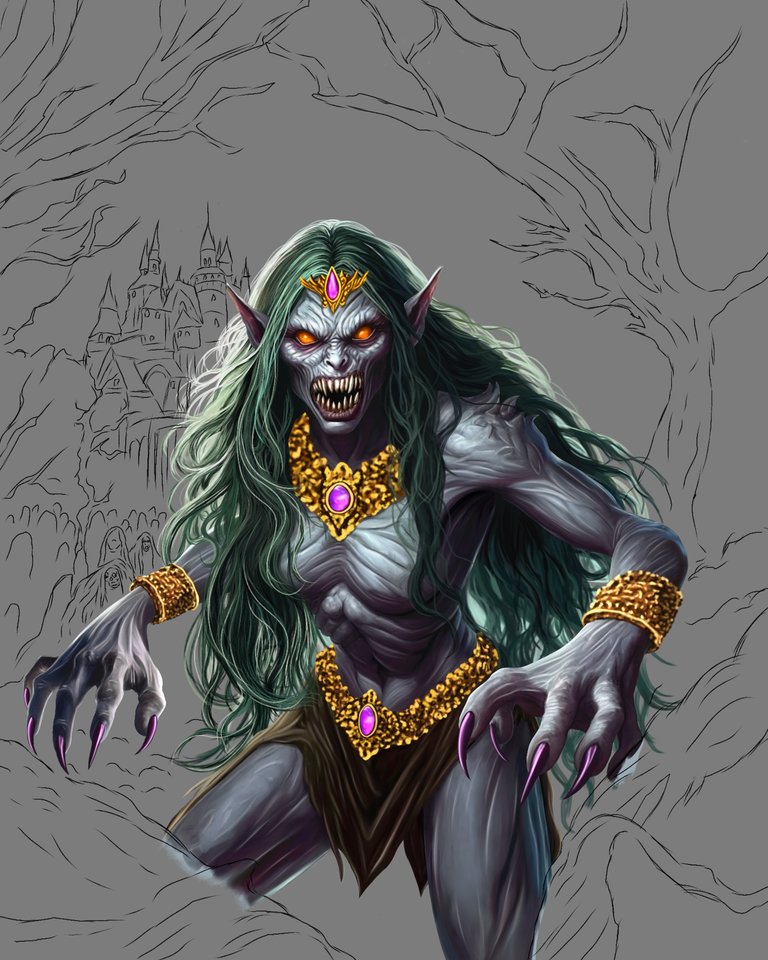 |  |
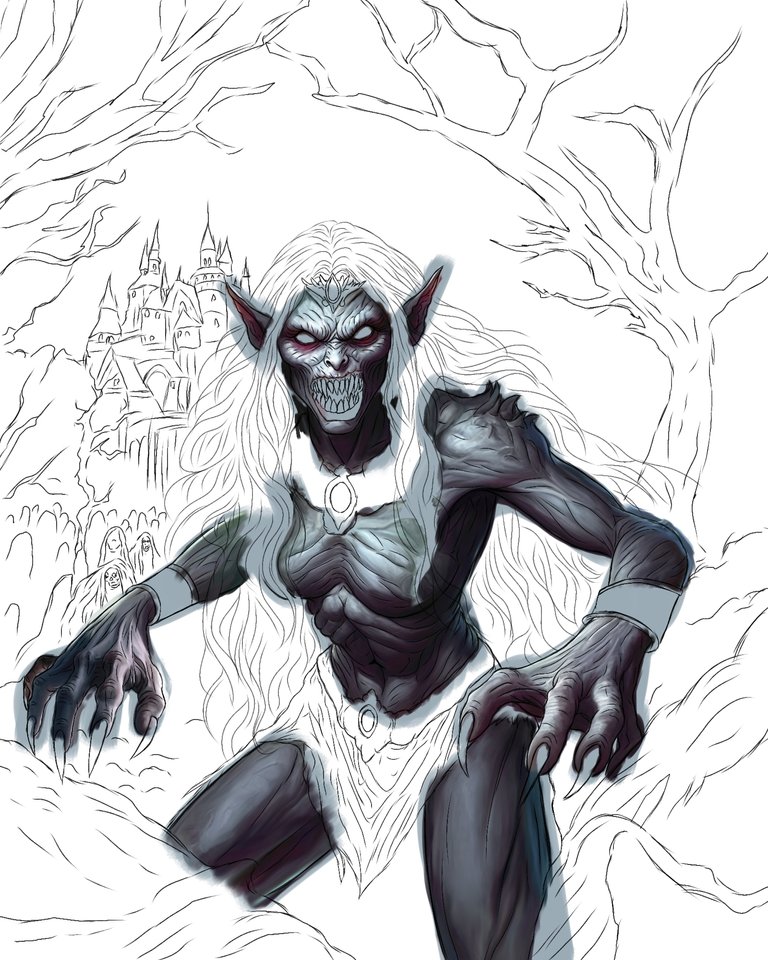
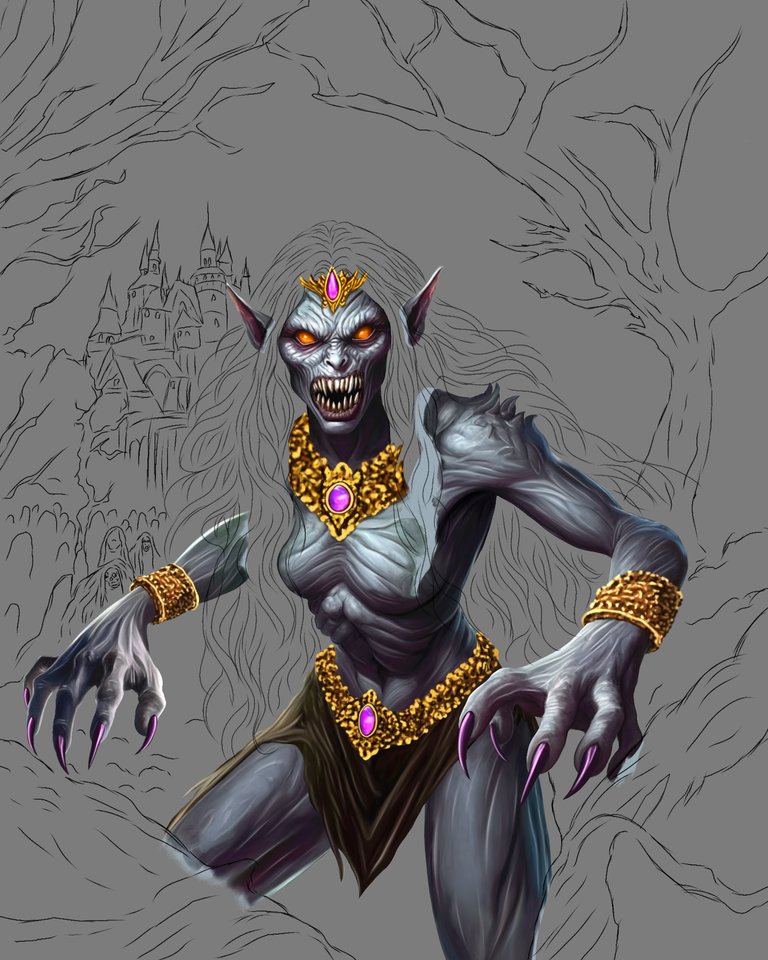
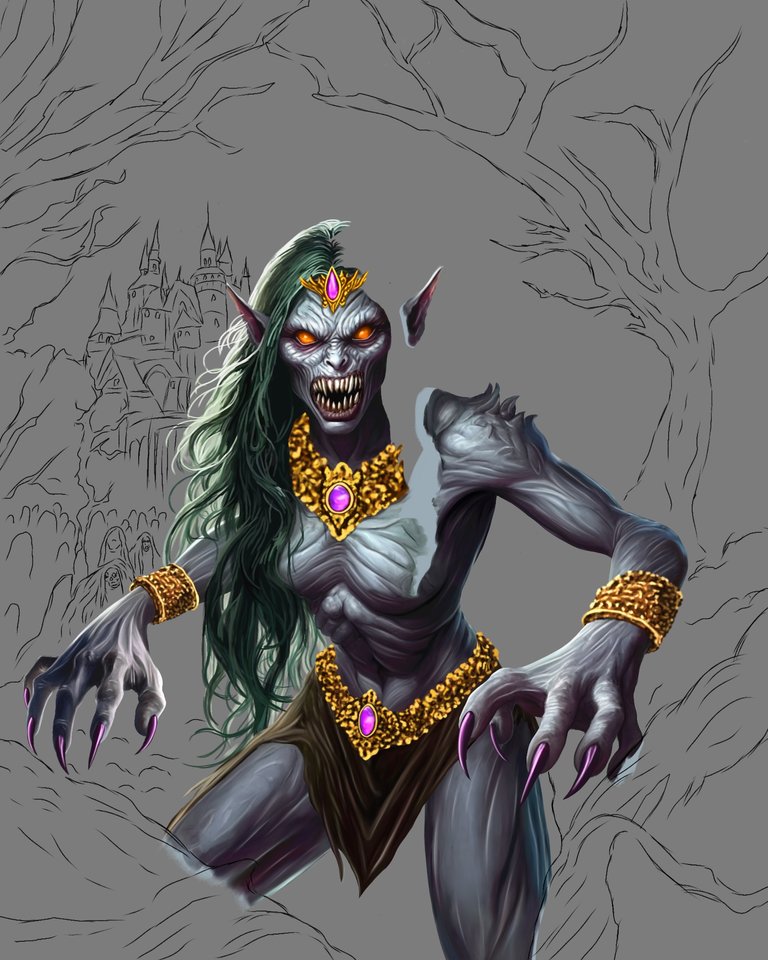
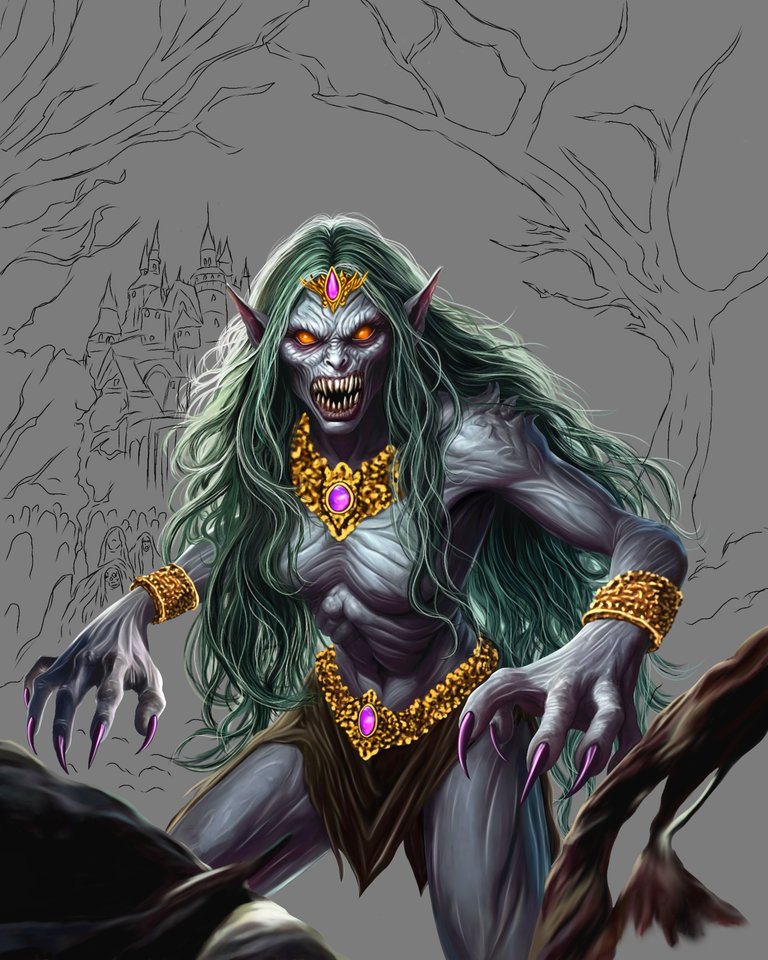
Al ver terminado todo el personaje, empecé a dedicarme al fondo, oscureciéndolo un poco más, para crear un contraste con Zirana. Cloné algunas capas para ir creando el fondo, que era un paisaje nocturno con un castillo. Quería un efecto de neblina en su entorno, para darle más misterio y ambientación. Apliqué la brocha nube con opacidad media baja, para lograrlo. También pincelé un enorme castillo de fondo, como en la versión base, usando un gris oscuro y algunos toques de iluminación. Para el firmamento, usé un azul oscuro, y texturicé con la brocha nube real, y para crear las estrellas use punto de brillo. Agregué algunos leves brillos en sus ojos con purpurina, para darle más expresividad y vida. También en sus prendas, para que se vieran más llamativas. Apliqué un poco de superposición, para darle más intensidad al color. Y así terminé esta versión que espero hayan disfrutado.
When I saw the entire character finished, I began to focus on the background, darkening it a little more, to create a contrast with Zirana. I cloned some layers to create the background, which was a night landscape with a castle. I wanted a fog effect in its surroundings, to give it more mystery and atmosphere. I applied the cloud brush with medium-low opacity to achieve this. I also brushed a huge castle in the background, like in the base version, using a dark gray and some highlights. For the sky, I used a dark blue, and textured with the royal cloud brush, and to create the stars I used glitter point. I added some slight sparkles in his eyes with glitter, to give him more expressiveness and life. Also in their clothes, so that they looked more striking. I applied a little overlay, to give more intensity to the color. And so I finished this version that I hope you enjoyed.
 |  |
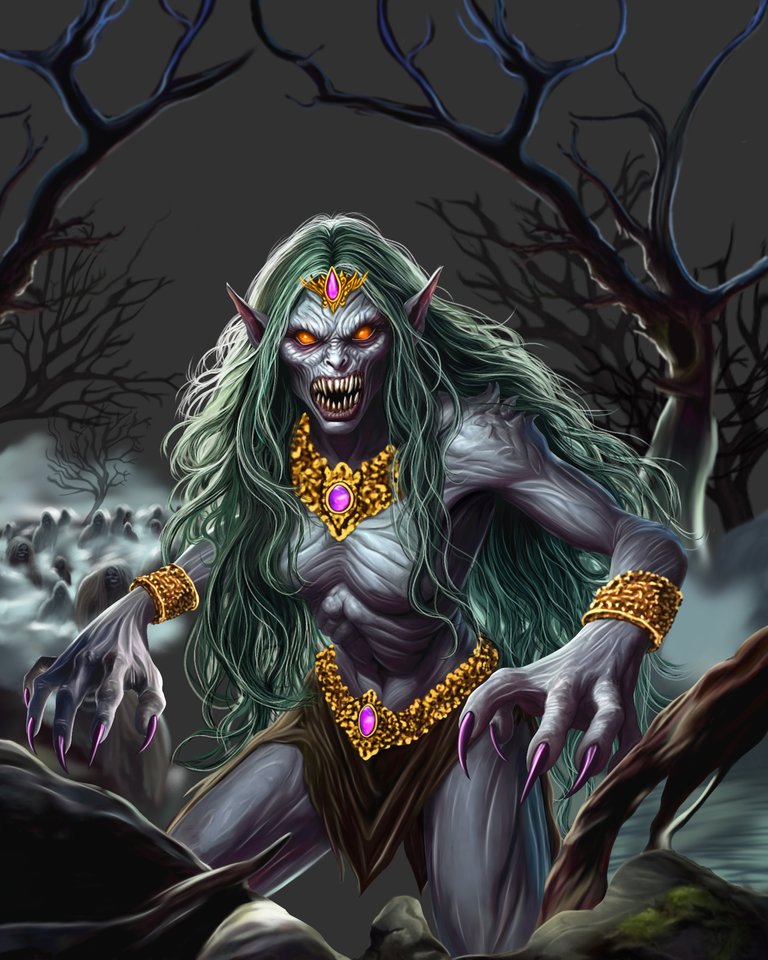 | 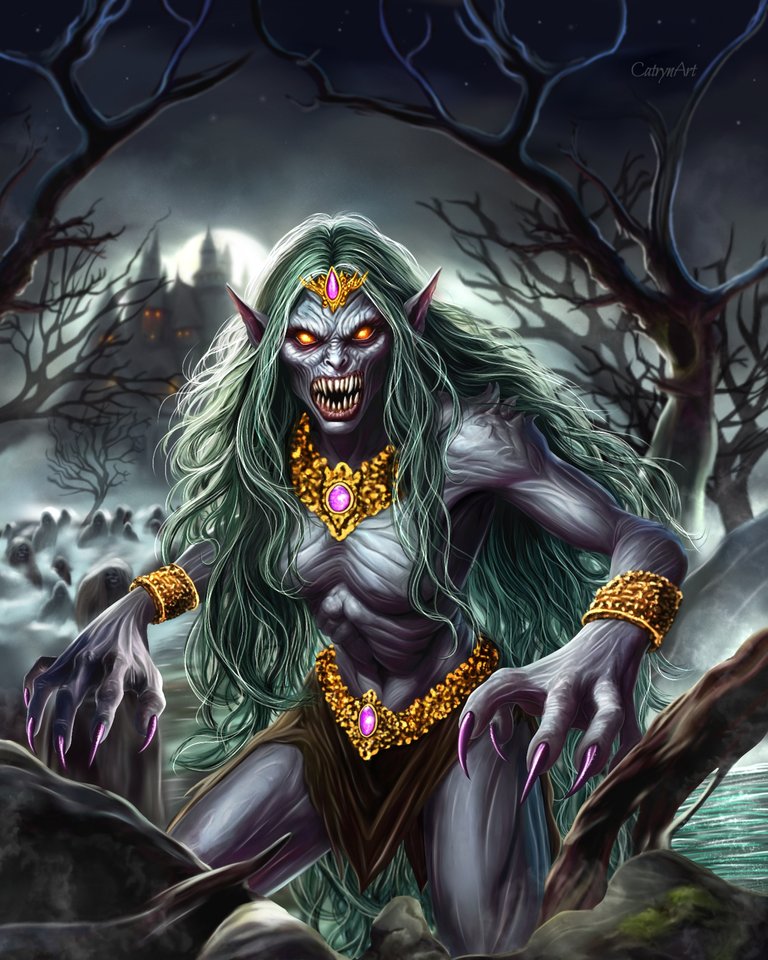 |
ILUSTRACIÓN FINAL/ End Illustration
Me permiti explorar la versión extendida y lograr lo que quería, un personaje que me gustó mucho realizar. Me hizo sentir motivada, ya que fue un reto para mí lograr la textura, el color y el detalle que quería. Me siento muy feliz de haber sido parte de este proyecto y de haber colaborado con el juego. Espero que les haya gustado y que lo aprecien tanto como yo. Les agradezco a todos su tiempo y su atención. Nos vemos en una próxima publicación. Hasta pronto amigos!!.👋😊🙂💕
Les invito a que visiten las páginas de @RadaQuest y se animen a ser parte de este universo fantástico, donde podrán adquirir nuevas cartas en la 9na CAMPAÑA DEL COLISEO DE RADAQUEST HONOR & GLORIA. No se pierdan esta oportunidad de disfrutar de un juego increíble con unos gráficos espectaculares y una historia apasionante.
Si quieres ver más de mis obras, puedes seguirme en mi perfil de Hive.blog , donde comparto mis creaciones y mis experiencias como artista digital. También puedes participar en la segunda edición del CONCURSO DE ARTE organizado por @RadaQuest , donde puedes mostrar tu talento y compartir junto a muchos artistas más.
It allowed me to explore the extended version and achieve what I wanted, a character that I really liked playing. It made me feel motivated, as it was a challenge for me to achieve the texture, color and detail I wanted. I feel very happy to have been part of this project and to have collaborated with the game. I hope you liked it and appreciate it as much as I do. I thank you all for your time and attention. See you in a next post. See you soon friends!!.👋😊🙂💕
I invite you to visit the pages of @RadaQuest and be encouraged to be part of this fantastic universe, where you can acquire new cards in the 9th RADAQUEST HONOR & GLORY COLISEUM CAMPAIGN. Don't miss this opportunity to enjoy an incredible game with spectacular graphics and an exciting story.
If you want to see more of my works, you can follow me on my Hive.blog profile, where I share my creations and my experiences as a digital artist. You can also participate in the second edition of the ART CONTEST organized by @RadaQuest, where you can show your talent and share with many other artists.
🔥 #RadaQuest #drawing #nft #spanish #english #neoxian #creativecoin🔥
Site: https://radaquest.net
Discord: https://discord.gg/3dkrender


Redes Sociales/ Social Networks
Sigueme en/ Follow me in:
👉 Instagram: @catrynart
👉 Twitter: @catrynart
Herramientas Usadas/Used Tools
- Tablet Android/ Android Tablet
- Programa Ibis Paint X/ Ibis Paint X Program
- Traductor Deepl/ Deelp Translator
- Servidor de Imagenes Imgbb/ Imgbb Image Server
- Dactilopintura Digital/ Digital Fingerprint Painting
🌺¡HASTA UN PRÓXIMO POST!/ UNTIL A NEXT POST!🌺
Detenerse es Retroceder
To Stop is to go Backwards

Posted Using InLeo Alpha
Súper ilustración amiga…muy buen post me gusto 😊👏🤩
Muchas gracias @ibarra95 🤗👋🏼😊🌵🪴💚 un saludo amigo
maravilloso
Thanks so 🤗💕
Amazing work! Thank you 💖
Thanks so so dear team❤️Special greetings Marcos, thanks for appreciating and valuing what I like to do. I'm really glad you liked it 🥰.
Thanks so for your support 💞🥰
A PERFECT PIECE OF ART, AMAZING :o
Thanks so dear @damoclesart ☺️💕
amazing artwork as always, thanks for sharing keep up the good work.
!giphy great
@sagarkothari88 vote 15%
Via Tenor
| Hive Curators Community | Support Witness | Follow Curation Trail |
Keep Up the good work on Hive ♦️
Thank you very much for your special support 💞🥰💞🥰💞🥰💞🥰👋🏼 regards
This one turned out creepy and cool! Which android tablet are using to make your art?
Thank you very much dear @castleberry I'm glad you liked it a lot.🥰👋🏼 well in these last months I was able to acquire an iPad pro and I accompany it with Apple Pencil using procreate and I continue with Ibis paint x..
Excelente trabajo, me encanta el paso a paso muy detallado te felicito..
Thanks so ☺️💐
https://twitter.com/AlienArtHive/status/1757108557407981807
Thanks so @eve66 💕