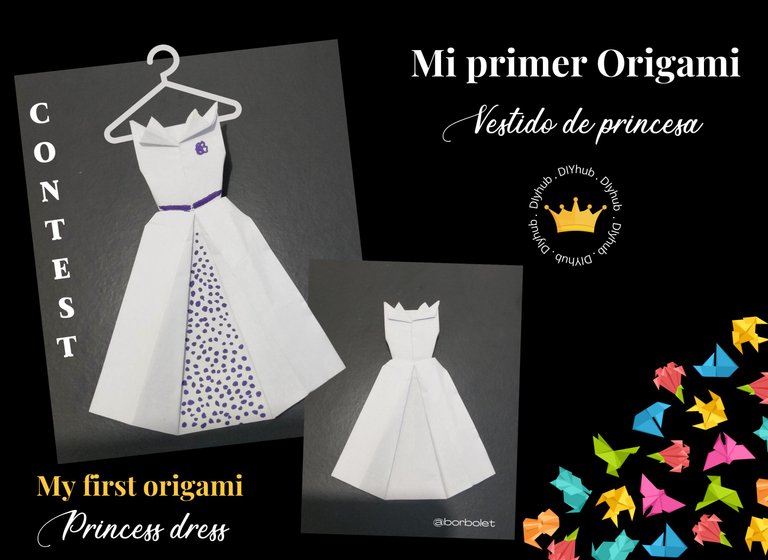
My First Origami Princess Dress (Contest @Diyhub)
ENG 🇺🇲
Hello to all my beautiful people of the hive, I hope you are well wherever you are.
It is a pleasure to be again sharing in this great community @diyhub where many express themselves through art, this time I will be doing my participation in the initiative on making origami, I confess that it is my first time doing this kind of art.
I started to look for videos and to practice a lot I bring you my 2nd attempt, a paper princess dress I hope you like it.
ESP 🇪🇸
Hola a toda mi gente linda de la colmena, espero que estén bien donde quiera que se encuentren.
Es un placer estar nuevamente compartiendo en esta gran comunidad @diyhub donde muchos se expresan a través del arte, en esta ocasión estaré haciendo mi participación en la iniciativa sobre hacer origami, confieso que es mi primera vez haciendo este tipo de arte.
Me puse a buscar videos y a practicar mucho les traigo mi 2do intento, un vestido de princesa de papel espero les guste.
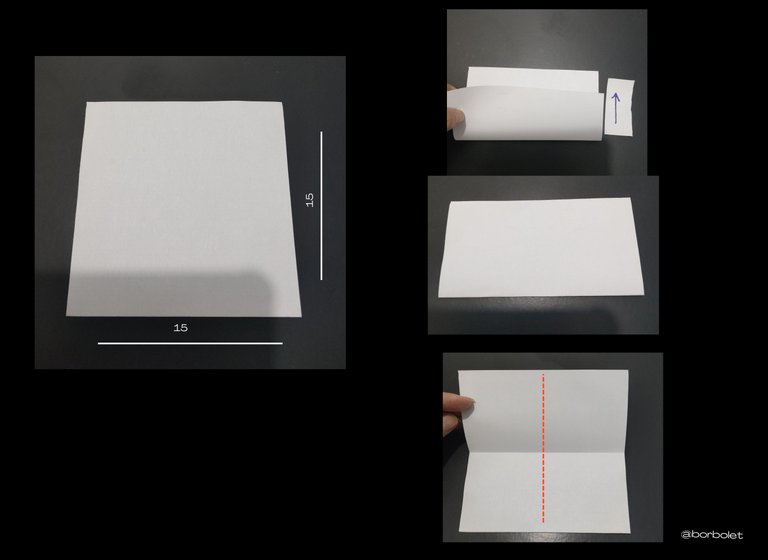
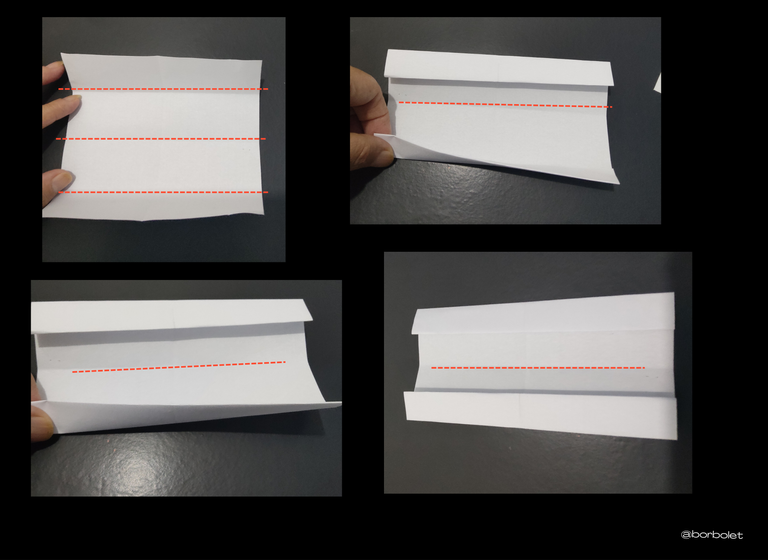
To make my origami I used a 15 cm square sheet of white paper.
The steps:
I made a fold in the central part joining the two ends and mark well. Then I opened my sheet and made another fold in the middle part in the opposite direction to the sheet, the idea is to leave the sheet marked.
Para hacer mi origami utilicé una hoja de papel blanco de 15 cm cuadrados.
Los pasos:
Hice un pliegue en la parte central uniendo los dos extremos y marque bien. Luego abrí mi hoja e hice otro doblez en la parte del medio en sentido contrario a la hoja, la idea es dejar la hoja marcada.
Now we open our sheet and fold from one end towards the central part, the same we will do with the other end.
Ahora abrimos nuestra hoja y doblamos desde un extremo hacia la parte central, lo mismo haremos con el otro extremo.
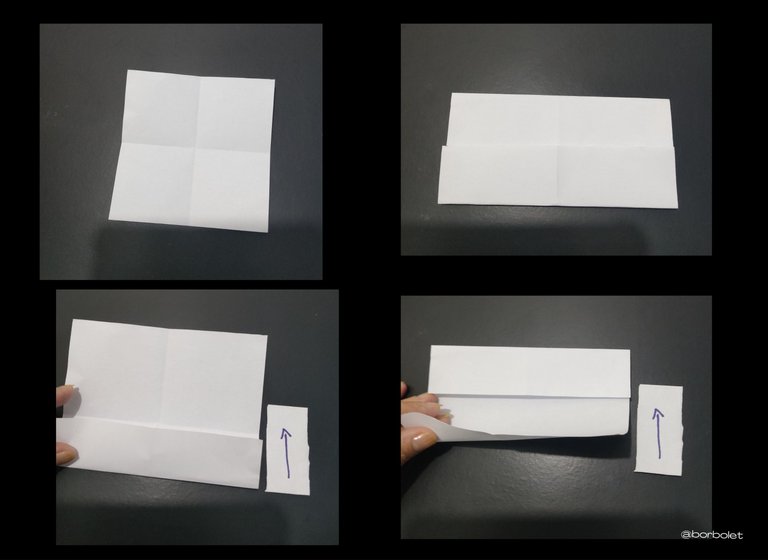
We open our sheet again, now we will fold each end of the sheet only a quarter inward, so that it does not reach the center line that I have marked in red.
Abrimos de nuevo nuestra hoja, ahora doblaremos cada extremo de la hoja sólo una cuarta parte hacia dentro, de forma que no llegue a la línea central que he señalado en rojo.
With the previous result we make a fold again at the ends until we meet the central part. Then we turn our sheet leaving the divisions down and make a fold in the center but on the opposite side to the previous one leaving about two centimeters outside.
Con el resultado anterior volvemos a hacer un pliegue en los extremos hasta encontrarnos con la parte central. A continuación giramos nuestra hoja dejando las divisiones hacia abajo y hacemos un pliegue en el centro pero en el lado opuesto al anterior dejando unos dos centímetros por fuera.
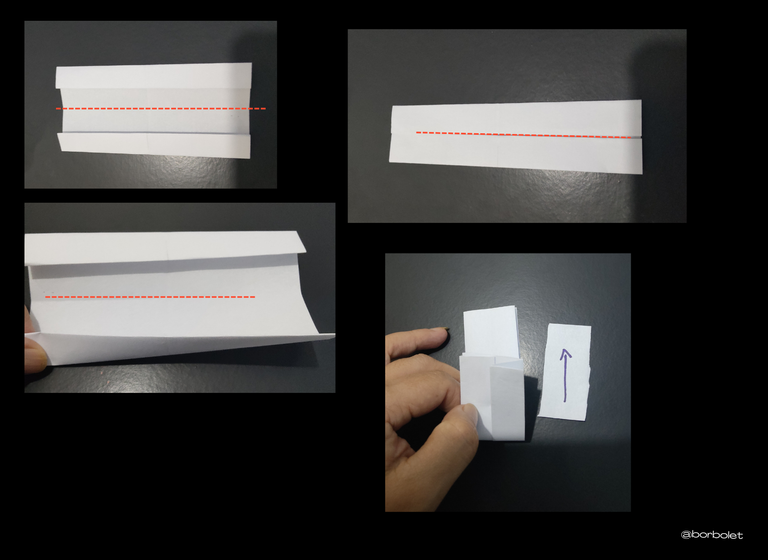
The smaller part will be folded down again making a crease in the central part as shown in the images.
La parte más pequeña se volverá a doblar hacia abajo haciendo un pliegue en la parte central como se muestra en las imágenes.
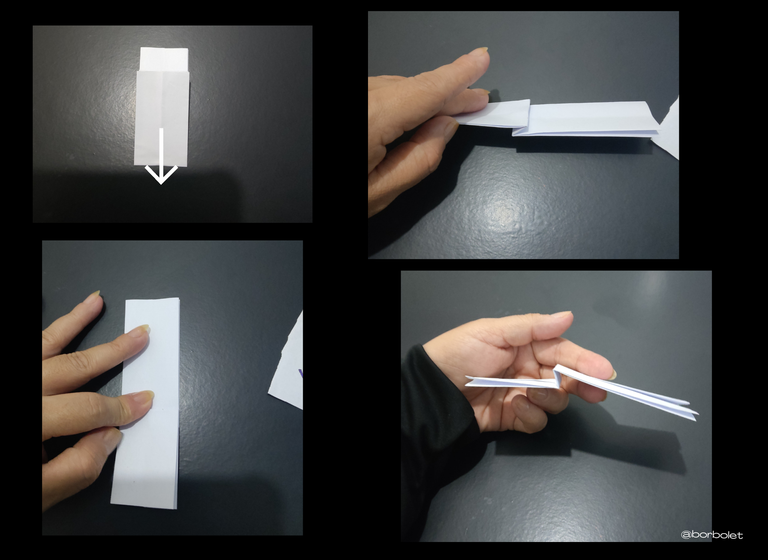
We place our sheet with the folds upwards and the longest part we will open it towards the ends, securing the central part, we will mark our fold, and in the part of the upper folds we fold the ends outwards.
Colocamos nuestra hoja con los pliegues hacia arriba y la parte más larga la abriremos hacia los extremos, asegurando la parte central, marcaremos nuestro pliegue, y en la parte de los pliegues superiores doblamos los extremos hacia fuera.

In the small pleats at the top of our dress we will open it a little, then we will turn it around and make a small pleat at the back and shape the waist part of the dress.
En los pequeños pliegues que hay en la parte superior de nuestro vestido lo abriremos un poco, luego le daremos la vuelta y haremos un pequeño pliegue en la parte trasera y daremos forma a la parte de la cintura del vestido.
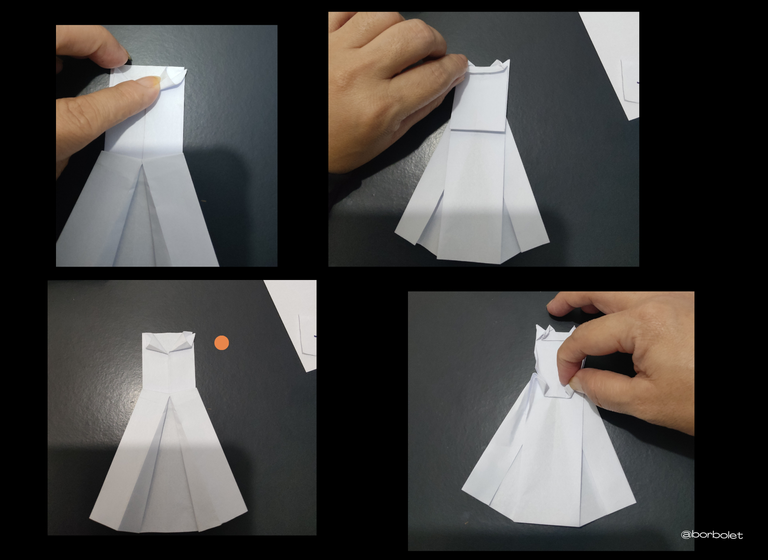
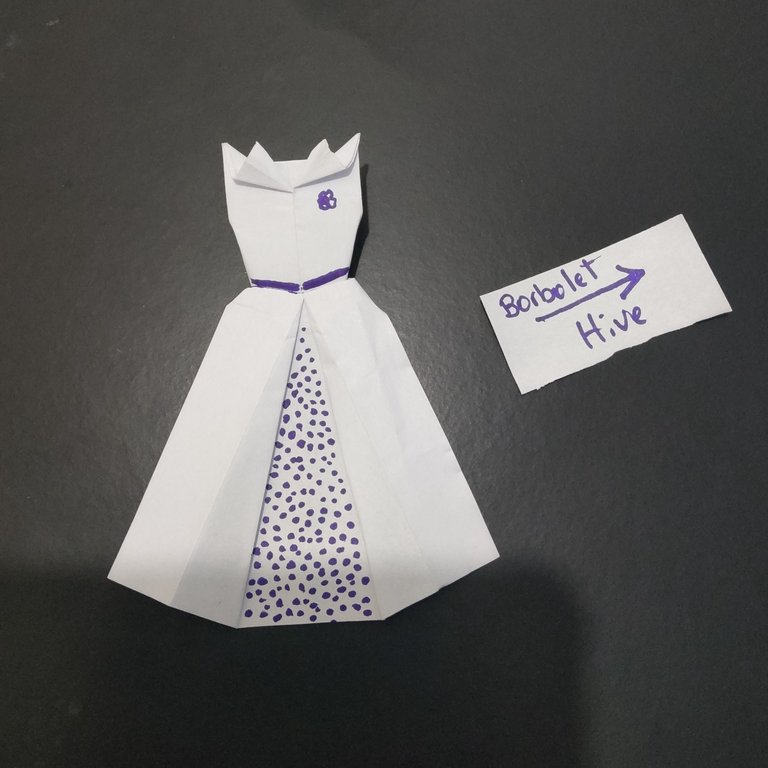
Then you turn around and you can see a nice result, I took a marker and drew a belt, a little flower on one side and some seeds in the center.
Luego te das la vuelta y puedes ver un bonito resultado, cogí un rotulador y dibujé un cinturón, una florecita en un lado y unas semillas en el centro.
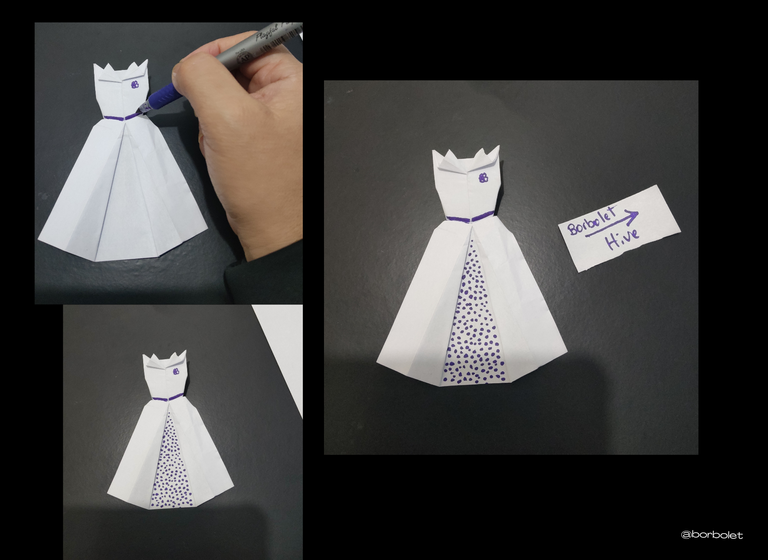
So I finished this origami of this beautiful dress 👗, there were many steps that seemed endless, I tell you that it has been a very nice experience, at first I did not get this piece I did it on the second try, it's good because it helps a lot to have concentration and use much more creativity.
So I reached the end of this post I hope you have understood all these steps that were a challenge for me but happy to be able to show it to everyone.
I say goodbye until another opportunity wishing you all the best in the world.
Así que terminé este origami de este hermoso vestido 👗, fueron muchos pasos que parecían interminables, les cuento que ha sido una experiencia muy bonita, al principio no me salía esta pieza lo hice al segundo intento, es bueno porque ayuda mucho a tener concentración y a usar mucho más la creatividad.
Así llegue al final de este post espero que hayan entendido todos estos pasos que fueron un reto para mi pero feliz de poder mostrarlo a todos.
Me despido hasta otra oportunidad deseándoles todo lo mejor del mundo.

Credits
Content-original
Photos taken with my phone
Editing resources canva
Creditos
Contenido-original
Fotografias tomadas con mi teléfono
Recursos de edición canva
Se ve muy lindo 😍 que bien que te animaste a participar!
suerte! 😉
Graciaaasss me alegra muchísimo que sea de tu agrado, fue un placer poder compartir en esta iniciativa, saludos 🤗 🌺
Te quedo precioso mi bella @borbolet. me encanto, pudo ser el primero pero te quedo muy lindo. Éxitos en el concurso...
!DIY
Graciaaaaaasss hermosa me gusto mucho participar, primera vez que hago un origami se lo mostré a mi familia y le gustó mucho también estoy muy contenta, saludos y bendiciones para todos.🤗🌺
Excellent work despite being the first. Thank you for sharing in our community and participating in the contest. Success
Thanks for the support @diyhub team, it was a pleasure to participate I congratulate you for these initiatives keep going.... 💪🤗
You can query your personal balance by
!DIYSTATSThank you 😊
Un hermoso vestido al estilo vintage, quedo muy bien amiga, mucha suerte en el concurso 😊
Hey gracias me alegra que te haya gustado, es primera vez que hago este tipo de trabajo y me animo muchísimo. Tengo que hacer otros jejeje.
It turned out really cute, in my training as a seamstress we also had to make our drawings, such paper dresses and glue them on. Thank you for the nice reminder.
!PIZZA
!LUV
!hiqvote
@themyscira, the HiQ Smart Bot has recognized your request (1/2) but the mana is too low. Try again later.
As a consolation, @borbolet gets !PIZZA from @hiq.redaktion.
For further questions, check out https://hiq-hive.com or join our Discord. And don't forget to vote HiQs fucking Witness! 😻
@borbolet, @themyscira just sent you LUV. (1/1)
Hola bueno, yo de costura si que no se nada solo conocer alguna partesita de alguna prenda, pero hacer o crear una prenda eso es un arte admirable, que bueno que hayas dado el visto bueno gracias por apoyar ☺️ saludos y bendiciones.
$PIZZA slices delivered:
@themyscira(2/5) tipped @borbolet
🤗 🍕🍕 gracias.
Quedó precioso, muy creativo 👏🏽
Hey gracias por apreciar linda
What a cute little dress!❤
Hehe if it was nice, thanks for appreciating it pretty...
Guaooo te quedó hermoso, maravilloso