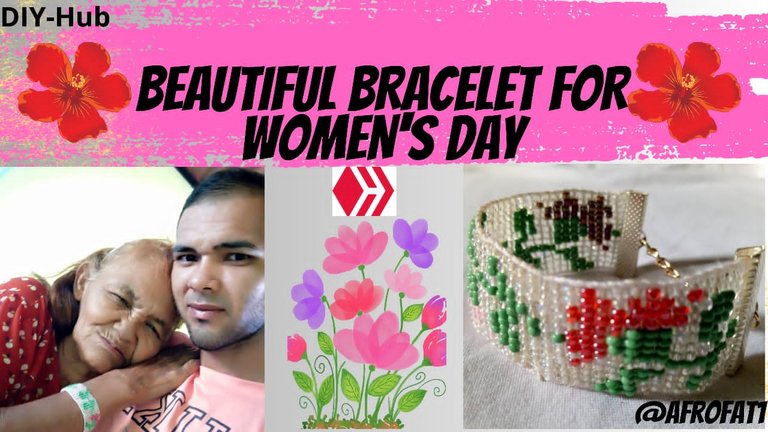
💐Beautiful Woman's Day Bracelet💐💐Hermoso Brazalete Para el Día De La Mujer💐
Greetings dear fellow members of this beautiful and creative DIYHub community, today I join the contest in honor of women, I want to pay a well-deserved recognition to all women in the world.
International Women's Day is a time to celebrate the strength, courage and perseverance of those women, who despite the obstacles that have been put in their way, have fought for their rights and have left a significant mark on society.
I would like to congratulate all women for their effort, dedication and courage, they are an example of inspiration for all of us.
My dear colleagues, today I have come to share with you a beautiful creation that I have made for my entry in this beautiful contest, a beautiful bracelet of flowers in loom inspired by the most beautiful being on this earth, as is my mother, who is also named Flower.
Next I will be showing you the materials used for the elaboration of this beautiful bracelet, later I will be presenting the step by step used for the elaboration of this beautiful costume jewelry accessory.
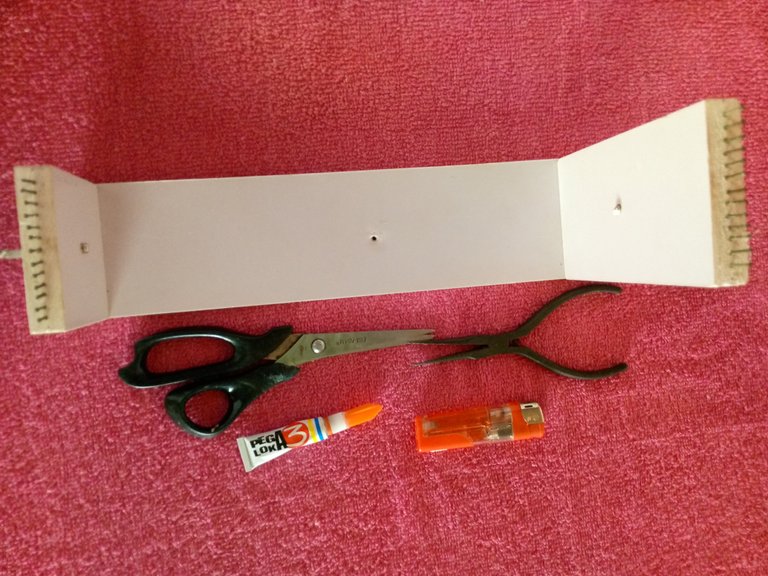
Materials Used
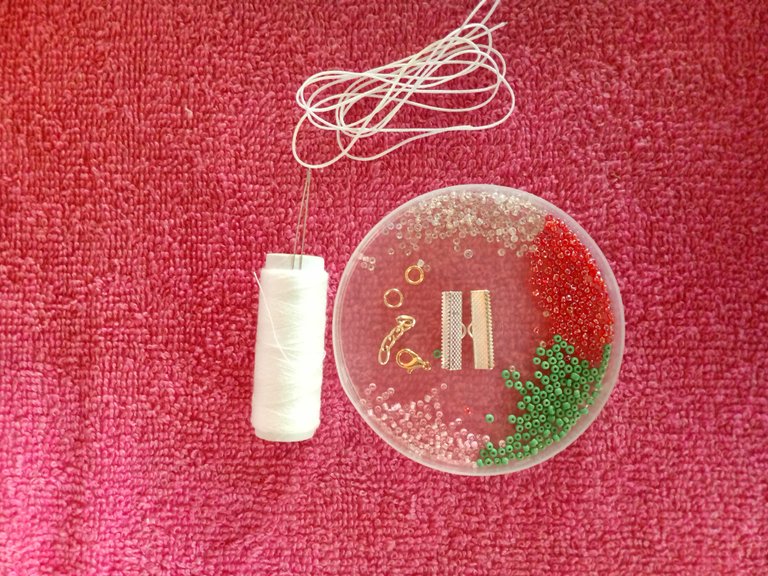
- Transparent, Red, Green, Pink and Violet beads.
- White polyester thread
- 40cm of Chinese thread
- Needle # 12
- Chain trimming
- 2 rings
- 2 Crocodile Tags
- 2 crocodile clips
- Wooden loom
- Scissors
- Pliers
- Lighter
- Glue
Step by Step
Step 1
The first thing we did was to Place 11 rows of polyester thread on our wooden loom, then in the 2 corners we placed the Chinese thread to make 13 rows in total.
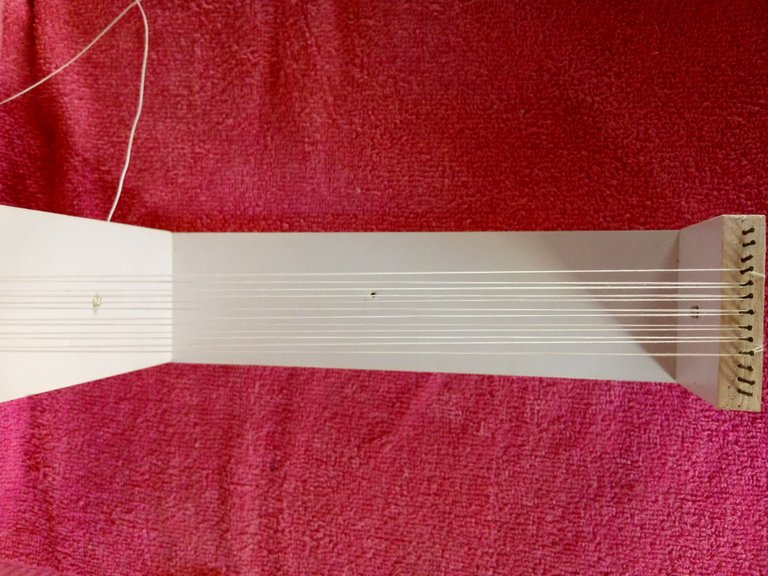
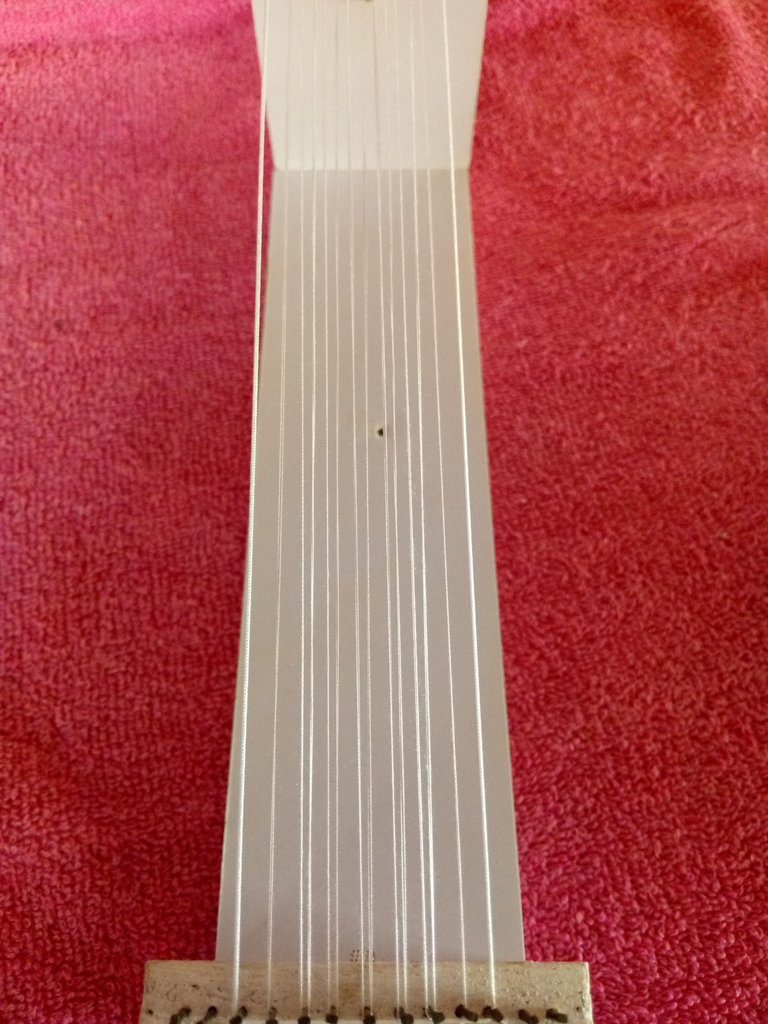
We place the Chinese threads to make our bracelet more resistant.
Step 2
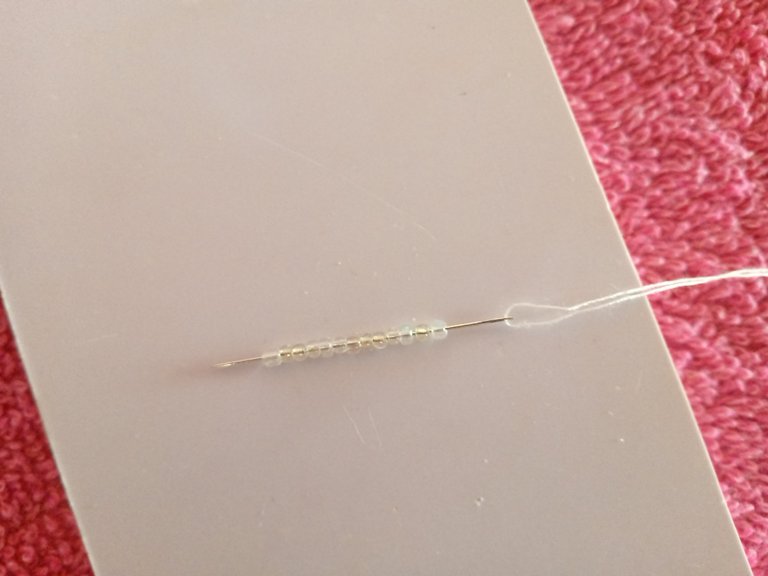
Then we are going to place approximately 3 meters of polyester thread in our needle, in my case I put it double so that it would be more resistant, then we will make some simple knots in one of the Chinese threads.

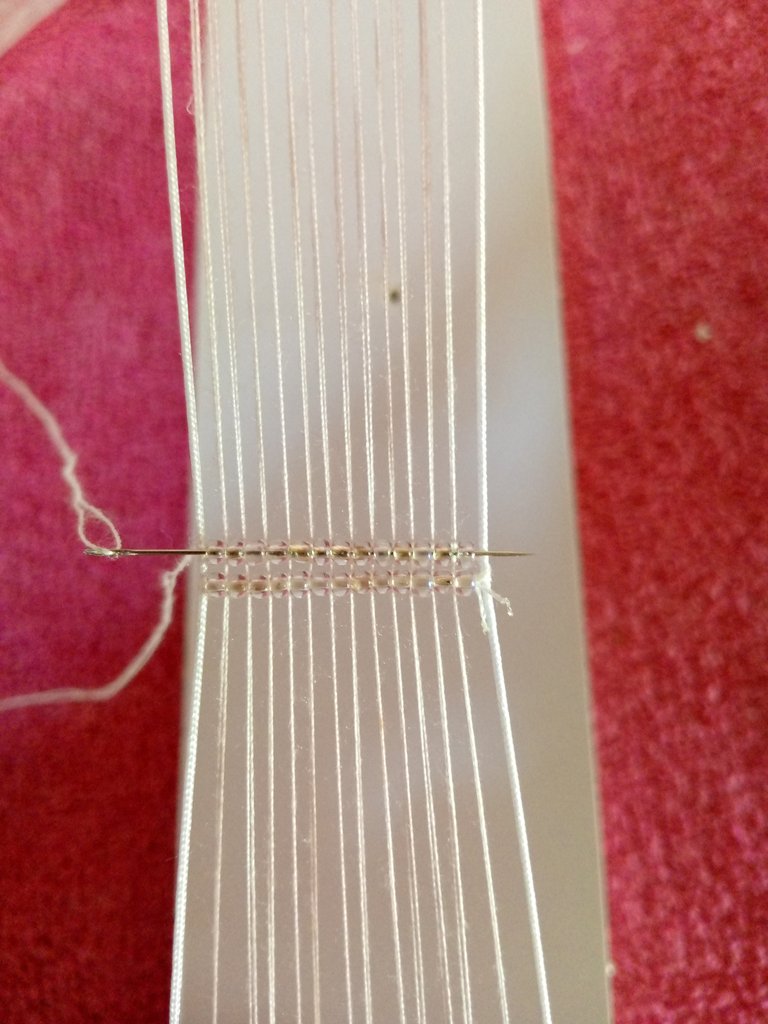
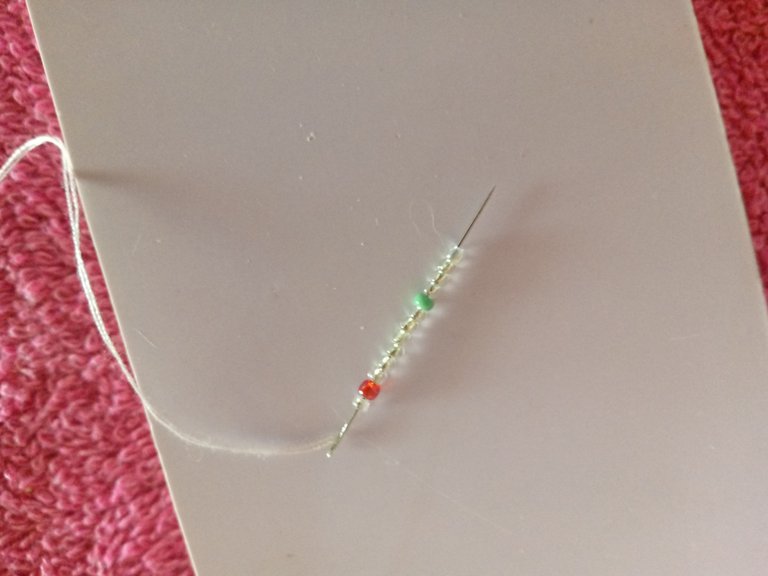
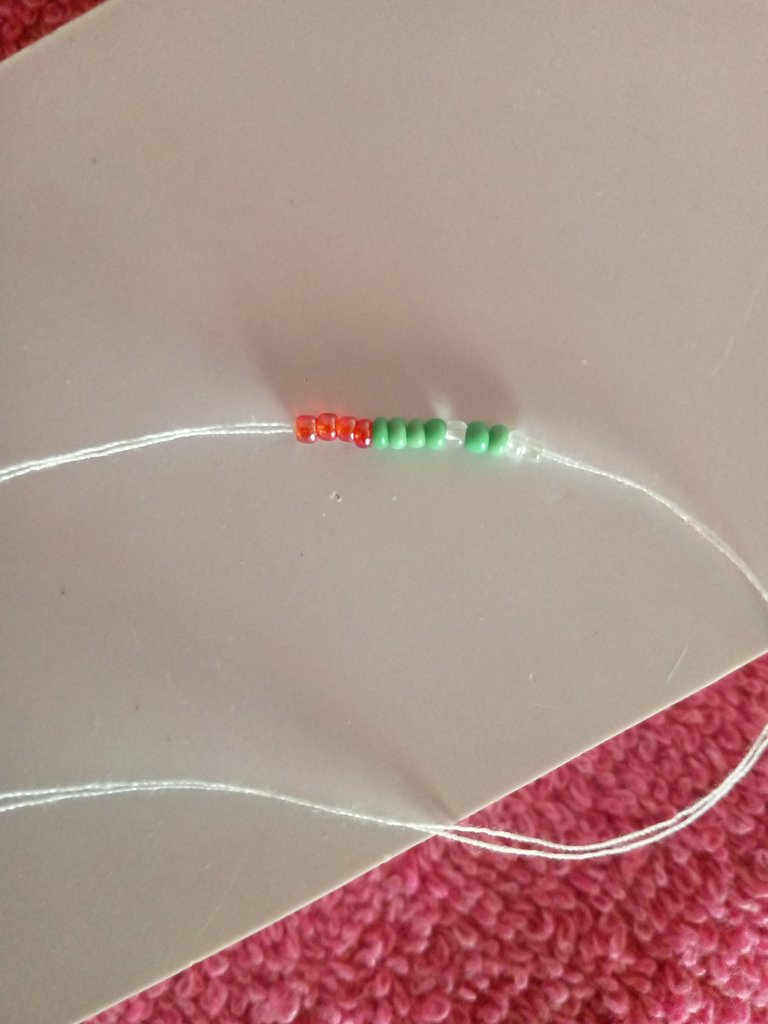
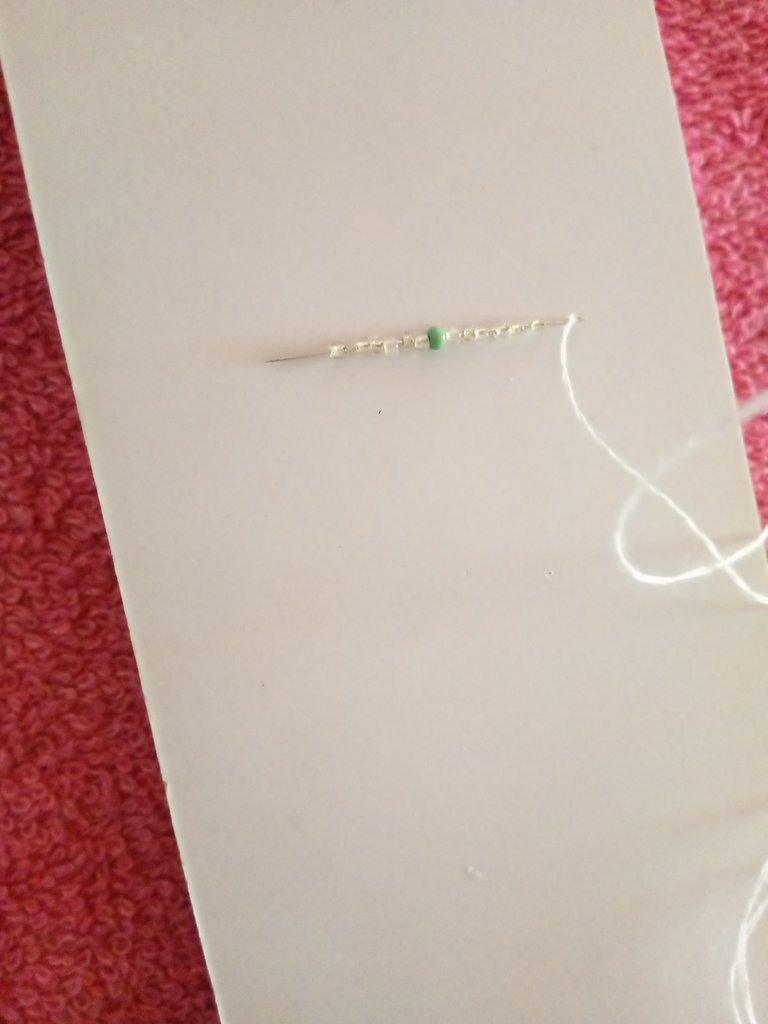
Next we are going to place 13 transparent beads on our needle.
We are going to position it on our loom, and then we are going to pass our needle through each of the beads at the top.
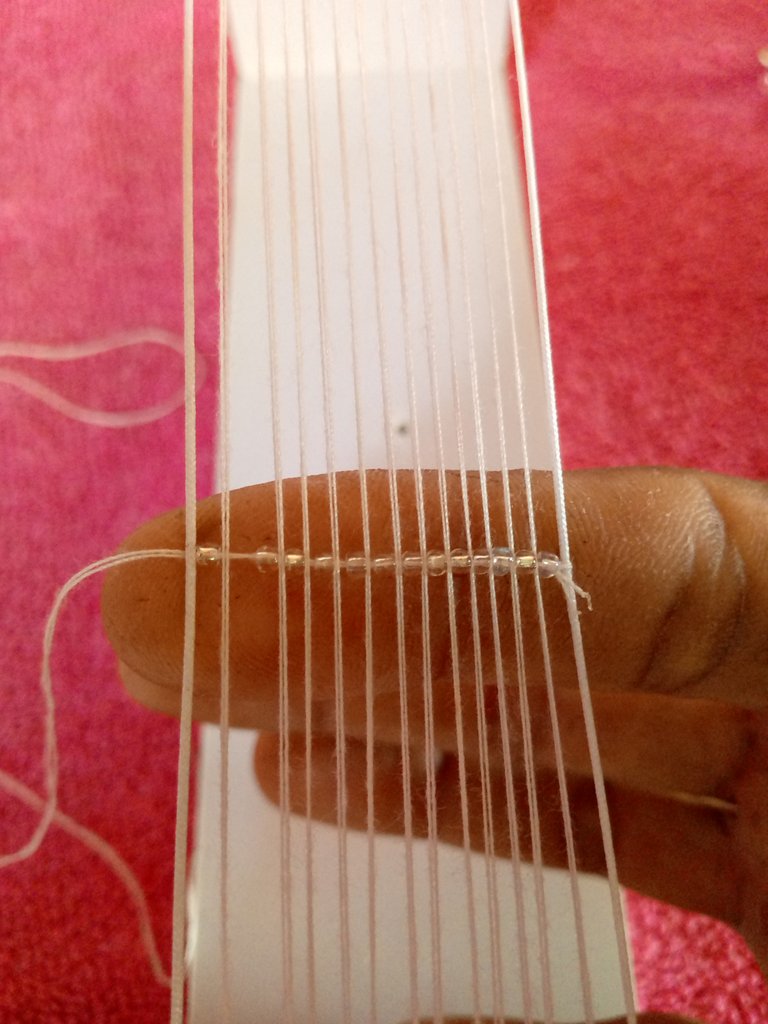
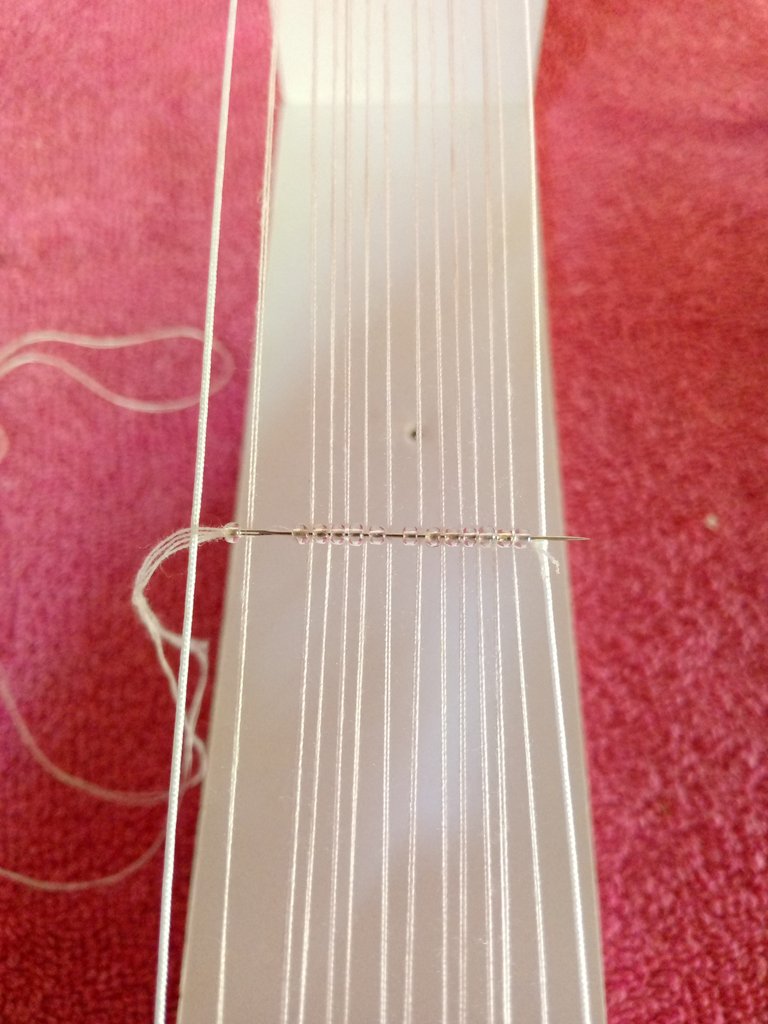

Again we are going to take 13 beads of the same color and repeat the same procedure, position the beads and then insert our needle through the top and through each of the beads.
Step 3
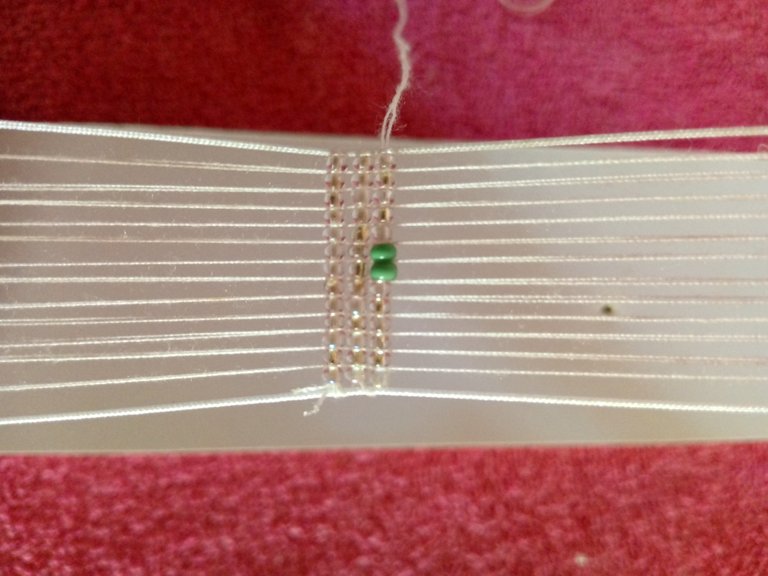
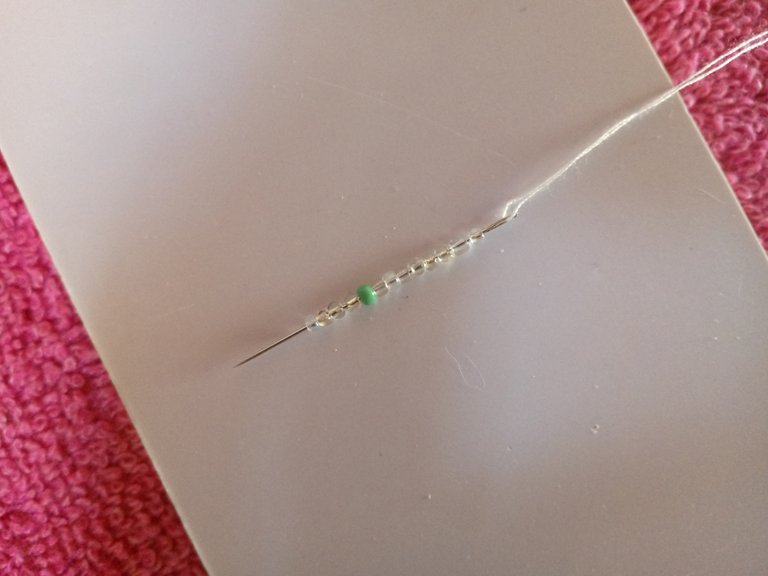
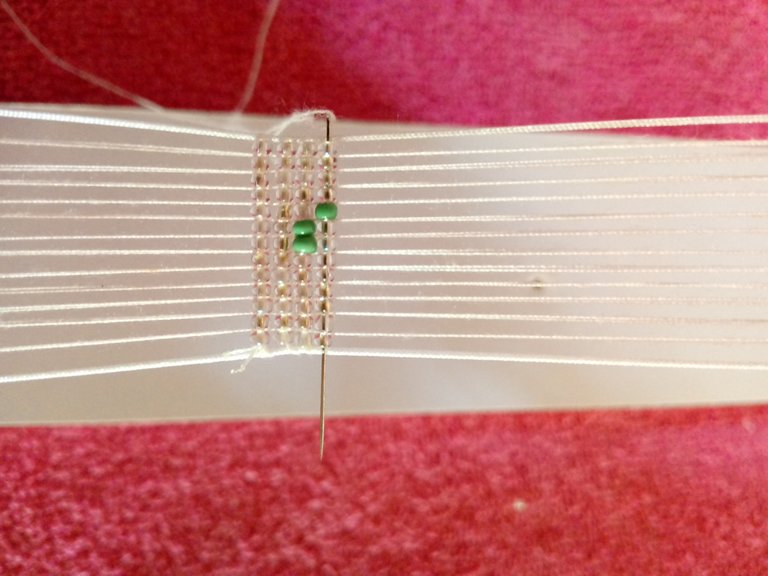
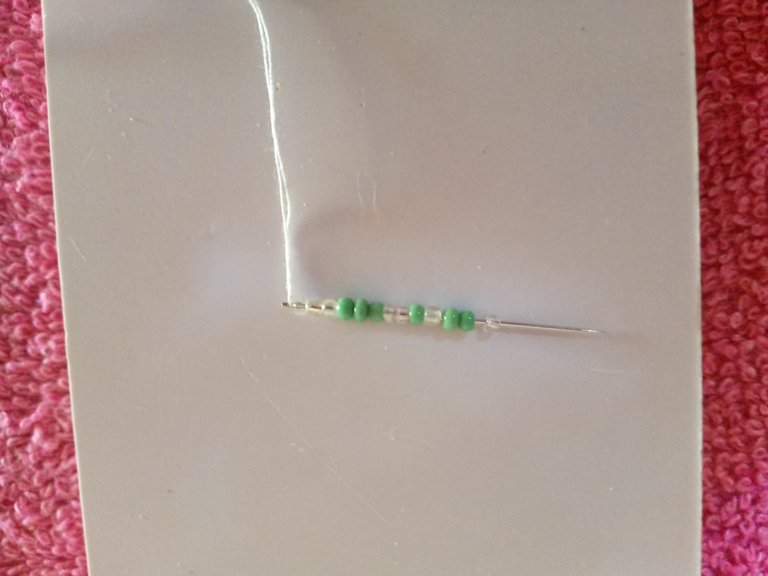
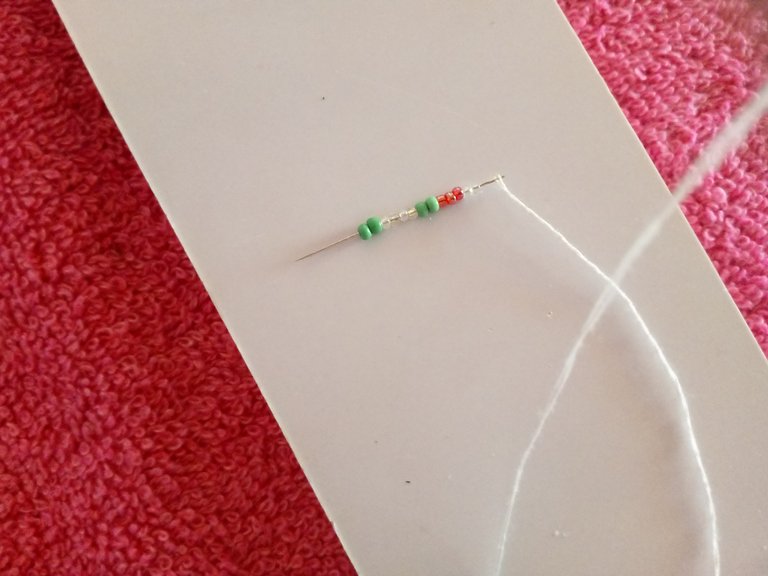
Next we are going to take six transparent beads, two green beads and 5 transparent beads.

In the same way we are going to position the beads at the bottom and then pass our water thread through each of the beads that protrude at the top.

Step 4
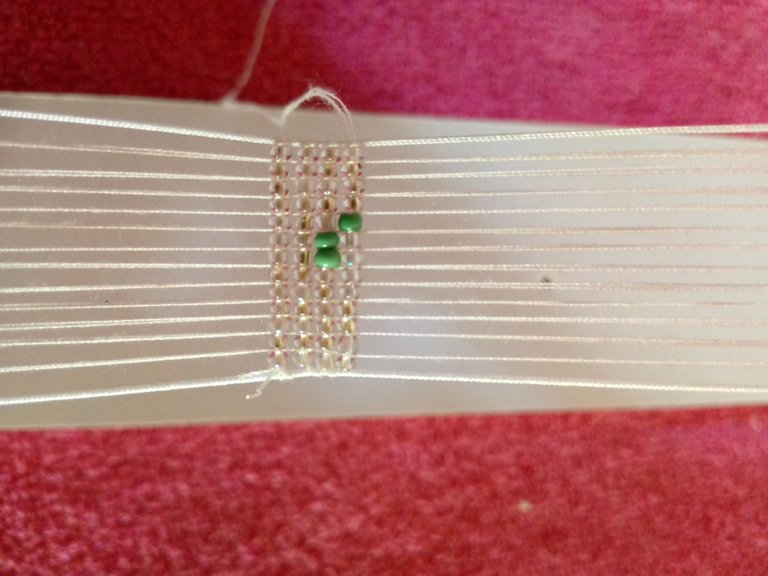
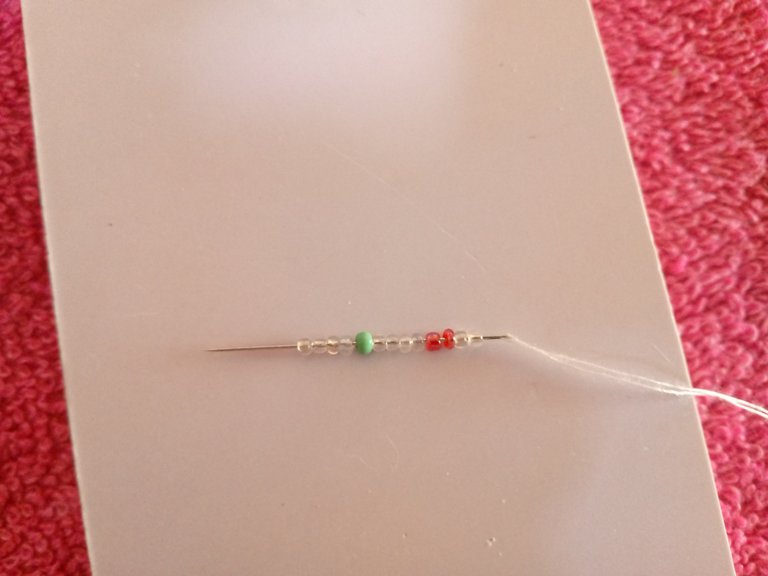
Now we are going to place eight transparent beads, one green bead and four transparent beads.
We will position the bead at the bottom, then we will pass our thread with the then we will pass our water with the thread through the top and introduce it through each of the beads.
Step 5
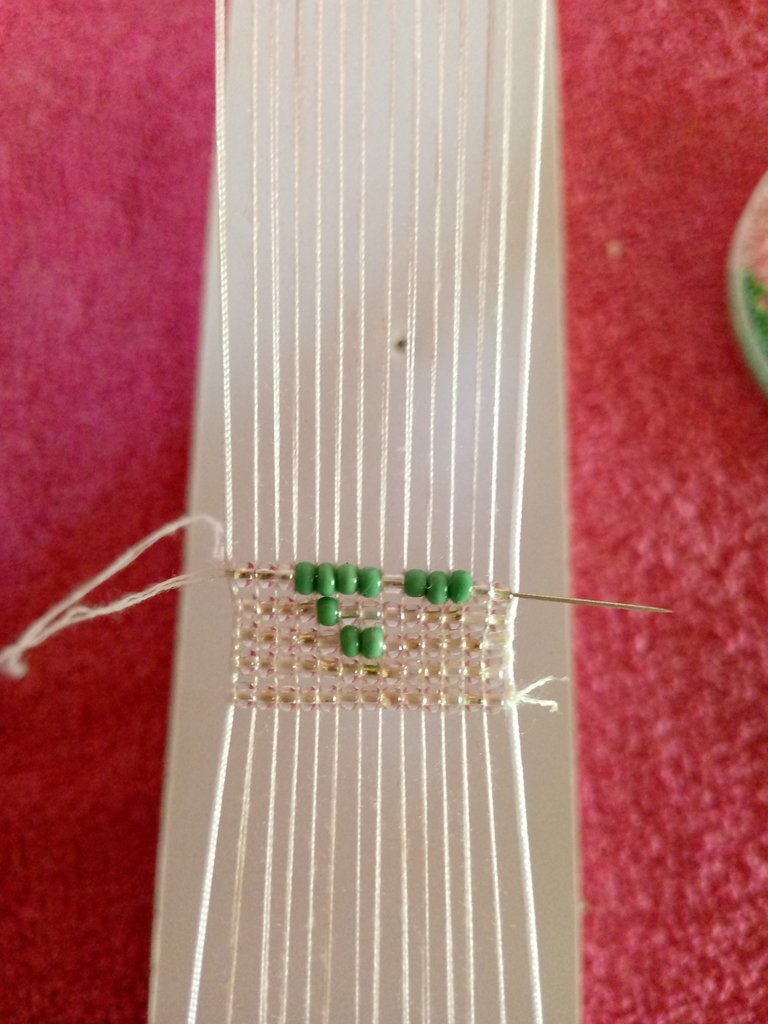
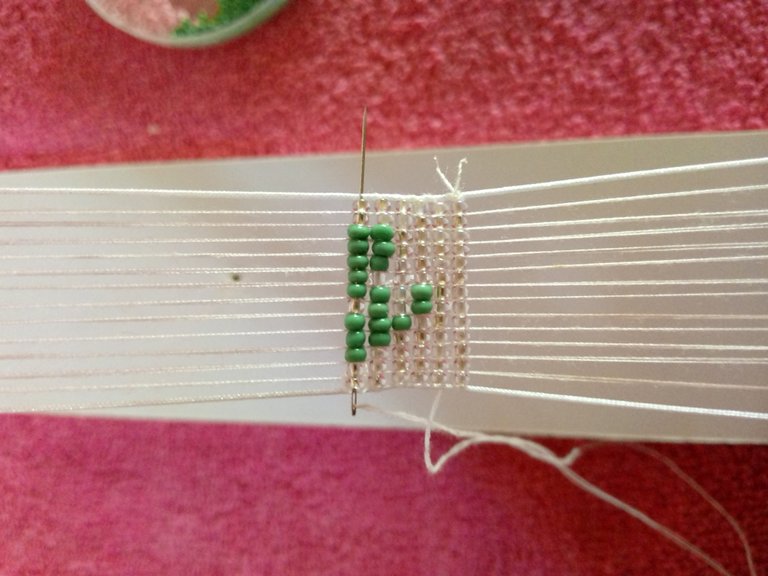
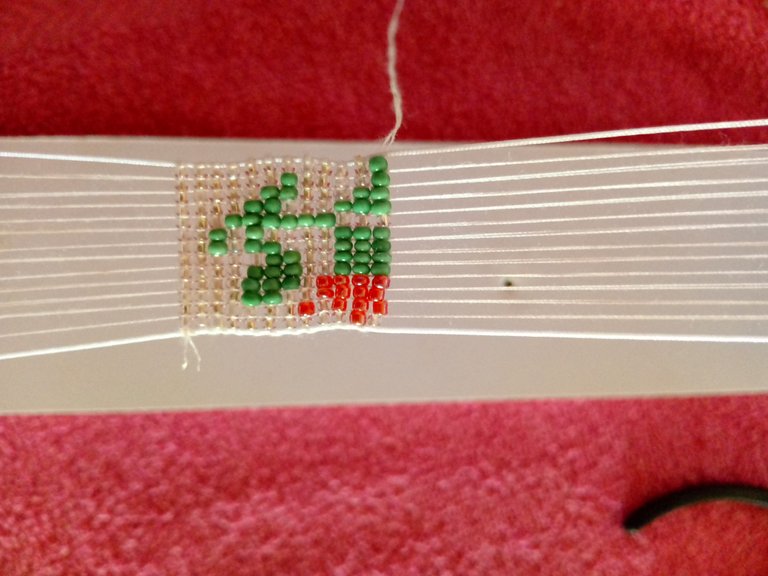
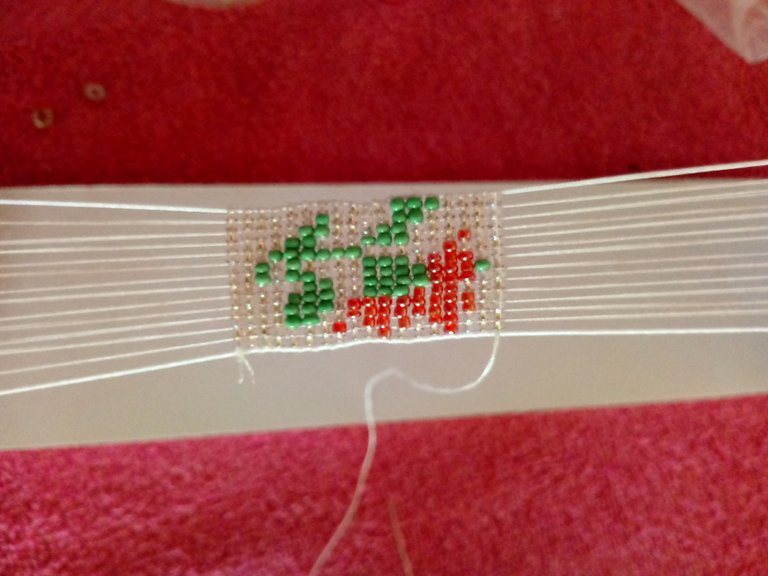
For this step we are going to insert three transparent beads, four green beads, one transparent bead, then three green beads and finally two transparent beads.

We position the beads of our loom then we pass the needle over the top and introduce through each of the protruding beads.
Step 6
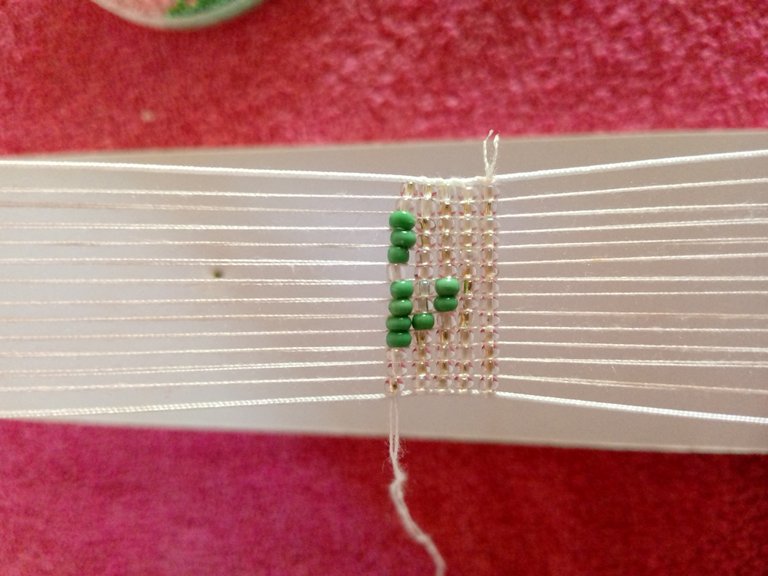
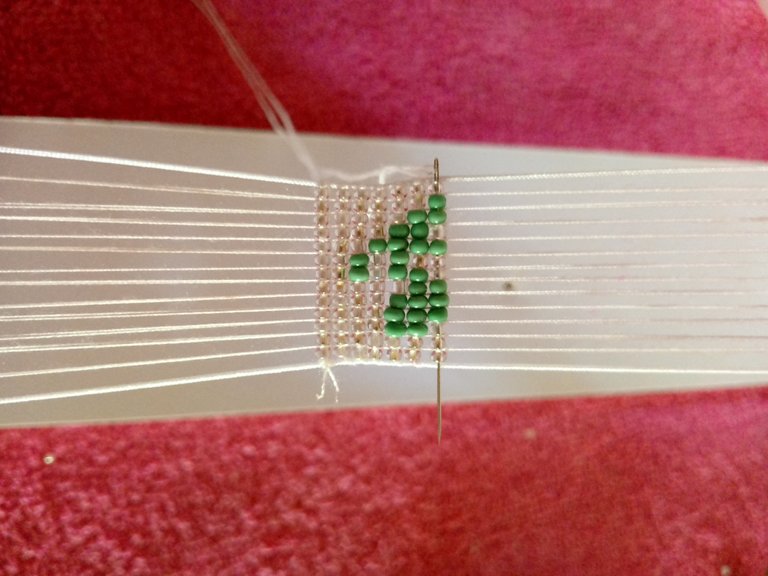
Next we are going to take two transparent beads, five green beads, one transparent bead, three green beads and two transparent beads.

In the same way we are going to position the beads on the loom, and we will pass our thread through the top and introduce the needle through each of the beads.
Step 7
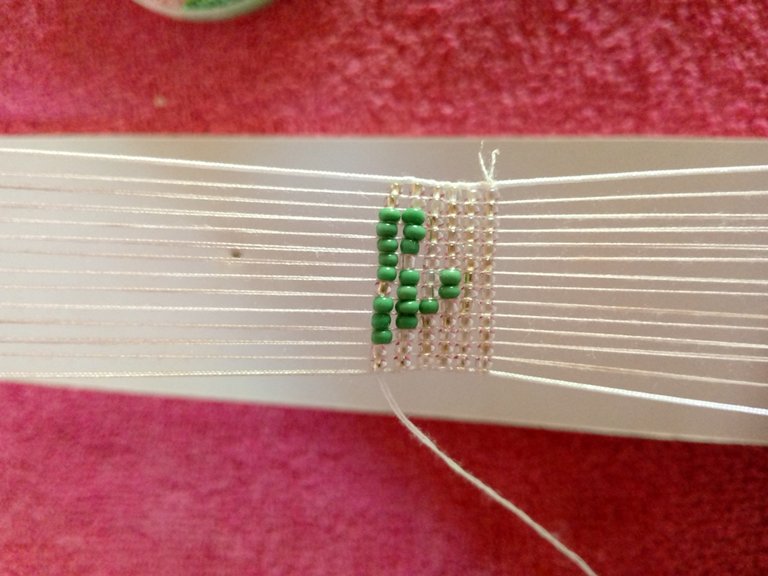
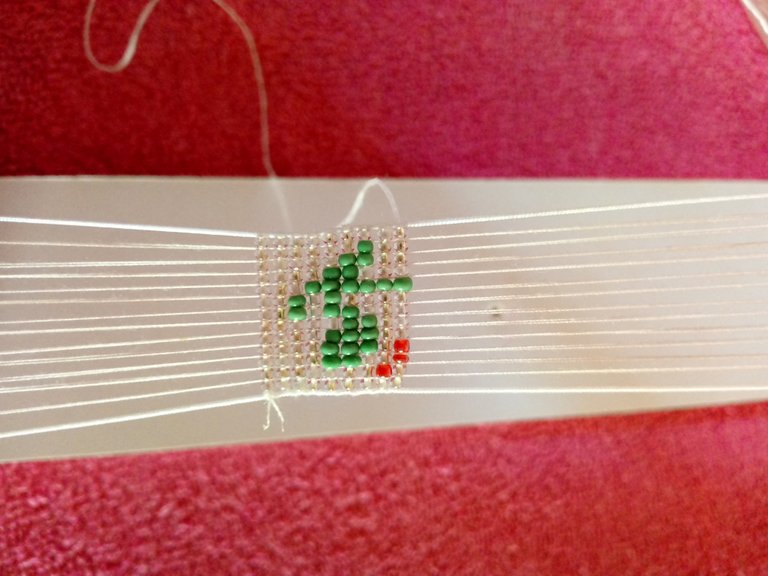
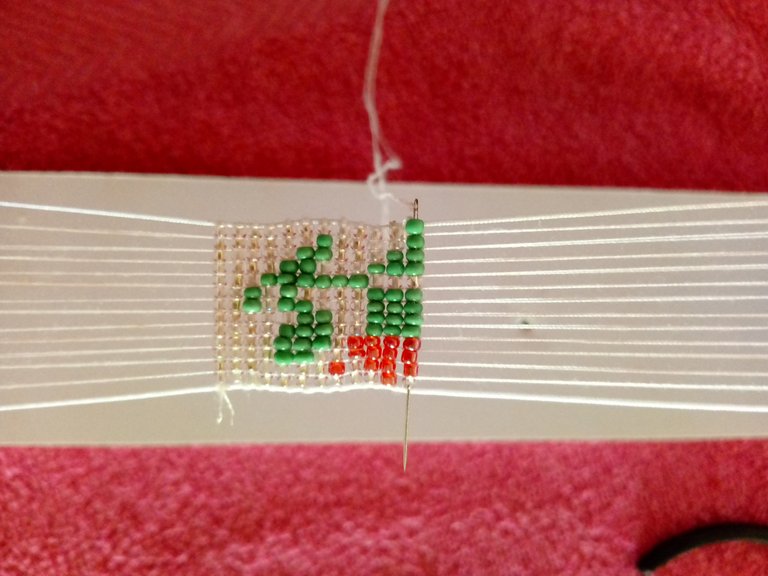
We continue with the elaboration of our beautiful bracelet, taking three transparent beads, three green beads, two transparent beads, one green bead, one transparent bead, two green beads and finally one transparent bead.
Just like the previous steps, we are going to position the bead at the bottom and then pass over and through each of the beads with our needle.
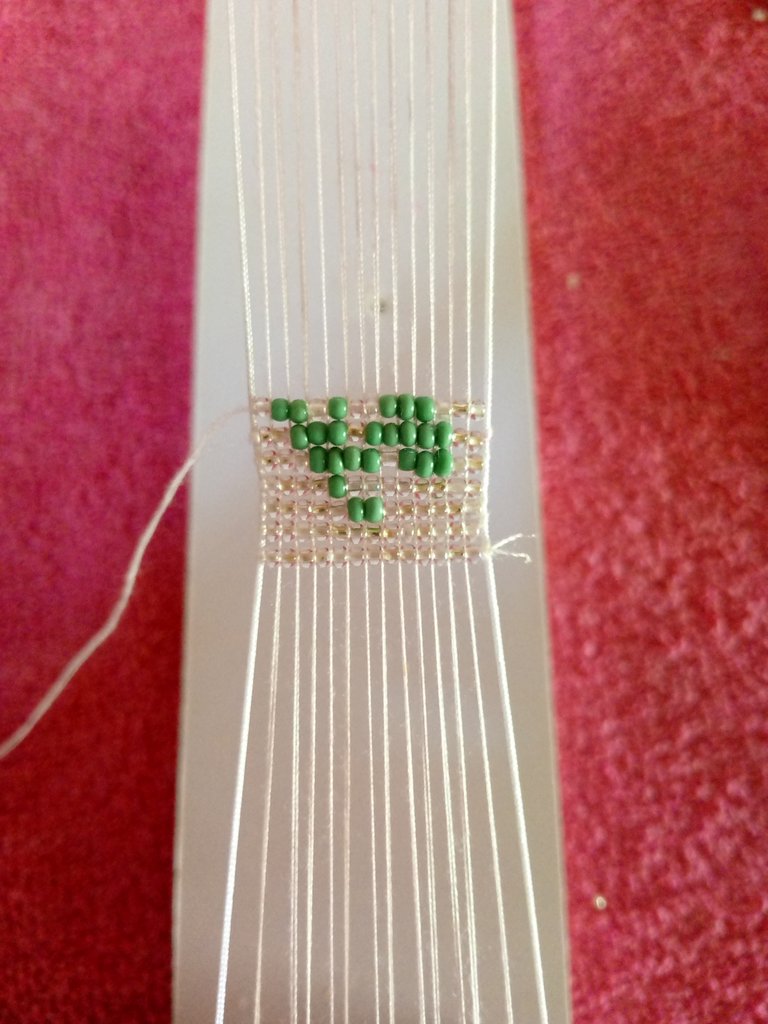
In this way we would have ready the stem and in this way we would have ready the stem and a leaf of our beautiful flower.
Step 8
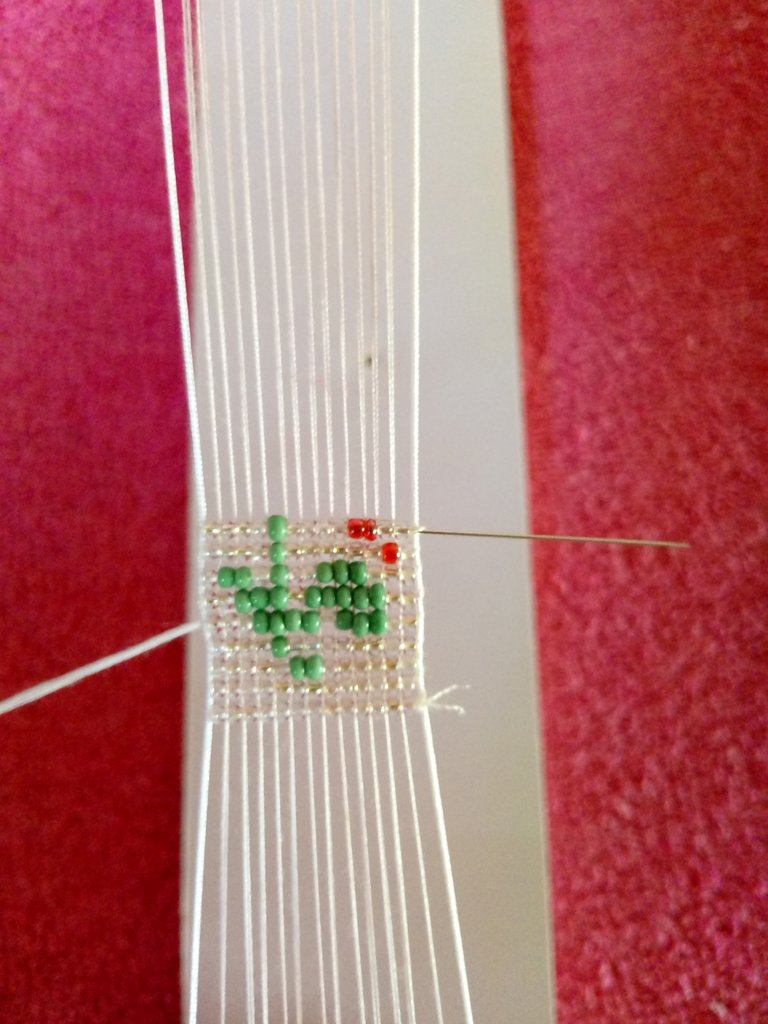
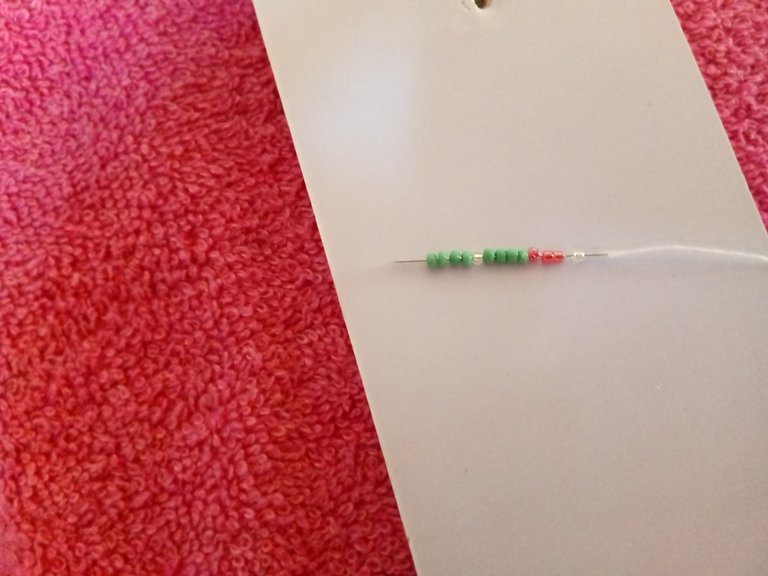
Then we will take one transparent mustard, one red mustard, six transparent mustards, one green mustard and four transparent mustards.
We position the beads on our loom and go to our needle through the top and inside of each of the protruding beads.


Step 9
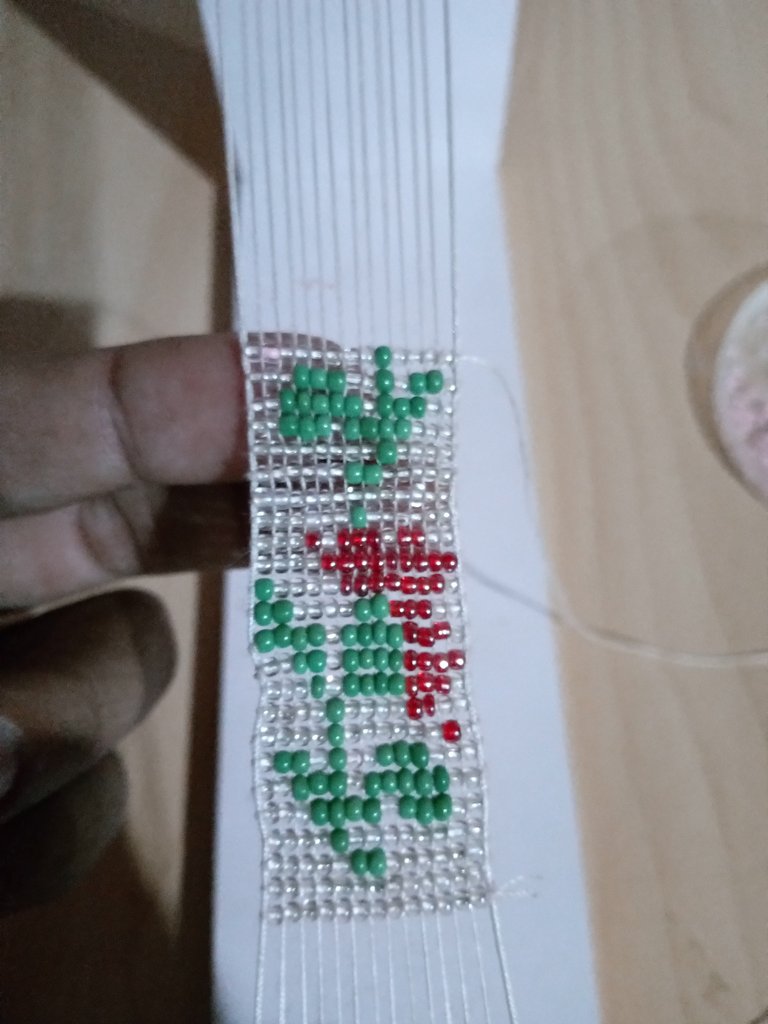
For this step we are going to insert two transparent beads, two red beads, four transparent beads, one green bead and finally four transparent beads.
We will continue to position the beads in the same way as we have been doing and then pass the thread through the top and introduce each of the beads.
Step 10
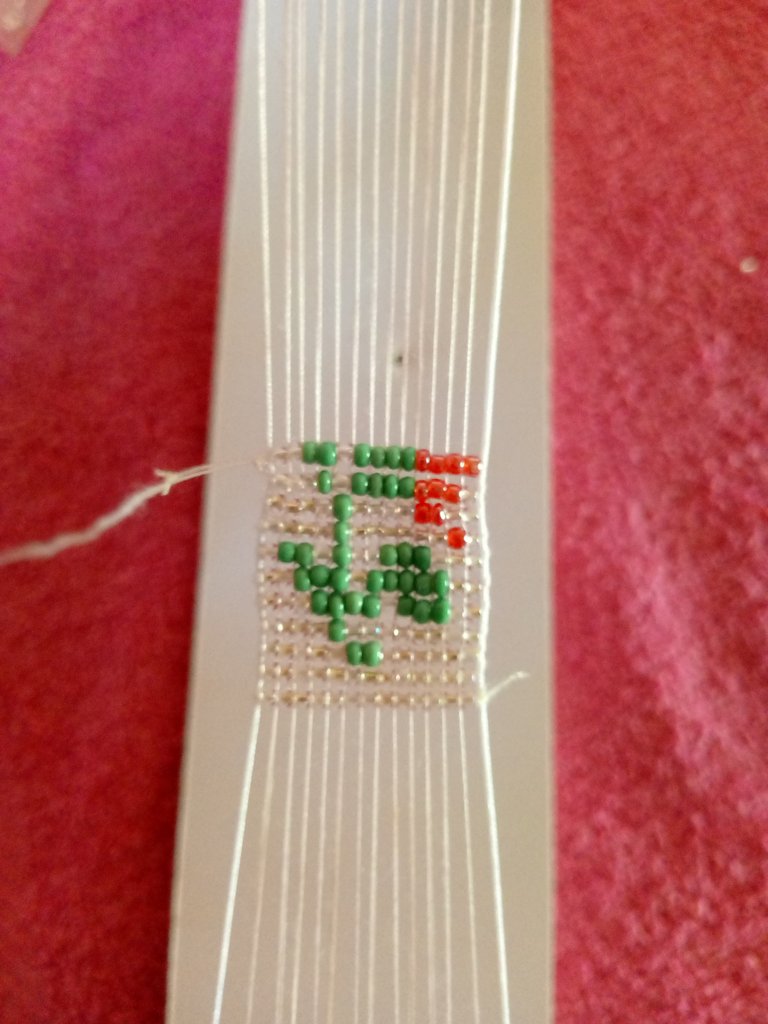
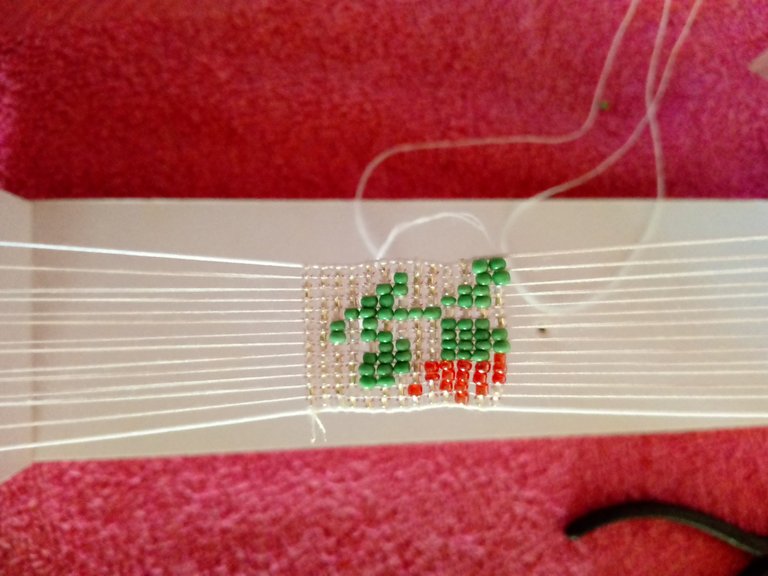
Now we will take three red beads, four green beads, one transparent bead, one green bead and four transparent beads.

We position each of the beads by the threads of the loom, the crane above we introduce all the beads, so we will be giving shape to each petal of the beautiful flower.


Step 11
We take four red, four green, one transparent, two green and two transparent beads.
We are going to position the bead on the loom and then from the top we pass the needle through each of the beads,
Working with the loom is very easy, you just have to have a pattern and repeat each step respecting the order of the beads.
step 12
With the help of the needle we are going to take one transparent bead, three red beads, four green beads, one transparent bead and again four green beads.
Positioning the beads on the loom, we are going to pass the needle through the upper part of the needle and introduce it through each bead.
Step 13 .
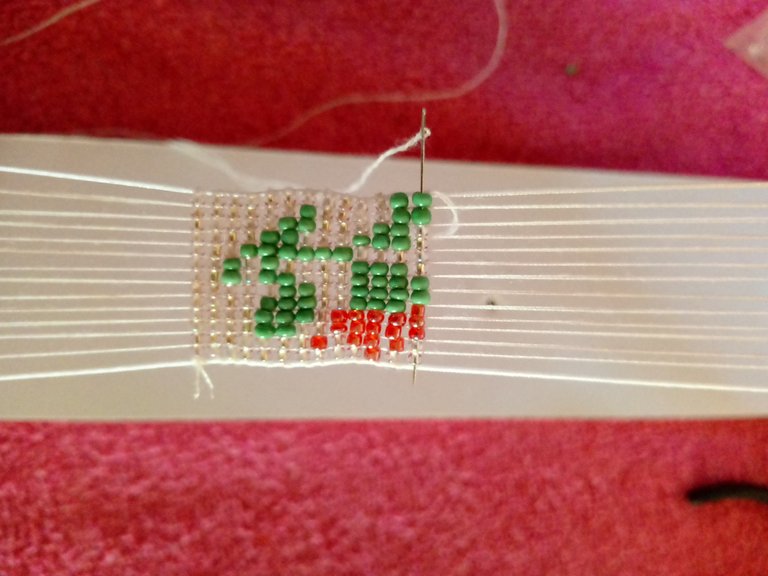
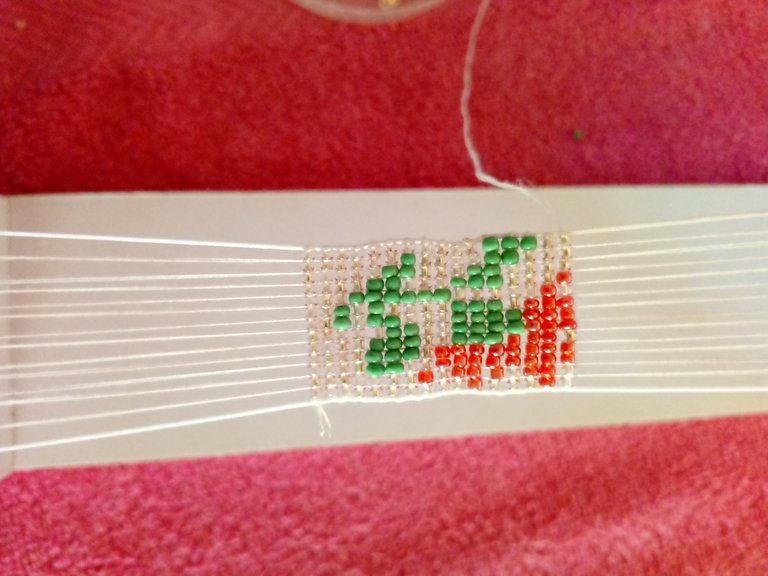
We are going to continue inserting the beads according to the order of the pattern, in this case we will place two transparent beads, three red beads, two green beads, four transparent beads and again two green beads.
As in the previous steps, we are going to position the beads on each thread of the loom and then pass the needle through the top and introduce it through each of the beads.
Step 14
For the realization of this beautiful bracelet I put dedication because it was a gift for my beautiful mother, in commemoration of women's day. Working with this technique is not difficult, you just have to be dedicated to do a good job.
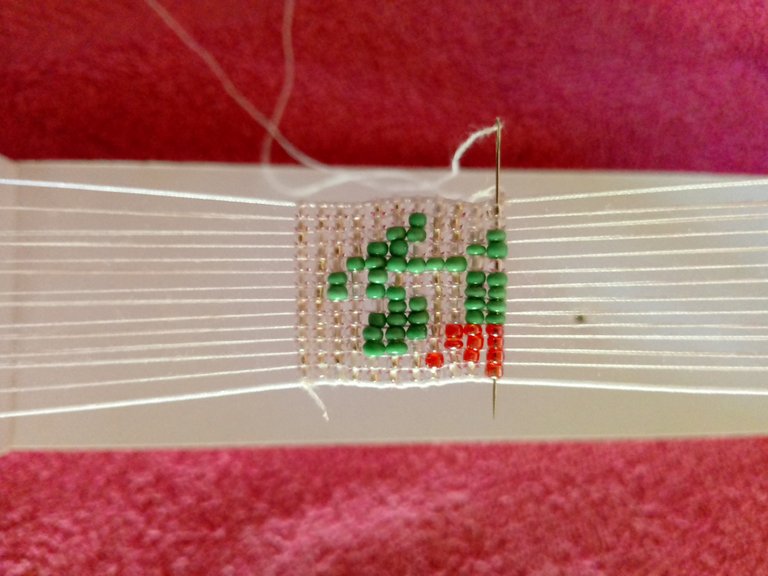
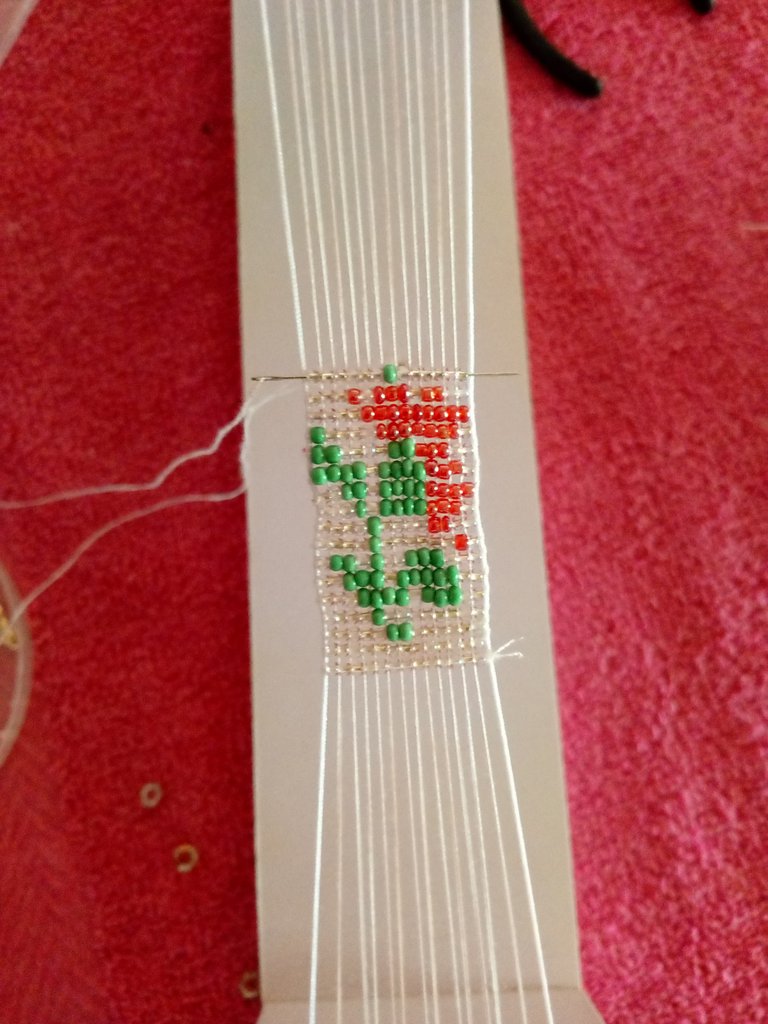
In this way we continue placing beads, we are going to take one transparent bead, seven red beads, four transparent beads and one green bead.
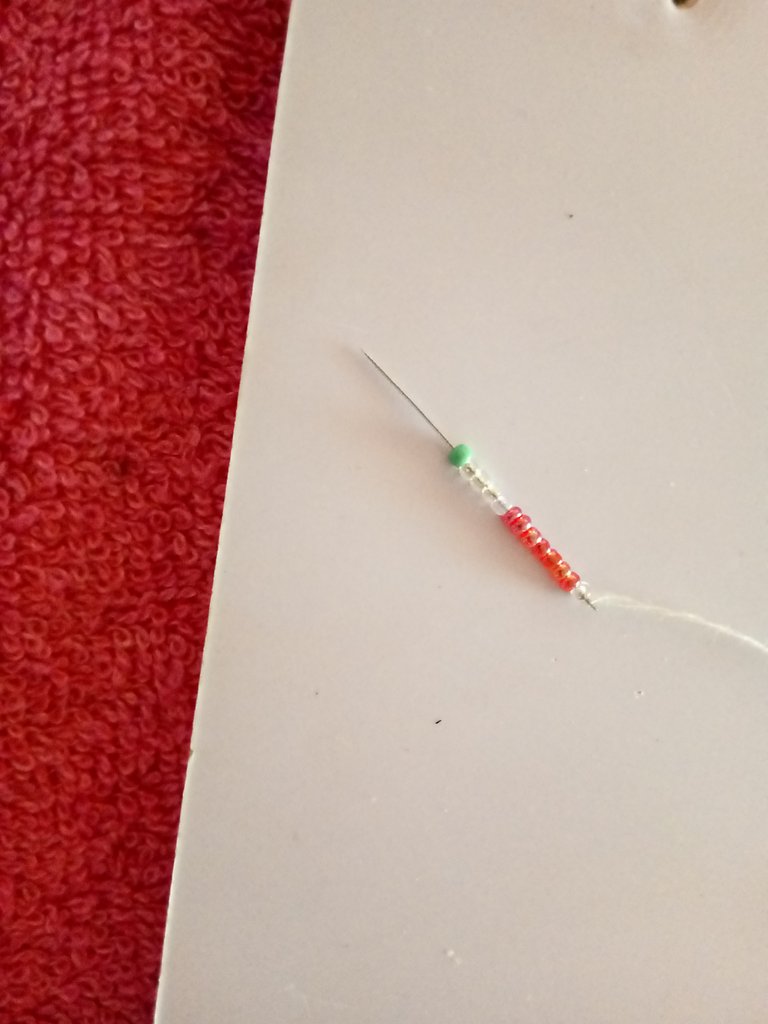
We position the mutation on the loom and pass the needle through the top and through each of the beads that are on the top.


Step 15
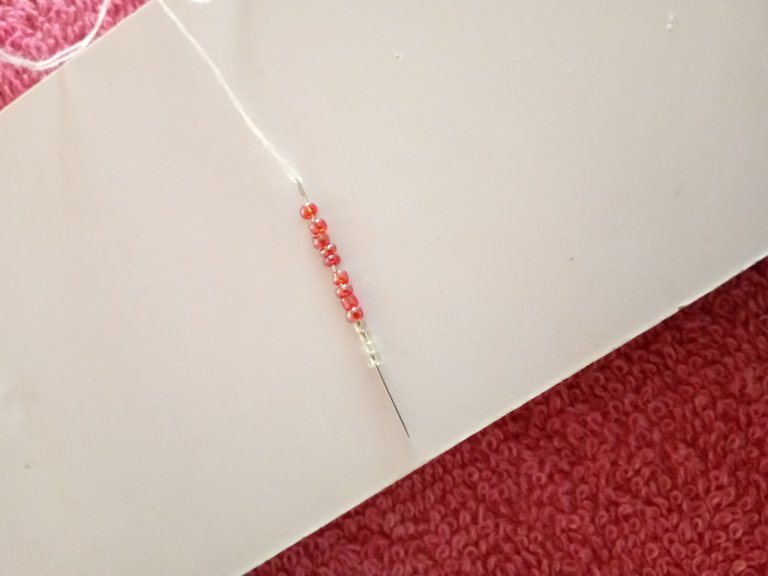
We are going to take new red beads and four transparent beads, we are going to position them on our loom and from the top we pass the needle with the thread through each of the beads.

Step 16
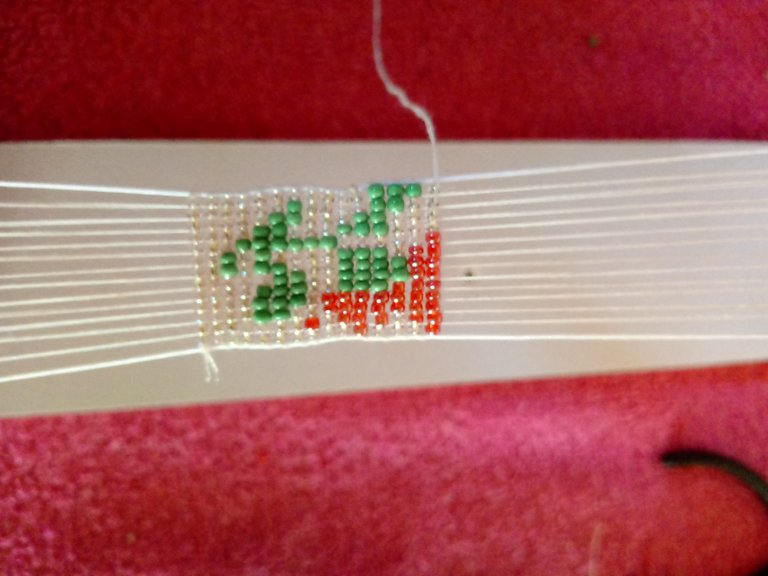
We will take two transparent beads, two red beads, one transparent bead, three red beads, one transparent bead, one red bead and finally three transparent beads.

We are going to position the beads on the loom, we introduce the needle with the thread through the top and through each of the beads.

Step 17
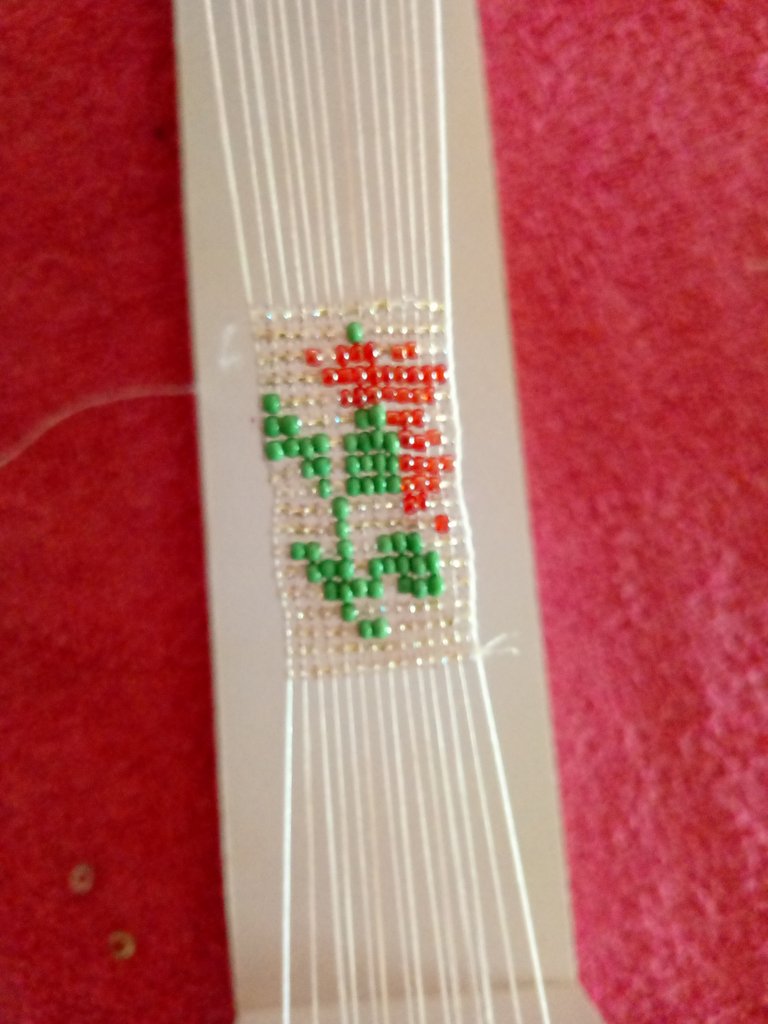
This step we will take six transparent beads, one green bead and again 6 transparent beads.
We are going to position the beads and in the same way we are going to pass water over and inside each bead.
This way our beautiful first flower is ready.
Step 18
For this step we are going to take 13 transparent beads.

We are going to position them on our loom and repeat the same procedure of the previous ones, we pass over the loom and introduce inside each of the beads.
Step 19
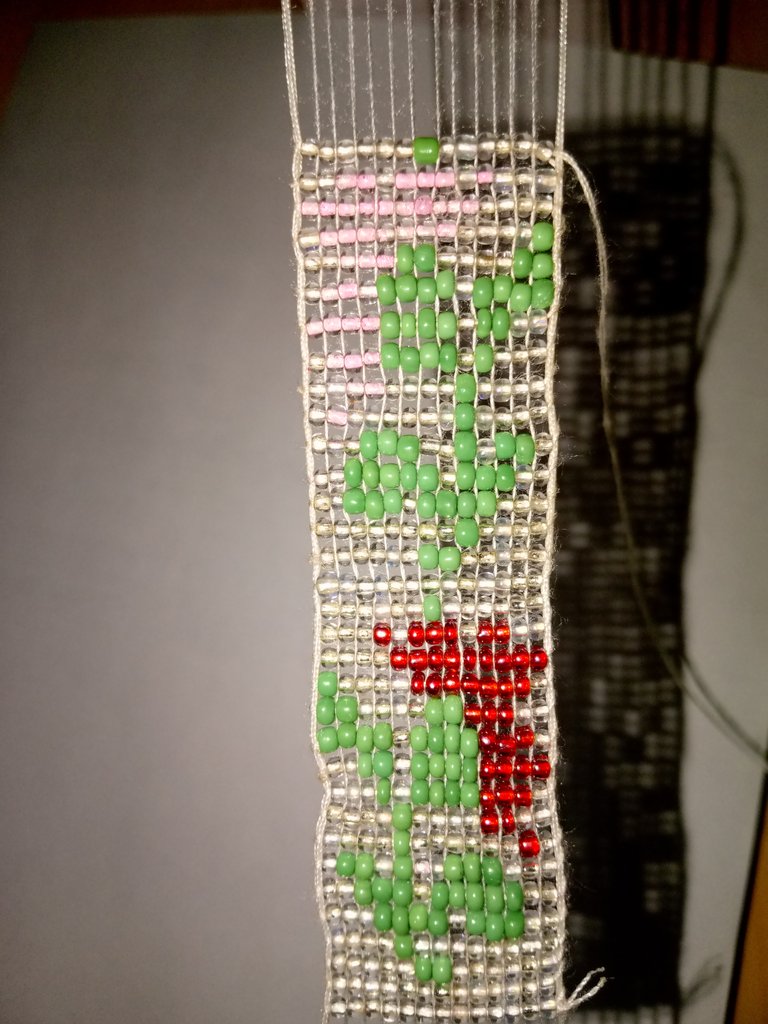
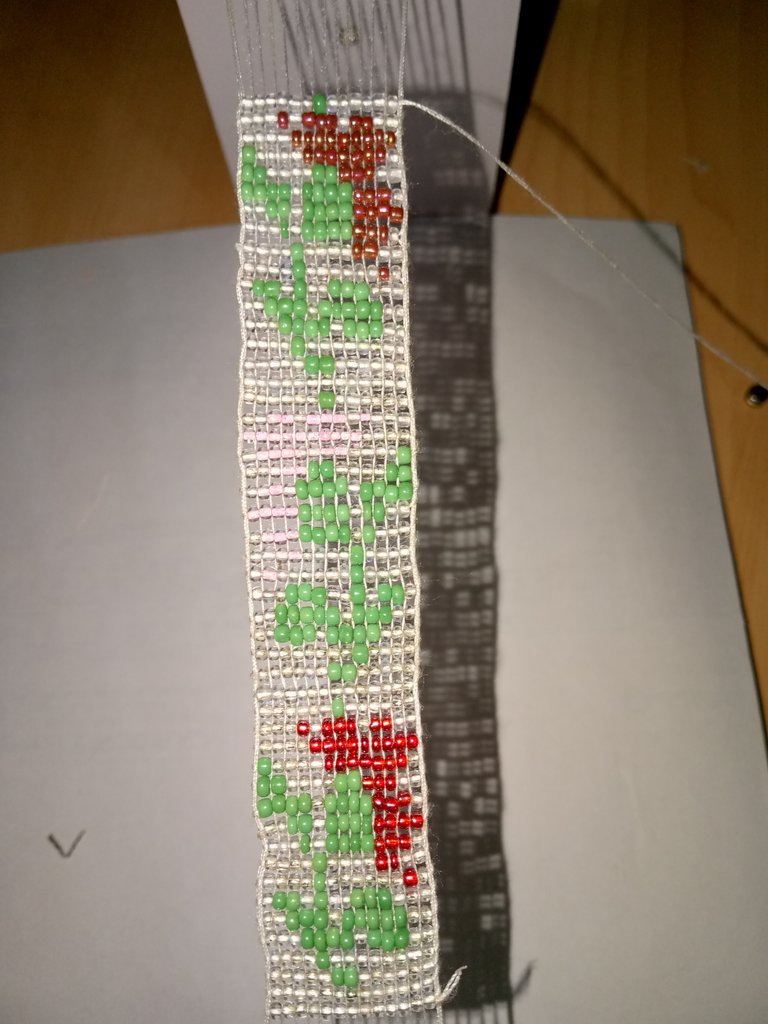
To continue making the other flowers, we will repeat the same process until we get the length of our beautiful bracelet.
I wanted to make a flower with petals on the other side, this process is the same just place the beads upside down, ie the ones that we place first we place them last or vice versa.
Step 20
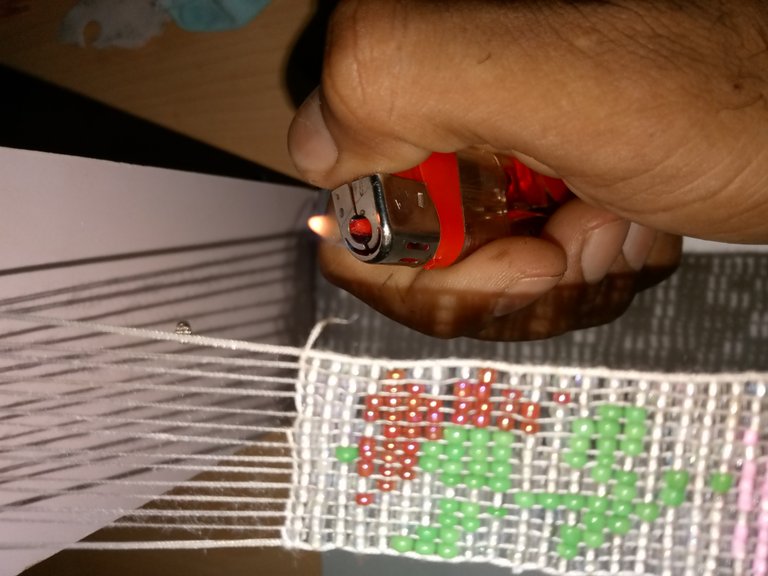
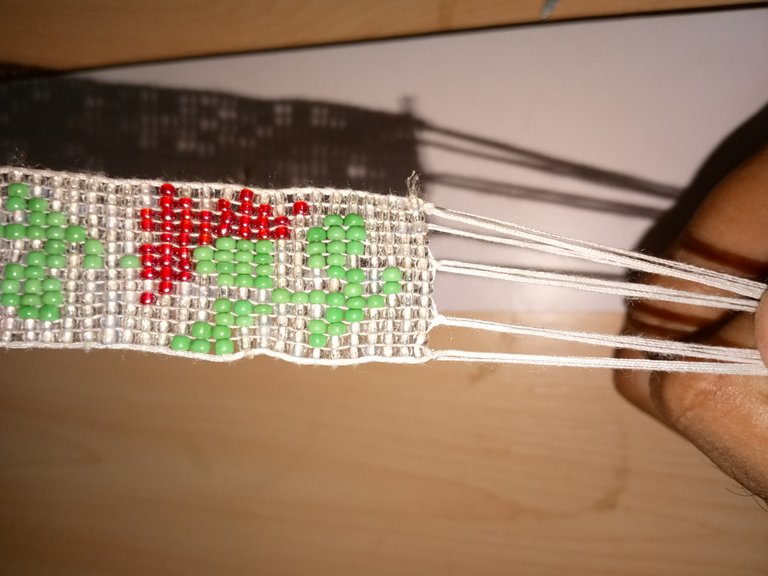
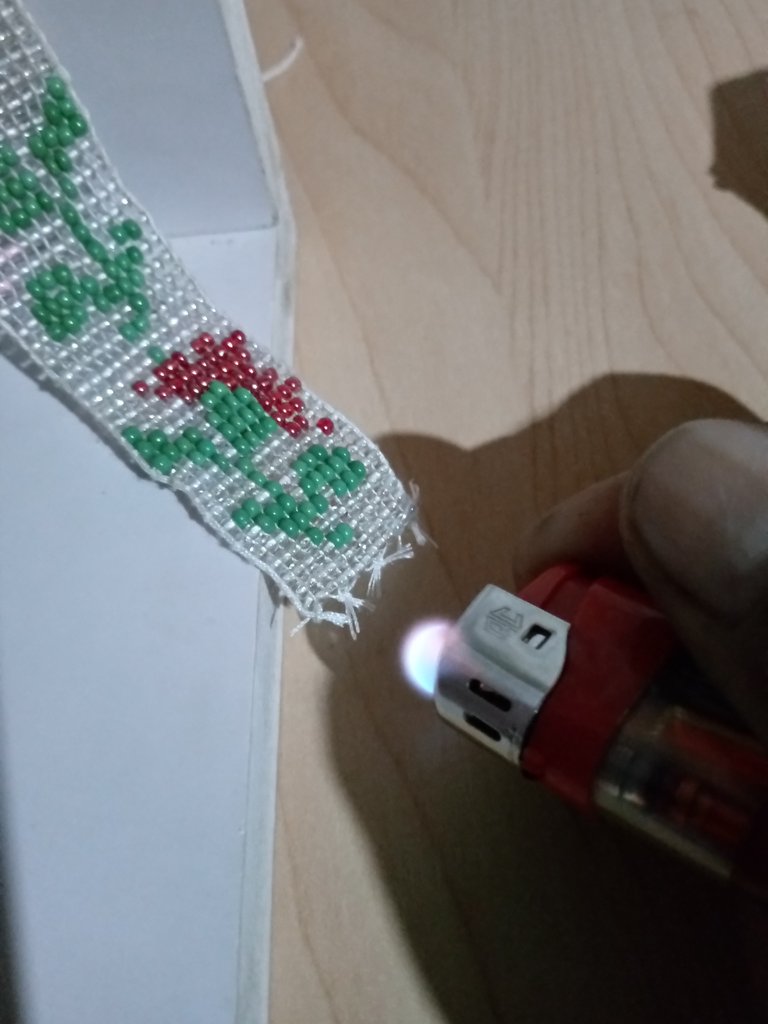
After we have obtained the desired distance of the bracelet, we secure one end with the thread that we have left over we are going to make simple knots in all the threads, then we cut with the scissors and we seal with the help of the lighter.
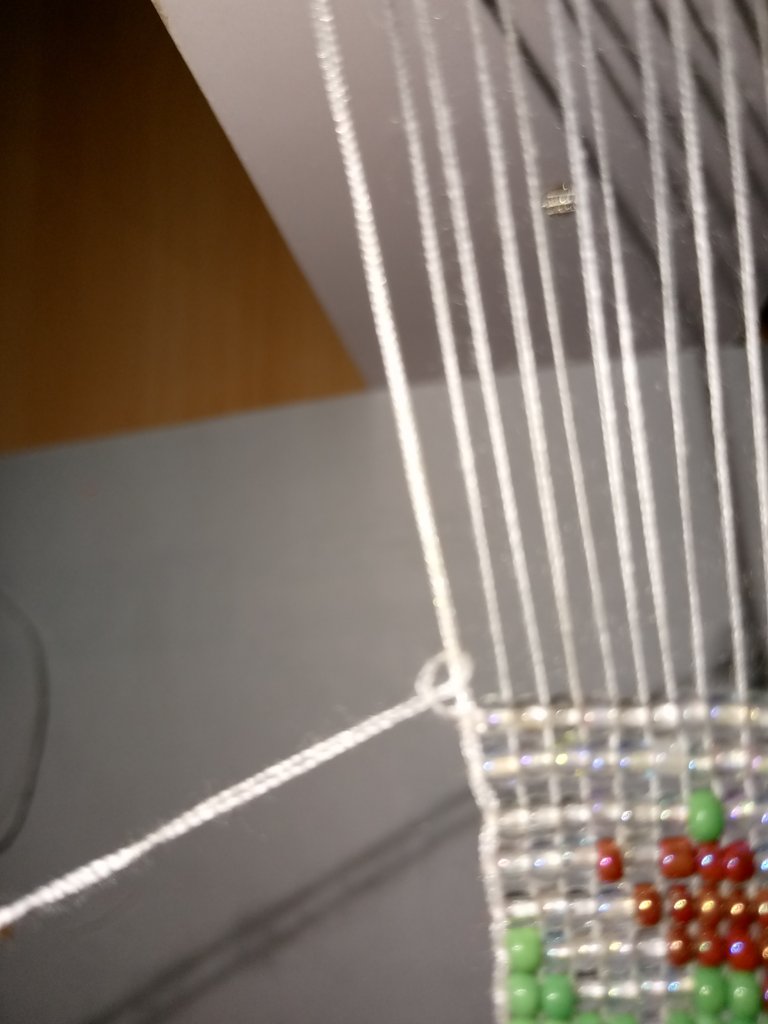
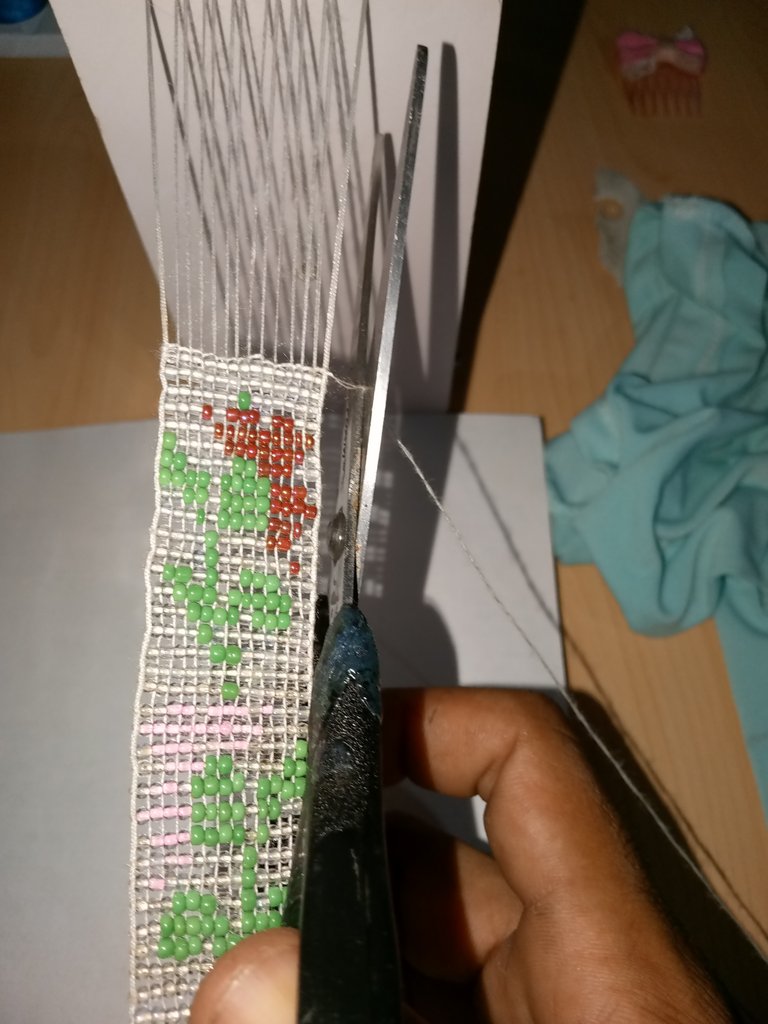
Step 21
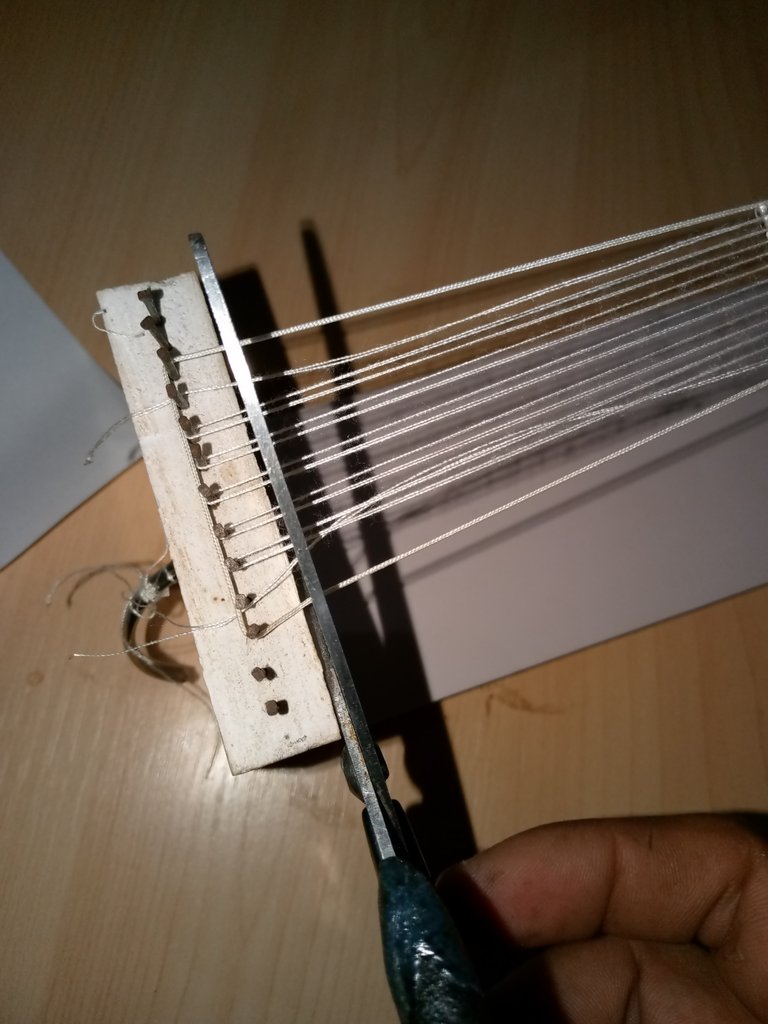
With the help of the scissors we will cut one of the ends of the threads on the loom, then we are going to take from the threads and make simple knots, then cut and seal with the help of the lighter.

Step 22
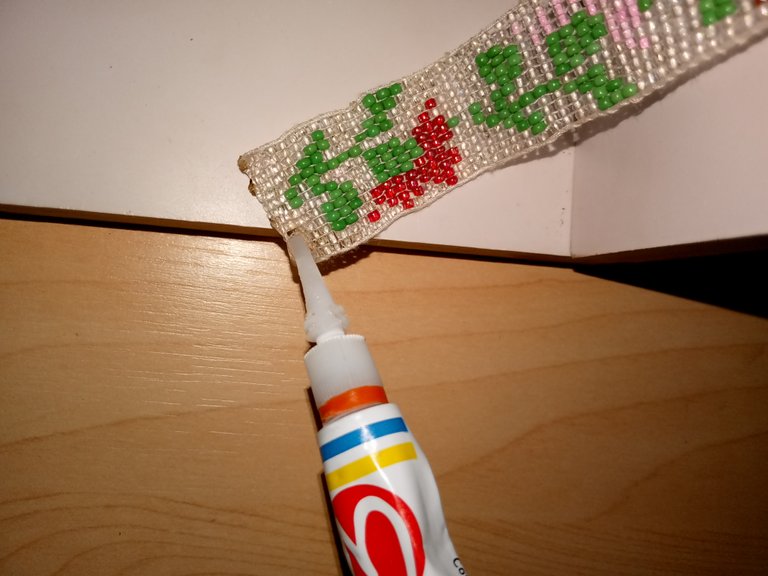
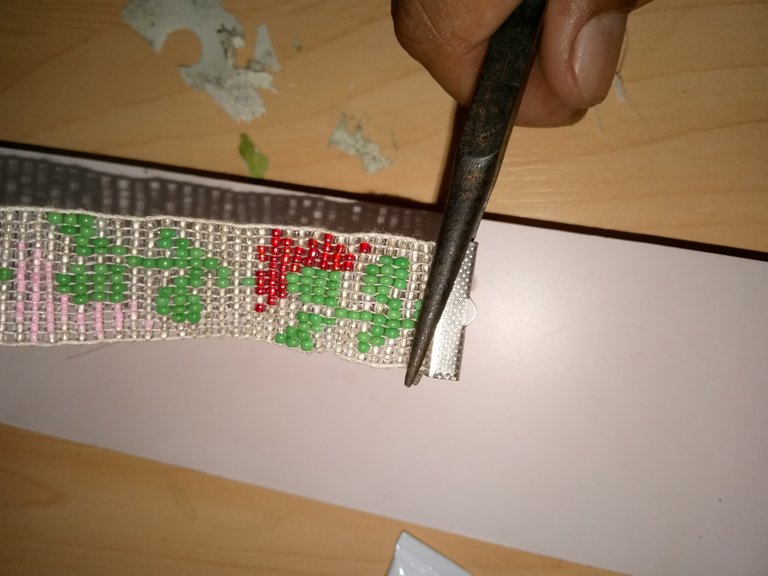
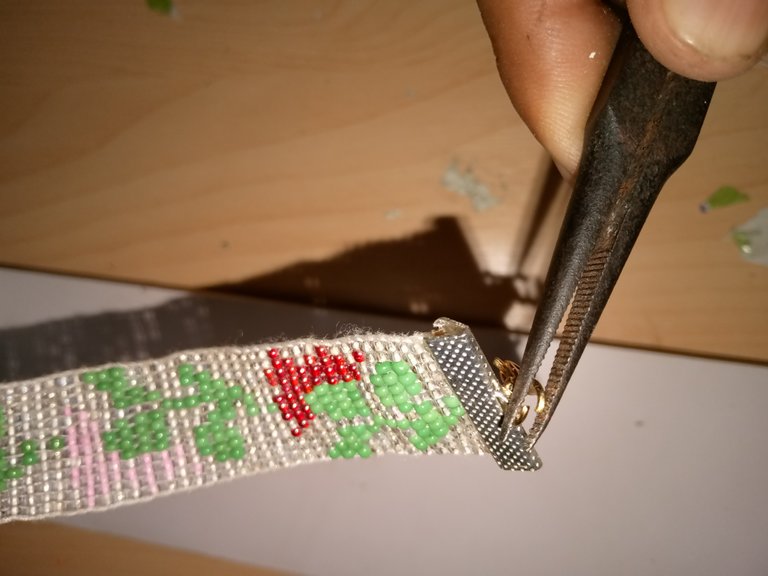
Now we are going to take the glue and very carefully, we will place some drops on the beads to secure them, we will take advantage of the glue and we will take a crocodile terminal, we will place it on the ends of our bracelet to take advantage of the glue and with the help of our pliers we tighten it until it dries.
Step 23
We will take a ring and the lock, with our pliers we will open and introduce the ring in the lock, then we will take to the end of crocodile and secure with the pliers.
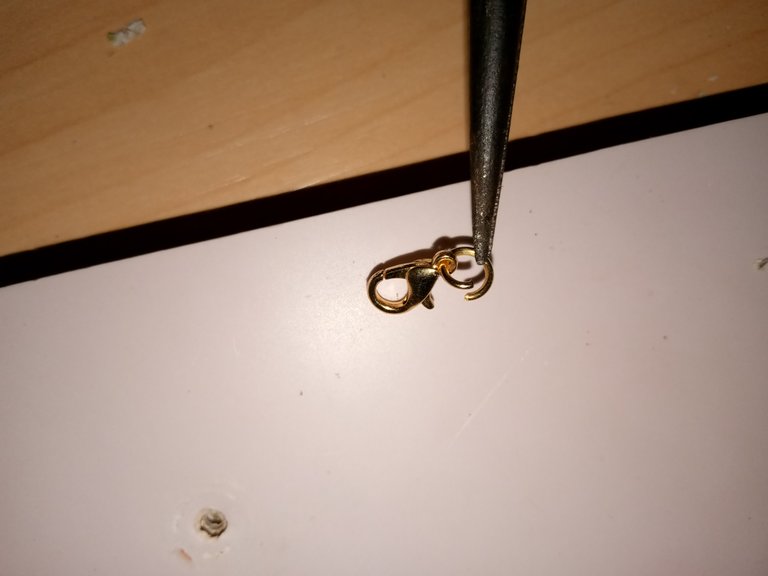
We will do the same procedure on the other side of our bracelet, we will cut the ends with the scissors, then we will make several simple knots and cut again and seal with the lighter, then we place a little glue and place our crocodile terminal, we take advantage of the glue to place the terminal and tighten with our pliers, to give it the final touch we will place the chain trimming.

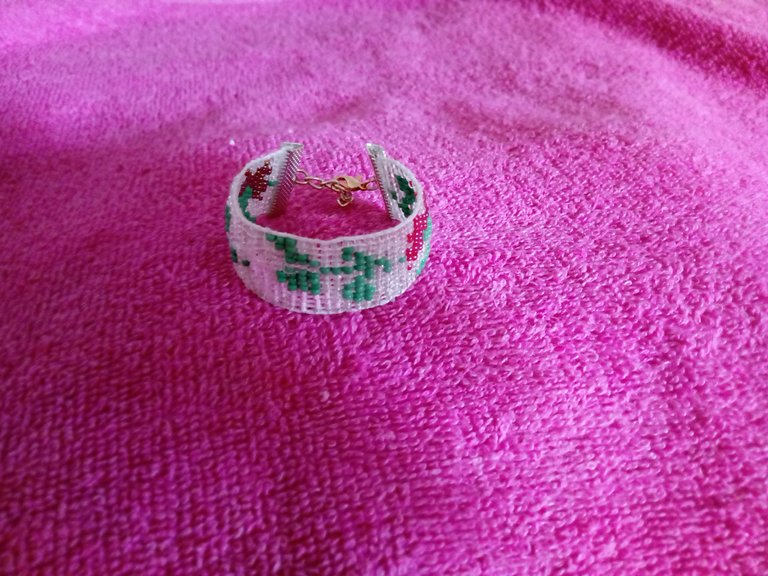
In this way would be ready and finished our beautiful bracelet dedicated to the day of the woman and inspired flowers parqa my beautiful mother, I hope you have been to your liking and help this post that I have made for all of you with love and dedication, I conclude my entry to this beautiful contest dedicated to women inviting @yanetzi1 @joheisy @mendoliliana.
Success and Blessings
Final Result
The photos were taken from my phone tecno spark Go 2023.
Translator Used: Deepl
Images are edited from canva application.
Saludos queridos compañeros de esta hermosa y creativa comunidad de DIYHub, hoy en dia me uno al concurso en honor a la Mujer, quiero rendir un merecido reconocimiento a todas las mujeres del mundo.
El dia Internacional de la Mujer es un momento para celebrar la fuerza, la valentía y la perseverancia de aquellas mujeres, que a pesar de los obstáculos que se les ha puesto en el camino, han luchado por sus derechos y han dejado una huella significativa en la sociedad.
Quiero felicitar a todas las mujeres por su ezfuerzo, dedicación y valentía, son un ejemplo de inspiración para todos nosotros.
Mis queridos compañeros, hoy he venido a compartirles una bonita creación, que he realizado para mi entrada en este bonito concurso, un hermoso brazalete de flores en telar inspirado en el ser más hermoso en esta tierra, como lo es mi madre, que también se lleva por nombre Flor.
A continuación les estare mostrando los materiales utilizados para la elaboración de este hermoso brazalete, posteriormente les estaré presentando el paso a paso utilizado para la elaboración de este hermoso accesorio de bisutería.
Materiales Utilizados
- Mostacillas Transparentes, Rojas, Verdes, Rosadas y Violetas
- Hilo poliéster Color Blanco
- 40cm de Hilo Chino
- Aguja # 12
- Recorte de cadena
- 2 Argollas
- 2 Terminales de Cocodrilo
- Trancadero o Seguro
- Telar de madera
- Tijeras
- Alicate
- Encendedor
- Pegamento
Paso a Paso
Paso 1
Lo primero que hicimos fue Colocar 11 filas de hilo poliéster en nuestro telar de madera, luego en las 2 esquinas colocamos el hilo chino para que sean 13 filas en total.
Colocamos los hilos chinos para que quede mas resistente nuestro brazalete.
Paso 2
Luego vamos a colocar un aproximado de 3 metros de hilo poliéster en nuestra aguja, en mi caso lo puse doble para que quedara mas resistente, luego haremos unos nudos simples en uno de los hilos chinos.
Seguidamente vamos a colocar en nuestra en nuestra aguja 13 mostacillas transparentes
Vamos a posicionarla en nuestro telar, y luego vamos a pasar nuestra aguja por cada una de las mostacillas en la parte de arriba.
Nuevamente vamos a tomar 13 mostacillas del mismo color y repetiremos el mismo procedimiento, posicionamos las mostacillas y luego introducimos nuestra aguja por la parte de arriba y por cada una de las mostacillas.
Paso 3
Seguidamente vamos a tomar seis mostacillas transparente, dos de color verde 5 mostacillas transparentes.
De igual manera vamos a posicionar la mostacillas la parte de abajo y luego pasamos nuestra agua hilo por cada uno de la mostacillas que sobresalen en la parte de arriba.
Paso 4
Ahora vamos a colocar ocho mostacillas transparentes una de color verde y cuatro mostacillas transparentes
Posicionaremos la mostacilla en la parte de abajo, luego pasaremos nuestro hilo con la luego pasaremos nuestra agua con el hilo por la parte de arriba e introducimos por cada una de las mostacillas.
Paso 5
Para este paso vamos a introducir tres mostacillas transparentes, cuatro de color verde, una transparente, luego tres verdes y por último dos mostacilla transparentes.
Posicionamos la mostacilla de nuestro telar luego pasamos la aguja por arriba e introducimos por cada una de las mostacillas que sobresalen.
Paso 6
Seguidamente vamos a tomar dos mostacillas transparentes, cinco de color verde, una transparente, tres de color verde y dos mostacillas transparentes.
De igual manera vamos a posicionar las mostacillas en el telar, y pasaremos nuestro hilo por la parte de arriba e introducimos la aguja por cada una de las mostacillas.
Paso 7
Seguimos con la elaboración de nuetro hermoso brazalete, tomando tres mostacillas transparentes, tres de color verde, dos transparentes, una Verde, una transparente, dos verdes y por último una mostacillas transparente.
Igual que los pasos anteriores, vamos a posicionar la mostacilla en la parte de abajo y luego pasaremos por encima y por cada una de las mostacillas nuestra aguja.
De esta manera tendríamos listo el tallo y de esta manera tendríamos listo el tallo y una hoja de nuestra hermosa flor.
Paso 8
Después tomaremos una mostacilla transparente, una de color rojo, seis transparentes, una de color verde y cuatro mostacilla transparentes.
Posicionamos la mostacilla en nuestro telar y vamos a nuestra aguja por la parte de arriba y por dentro de cada una de las mostacillas que sobresalen
Paso 9
Para este paso vamos a introducir dos mostacillas transparentes, dos de color rojo, cuatro transparente, una de color verde y por último cuatro mostacillas transparentes.
Seguiremos posicionando la mostacillas de la misma manera como lo venimos haciendo para luego pasar el hilo por la parte de arriba e introducir por cada una de las mostacillas.
Paso 10
Ahora tomaremos tres mostacillas rojas, cuatro verde, una transparente, una verde y cuatro mostacillas transparente.
Posicionamos cada una de las mostacillas por los hilos del telar, la grúa por encima introducimos por todas las mostacillas, así le iremos dando forma a cada pétalo de la hermosa flor.
Paso 11
Tomamos cuatro mostacillas de color rojo, cuatro verdes, una transparente, dos verdes y dos transparentes.
Vamos a posicionar la mostacilla en el telar y luego por la parte de arriba pasamos la aguja por cada una de las mostacillas,
Trabajar con telar es una forma muy fácil solo hay que tener un patrón e ir repitiendo cada paso respetando el orden de la mostacillas
Paso 12
Con la ayuda de la aguja vamos a tomar una mostacillas transparentes, tres de color rojo, cuatro de color verde, una transparente y nuevamente cuatro de color verde.
Posicionando las mostacillas en el telar, vamos a pasar la aguja por la parte de arriba introducimos por cada mostacilla.
Paso 13
Vamos a seguir introduciendo las mostacillas según el orden del patrón, en este caso colocaremos dos mostacillas transparentes, tres de color rojo, dos verdes, cuatro transparentes y nuevamente dos mostacillas verdes.
Igual que los anteriores pasos vamos a posicionar la mostacillas en cada hilo del telar y luego pasamos la aguja por arriba e introducimos por cada una de las mostacillas.
Paso 14
Para la realización de este hermoso brazalete le puse dedicación porque era un regalo para mi hermosa madre, en conmemoración del día de la mujer. Trabajar con esta técnica no es difícil, solo hay que dedicarse para realizar un buen trabajo.
De esta manera seguimos colocando mostacillas, vamos a tomar una mostacilla transparente, siete de color rojo, cuatro transparentes y una mostacilla de color verde.
Posicionamos la mutación en el telar y pasamos la aguja por la parte de arriba y por cada una de las mostacillas que están en la parte de arriba.
Paso 15
Vamos a tomar nueva mostacilla de color rojo y cuatro mostacillas transparentes, vamos a posicionarlas en nuestro telar y por la parte de arriba pasamos la aguja con el hilo por cada una de las mostacillas.
Paso 16
Tomaremos dos mostacillas transparentes, dos de color rojo, una transparente, tres de color rojo, una transparente, una mostacilla roja y por último tres mostacillas transparentes.
Vamos a posicionar la mostacillas en el telar introducimos la aguja con el hilo por la parte de arriba y por cada una de las mostacillas.
Paso 17
Este paso tomaremos seis mostacillas transparente, una de color verde y nuevamente 6 mostacillas transparente.
Vamos a posicionar la mostacillas y de la misma manera vamos a pasar agua por encima y por dentro de cada mostacilla.
De esta manera quedaría lista nuestra hermosa y primera flor.
Paso 18
Para este paso vamos a tomar 13 mostacillas transparentes
Las vamos a posicionar en nuestro telar y repetimos el mismo procedimiento de las anteriores, pasamos por encima del telar y introducimos por dentro de cada una de las mostacillas.
Paso 19
Para seguir realizando las demas flores, vamos a repetir el mismo proceso hasta obtener el largo de niuestro hermoso brazalete
Quise realizar una flor con pétalos hacia el otro lado, este proceso es el mismo solo hay que colocar las mostacillas al revés, es decir las que colocamos de primero las colocamos de último o viceversa.
Paso 20
Después de haber obtenido la distancia que deseamos del brazalete, aseguramos un extremo con el hilo que nos haya sobrado vamos a hacer nudos simple en todos los hilos, luego cortamos con la tijera y sellamos con la ayuda del encendedor.

Paso 21
Con la ayuda de la tijera cortaremos uno de los extremos de los hilos en el telar, luego vamos a tomar de los hilos y haremos nudos simples, para luego cortar y sellar con la ayuda del encendedor.
Paso 22
Ahora vamos a tomar el pegamento y con mucho cuidado, colocaremos algunas gotas en las mostacillas para asegurarlas, aprovecharemos el pegamento y tomaremos un terminal de cocodrilo, lo colocaremos en los extremos de nuestro brazalete para aprovechar el pegamento y con la ayuda de nuestro alicate apretamos hasta que seque.
Paso 23
Tomaremos una argolla y el seguro, con nuestro alicate abriremos e introducimos la argolla en el seguro, luego llevaremos al terminar de cocodrilo y aseguramos con el alicate.
Haremos el mismo procedimiento del otro lado de nuestro brazalete, cortaremos los extremos con la tijera, luego haremos varios nudos simples y cortamos nuevamente y sellamos con el encendedor, luego colocamos un poco de pegamento y colocamos nuestro terminal de cocodrilo, aprovechamos el pegamento para colocar el terminal y apretamos con nuestro alicate, para darle el toque final colocaremos el recorte de cadena.
De esta manera quedaría listo y terminado nuestro hermoso brazalete dedicado para el día de la mujer e inspirado flores parqa mi hermosa madre, espero haya sido de su agrado y ayuda este post que he realizado para todos ustedes con mucho cariño y dedicación,concluyo mi entrada a este hermoso concurso dedicado a la mujer invitando a @yanetzi1 @joheisy @mendoliliana.
Exitos y Bendiciones
Resultado Final
Las fotos las tome de mi teléfono tecno spark Go 2023.
Traductor Utilizado: Deepl
Las imágenes son editadas desde aplicación canva.
Que presentación tan bella. Mi favorita!
What a beautiful presentation. My favorite!
Muchas gracias amiga, una bella representación de la mujeres en su día, las quise dedicar a mi hermosa madre. Saludos
Vaya que hermoso ha quedado esto. Es todo un trabajo bien elaborado. Felicodades
Muchas gracias, bendiciones para ti🤗
!ALIVE | !BBH | !PGM | !LOLZ
@afrofat1! You Are Alive so I just staked 0.1 $ALIVE to your account on behalf of @ vocup. (3/20)
The tip has been paid for by the We Are Alive Tribe through the earnings on @alive.chat, feel free to swing by our daily chat any time you want, plus you can win Hive Power (2x 50 HP) and Alive Power (2x 500 AP) delegations (4 weeks), and Ecency Points (4x 50 EP), in our chat every day.

@afrofat1! Your Content Is Awesome so I just sent 1 $BBH (Bitcoin Backed Hive) to your account on behalf of @vocup. (2/20)
lolztoken.com
Nothing at all. It's juiceless.
Credit: reddit
@afrofat1, I sent you an $LOLZ on behalf of vocup
(3/10)
This is such a beautiful bracelet to commemorate such women. Nice work
Thank you very much for appreciating my work, blessings
Esta precioso tu trabajo. Me encantó. Bonito diseño y muy vivos los colores.
Muchas gracias amiga, bendiciones
🌼Hermoso trabajo 👏🏻 siempre te lo Digo eres único, excelente creación hermoso te ha quedado mi vida,😘 Gracias por compartir, y te deseo suerte en el concurso.
Muchas gracias mi amor, igualmente para ti muchas bendiciones
😘
Que lindo te quedó muy elegante increíble es mi favorito también gracias por compartir 👍🏻😊
Muchas gracias, bendiciones
No logro ver las imagenes a patir del paso 3 no se porque
Me parece extraño amiga, puede ser algún problema de señal, espero las puedas ver amiga, gracias por mostrar interés en ver el post, bendiciones
logre verlo, creo que es mi internet que esta suuuper leeento
Me alegro que hayas podido ver el post amiga, muchas gracias, últimamente la señal de el internet ha estado mal.
Hola amiga. Es tu señal, yo logro ver las imágenes.
Te quedó precioso, felicidades 💜
Muchas gracias amiga, bendiciones
Te quedo hermosa, buen trabajo.
Muchas gracias, bendiciones
Wow muy hermosa te ha quedado amigo como todas tus creaciones, una obra de arte más .. ❤️🤗🤗🤗💕 exitos
Muchas gracias amiga por siempre apreciar mi trabajo y ser una fiel admiradora de mis creaciones, bendiciones
This is so beautiful and creative. Thanks for sharing this beautiful piece.
Thank you very much friend, many blessings to you
You are welcome
!DIY
!discovery 30
This post was shared and voted inside the discord by the curators team of discovery-it
Join our Community and follow our Curation Trail
Discovery-it is also a Witness, vote for us here
Delegate to us for passive income. Check our 80% fee-back Program
You can query your personal balance by
!DIYSTATSCongratulations @afrofat1! You have completed the following achievement on the Hive blockchain And have been rewarded with New badge(s)
Your next target is to reach 7000 upvotes.
Your next payout target is 1000 HP.
The unit is Hive Power equivalent because post and comment rewards can be split into HP and HBD
You can view your badges on your board and compare yourself to others in the Ranking
If you no longer want to receive notifications, reply to this comment with the word
STOPCheck out our last posts: