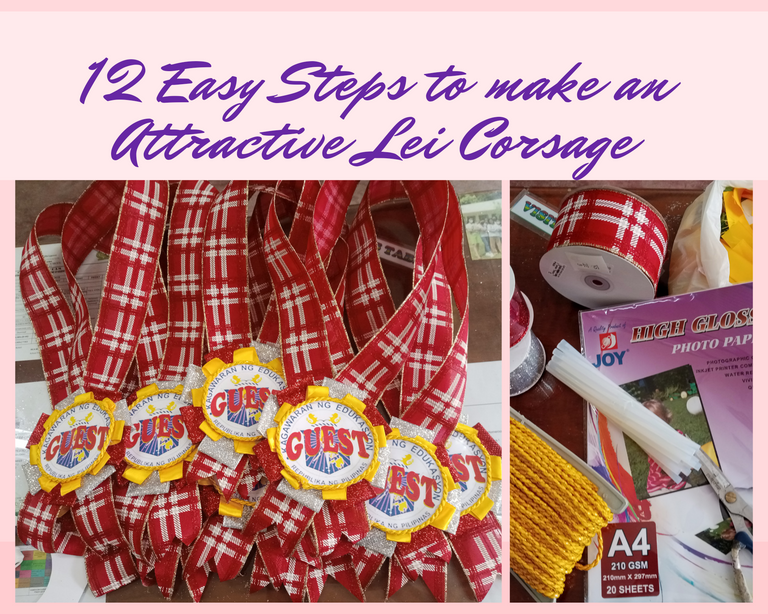
12 EASY STEPS TO MAKE AN ATTRACTIVE LEI CORSAGE : OUR SIMPLE AND CREATIVE WAY ♥️
– Yo-Yo Ma
Passion for work gives us the courage to pursue what we have started with excitement within, willingness to take risks, and enthusiastically wanting to learn something new and explore things that we were interested in.
Hello, my dear Hive Friends!
How are you today? Hope you're doing great and healthy. We have fine weather right now here in the Philippines. I am hoping you have a great day there! This is my first post in this community. A community where I had read and witnessed everyone's talents and interests when it comes to their DIY thing. I am very proud of you all.
Anyways, Allow me to share how to make an attractive Lei Corsage for our visitors and guests.
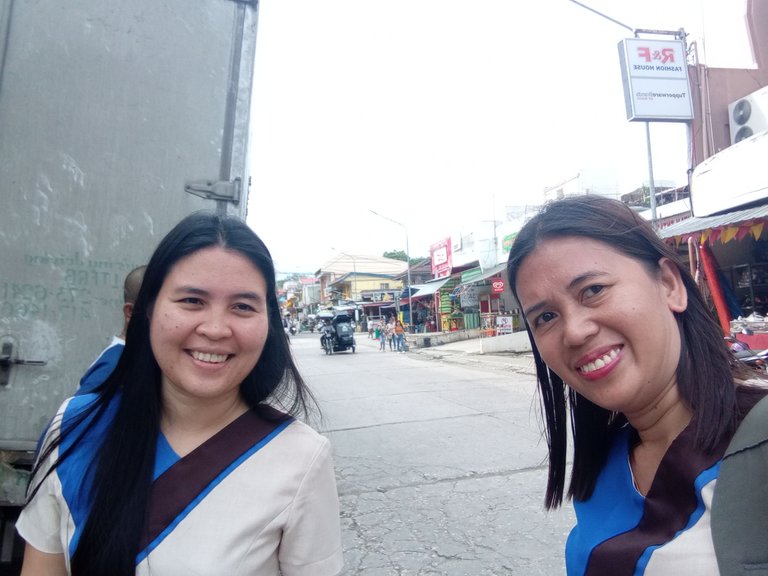
I together with @missleray was assigned to make and design a Lei Corsage for our guests in the incoming events of our school. We were not good at this but we were excited to explore and learn something new. We made a plan first before buying the materials to be used.
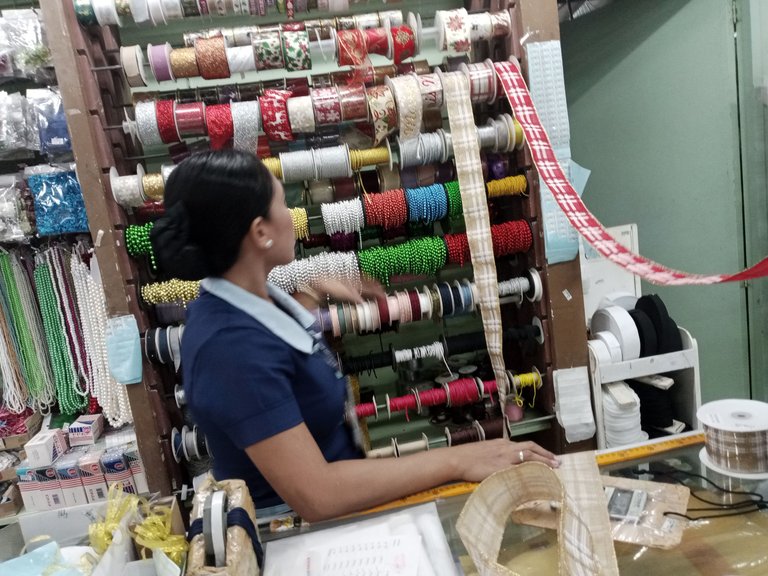
When we had our plan already, we bought the materials and made sure to buy them completely.
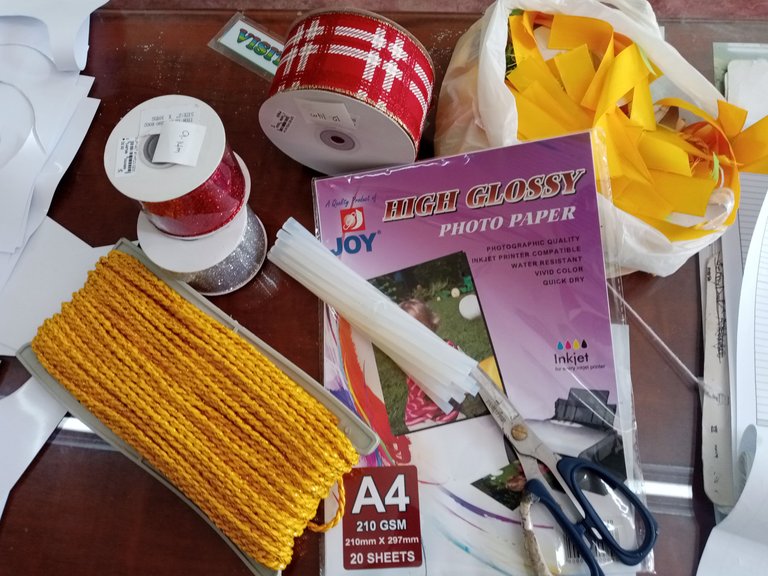
THE PREPARATIONS
Step 1. Prepare all the materials to be used
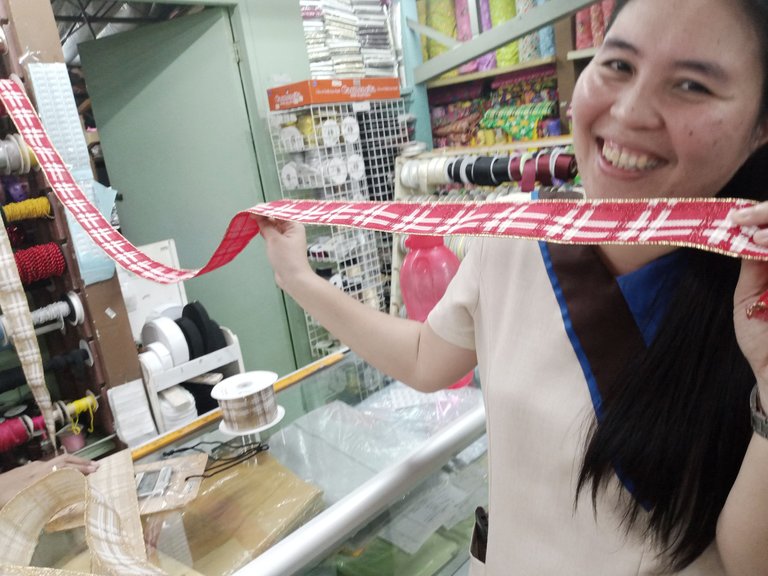
1 roll of silver ribbon
1 roll of red ribbon
12 meters of red sash with a design for the laces
1 roll of gold satin ribbon
15 pieces of glue sticks ( small)
1 pack of photo paper ( 20pcs)
1 meter of insulation foam
1 or 2 scissors
1 roll of gold cord
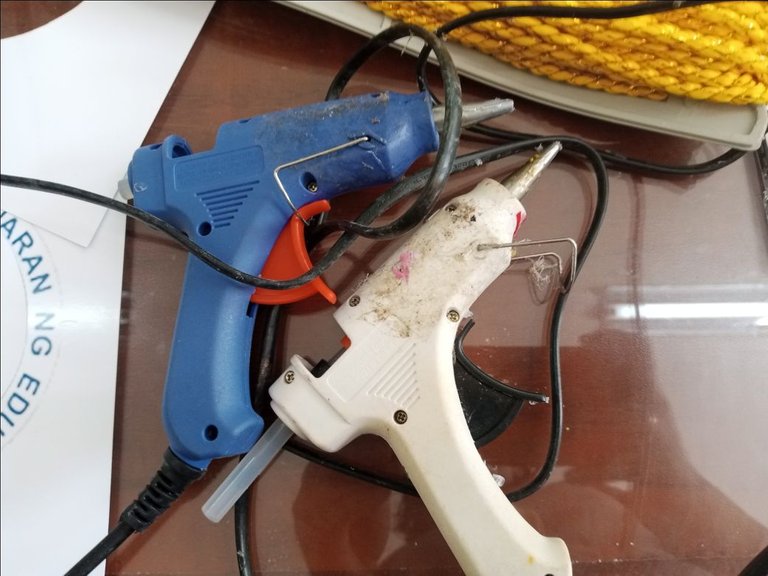
glue gun
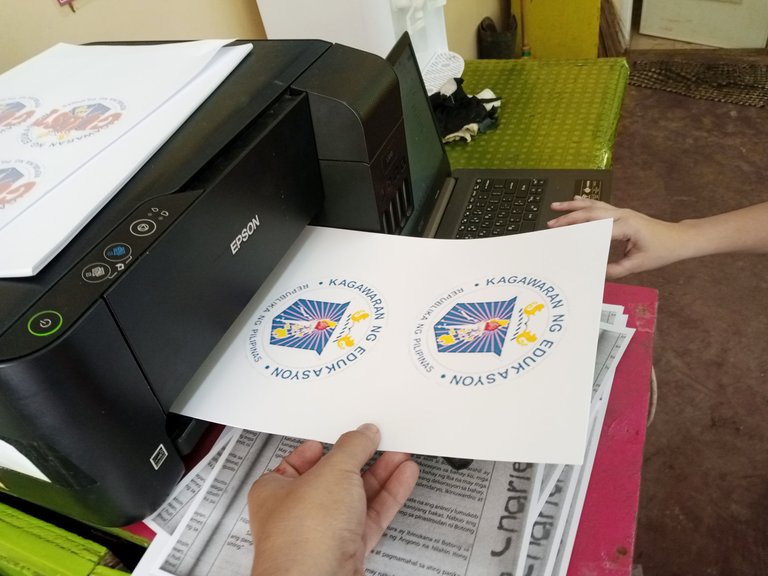
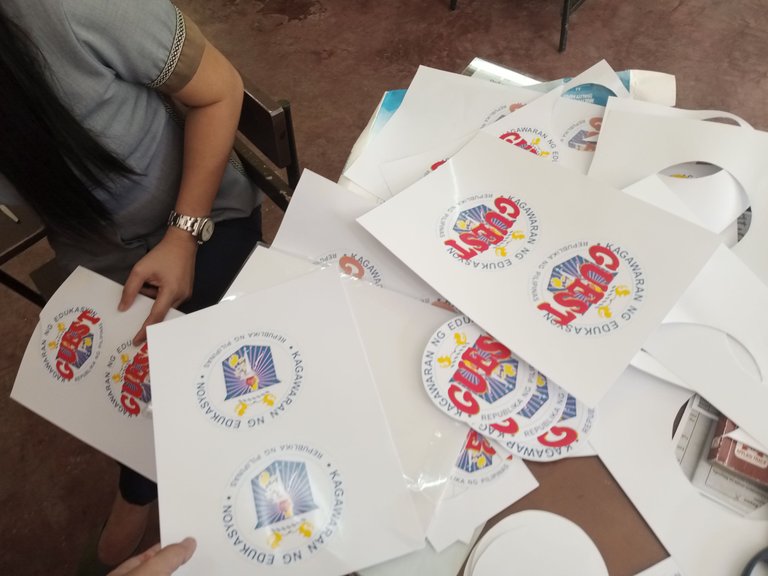
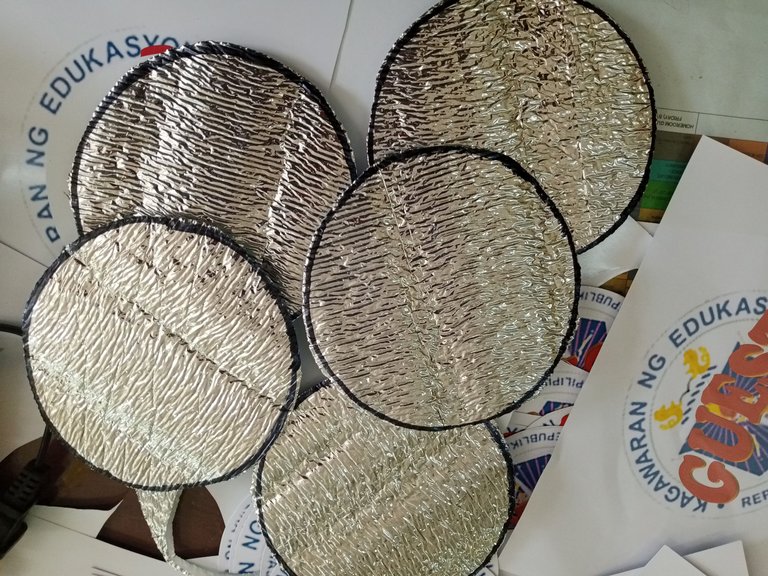
Step 2. Prepare the photo paper and decide what you wanted to design in the front and the back. When you already have your layout. Print it and cut it.
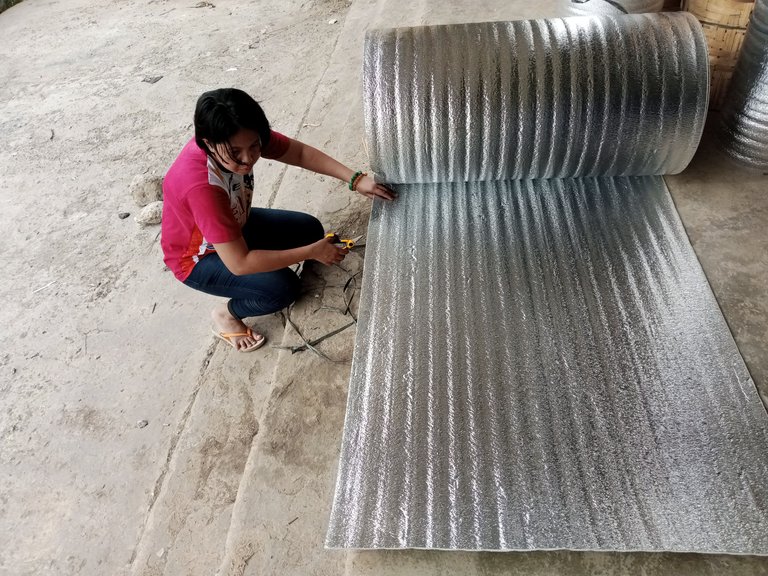
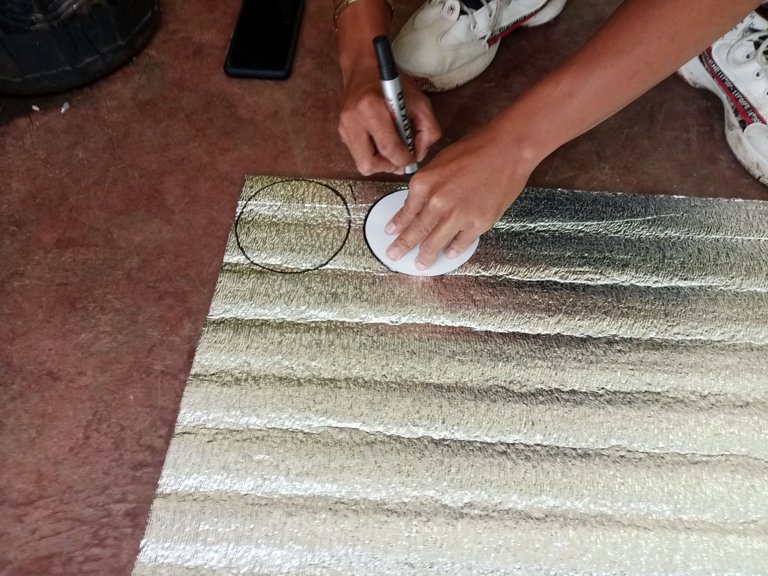
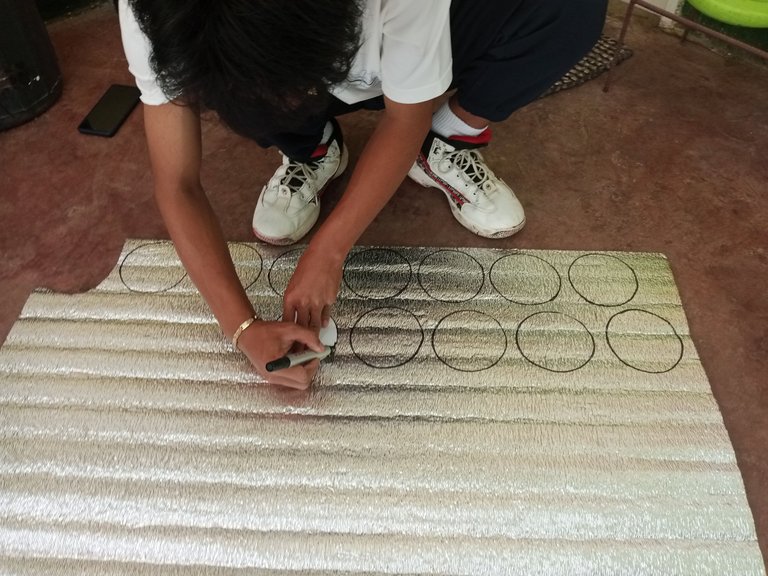
Step 3. Draw and form the cut layout in the insulation foam and cut it after. This will be used as your base in making your design. Be sure to form all the circles in the same sizes. Use a guide in drawing a circles.
Step 4. Cut the ribbons to your desired size. You can either make 1 to 1.3 meters for your lace. In our case, we decided to cut it by 1.2 meters.
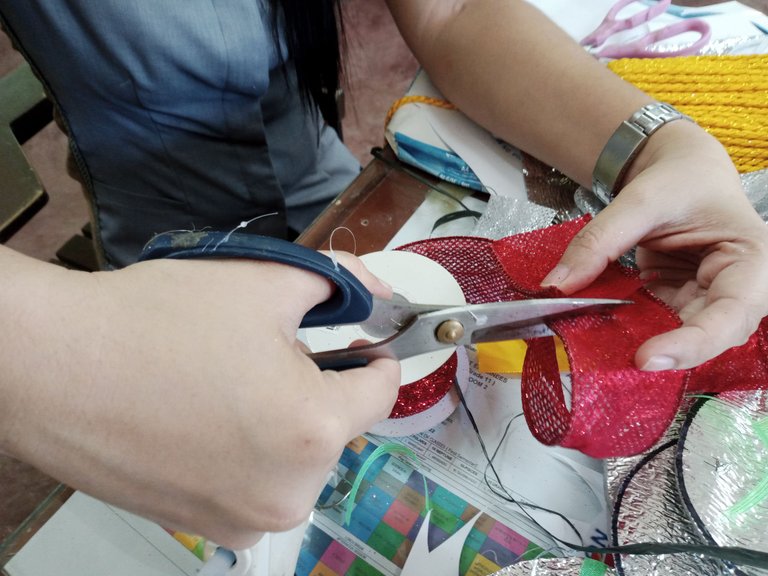
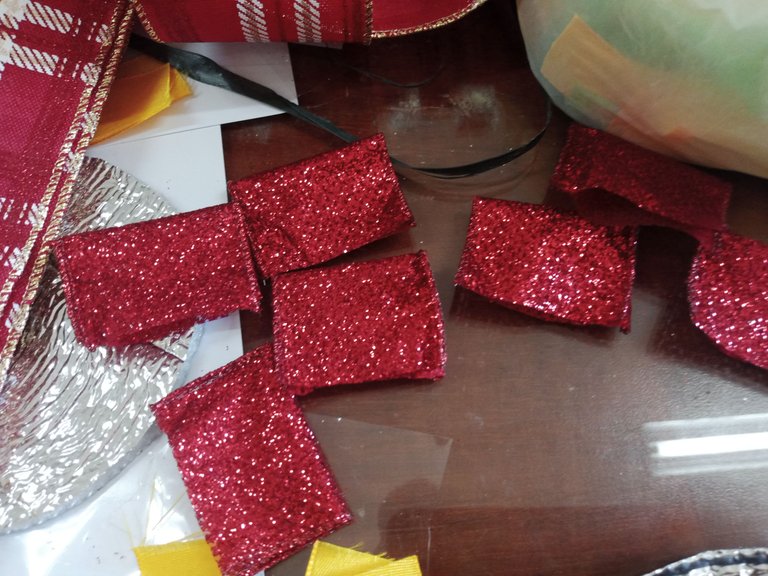
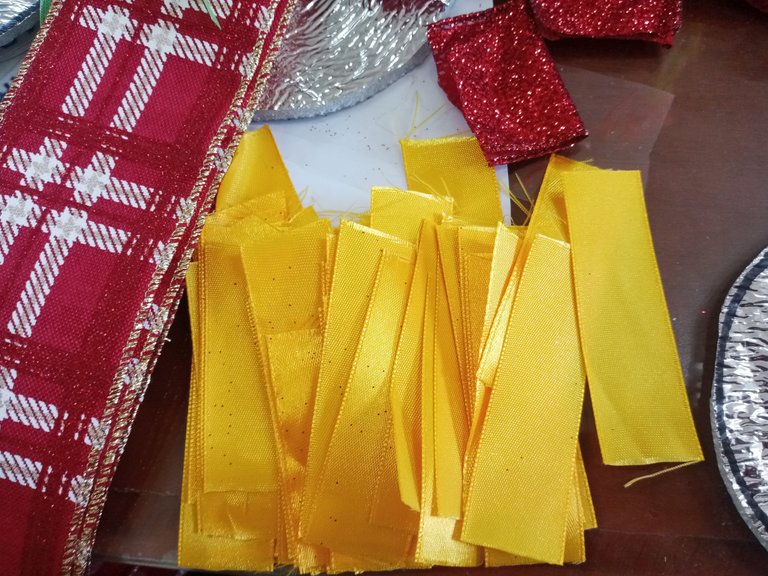
Step 5. Cut the two ribbons into 1.5 inches and fold them after the next one to cut is the satin ribbon and still the same size. Be sure to cut them in the same size.

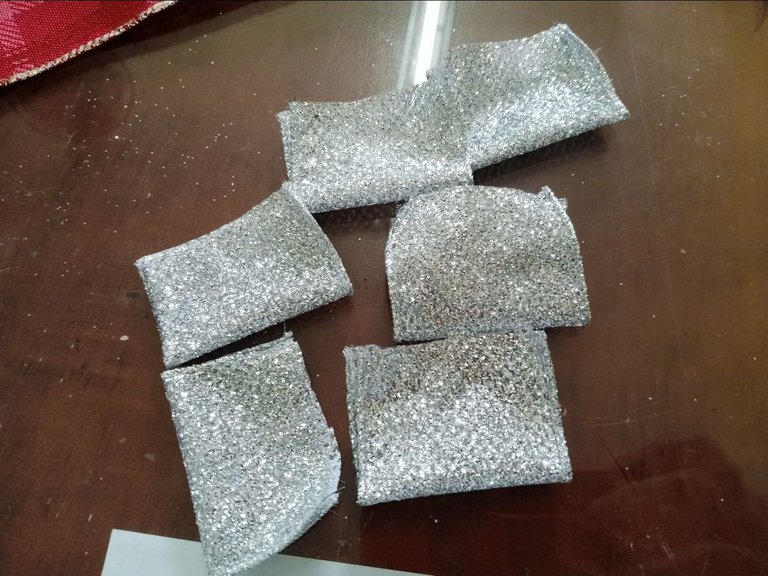
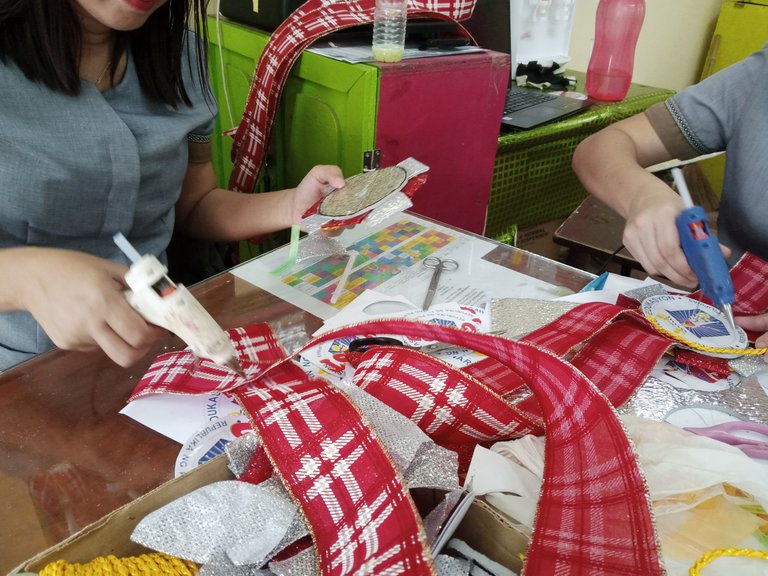
Step 6. When the insulation foam is already cut into its desired form, we will start pasting the ribbons.
Step 7. We pasted first the silver ribbon to the insulation foam and then the red ribbon after. Paste them alternately using the glue sticks and the glue gun.
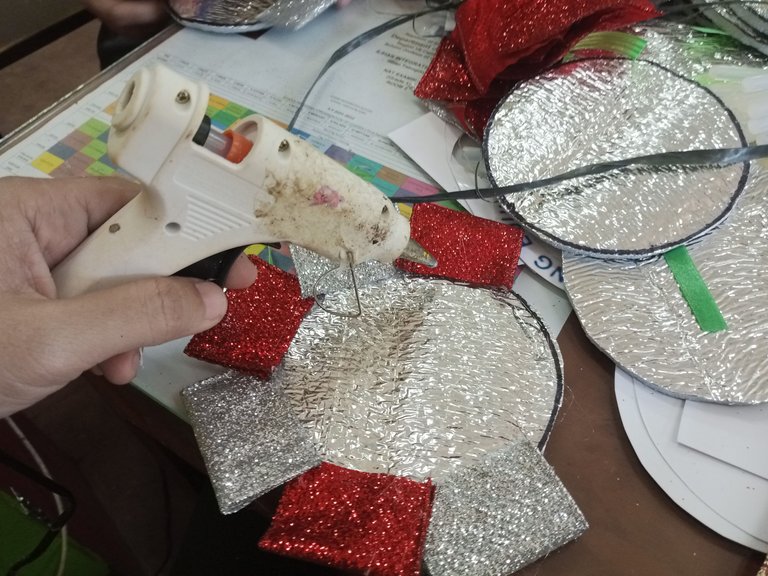

Step 8. The next one will be the satin ribbon (gold color). Fold and paste in the middle of the silver and red ribbons. Continue the process until it is filled.

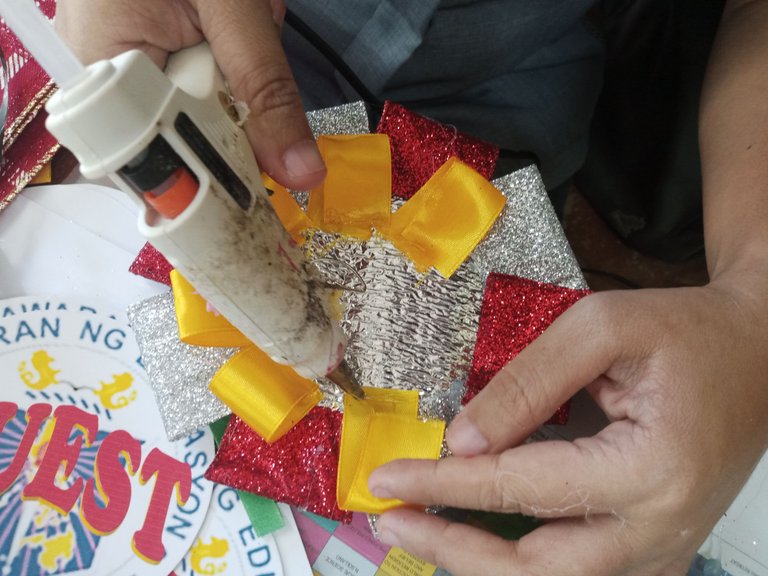
Step 9. Paste the layout in the front by using again the glue. Be sure to completely paste all the sides of the photo paper. Remember the front side only🥰
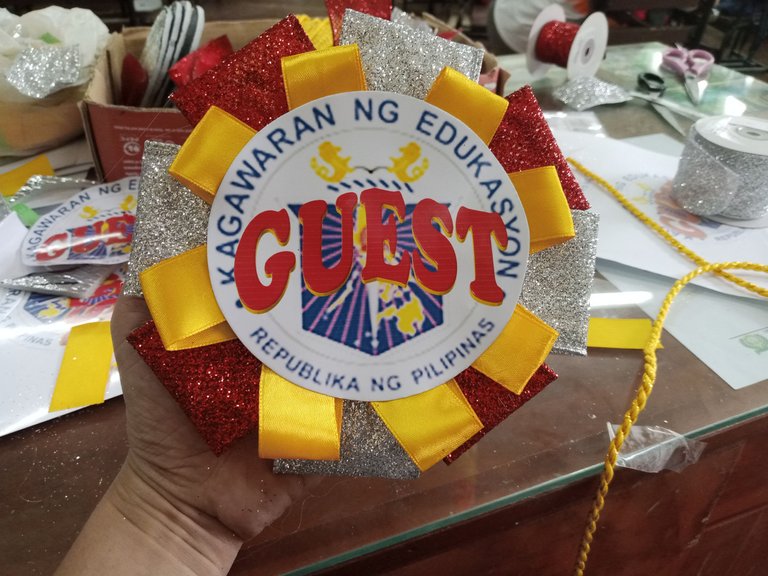
Step 10. The next one will be pasting the gold chord into the edge of the printed circle.
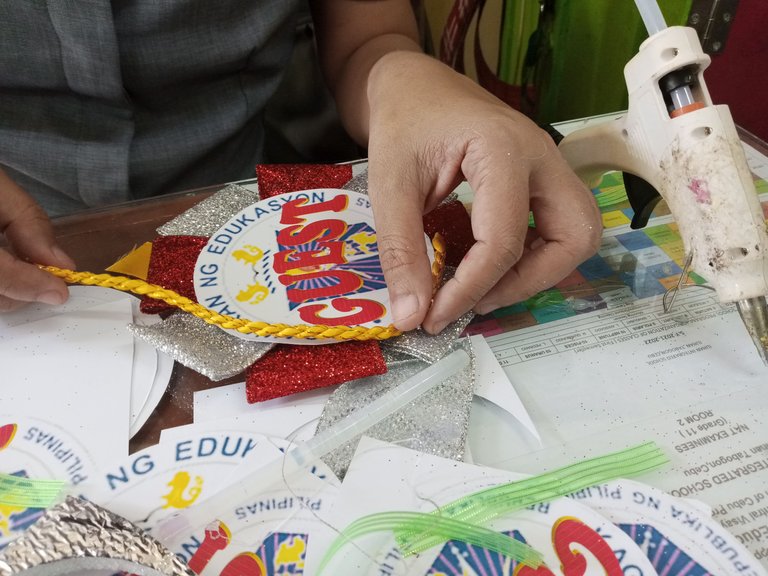
Step 11. Get the lace and paste the design materials.
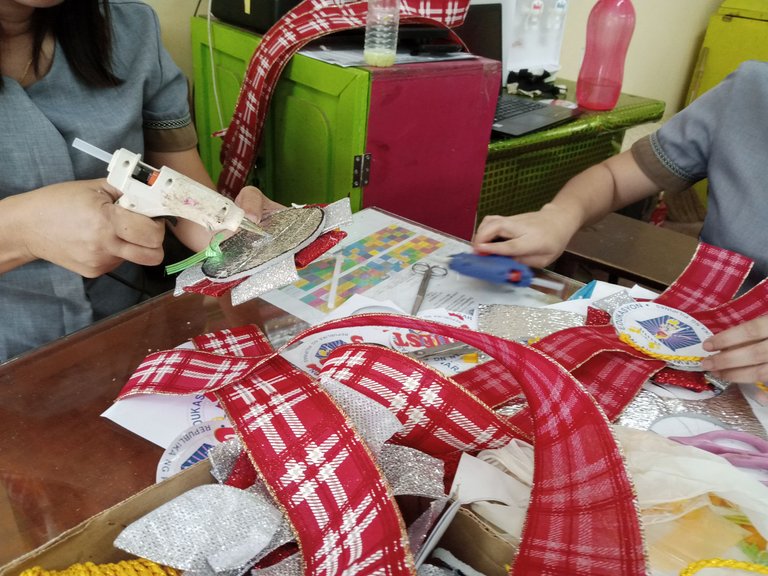
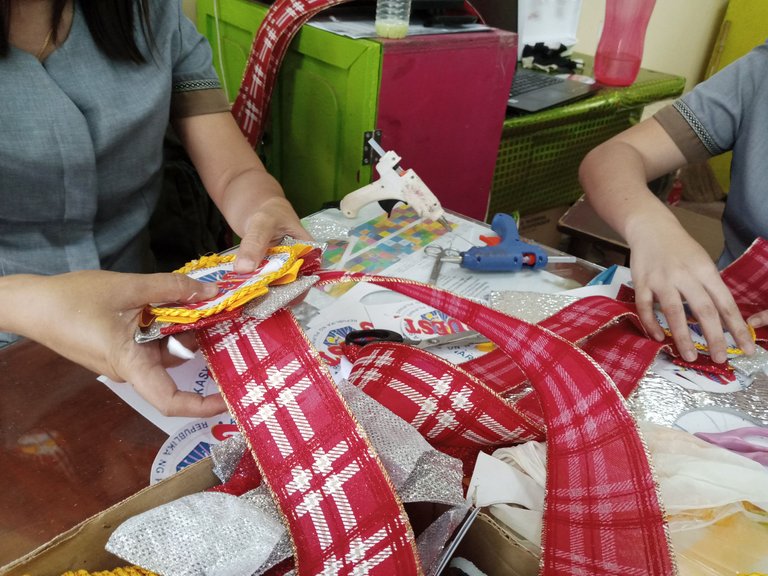
Step 12. Paste the back layout and paste the gold chord at the edge of the circle.
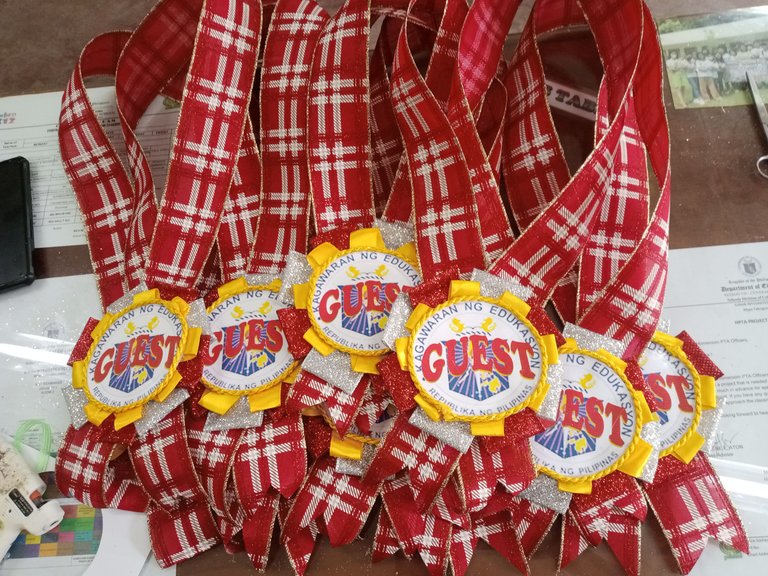
Repeat the process for all remaining materials. These were the results of our Lei Corsage.
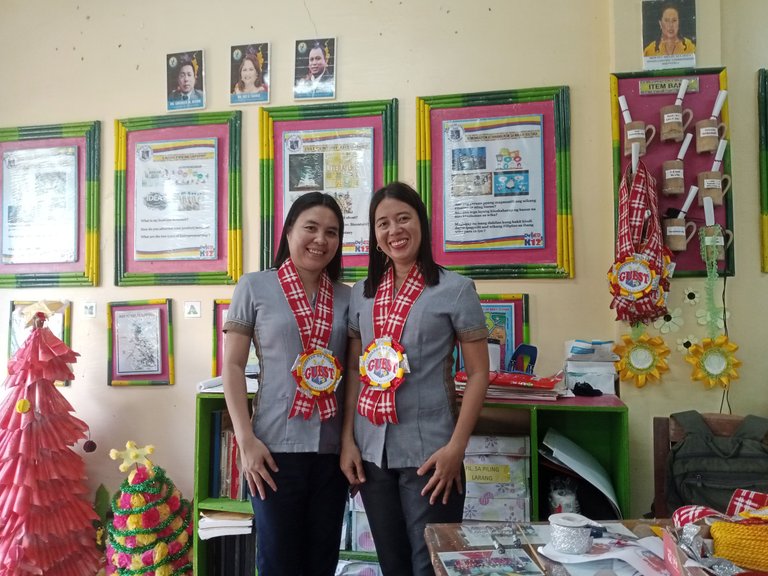
We were thankful to God that we made it and are still eager to learn and explore more. The most important thing is you are interested and enjoyed what you are doing.
That's all for now my dear hivers. Hopefully, this inspired and give you the idea to do a Lei corsage for the incoming events. Keep safe always and may God bless us all.
Thank you for sharing this post in the DIYHUB Community!
Your content got selected by our fellow curator rezoanulvibes & you just received a little thank you upvote from us for your great work! Your post will be featured in one of our recurring compilations which are aiming to offer you a stage to widen your audience within the DIY scene of Hive. Stay creative & HIVE ON!
Please vote for our hive witness <3
Thank you for the love and support @diyhub. I really appreciate it
What a great skill you had. This is incredible. I like it.
Love the color combination @simplechalyns 💞... Teachers are indeed back of all trades! Keep it up ladies🥰
Thank you, mam Cha for your brilliant ideas. I've learned a lot from this experience. ☺️
Happy weekend. ☺️
Thank you pud mam @missleray for the guidance. We've learn a lot indeed. Next time nasad🥰
You're welcome. ☺️
Brilliant ideas + Great Teachers = Superb Outcome! Congratulations momshies for a very well done corsage.
Thank you @amoreyl for dropping by.
God bless
You two have in common, youre good at making corsage. Such a big help to our school. Congratulations to both of you!
Thank you @jobeliever
Congratulations @simplechalyns you are so creative. I can't wait to make such beautiful corsage. See you around.
Congratulations @simplechalyns! You have completed the following achievement on the Hive blockchain And have been rewarded with New badge(s)
Your next target is to reach 700 comments.
You can view your badges on your board and compare yourself to others in the Ranking
If you no longer want to receive notifications, reply to this comment with the word
STOPCheck out our last posts:
Support the HiveBuzz project. Vote for our proposal!